Peckham Road
The rooms in Peckham Road all vary slightly, but as a minimum they have the following features:
Each room has:
- 1x HDMI inputs (the larger room has 2)
- 1x USB-C HDMI adapter
- 1x HDMI cable
- Height Adjustable Lectern
- Camera for lecture capture
- Lapel microphone for lecture capture (larger rooms have voice lift)
What is voice lift?
Voice lift, or sound reinforcement is an AV technique where the sound of your voice is subtly amplified throughout the room to ensure that everyone has a similar hearing experience, whether they are right next to you or 10 rows back.
What is lecture capture?
Lecture capture is a live stream and recording to Panopto, our Lecture Capture system, which allows students to re-watch their classes after they've ended and watch from home in real-time if they're unable to make it to class.
This has proven highly effective in supporting students with learning differences and supporting students with English as a second language.
How do I use the room?
When you come into the room, you need to:
1. Turn everything on
On or near the lectern, there is a 7" touch panel, which may be blank to save energy. Tap this once to wake the screen and once more to turn on the system.
The projectors or TV(s) should now wake up and look something like this:
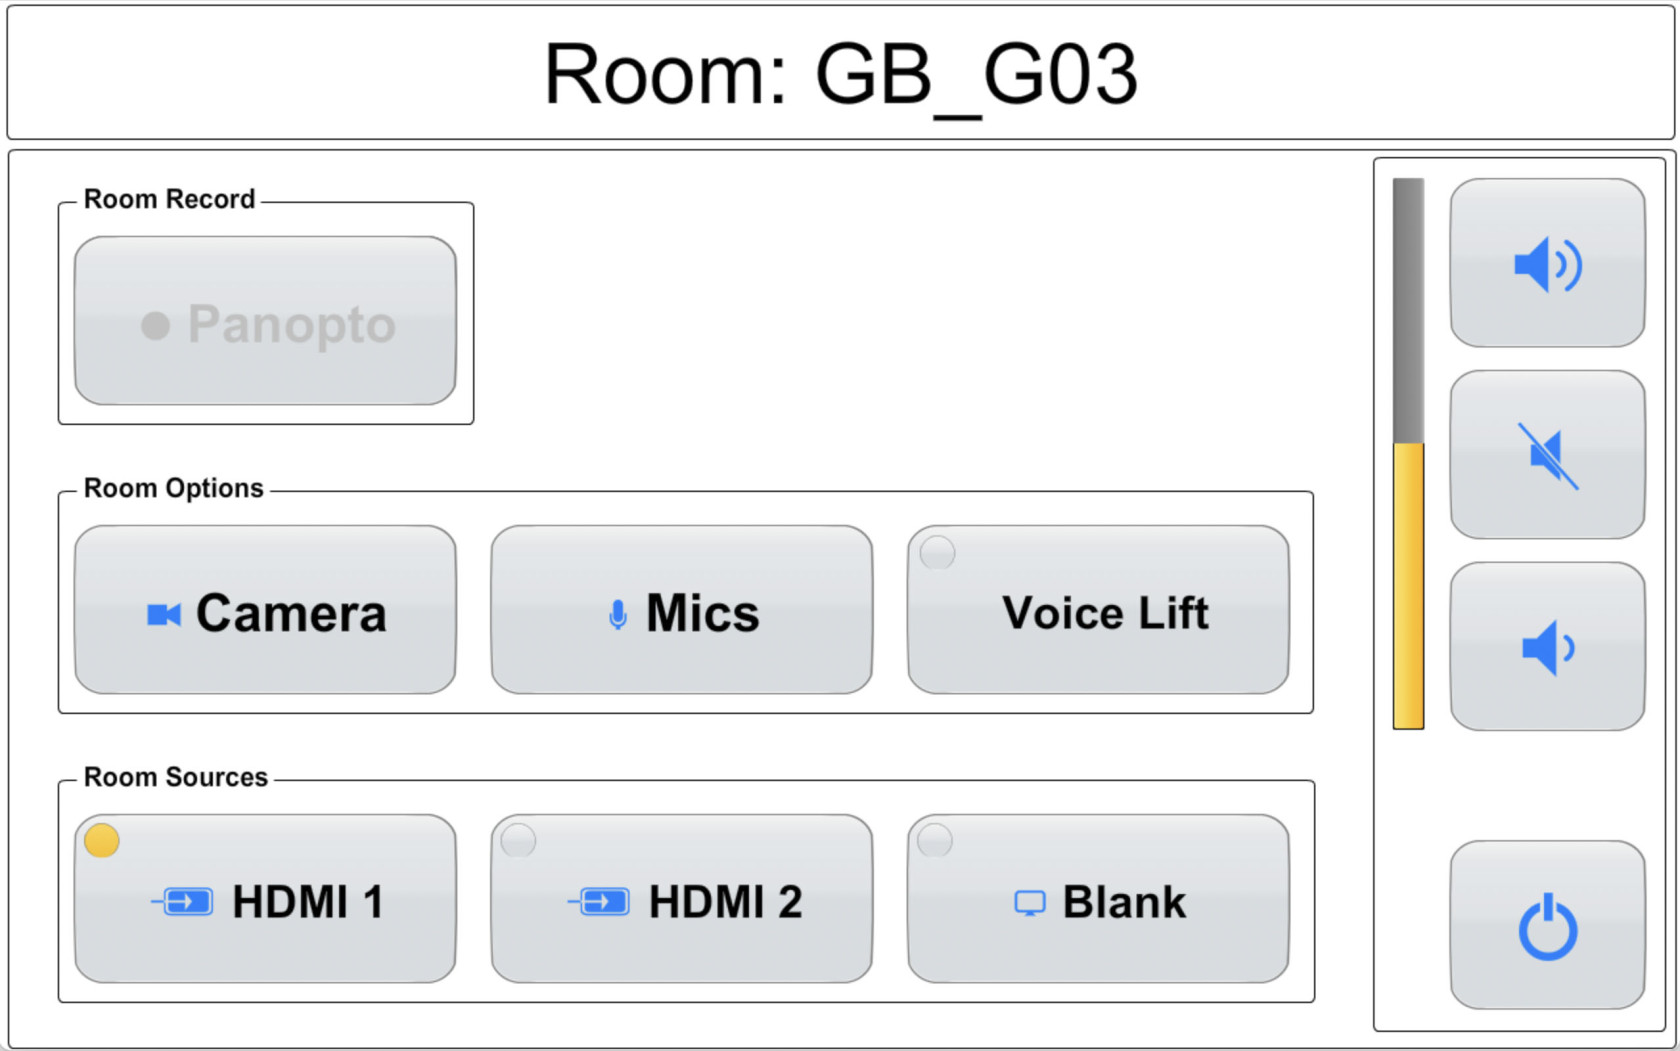
From here, you can select your source if the room has multiple HDMI inputs, toggle voice lift on/off if it has that feature, set the program audio level, and turn off the system.
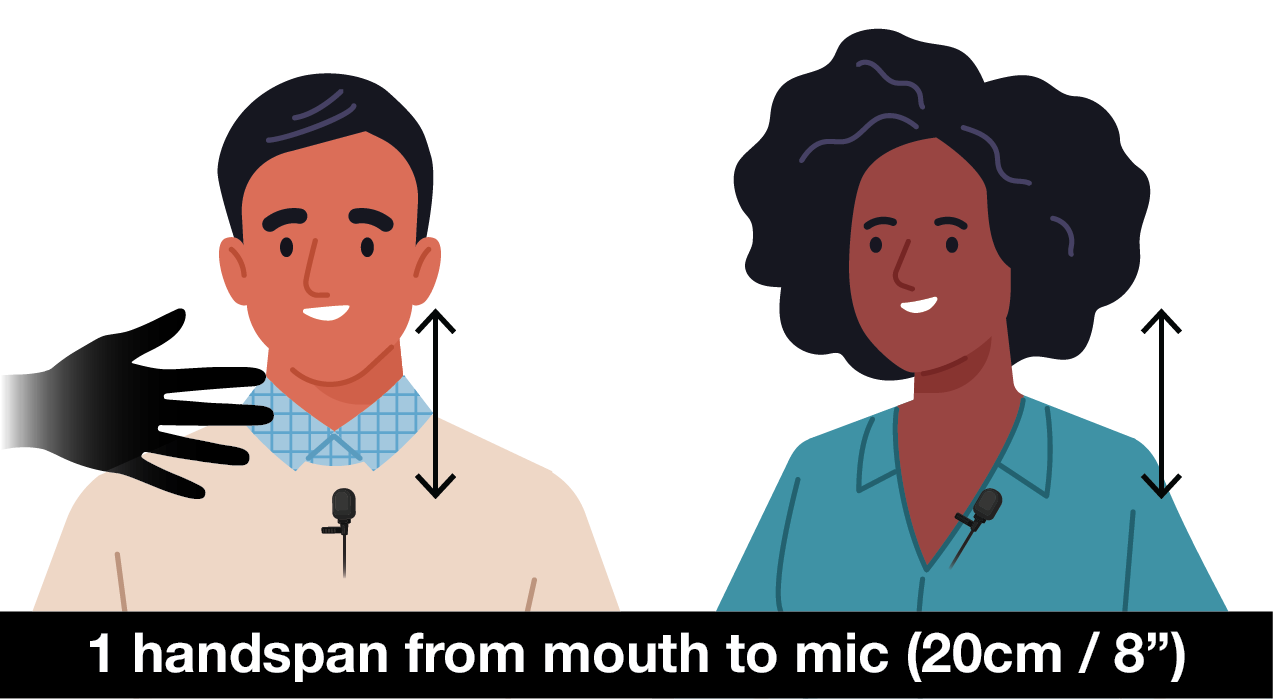
2. Put on your microphone
You should aim to clip the microphone about one handspan away from your mouth in a normal resting position, that is approximately 6-8 inches, somewhere in the middle of your chest as pictured below.
Be careful to remove anything which could make a lot of noise near the microphone, such as earrings that clang with another piece of jewellery and lanyards.
3. Plug in your laptop
At the lectern, you will find a USB-C HDMI adapter and an HDMI cable plugged in to the touch panel or TV stand. Where there is more than 1 HDMI input, the left HDMI port is HDMI 1, and the right HDMI port is HDMI 2.
You should use HDMI 1 by default as this is recorded by default.
If you require the use of HDMI 2 for a document visualiser or similar, please be aware that this will not be recorded by Panopto automatically and needs to be requested in advance.
How to shut down the room
At the end of teaching, you need to make sure you leave the classroom as good or better than you found it.
1. Tidy up
Before you end the class, ask the students to throw out any litter (cups, tissues, and papers) around them and put their tables and chairs back.
This is particularly important if you have changed the layout of the room because it can take half an hour for one technician to put a room back, whereas a group of students can do it in less than 5 minutes.
2. Power down
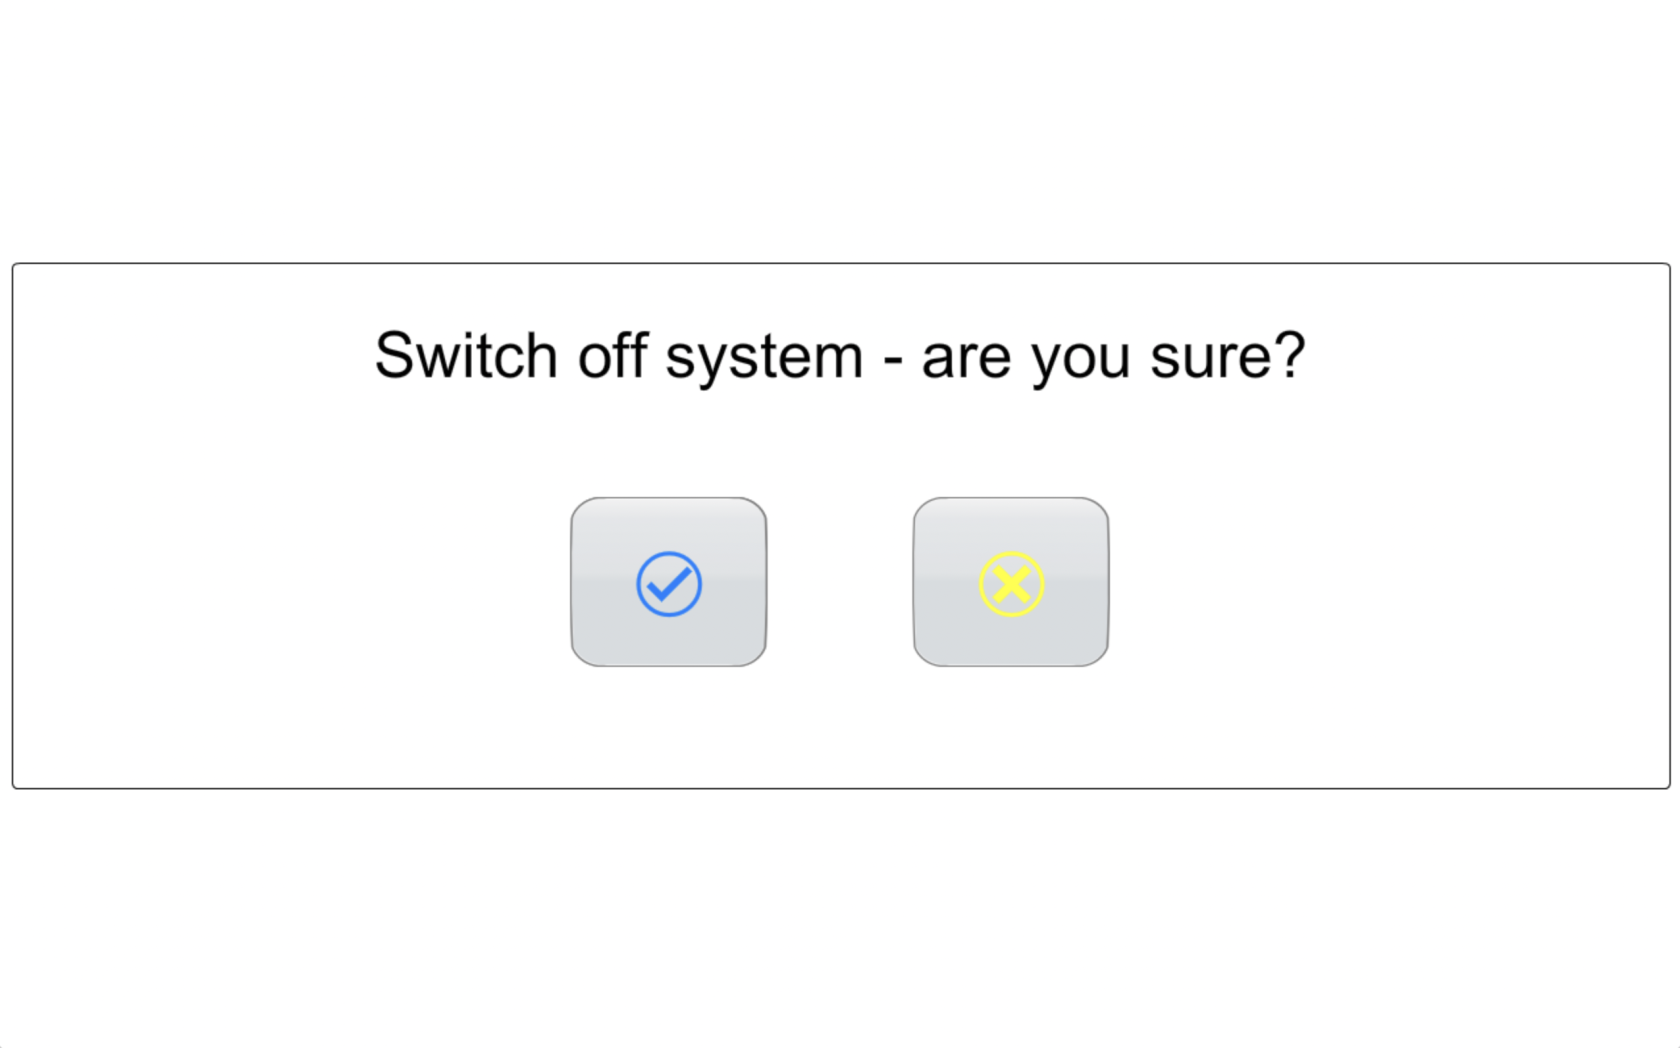
On the touch panel, press the power icon and confirm shutdown. This will save energy and ensure the equipment lasts longer so we can spend money on other things.
Step 1 - Press the power icon in the bottom right corner
Step 2 - Confirm power down by pressing the blue Tick button on the middle left of the screen.
3. Put back your accessories
Ensure you leave the HDMI cable and USB-C adapter on the lectern in a visible location for the next lecturer.
Also, please make sure you plug the lapel microphone back into the dock to charge.