Working with Conductive Yarns and Threads
There are many different ways that conductive threads can be used with electronics.
Knitting With Conductive Yarn
Knitting is a really versatile and flexible way to integrate sensors and other conductive material directly into fabric. Depending on the kind of pattern, and the type of yarn that you use, knitted textiles can be used to integrate directly into stretchable, conformable fabric:
- stretch sensors
- touch sensors
- switches
- pressure sensors
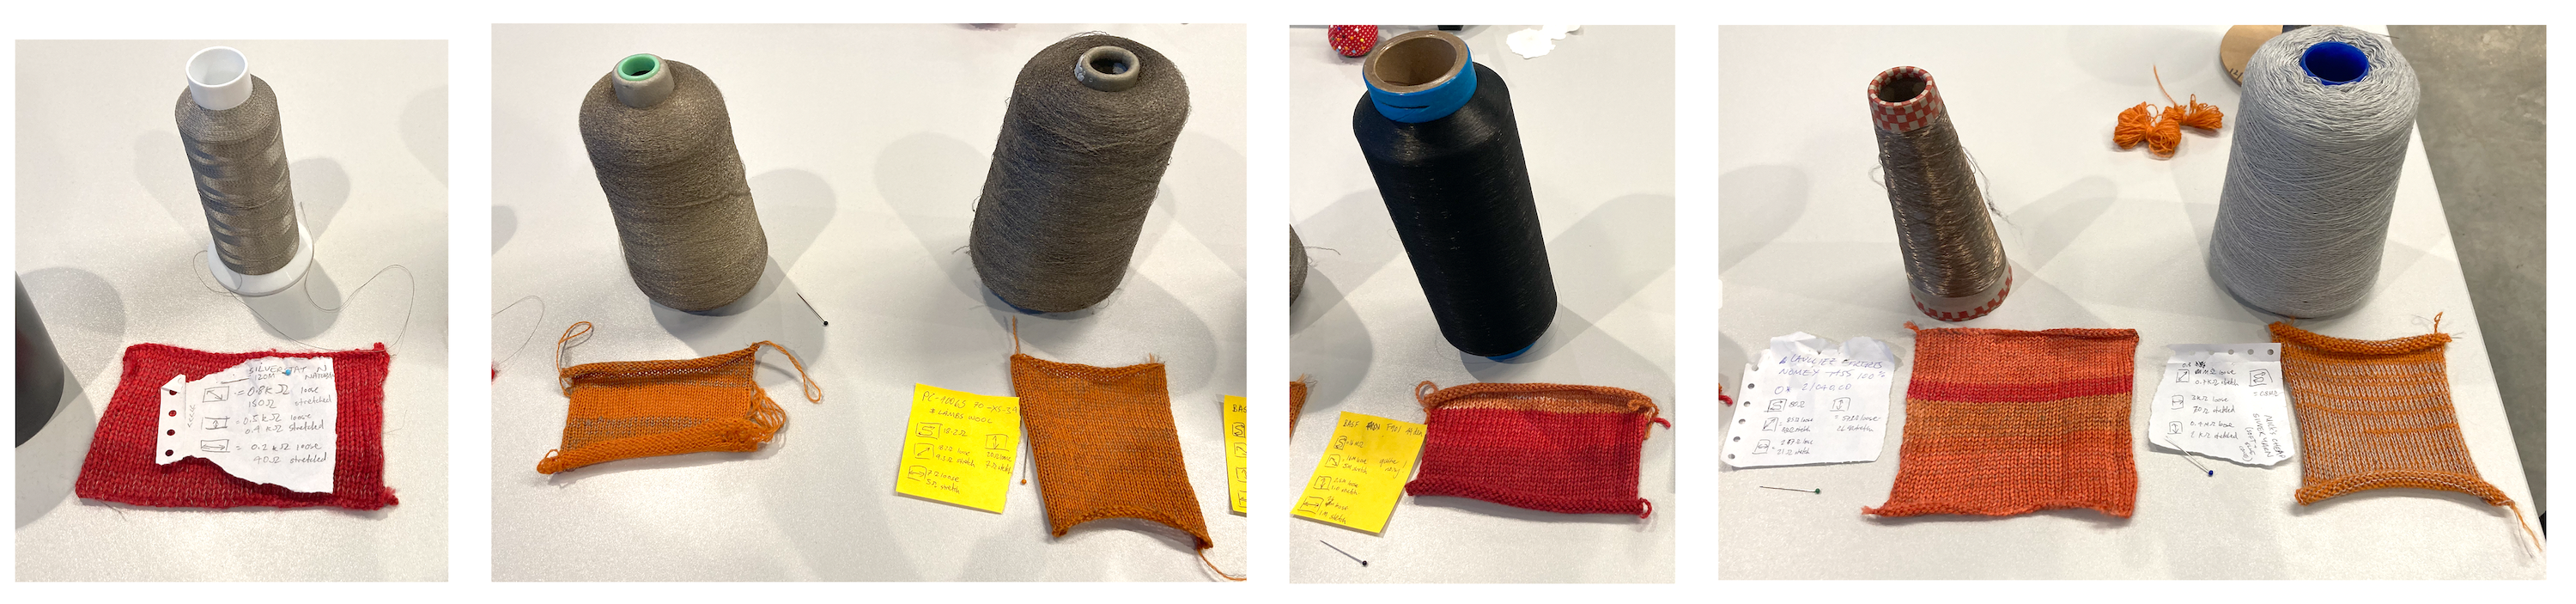
At the CCI we have a range of conductive yarns and threads that can be used that have variable conductive and textural properties. We have a Silver Reed knitting machine that is suitable for knitting up to 4 ply yarn, and can be used programatically with the DesignaKnit software.

Typically, the conductive yarn is used along with a carrier yarn, that adds structural stability, colour, and texture to the knit.
In general, knitted textiles should not be used to conduct any currrent greater than 100mA or so, as they can risk getting hot, and because of their form (and the potential for shorts) in general my advice would be to consider them primarily as sensing rather than conductive material.
This page isn't a tutorial on the Silver Reed, but an overview of options for making conductive knitted textiles at the CCI.
Knitted Touch Sensor
It's possible to use conductive knits along with the MPR121 Capacitive Touch Sensor. This allows you to detect when a conductive object has been touched. Often, you might need to adjust the sensitivity of the MPR121 to pick up on the signals from the knit sample, as these can be much less strong than more conductive media like copper tape.
e-textiles support technician Rosie Walker made a touch-sensitive orb using an intarsia technique to make sure the samples weren't touching!

In order to get the sensor to work properly, she both changed the thresholds of the MPR121, and used a set of buffers to smooth the signal.
Adjusting the Sensitivity of the MPR121
To initialise the MPR121, the following lines are needed:
Adafruit_MPR121 cap = Adafruit_MPR121();
void setup(){
cap.begin(0x5A);
}
This begin() function is defined as follows:
begin(uint8_t i2caddr=MPR121_I2CADDR_DEFAULT,
TwoWire *theWire=&Wire,
uint8_t touchThreshold=MPR121_TOUCH_THRESHOLD_DEFAULT,
uint8_t releaseThreshold=MPR121_RELEASE_THRESHOLD_DEFAULT)
By default the values are MPR121_TOUCH_THRESHOLD_DEFAULT = 0x41 and MPR121_RELEASE_THRESHOLD_DEFAULT = 0x42. The 0x at the beginning of the number shows that they are written in hexadecimal, click here to understand how hexadecimal works and to convert between hexadecimal and decimal.
We can change these values to adjust the sensitivity. To do this, add arguments to begin() with new values for the thresholds, as below:
Adafruit_MPR121 cap = Adafruit_MPR121();
void setup(){
cap.begin(0x5A, &Wire, 0x4, 0x5);
}
To see the full definitions for the MPR121 Arduino library, click here
Knitted Stretch Sensor
Knitted fabrics that integrate conductive yarn will have different amounts of resistance, depending on the size of the sample, the density of the stitches, and the yarns used. These samples can be used as part of a voltage divider circuit, which measures a changing resistance.
In the circuit below, the knitted stretch sensor is being used to control the brightness of an LED:

These sensors can be used anywhere a potentiometer would be used instead. Typically the signal is much noisier and harder to control, but you can still get some interesting results! One example project is the knitted synthesisers workshop.
Measuring the Resistance

When trialling knit stretch sensors, it's important to know the range of resistances you are working with. You can measure their resistance using a multimeter
Attach the crocodile clips to the edge of the sample, and connect the other ends to the multimeter. Move the wheel of the multimeter to the setting with the Ω symbol, and press the 'mode' button until you also see a Ω on the screen.

Once the system is connected, you should see a reading of the sample's resistance on the multimeter. Try stretching the sample and the number should decrease! Note that the letters next to Ω refer to the magnitude: k stands for 'kilo' (x1000), and M stands for 'mega' (x 10,000). You want your sample to be at least a few kΩ for this to work.
Making a Voltage Divider
To be able to measure the change in resistance of your knitted sensor, you need to use a circuit called a voltage divider. This consists of two resistors placed in series, meaning that the voltage applied is divided between the two, relative to their resistance. For example, in a voltage divider circuit with two resistors of equal value, the voltage would be evenly split in half between the two. If one resistor had a vastly larger value, it would take up the majority of the voltage and the other would have very little.
We can then measure the voltage between the two resistors. If we know the value of one resistor and the voltage being applied across both, we can determine the value of the other resistor. Therefore, if we have a variable resistor (like a conductive knitted swatch), we measure the change in resistance.
We can do this by wiring the knitted swatch in series with a resistor and connecting the point between them to an analog pin on an arduino like the diagram below. You can then use analogRead() to measure the value.

To determine the value of the non-variable resistor, first measure the resistance of your conductive swatch as described in the section above. You need to have the range of resistances, so do this with the fabric not stretched then with it stretched. Choose a value for the resistor that is approximately in the middle of these two values (e.g. if your swatch varies between 100 and 200 ohms, your resistor would need to be 150 ohms).
For more information on voltage dividers, click here.
Knitted Switch
By bringing pieces of conductive knit into contact with one another, or with other conductive things (like a wire!), it's possible to toggle the state of a circuit on and off. One sample switch in the CCI is a knit sample where the conductive yarn is integrated in stripes!
Prototyping Wearables
Wearable electronics comes with a bunch of considerations about size and power management. We stock sewable battery holders for coin cells and 9V batteries, and we also have higher-power LiFeP04 batteries available in the robotics workshop. We do not currently stock Lithium Ion batteries, as these aren't allowed on UAL campuses due to fire risk.
Lots of wearable projects involve wireless components (so whoever is wearing it doesn't have to have a USB cable attached to them), so you might also want to look into networking protocols, using either Wifi, Radio or Bluetooth.
There are many options for integrating circuits into textiles, ranging from making conductive textiles from scratch (e.g. conductive knit) to using silicon-coated wire to stitch flexible threads into garments. For project ideas involving textiles, we have a wiki page for e-textiles and the website How To Get What You Want (by the collective Kobakant) is an amazing resource for different project ideas.
Making your project smaller
This is a pretty classic issue with arduino-based wearables: you have a circuit that works, maybe built with Arduino, and you want to minaturise it. Here are some options, from biggest to smallest:
- use an Arduino shield -- this is a special prototyping board that allows you build directly on top of the Arduino. This can be nice if you just want to avoid connection spaghetti
- use a smaller board we have many smaller boards available for use, including the Arduino Nano BLE Sense and the ESP32. These have the added advantage of working wirelessly, which is useful for wearable projects!
Arduino shield (left) and Arduino BLE Sense (right):


mounting and housing power and boards
There are many options for housing wearable circuits, and often the most effective include wearable bands and pouches. It's important to make sure that your electronics are housed securely, and can't short-circuit each other! It's also a good idea to solder things on stripboard, rather than relying on header wires.
We have elastics, nylon buckles and straps, velcro and fabric available to make housing.


Making your project wireless
In order to communicate between the wearer and other systems -- e.g. a computer, an arduino -- some form of communication needs to take place. In the CCI, the two main boards we stock for doing this are the ESP32 board (which works using wifi), and the Arduino Nano BLE Sense, which works over Bluetooth. We are also stocking a small amount of Arduino Uno R4 boards, which work over WiFi.
Esp32 (left) and Arduino Uno R4 (right):


Remember that even wireless circuits will still need a power supply! Talk to technicians about the best options for powering your circuit.
Making your circuit soft/flexible
Another issue with wearables is that electronics tends to be hard. While it's difficult with the materials we have in the CCI to make totally soft circuits, it's normally possible to make the wires and connections surrounding the circuit softer and flexible. In the CCI we stock the following components that can help with this:
- Silione covered strand-core wire
- Conductive thread and yarn
- Conductive ribbon
- Conductive fabric
A big challenge with integrating electronics into textiles is making good and durable connections. Kobakant has a bunch of resources for doing this -- normally these involve a fair amount of sewing.
