Using the Brother Innov-is V3 Embroidery Machine
To use this machine, you must have had an induction from one of the technical staff. This guide is to serve as a reminder for students who have already had this induction.
Overview
The Brother Innovis V3 is a top-end domestic embroidery machine that can be used to produce high-quality digital embroidery.
Embroidery machines work by moving a piece of fabric (fixed within a hoop) in x and y beneath a needle that moves up and down. In this sense, they have a lot in common with many other 2-axis CAD machines (like laser cutters, routers, plotters), though because of the paticular qualities of working with stitches as opposed to straight toolpaths (and various embroidery software weirdness) there's some practice involved in getting consistent results.
This guide is a condensed overview of the machine operation -- if you'd like a more detailed reference, see the Brother Operation Manual.
Producing a file
In order to embroider your design, you must first create a .PES file. At CCI, there are 2 main ways that this can be done:
- Programatically, using the open-source PEMBroider package for Processing
- Using Brother's PE Design 11 software
Both approaches have their advantages and disadvantages depending on the kind of design you want to make. In general, PEMBroider gives you a huge amount of control over how the design is stitched, whereas PE Design auto-generates the toolpath, allowing you to choose from a few different presets. As such, the learning curve with PEMBroider is a bit steeper, and generally requires a bit more tinkering to achieve a result, but can produce some really unique designs.
As PEMBroider is just an extension of Processing, it can be run on your computer. PE Design is a piece of proprietary Windows software, for which we have one license, so it must be used on the dedicated Windows machine next to the embroidery machine. There is a Windows-only trial version available here.
Machine Setup
While this machine is threaded using a similar approach to most domestic sewing machines, it has some specific features that are a little less common.
Changing the top thread
This is the thread that will be on the top side of your fabric, and
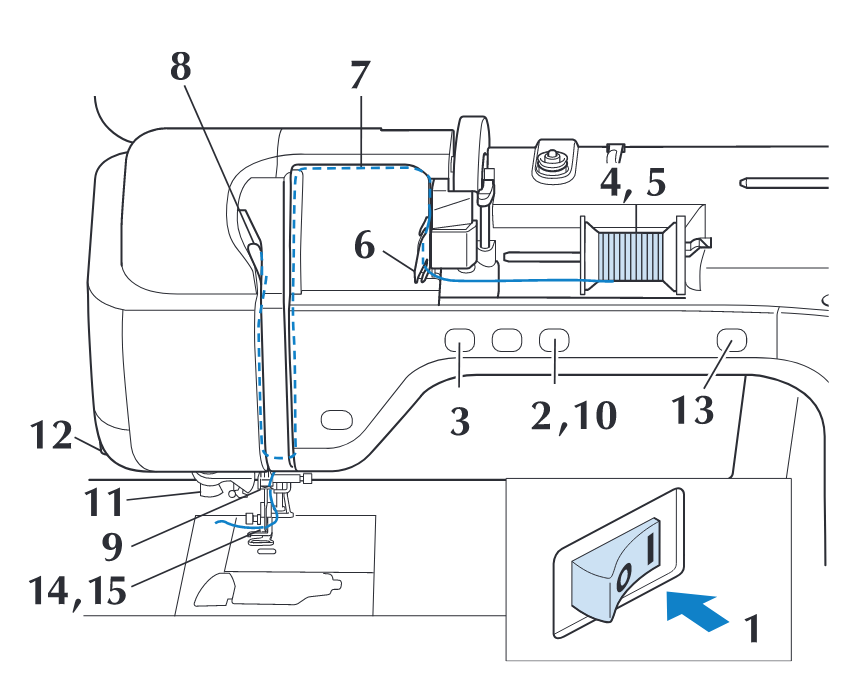
The diagram below shows how the top thread should look when properly threaded through the machine. For a full step-by-step instruction, the guide in the manual is very thorough, though if you are unsure then please ask for a refresher.
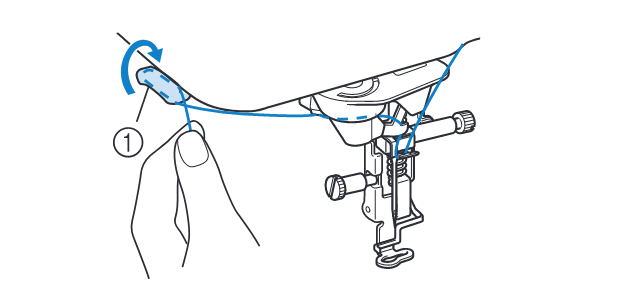
The final step of threading the top thread is shown below -- pull the thread through the thread cutter, and then press the 'auto thread' button for the machine to automatically thread the needle. (it's also possible to do this by hand but much less efficient).
Changing the bobbin thread
The bobbin thread is what binds the top thread to the fabric, and sits underneath. Typically, this thread is either black or white -- if you are sewing
Using Conductive Thread
this part is yet to come as we need to do some tests!


