UltiMaker Cura Set-Up
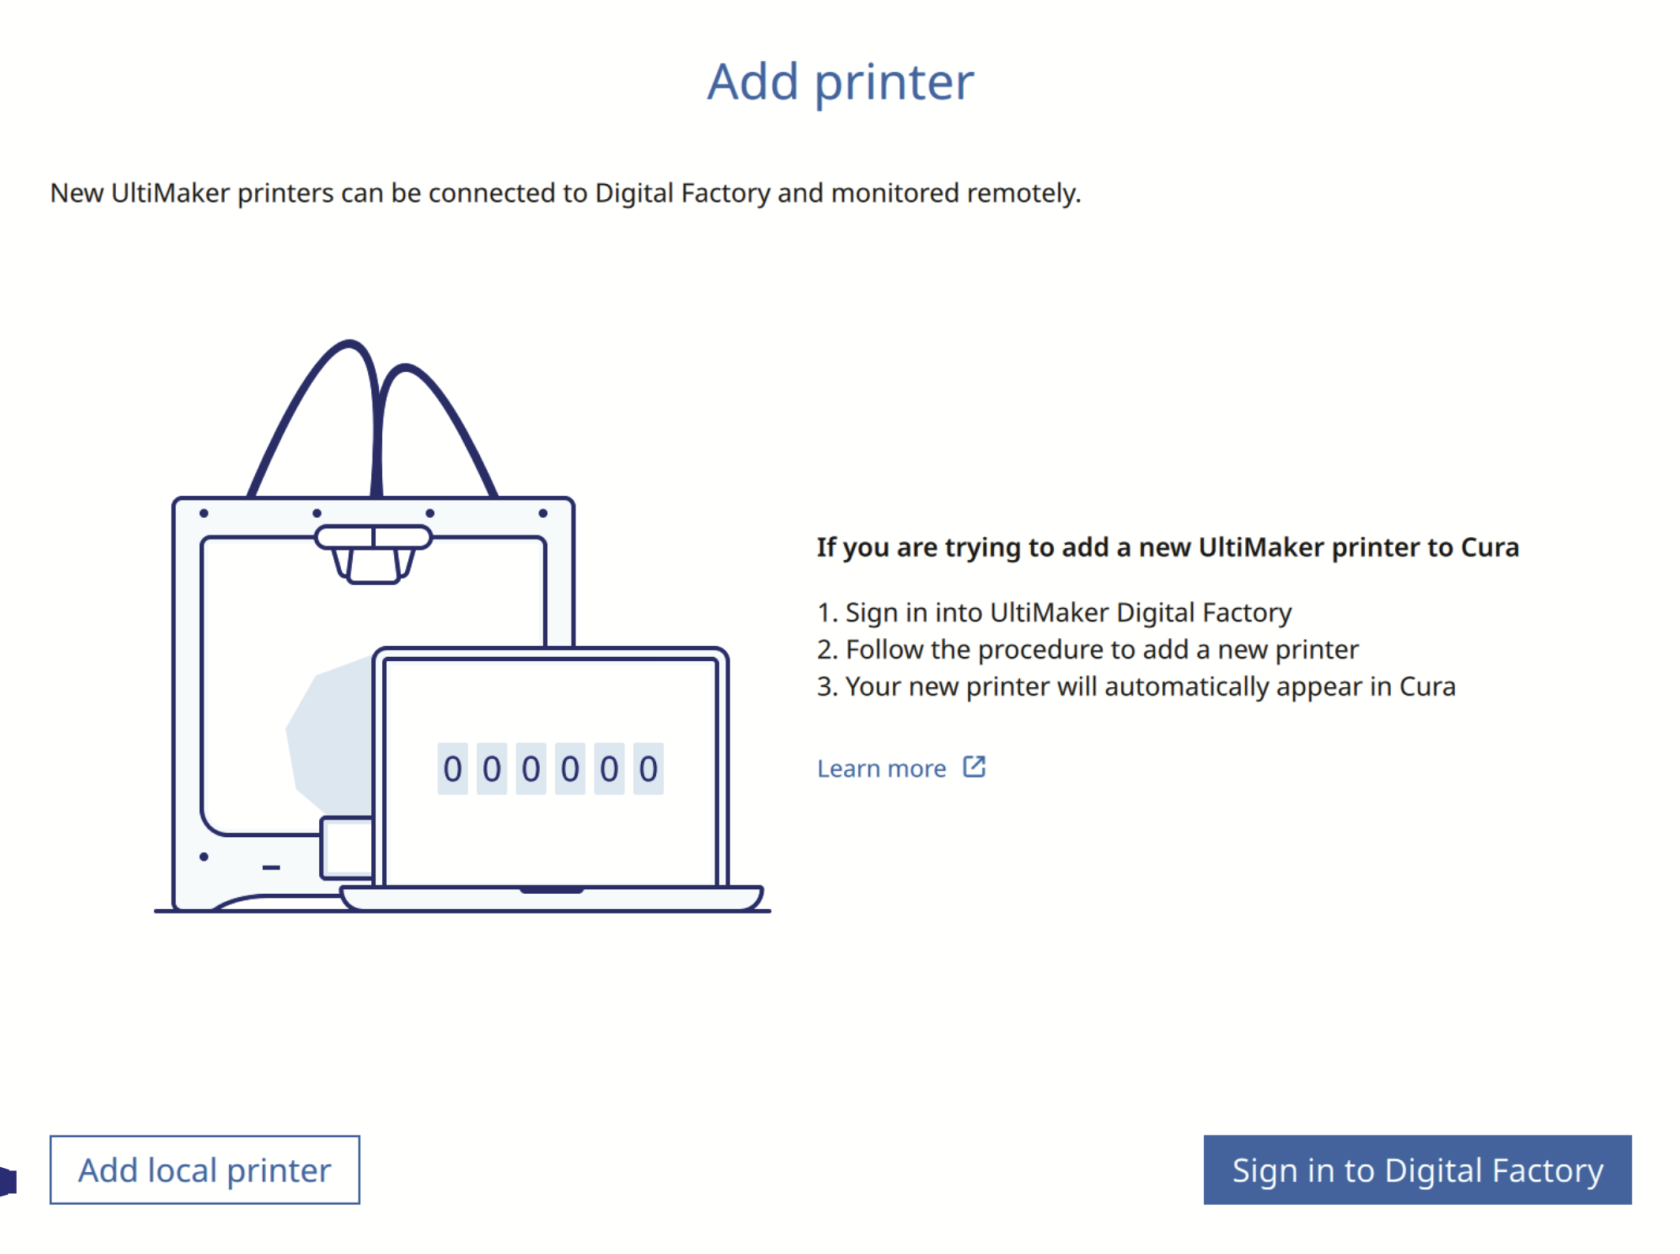
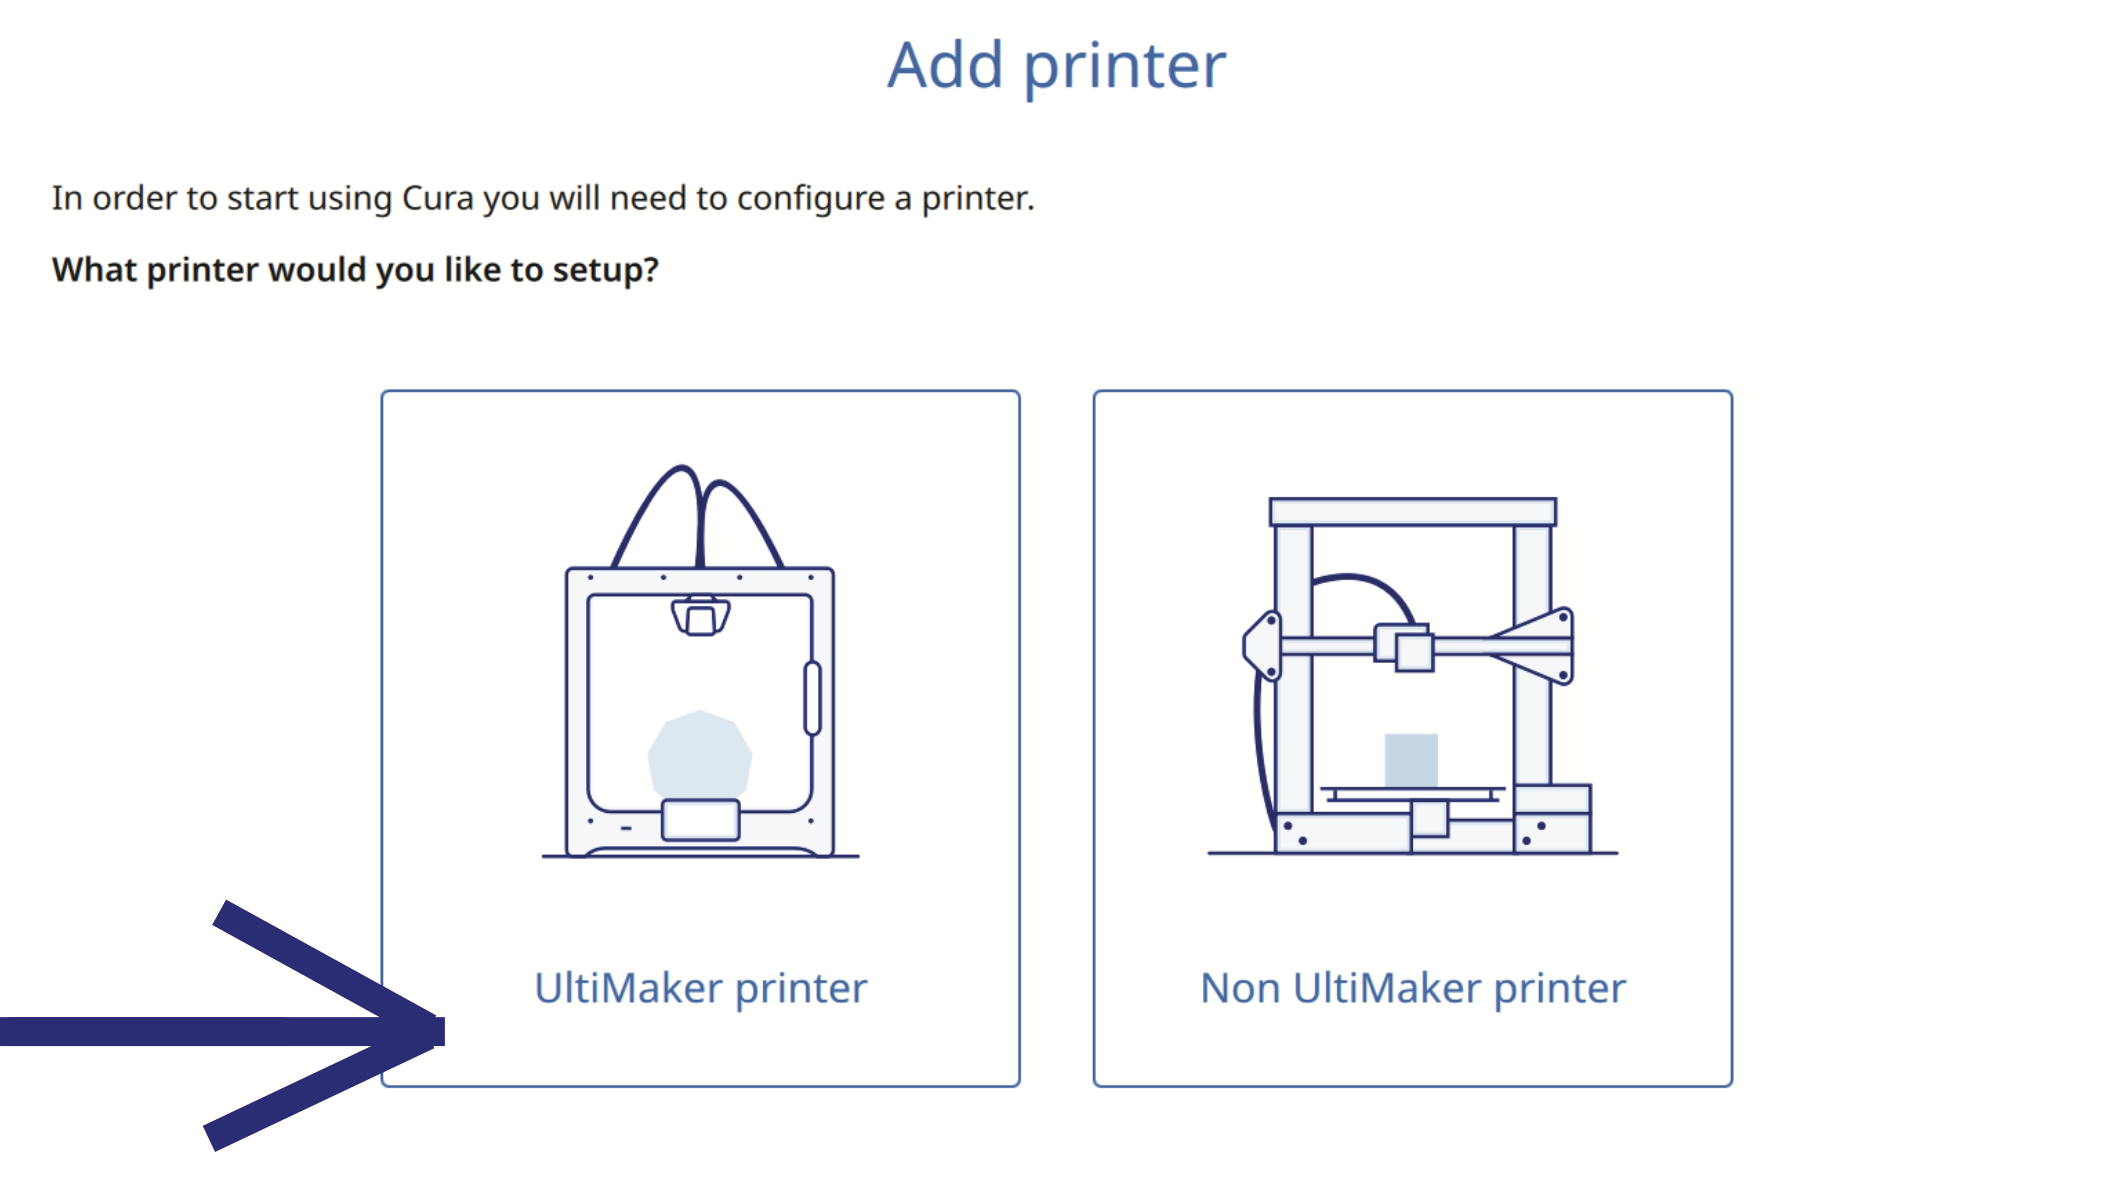
- Add an UltiMaker printer from the start menu.

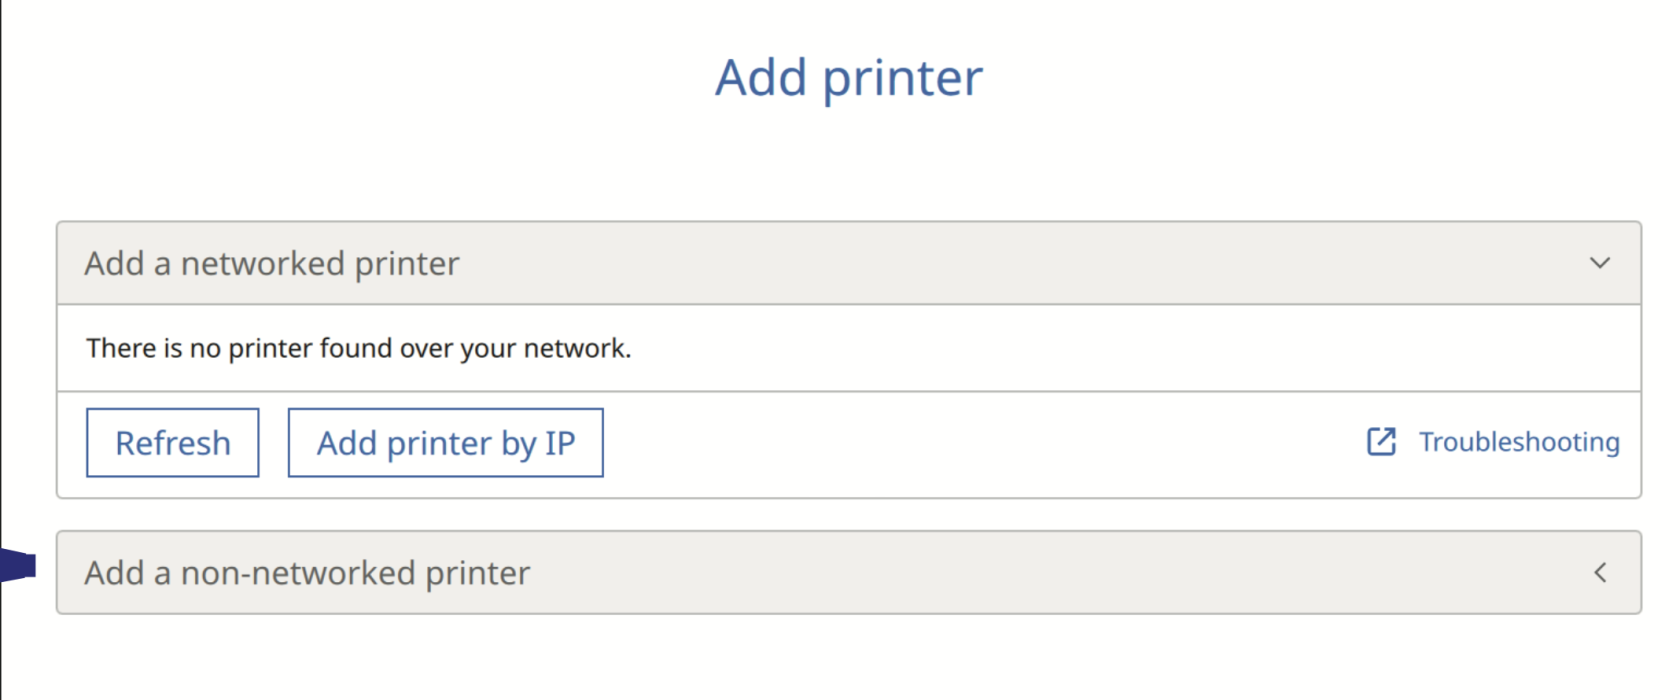
- Add a local printer from the start menu.
- Add a non-networked printer from the start menu.
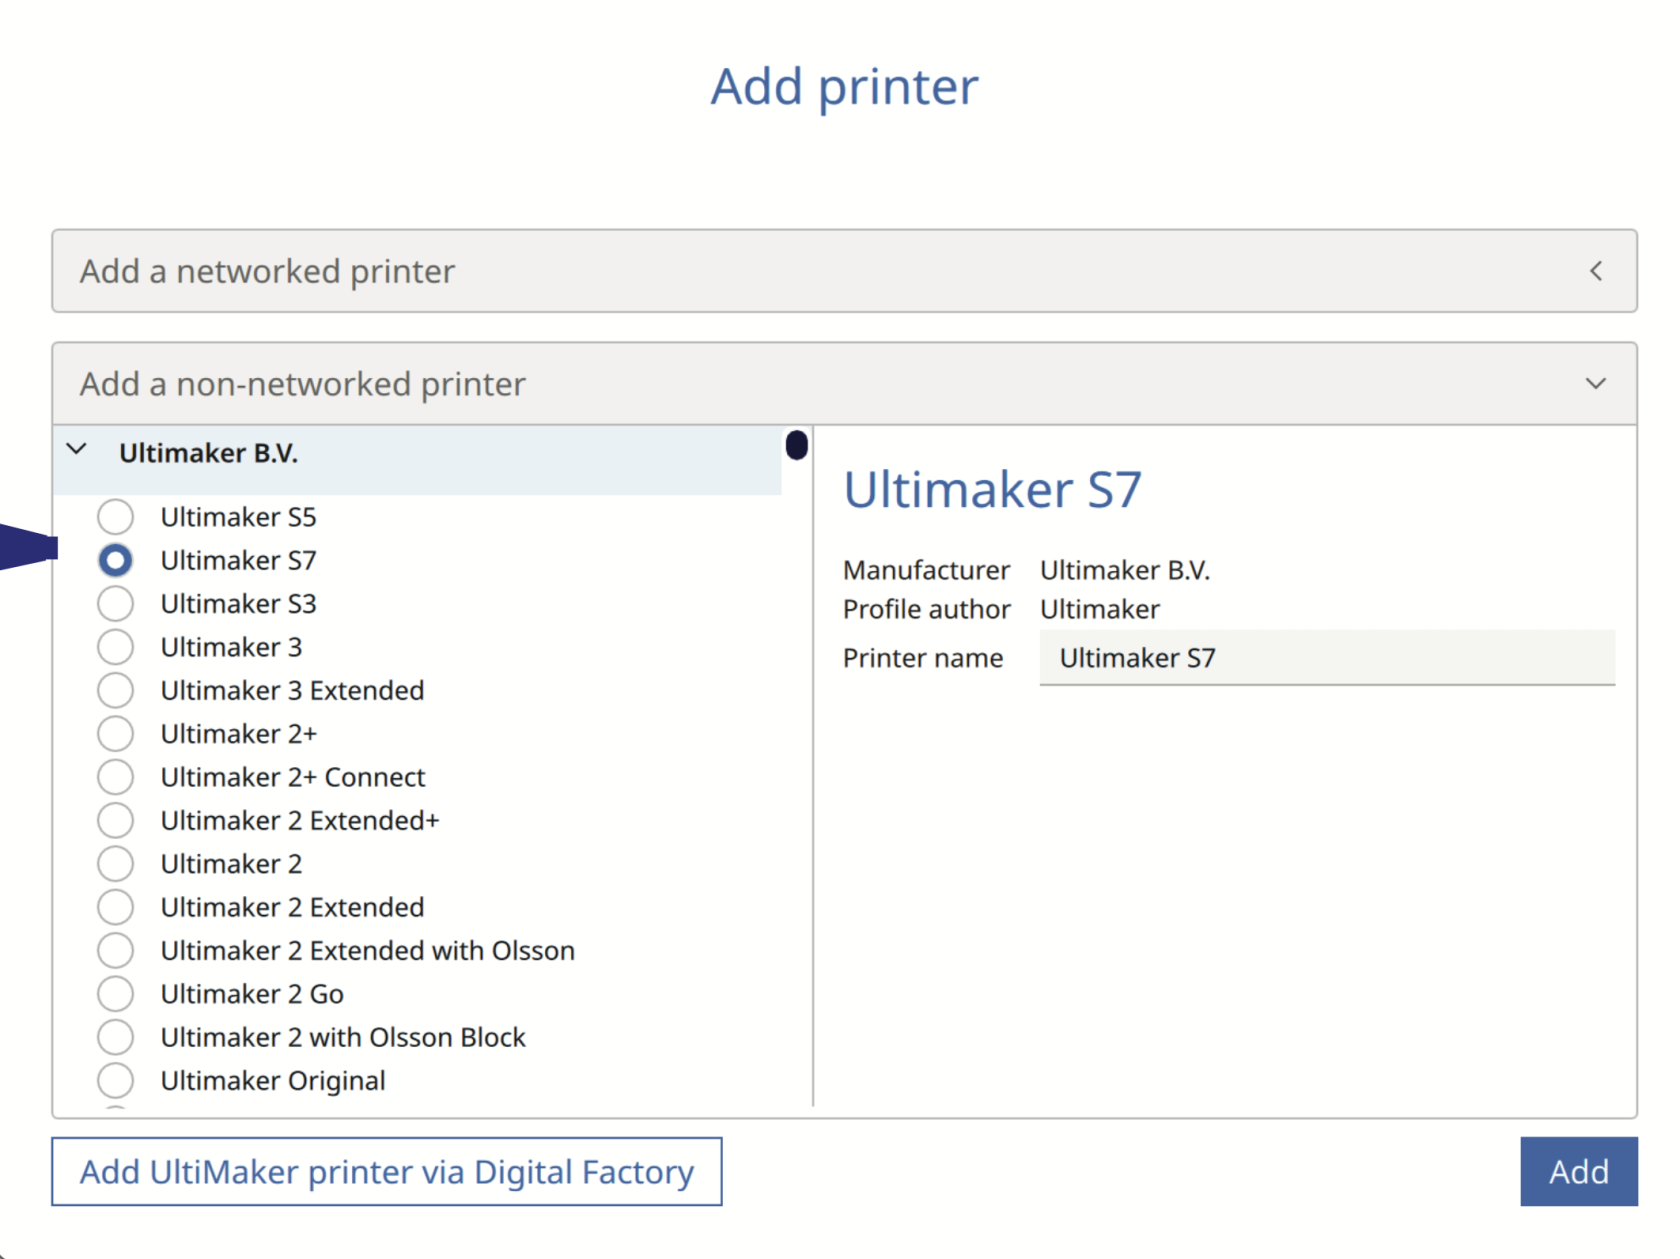
- Add Ultimaker S7


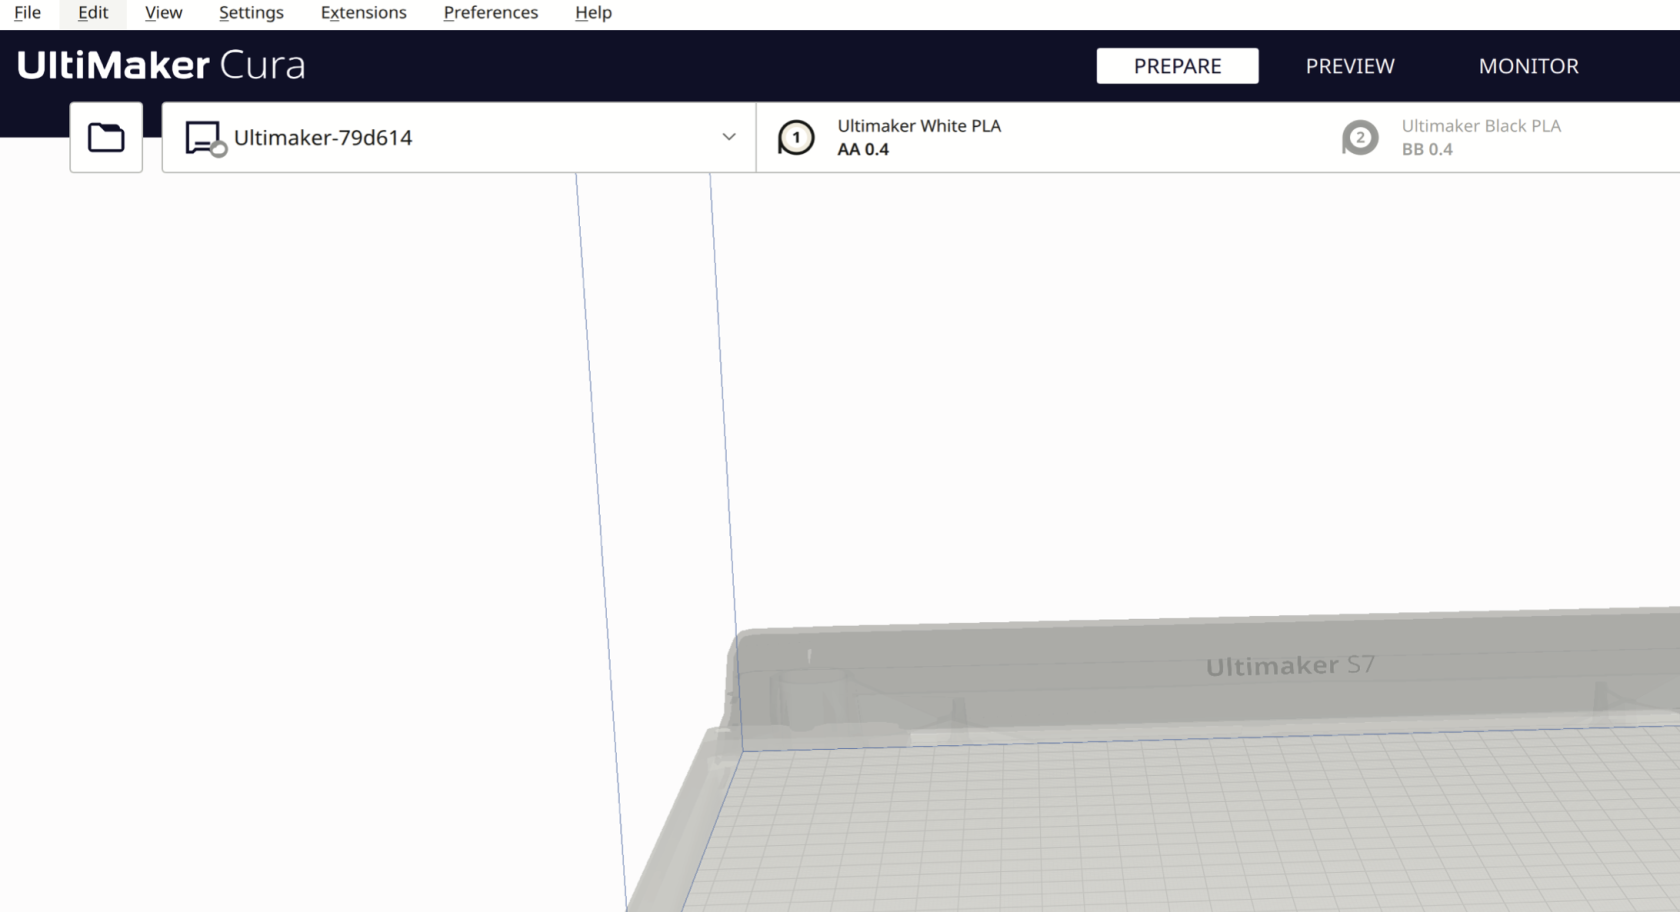
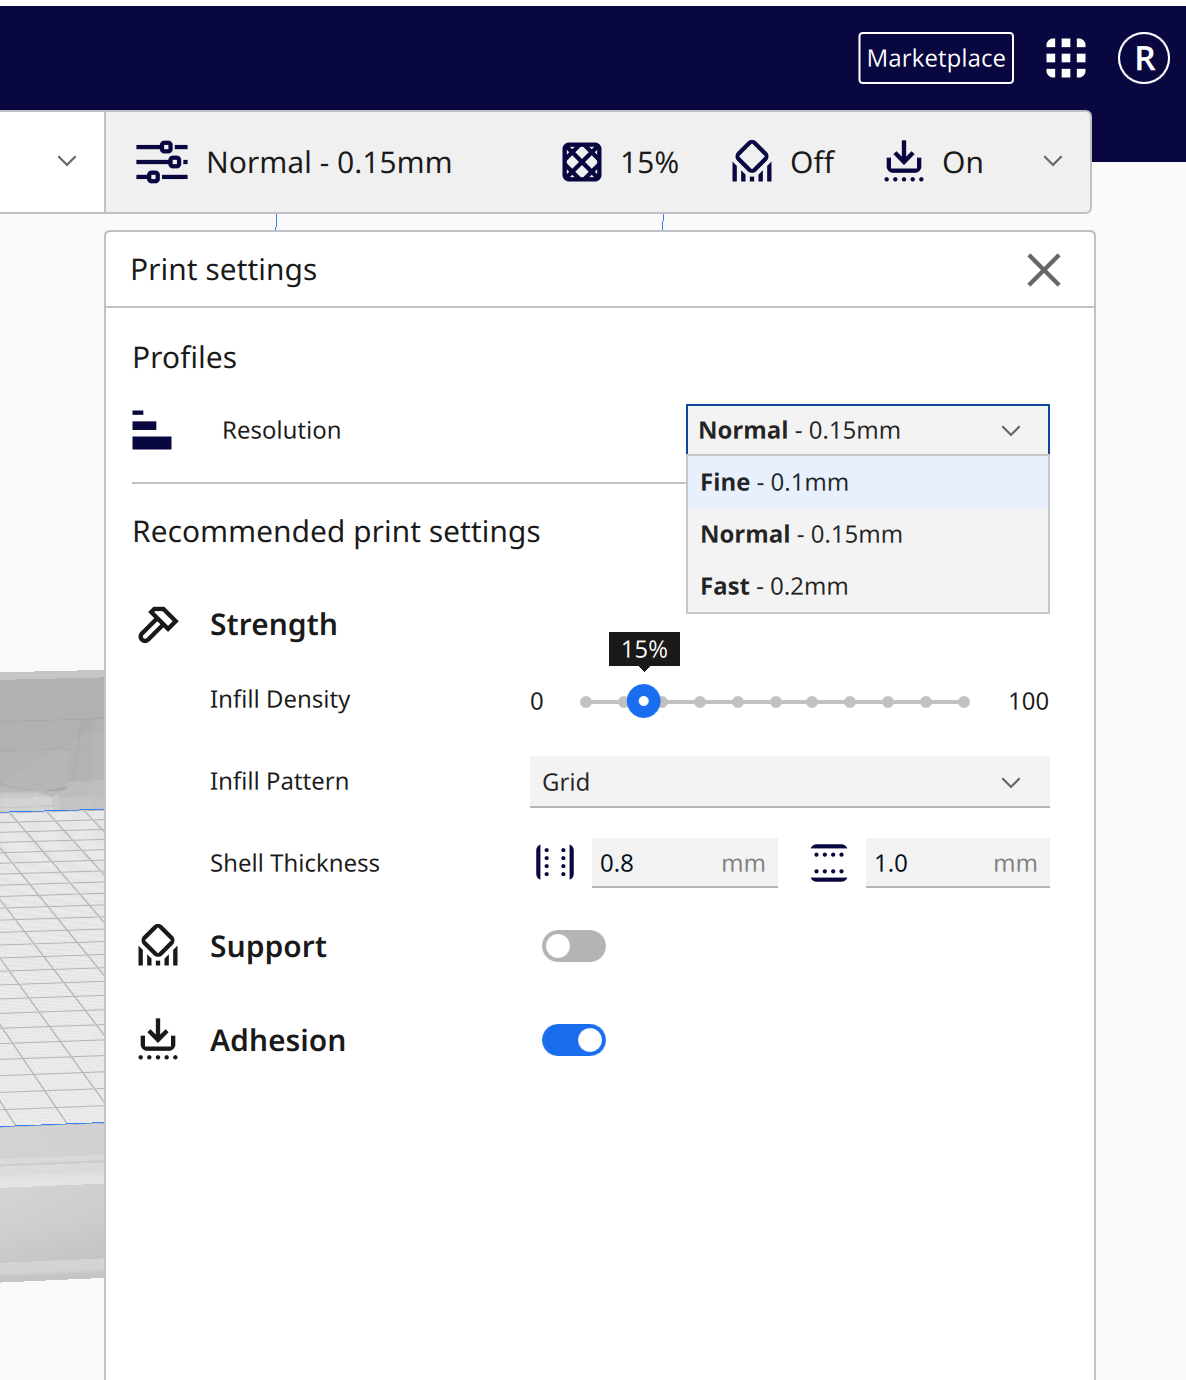
This is the preparation window, which shows the bed size of the Ultimaker S7 (330 x 240 x 300 mm), select the filament type and color, as well as setting up the values such as print resolution, which affects the length of time it takes to print, as well as the material infill density.
-
Press the Folder button to import your STL/OBJ/3MF file into Ultimaker Cura, or drag and drop files into Ultimaker Cura.
-
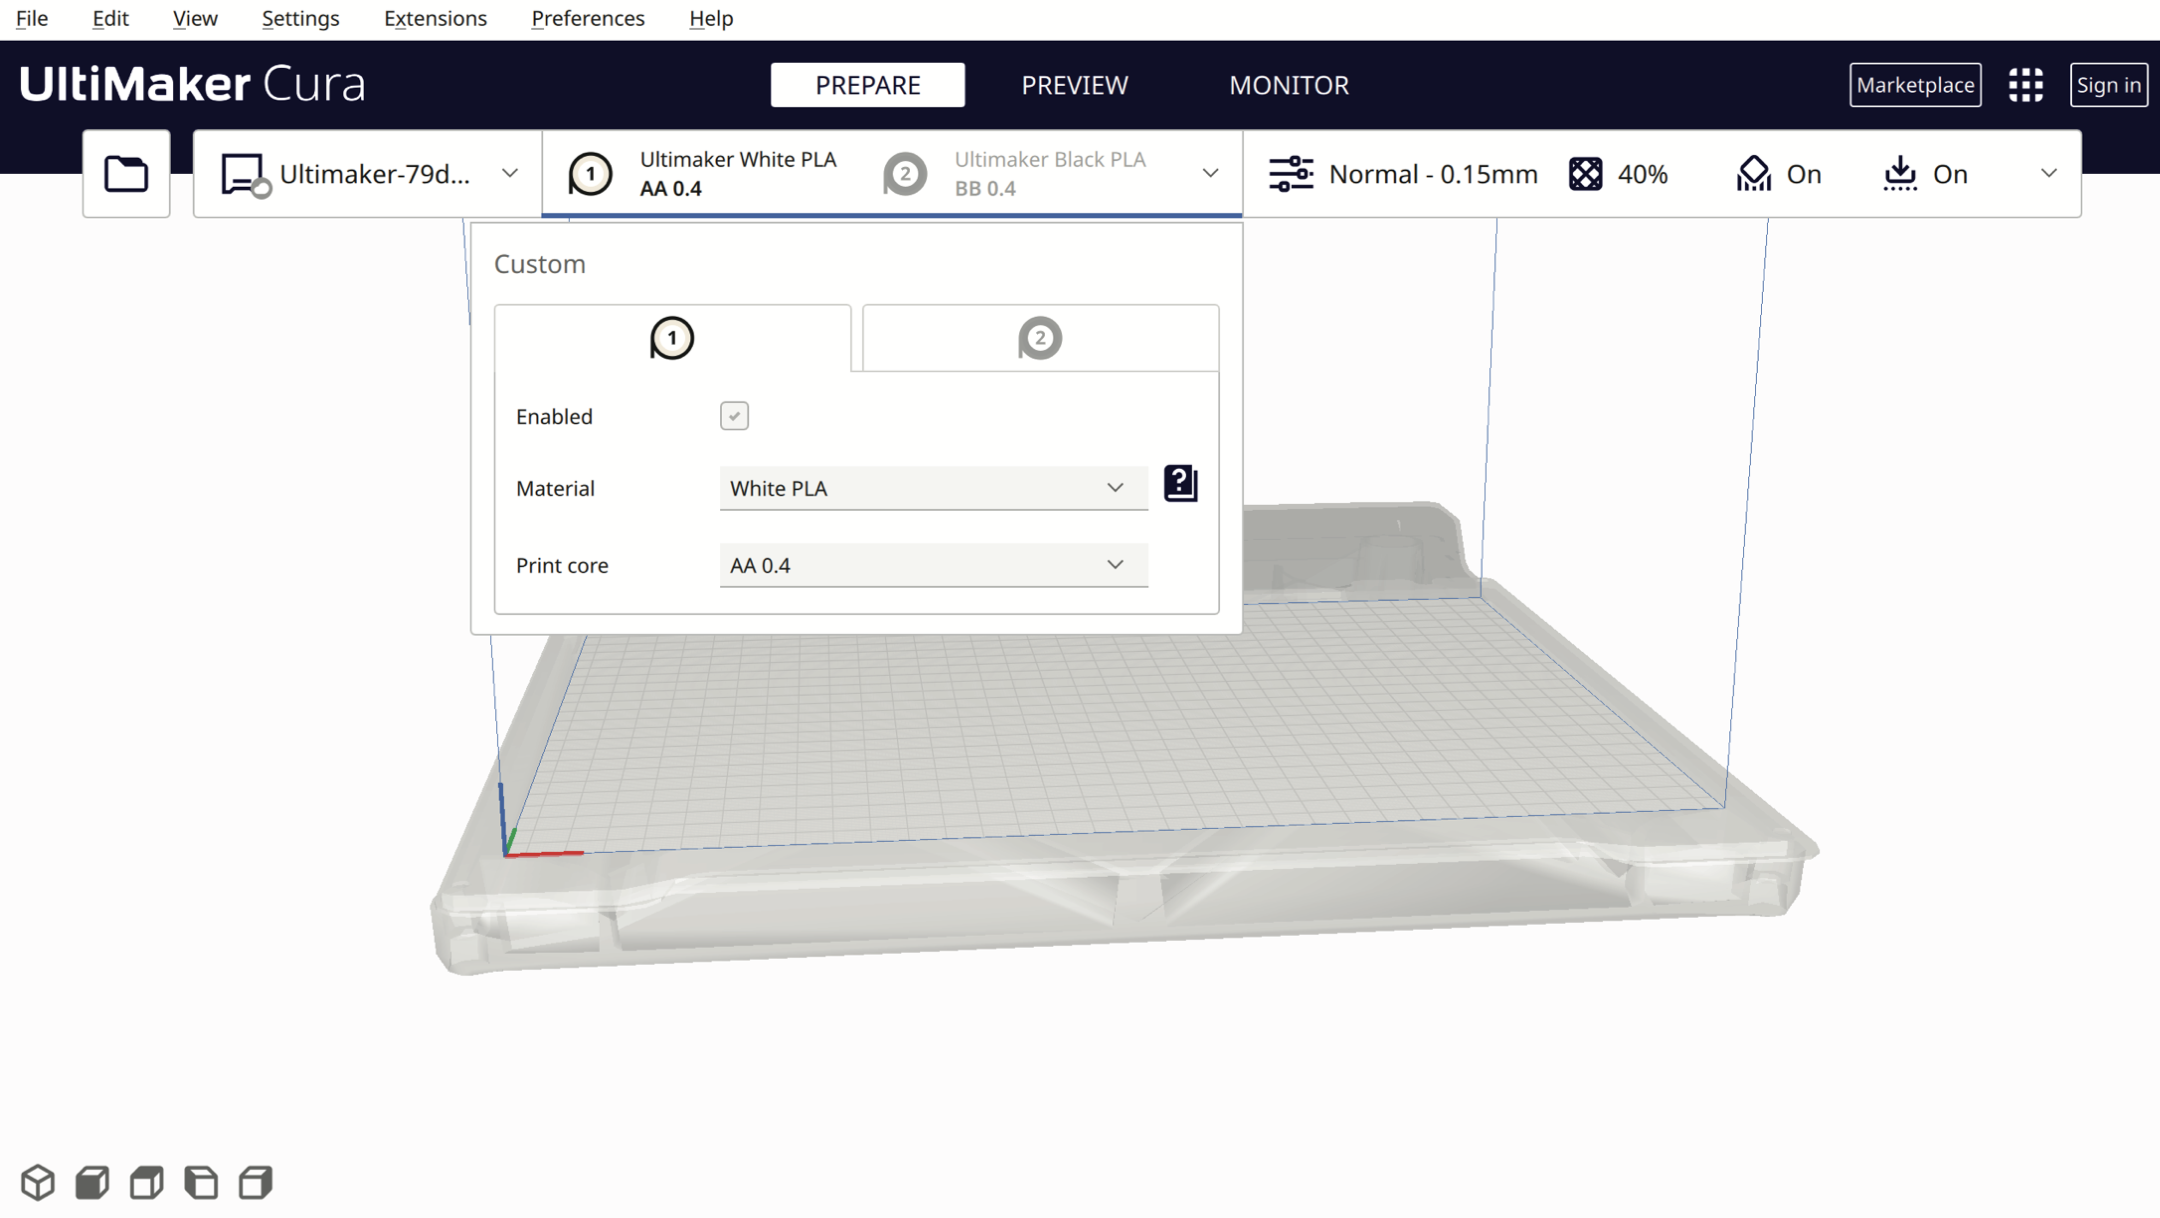
In the drop-down menu, select the type of filament, e.g. PLA, Tough PLA, PVA, TPU, Breakaway and the filament colour. In this example, we are using UltiMaker White PLA from extruder AA 0.4

-
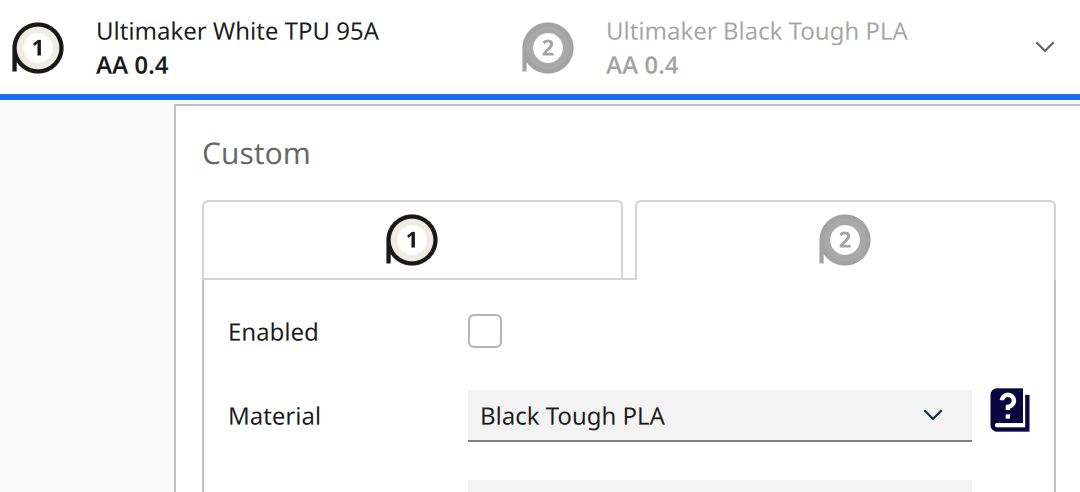
Enable and disable the filament extruder heads by ticking the “Enabled” box. (Please uncheck the second extruder option; we will cover the dual-extrusion option in our advanced 3D printing workshop)
-
Material Setting
-
Important Reminder❗️


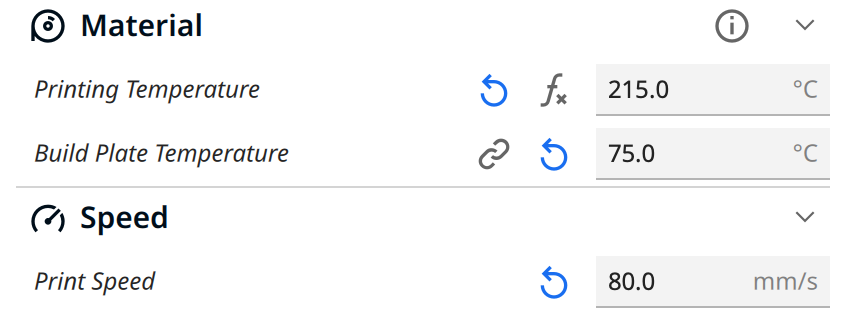
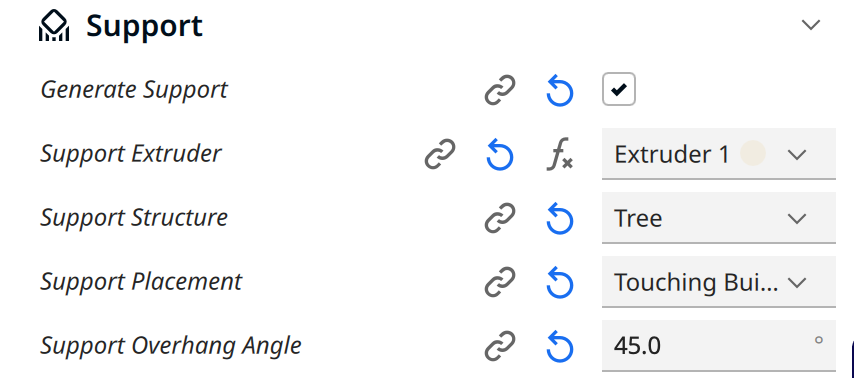
- The build plate temperature should be set to 75°C;
- The material temperature setting depends on different materials, and the support overhang angle should be 45°.
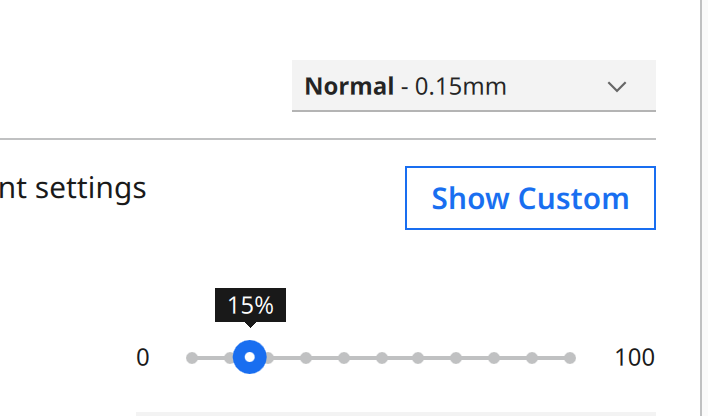
- Go to the Show Custom page to change them.


- Different filaments need different settings; for more info, please refer to the Filaments page
- For example, if you are using PLA, set the printing temperature to 215°C and printing speed to 80–110 mm/s. (Never forget to set the Support overhanging Angle to 45, unless for tailored solutions or your model doesn't need supports.)