Prototyping Wearables
Wearable electronics comes with a bunch of considerations about size and power management. We stock sewable battery holders for coin cells and 9V batteries, and we also have higher-power LiFeP04 batteries available in the robotics workshop. We do not currently stock Lithium Ion batteries, as these aren't allowed on UAL campuses due to fire risk.
Lots of wearable projects involve wireless components (so whoever is wearing it doesn't have to have a USB cable attached to them), so you might also want to look into networking protocols, using either Wifi, Radio or Bluetooth.
There are many options for integrating circuits into textiles, ranging from making conductive textiles from scratch (e.g. conductive knit) to using silicon-coated wire to stitch flexible threads into garments. For project ideas involving textiles, we have a wiki page for e-textiles and the website How To Get What You Want (by the collective Kobakant) is an amazing resource for different project ideas.
Making your project smaller
This is a pretty classic issue with arduino-based wearables: you have a circuit that works, maybe built with Arduino, and you want to minaturise it. Here are some options, from biggest to smallest:
- use an Arduino shield -- this is a special prototyping board that allows you build directly on top of the Arduino. This can be nice if you just want to avoid connection spaghetti
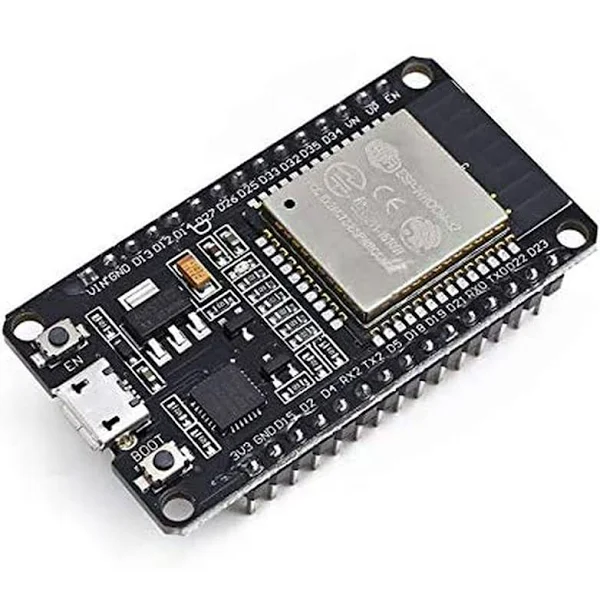
- use a smaller board we have many smaller boards available for use, including the Arduino Nano BLE Sense and the ESP32. These have the added advantage of working wirelessly, which is useful for wearable projects!
Arduino shield (left) and Arduino BLE Sense (right):


Making your project wireless
In order to communicate between the wearer and other systems -- e.g. a computer, an arduino -- some form of communication needs to take place. In the CCI, the two main boards we stock for doing this are the ESP32 board (which works using wifi), and the Arduino Nano BLE Sense, which works over Bluetooth. We are also stocking a small amount of Arduino Uno R4 boards, which work over WiFi.
Esp32 (left) and Arduino Uno R4 (right):

Remember that even wireless circuits will still need a power supply! Talk to technicians about the best options for powering your circuit.
mounting and housing power and boards
There are many options for housing wearable circuits, and often the most effective include wearable bands and pouches. It's important to make sure that your electronics are housed securely, and can't short-circuit each other! It's also a good idea to solder things on stripboard, rather than relying on header wires.
We have elastics, nylon buckles and straps, velcro and fabric available to make housing.


Making your circuit soft/flexible
Another issue with wearables is that electronics tends to be hard. While it's difficult with the materials we have in the CCI to make totally soft circuits, it's normally possible to make the wires and connections surrounding the circuit softer and flexible. In the CCI we stock the following components that can help with this:
- Silione covered strand-core wire
- Conductive thread and yarn
- Conductive ribbon
- Conductive fabric
Metal to Fabric Connections
A big challenge with integrating electronics into textiles is making a good and durable connection between a metal wire/component and the conductive yarn/thread. There are a few different ways that this can be done.
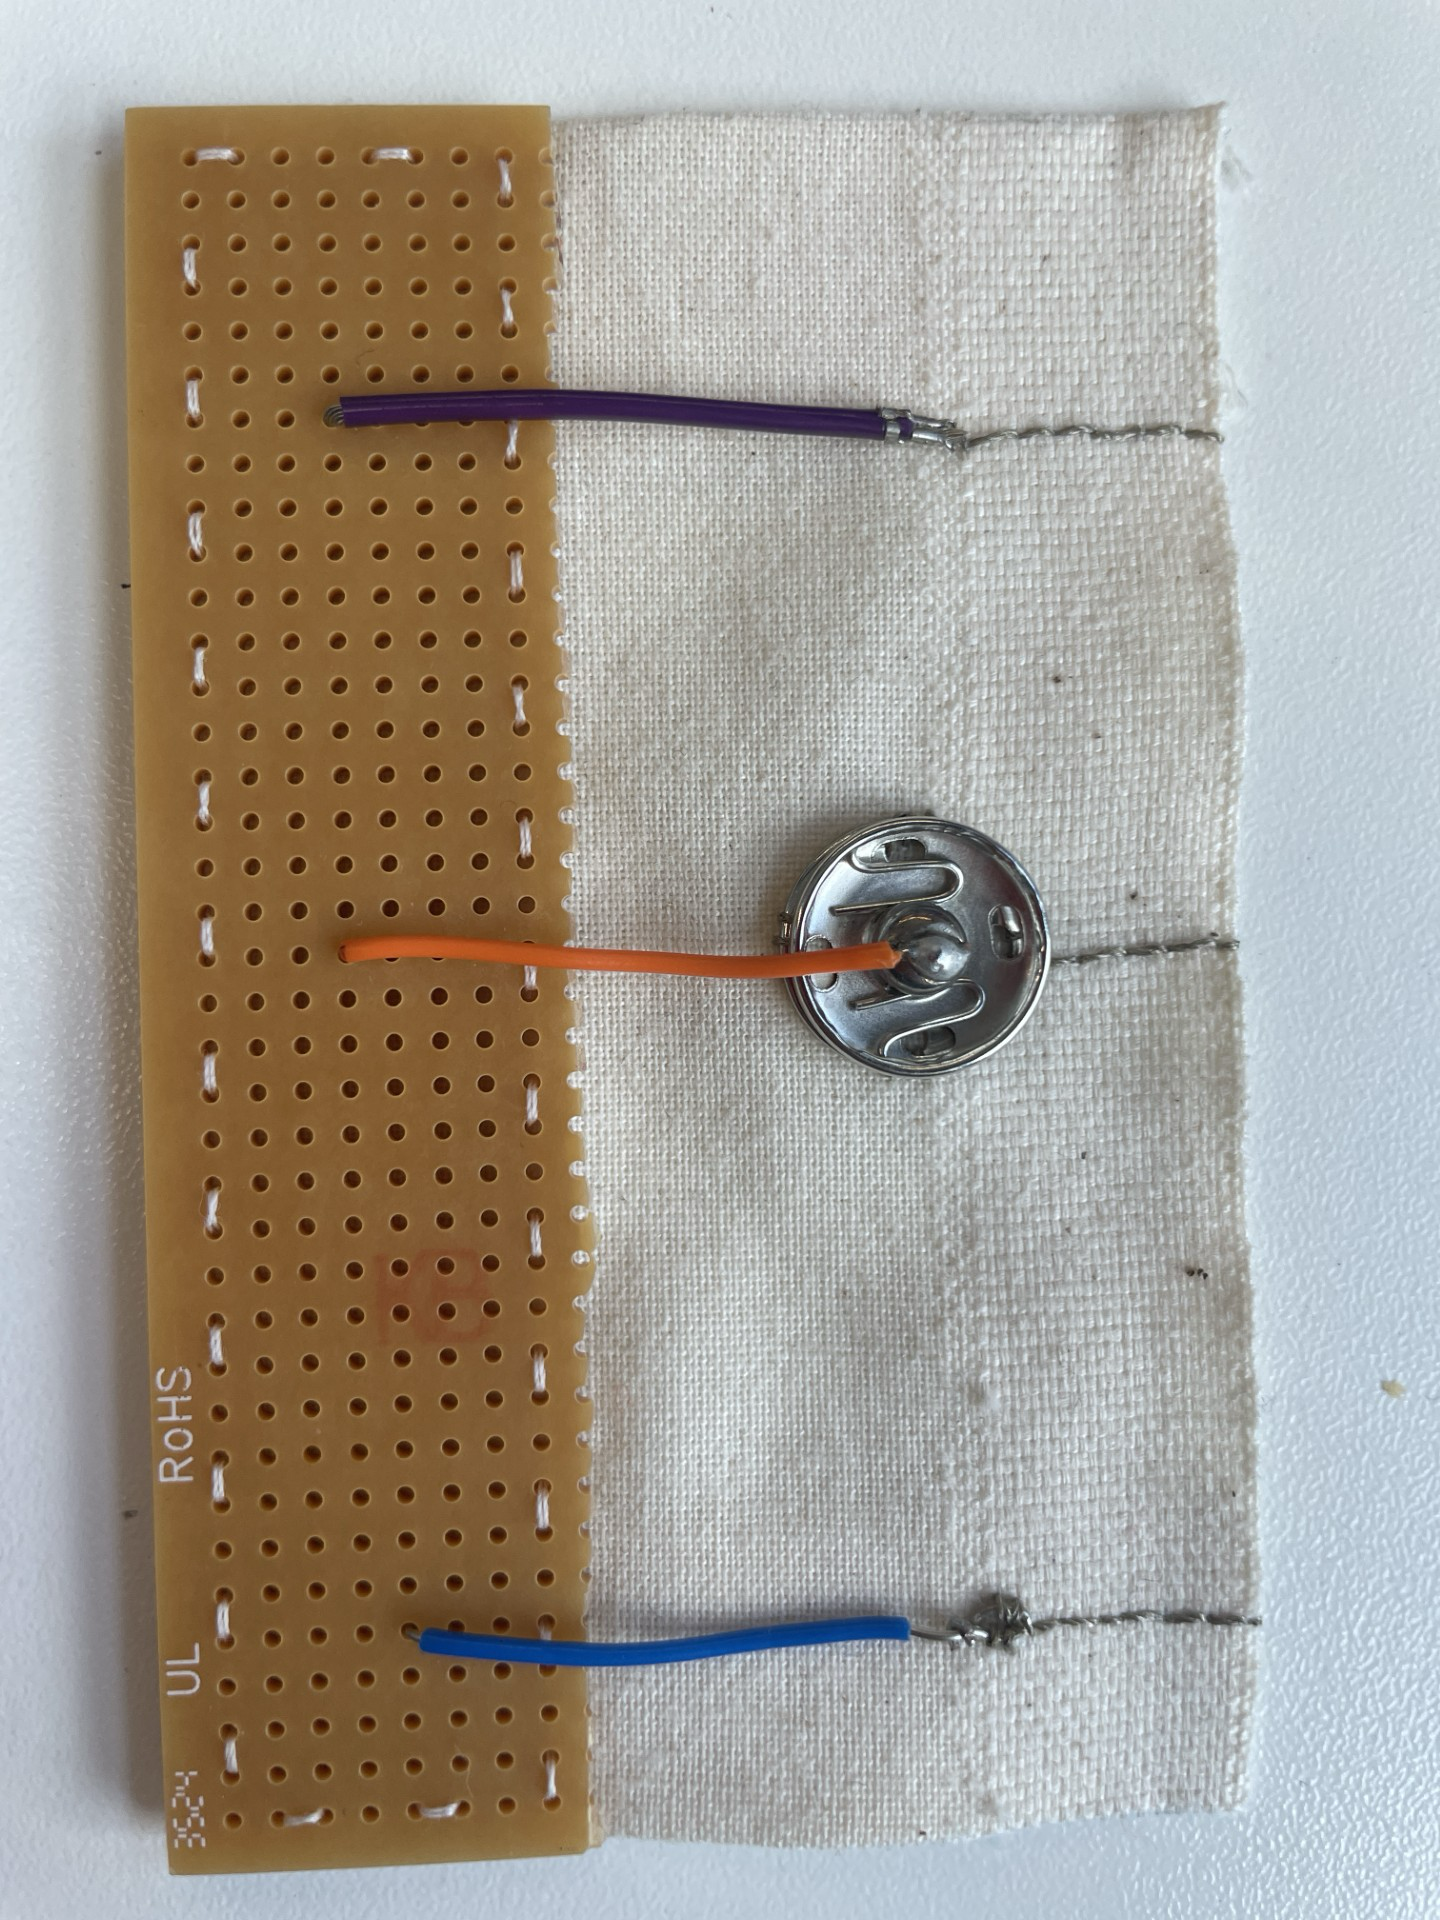
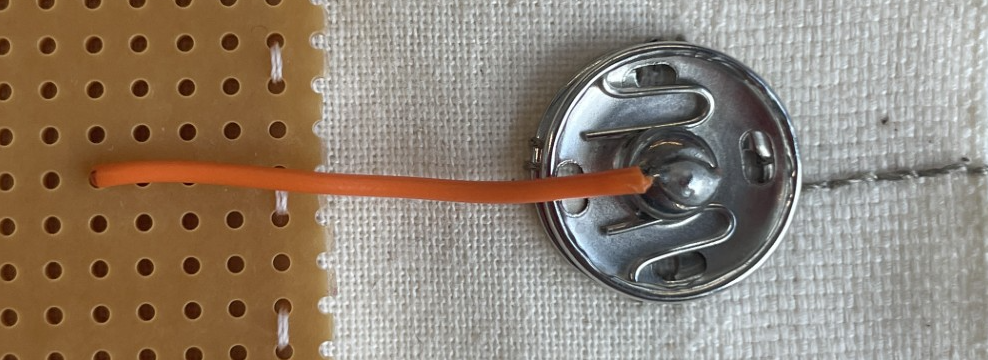
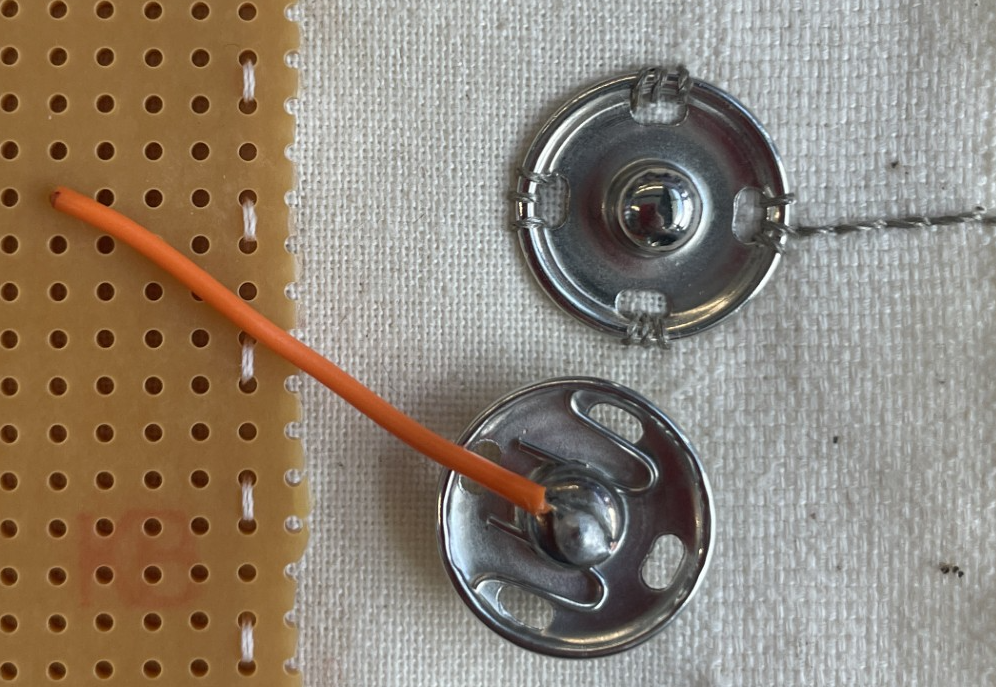
Sewable snaps
By sewing one side onto your fabric with the conductive yarn/thread then soldering a wire onto the other, you can create a very reliable connection that can also act as a switch.

Pros: can be disconnected making things easier to move around, can act as a switch as well
Cons: bulky (depending on the size of your snaps), sometimes the snaps can wear out after repeated use making the connection not as reliable.
JST crimps
If you have used JST connectors before, this uses the crimps to securely connect strand core wire to conductive thread/yarn (if you haven't used JST connectors before ask a technician to show you before trying this).
- Strip and trim the wire as normal
- Tie the conductive thread in a knot around the striped part of the wire as below.
- Holding the thread in place, crimp the wire as normal. This should lock the thread into the crimp with the wire, creating a secure connection.
This method works best if you connect the thread and wire before sewing as trying to do this when the thread is already connected to the fabric will be very tricky. This method is quite fiddly and takes a bit of practice so if you would like some help, speak to Rosie.
Pros: strong and reliable connection, sleek and small for more intricate designs such as wearables
Cons: fiddly, time consuming, permanent

Sewable snaps
By sewing one side onto your fabric with the conductive yarn/thread then soldering a wire onto the other, you can create a very reliable connection that can also act as a switch.
Pros: can be disconnected making things easier to move around, can act as a switch as well
Cons: bulky (depending on the size of your snaps), sometimes the snaps can wear out after repeated use making the connection not as reliable.
Hand sewing into a loop
This is the simplest method but the least reliable.
- Strip about 2cm of the wire
- Use pliers to bend and twist it into a loop
- Sew through the loop with the conductive thread or yarn
Make sure that you are sewing nice and tightly around the wire in order to get the most reliable connection.
Pros: reasonably fast
Cons: can be unreliable if not tight enough, permanent

Kobakant has a bunch of resources for doing this -- normally these involve a fair amount of sewing.
