5V Air Pump Guide
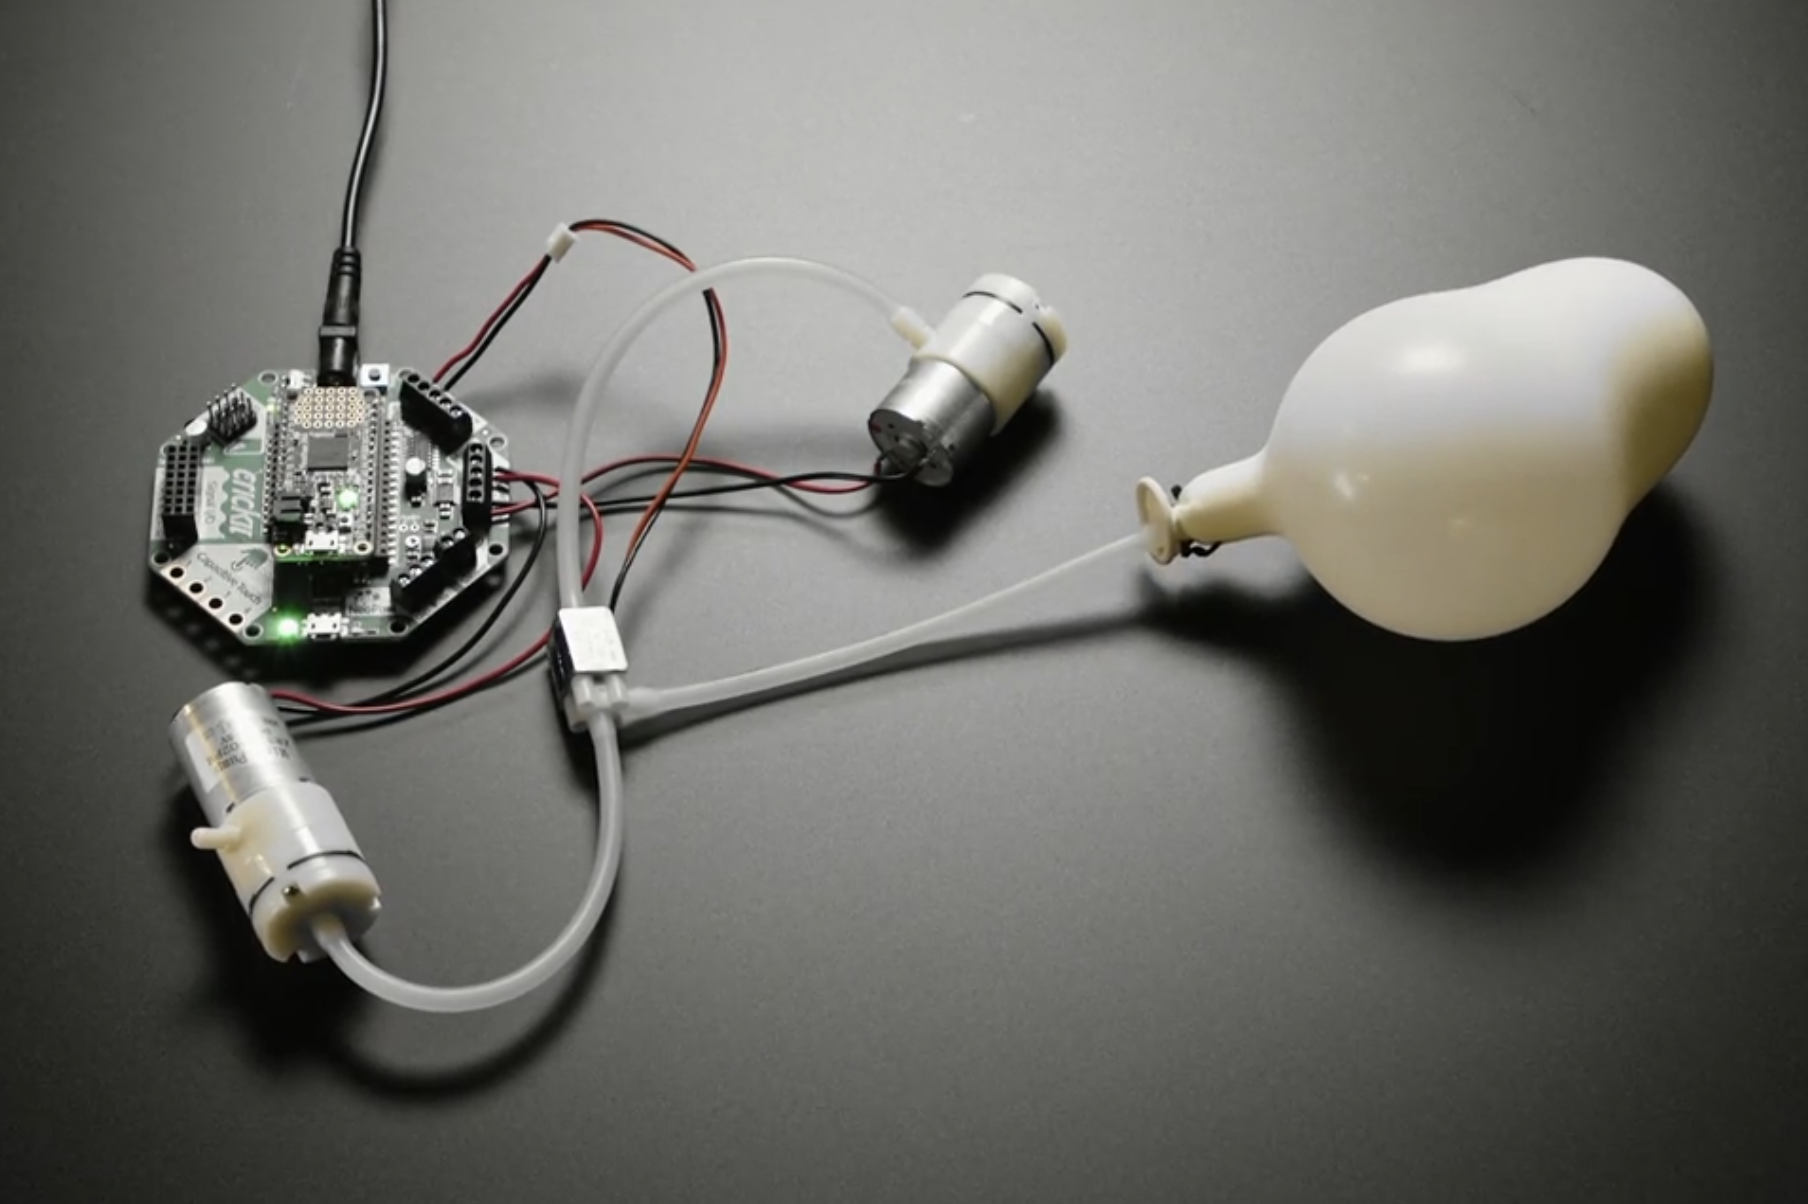
We have a number of small 5V air pumps and silicone tubing available for students to borrow for small-scale inflatable projects. These can't fill a lot of space, so for inflatables larger than about a balloon's worth of volume, you might want to get something more powerful. They are ideal for silicon soft robotics projects!
These alsopumps cannot be used to pump water: for liquid pumps please come and chat to us, as we have a small number of peristaltic pumps available to borrow. The other main constraint of these pumps is that they are unidirectional -- to both inflate and deflate something you will need two!
InflatingBasic or deflatingSetup
The setup for an air pump is basically equivalent to that of a DC motor, and like a DC motor requires the use of an external power supply, to manage the flow of current to the pump. The easiest way to do this is to use one of the 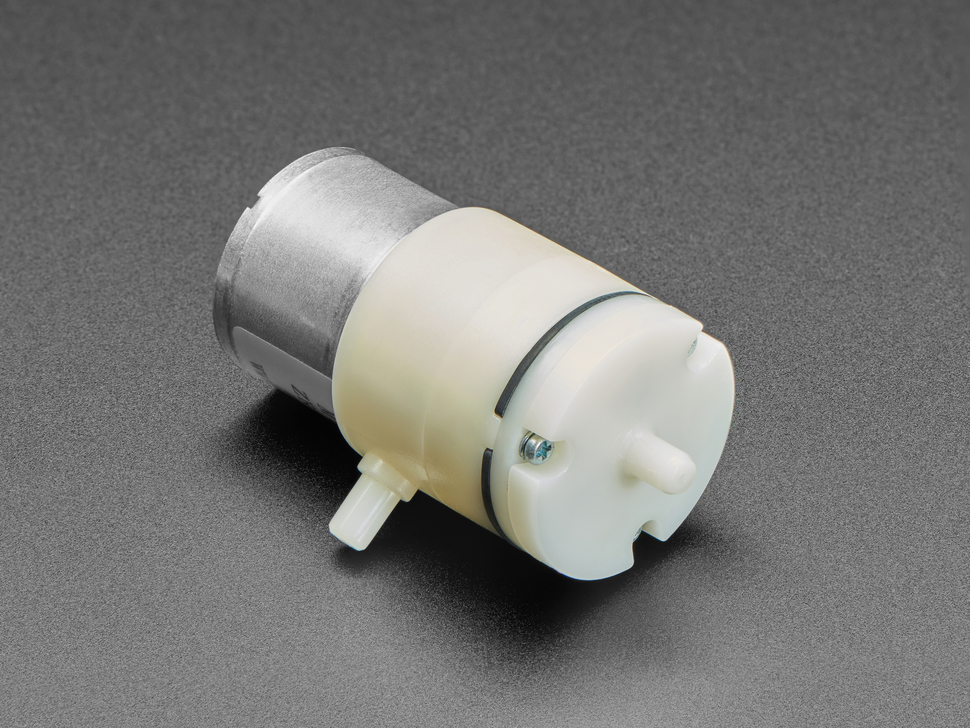
Parts List
All of these parts may be borrowed from the technical office.
- Arduino Leonardo (Uno is also fine)
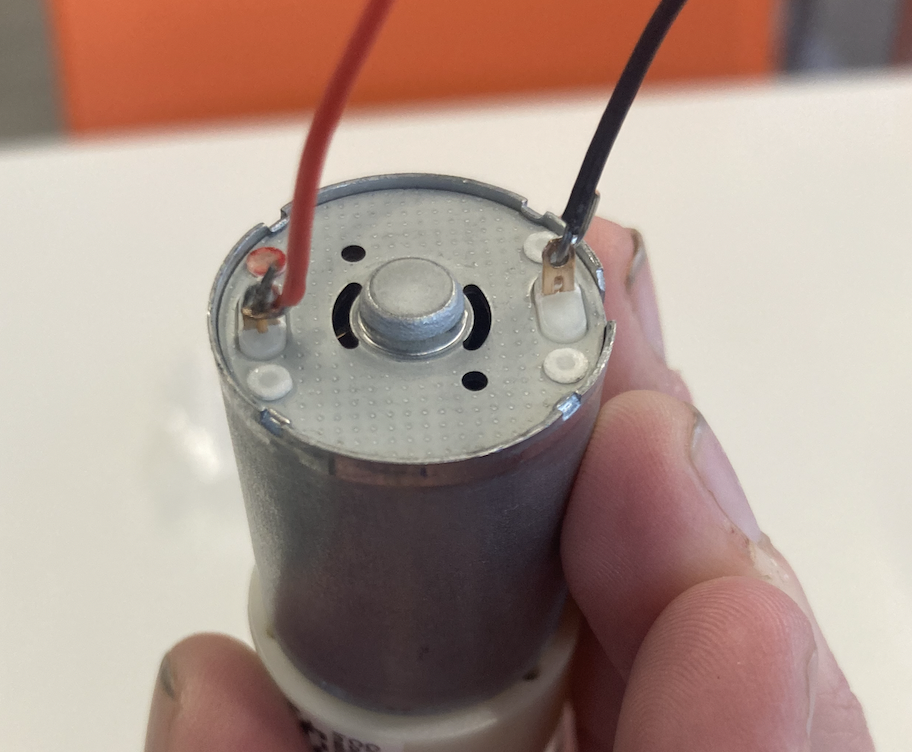
- 5V air pump (you need to solder connecting wires to the pins on the bottom if not already done)
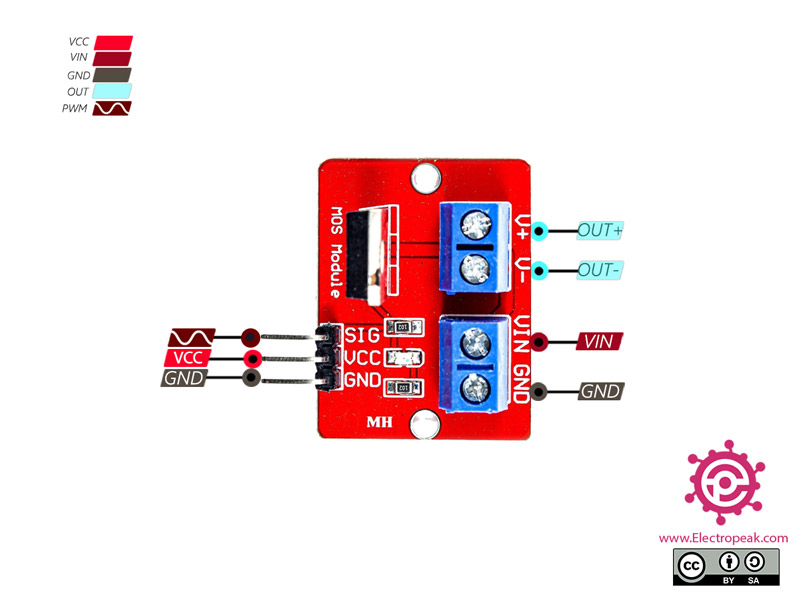
- IRF520 MOS Module
- 5V power supply (because these are 5V pumps -- don't use a higher one!)
- A DC terminal barrel jack (socket type)
- Connecting wires, silicon tubing, etc etc
- Screwdrivers for attaching the wires to the screw terminal blocks on the MOS module and DC barrel jack

You want to wire up the components according to the diagram below:
-
Out+andOut-connect to your pump -
VinandGnd(on the screw terminal blocks) connect to the + and - of the barrel jack of your power supply. Very important -- Vin connects to + and Gnd connects to - -
SIG,VCCandGND(e.g. the non-screw terminal connector) connect to a PWM pin (e.g. pin 3),5VandGND, on your Arduino.
Soldering:
Pins are on the base of the pumps. Wrap the wire through the small hole, add a blob of solder and trim any excess wire to prevent shorts. Give the wires a gentle tug to make sure they're properly secured.
Attaching screw terminal:
Make sure when you're attaching things to screw terminals that the wires are attached tightly and do not show exposed metal. This is not a part of your circuit where you want a short! Once they are screwed in, give the wires a gentle tug to make sure they're properly secured.
Sample Arduino code
Once your circuit is wired up, you want to plug in your 5V power supply (and plug it into the jack), and plug your Arduino in to your computer. This code assumes you have connected SIG on the board to Pin 3 of the Arduino.
#define PWM 3

void setup() {
  Serial.begin(9600);
  pinMode(PWM,OUTPUT);
}


void loop() {
  # turn on
  analogWrite(PWM,255);
  delay(3000);


  # turn off
  analogWrite(PWM,0);
  delay(3000);
}
Inflating and deflating
The pumps we have are not bidirectional -- this means that if you want something that inflates and deflates, you need to use 2 pumps linked by a splitter. The circuit to drive each pump will be the same, but you can connect both SIG pins to different PWM pins on the same Arduino. We have valves and splitters available in the tech office.