
Tobii Pro Spark Eye Tracker Setup Guide
Tobii Pro Spark Setup and Usage Guide
This guide explains how to set up a Tobii Pro Spark eye tracker and begin recording eye-tracking data using Tobii Pro Lab.
Before You Start
Before opening any Tobii software, check the display settings on the workstation.
Configure Display Settings
- Open Settings → System → Display
- Set Scale to 100%
- Set Display Resolution to 2560 × 1440
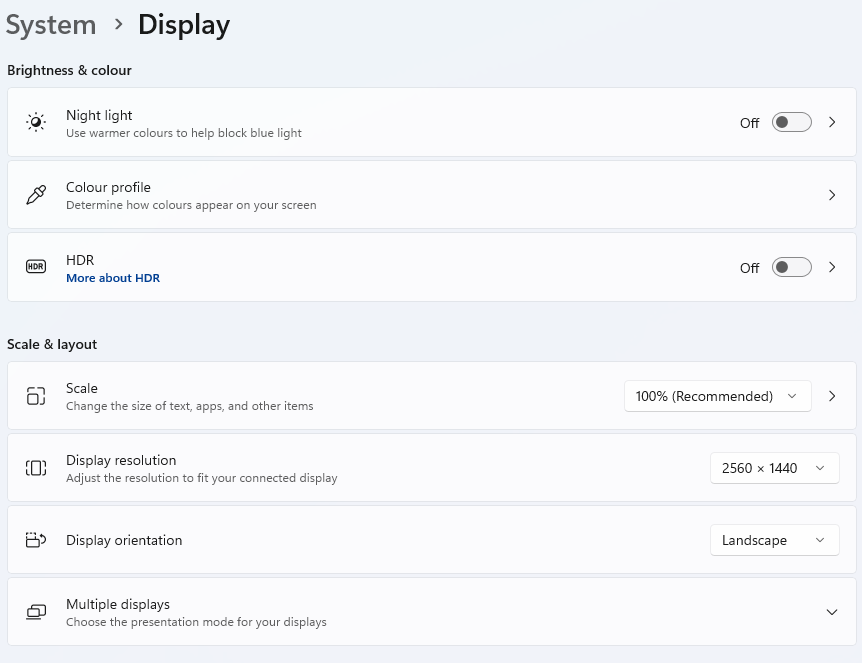
Important: Tobii Pro Lab requires the presentation display to be set to 100% scaling. Calibration and recording may fail if Windows scaling is set higher.
(screenshots/eye-tracker-manager.png)
Configure the Eye Tracker
The eye tracker must be configured using Tobii Eye Tracker Manager before it can be used in Tobii Pro Lab.
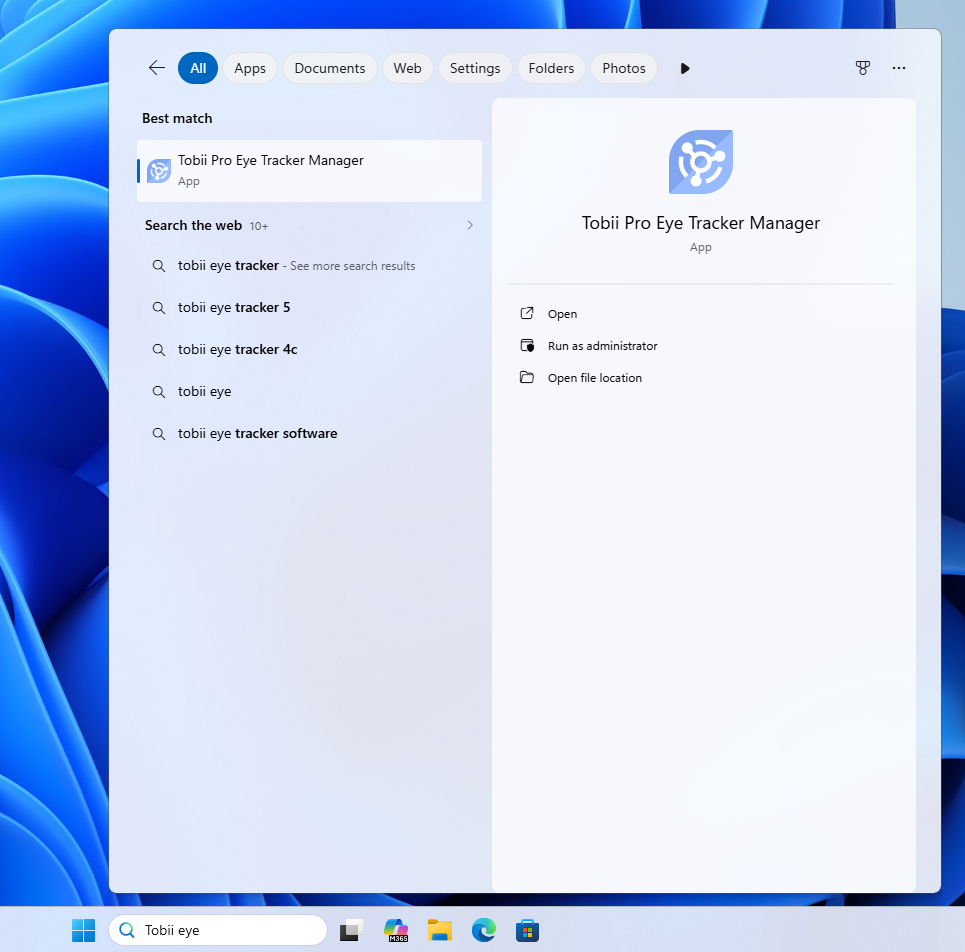
Open Tobii Eye Tracker Manager
Launch Tobii Eye Tracker Manager from the Start Menu.

Create a New Setup
Select Create New Setup.

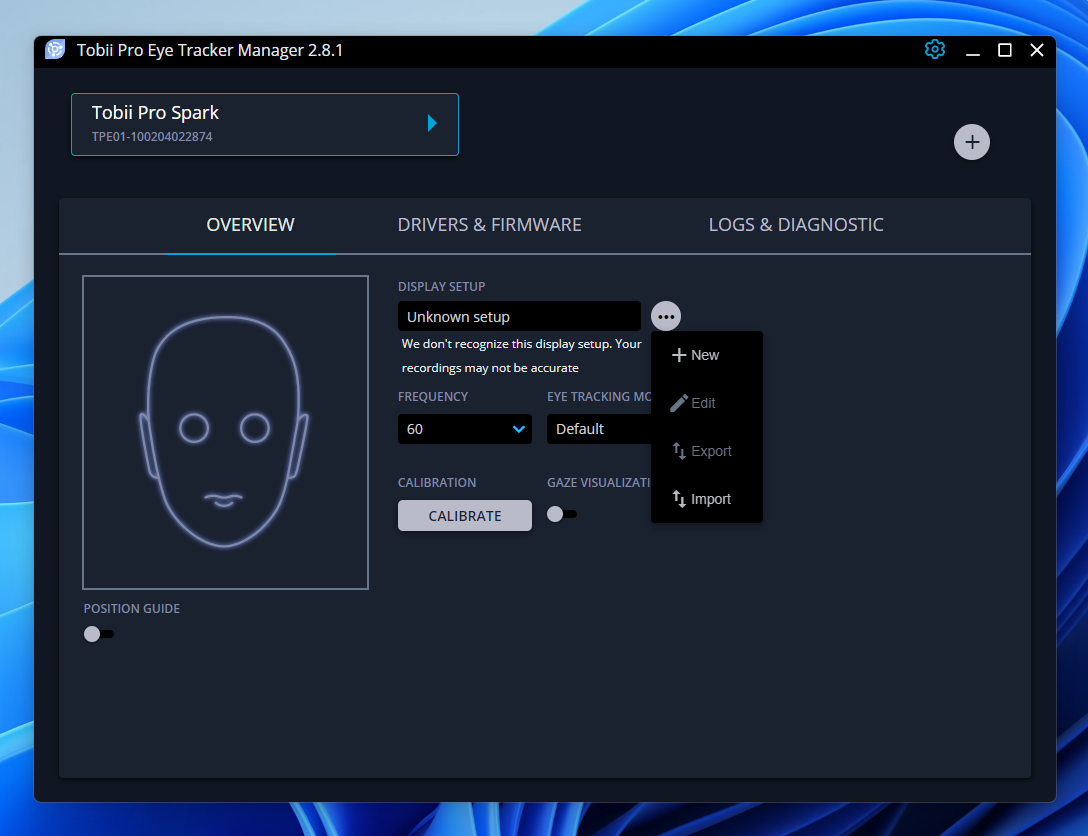
Give the setup a descriptive name.
Enter Display Measurements
When prompted, enter the height of the monitor's lower bezel.
For the LG UltraFine displays in the HCI Lab use:
22 mm

Align the Eye Tracker
Position the eye tracker and align the on-screen guides with the markings on the Tobii Pro Spark device.

Check Participant Position
Sit in front of the display and adjust your position until the participant indicator is correctly detected.
The guide should appear green when positioning is correct.

Run Calibration
Follow the calibration procedure by looking at the moving calibration targets displayed on the screen.

Once calibration completes successfully, the eye tracker is ready for use with Tobii Pro Lab.
Using Tobii Pro Lab
Launch Tobii Pro Lab
Open Tobii Pro Lab from the Start Menu.
Activate the Licence
If prompted, enter a valid Tobii Pro Lab licence key.

Please deactivate the licence when you finish using the workstation so that it remains available for other users.
Create a New Project
Create a new Tobii Pro Lab project.

Project Storage
Store projects on a local drive while collecting data.

Important: Tobii Pro Lab can behave unpredictably when projects are stored directly in OneDrive. Create and use projects locally, then copy completed projects to OneDrive for backup or sharing.
Select the Eye Tracker
Choose Tobii Pro Spark from the list of available eye trackers.

Confirm that the device is detected before continuing.
Create a Participant
Create a participant record within the project.
Enter any participant details required for your study.
Start Recording
Click the Record button to begin a recording session.

Tobii Pro Lab will prompt you to perform participant calibration before recording begins.
Troubleshooting
"Eye tracker not properly set up"
If Tobii Pro Lab reports:
The display area is not valid. Please configure your eye tracker in Tobii Eye Tracker Manager.
Open Tobii Eye Tracker Manager and create or re-run the eye tracker setup.
"Presentation screen scaling is not set to 100%"
If Tobii Pro Lab reports:
Recording cannot begin. The presentation screen scaling is not set to 100%.
Check:
Settings → System → Display → Scale
and ensure the display used for the presentation screen is configured to 100%.
Further Support
For assistance with eye tracker configuration, licensing, or experiment setup, contact the Creative Computing Institute technical team.calibration-screen.pngdisplay-settings.pngcalibration-screen.png