Using a Sparkfun MP3 Trigger
What is the MP3 Trigger?
The MP3 trigger is a board made by Sparkfun electronics that provides a way to play MP3 files from a Micro SD card via either one of 18 TRIG inputs on the board, or serial communication with the board.
The MP3 Trigger has a headphone output which can be connected to powered speakers of your headphones for testing.
Loading files
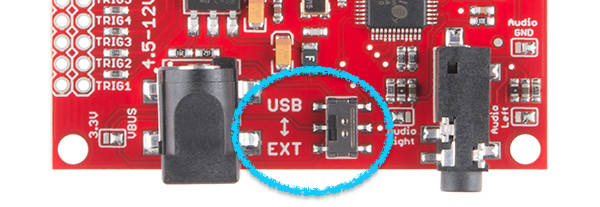
You must us a micro SDSC (up to 2GB) card, or a SDHC (up to 32GB) card formatted in FAT16 or FAT32. After inserting the card you must power cycle the MP3 Trigger so it detects the card, this can be done by switching the USB <-> EXT switch back and forth.
- USB: means power from the Arduino.
- EXT: means power via the 2.1mm connector to the left of the switch.
File naming
Files should be named 001.MP3 through 018.MP3, and the MP3 Trigger will match the file name to the TRIG pins, if you controlling the MP3 Trigger via serial the number will match 0 to 255.
Wiring
Wiring is simple:
There are three wires:
- Ground (GND connects to GND)
- Power (USBVCC connects to 5V)
- Data (RX on the MP3 Trigger to TX on the Arduino)
- Optionally you can connect the TX on the MP3 Trigger back to the RX on the Arduino if you wish to get playback status information.

**Warning**
Arduino Leonardo, unlike Arduino Uno has two serial ports. In this example we will be using Arduino Uno, if however you want to use Arduino Leonardo you'll need to use `Serial1` which is the RX/TX pins on pins 0 and 1, rather than `Serial` which is the USB serial monitor.
Getting started
There are libraries available for the Sparkfun MP3 Trigger however it's so easy to use it's easier to use Serial.print to control it rather than a library.
Basic Example
This basic example will play 001.MP3 - 005.MP3 from the SD card with a 1 second delay between playing each.
This is a great demo of how to play files from the SD card via Serial.
Sample MP3 files
To help you get up and running quickly there are 5 example MP3's you can use with the basic example of Tom saying 1-5.

