Using a Sparkfun MP3 Trigger
The MP3 trigger is a board made by Sparkfun electronics that provides a way to play MP3 files from a Micro SD card via either one of 18 TRIG inputs on the board, or serial communication with the board.
The MP3 Trigger has a headphone output which can be connected to powered speakers of your headphones for testing.
Loading files
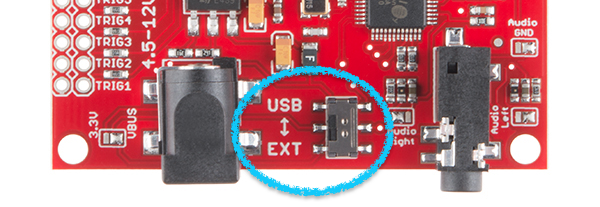
You must us a micro SDSC (up to 2GB) card, or a SDHC (up to 32GB) card formatted in FAT16 or FAT32. After inserting the card you must power cycle the MP3 Trigger so it detects the card, this can be done by switching the USB <-> EXT switch back and forth.
- USB: means power from the Arduino. This isn't done via a 'USB' connector, but instead by connecting the FTDI pins (see below). If you are connecting to the board using an arduino, use this option
- EXT: means power via the 2.1mm connector to the left of the switch. If you are only using trigger pins with no Arduino control, get an external power source and use this option.
File naming
Using the trigger pins
If you want to play tracks on the board using the trigger pins, files should be named 001.MP3 through 018.MP3, and the MP3 Trigger will match the file name to the value on the pressed TRIG pin.
Using serial input
To control the MP3 Trigger using serial (as in the example below), you need to send it a track number to play. The command is sent in 2 parts: a 'p' which tells the board you want to play something, and then a number (start counting at 1). It looks like (in Leonardo code):
Serial1.print("p")
Serial1.write(1)
This will get the MP3 Trigger to play the 'first' track. Note that the order of tracks is not the alphabetical or numeric order, but instead the order that the files appear on the SD card. If you get tracks playing in the correct order, it's good to check this.
Important: If you are using a mac to write the .mp3 files
Macs do a weird thing where every time you plug in a memory stick, it creates a bunch of hidden files. This shouldn't be an issue if you're playing tracks using the triggers (as those target files with particular names) but it causes a lot of issues if you're trying to play files using serial.
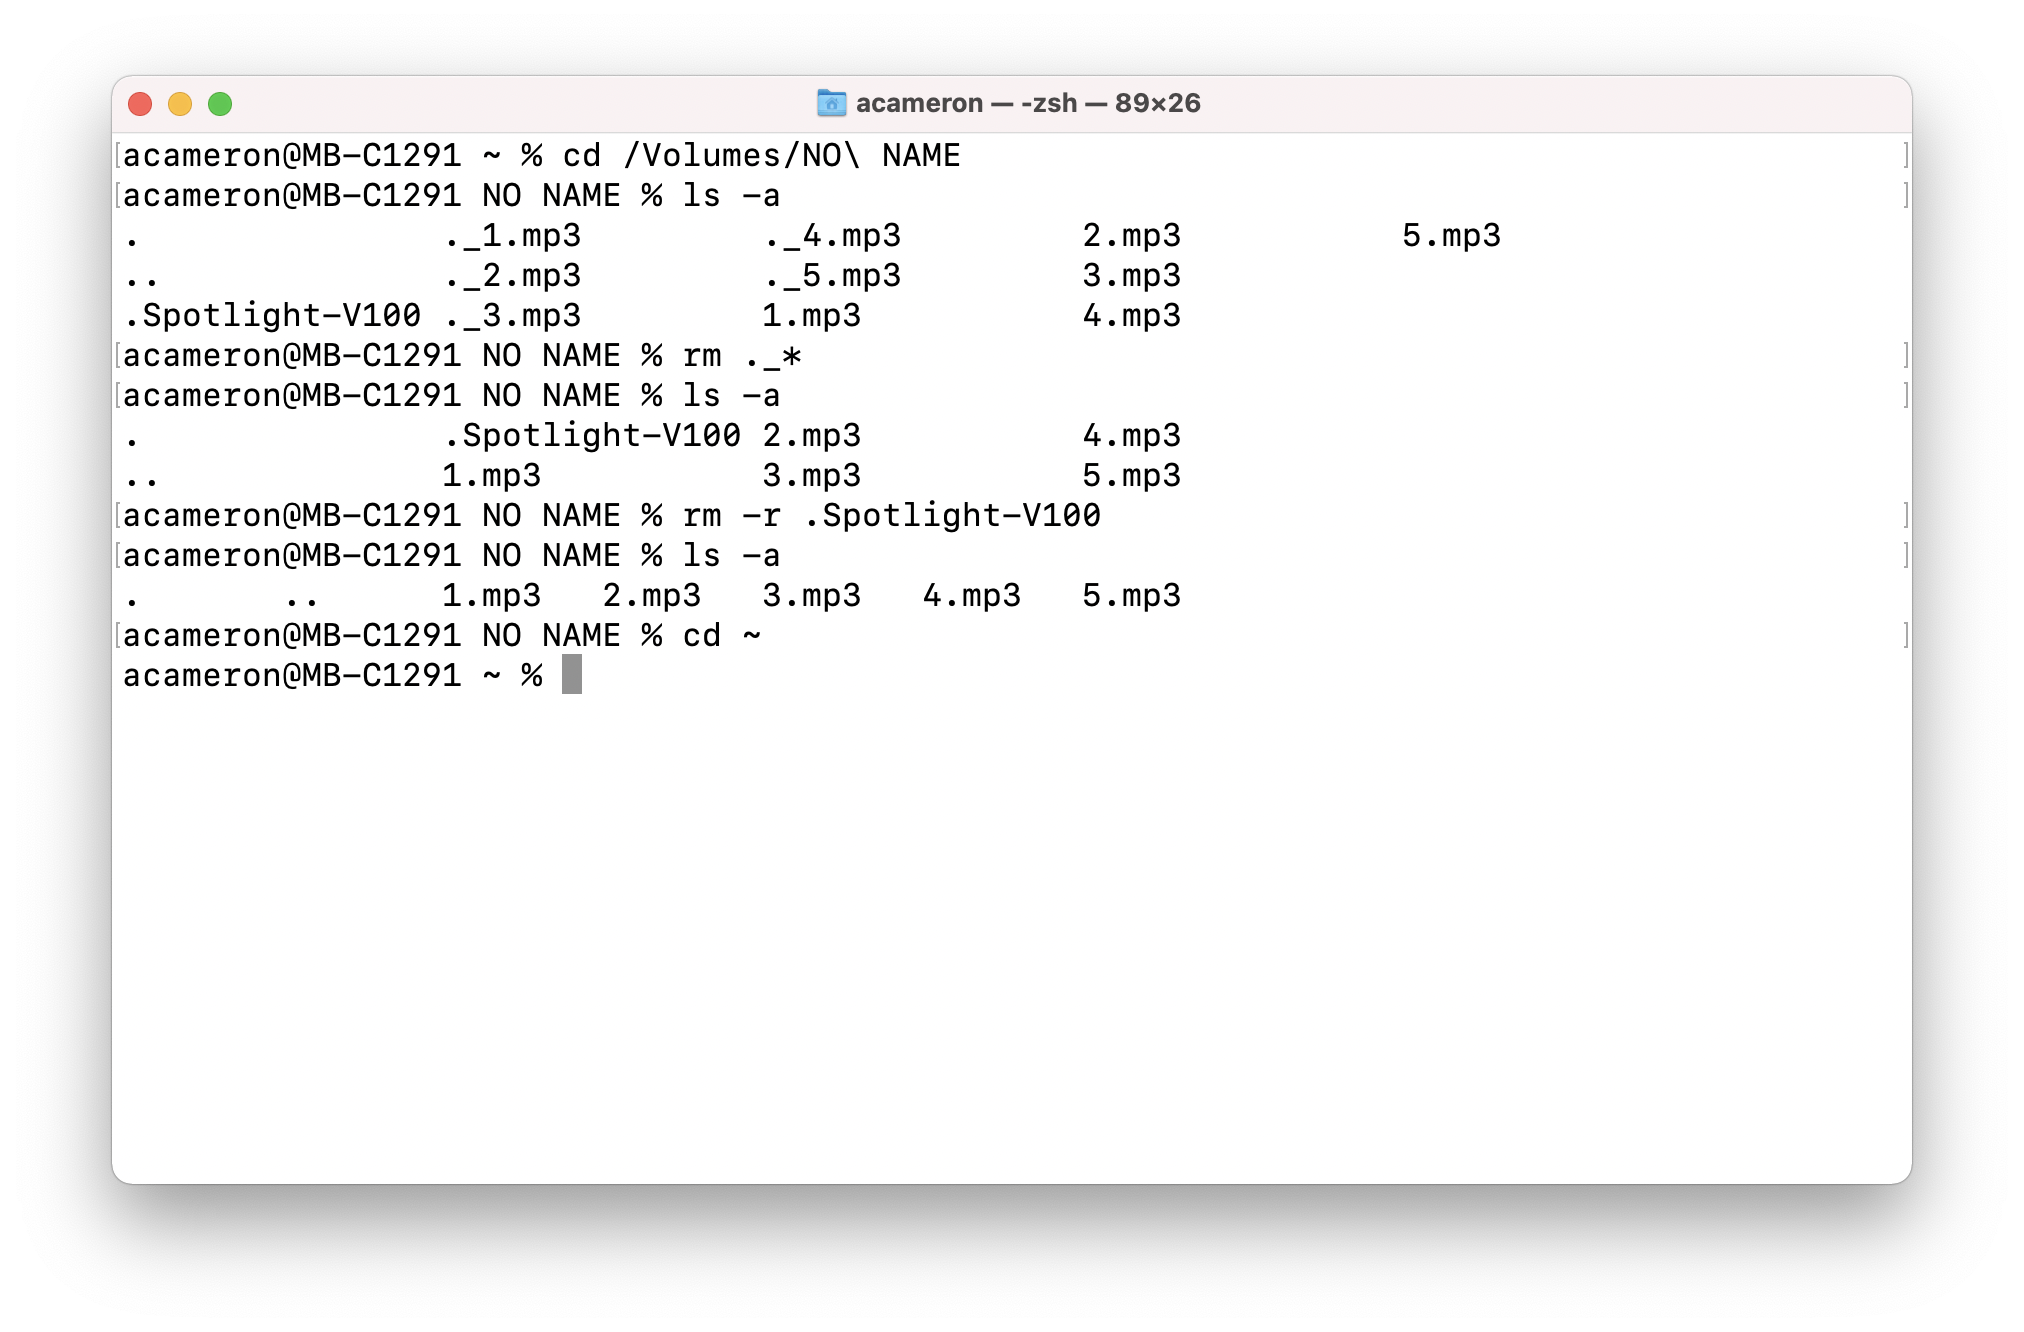
These can't be removed in Finder, and instead need to be removed by opening up the volume using the terminal. Once you have copied your .mp3 files to the SD card, open up a mac terminal and type in the following:
$ cd /Volumes/<name-of-volume>	#this navigates to the correct volume
$ rm ._*.mp3			#this removes all of the thumbnails
$ rm -r .Spotlight-V100 	#deletes the .Spotlight-V100 folder
$ rm -r .fseventsd   		#deletes the .fseventsd folder
$ rm -r .Trashes     		#deletes the .Trashes folder
$ ls -a				#this shows all the files you have
**Warning**
Be very careful when you are running the 'rm -r' command: this will recursively delete files and is NOT reversible. Only run it when you know you are in the correct folder, and make sure you know which folder you are deleting)
e.g. see below: I use ls -a multiple times to check what I still need to delete. At the end, all that's left is the .mp3s and the . and .. shortcuts (these aren't file and can be ignored).
Wiring
To connect the board to an Arduino, you need to connect the FTDI pins. This requires only 3 wires.
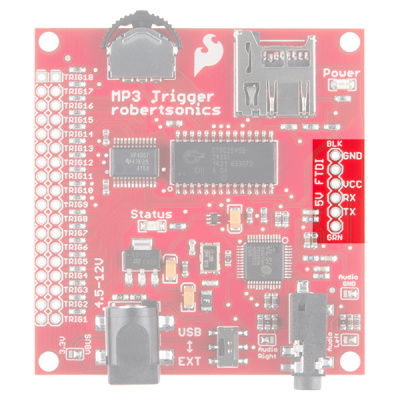
- Ground (GND on the on the MP3 Trigger connects to GND on the Arduino)
- Power (VCC on the MP3 Trigger connects to 5V on the Arduino)
- Data (RX on the MP3 Trigger to TX on the Arduino)
- Optionally you can connect the TX on the MP3 Trigger back to the RX on the Arduino if you wish to get playback status information.

**Warning**
Arduino Leonardo, unlike Arduino Uno has two serial ports. This tutorial contains code for both cases. The core difference is, if you want to use Arduino Leonardo you'll need to use `Serial1` which is the RX/TX pins on pins 0 and 1, rather than `Serial` which is the USB serial monitor.
Getting started
There are libraries available for the Sparkfun MP3 Trigger however it's so easy to use it's easier to use Serial.print to control it rather than a library.
Basic Example
This basic example will play 1.mp3 - 5.mp3 from the SD card with a 1 second delay between playing each.
Sample MP3 files
To help you get up and running quickly there are 5 example mp3's you can use with the basic example of Tom saying 1-5. If the files are getting played in a weird order, or some of them aren't playing, it's likely that you are having issues with hidden files. Please see the instructions above for more details.
Resources
- Sparkfun Hookup Guide -> this has lots more details about other features on the board, and how file naming works