Using the serial monitor and serial logger
Serial communication is a type of communication between two devices, normally between a computer and a microcontroller (such as an Arduino), between computers, or between Arduinos.
Serial communication can be over physical cables between two Arduinos, or via an XBee wireless shield, USB or Bluetooth serial emulators. However at it's most basic serial communication is a sequence of binary digits (0s and 1s) that convey information.
Serial monitor
The serial monitor on the Arduino is able to display messages the Arduino board sends via USB serial (note that Arduino Leonardo and some other boards based around the 32u4 chip have a seperate USB serial and hardware serial, and you cannot directly monitor the hardware serial [Serial1] output using this method).
You can also send basic messages from the serial monitor screen back to the Arduino board.

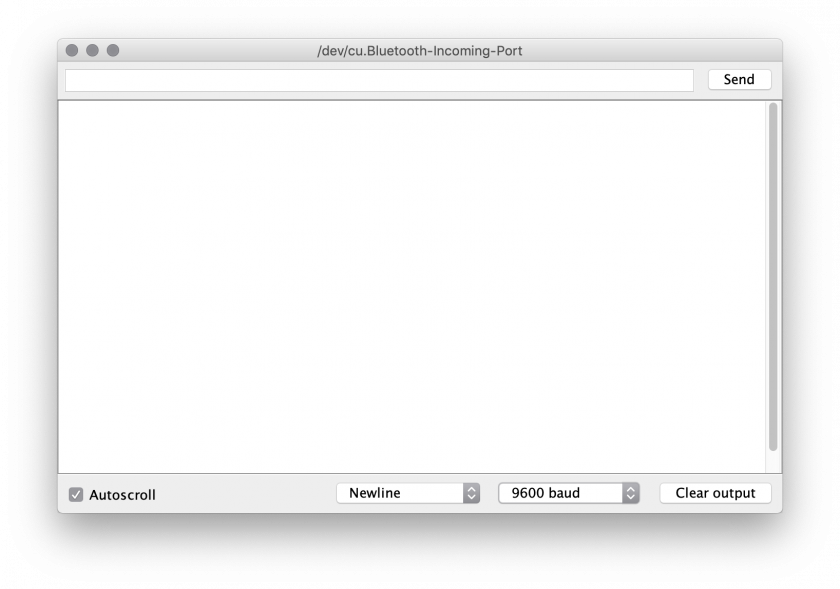
Above is a screenshot of the serial monitor, the first text field is where you can type text and press the send button to transmit to the Arduino. The main window below is where ASCII text will be displayed which the Arduino is transmitting.
In the middle at the bottom you can specify what character should be sent after each message you send, it's common to send a newline character to indicate each distinct message.
There is also an option "9600 baud" this is the communication speed. One of the fundamental parts of serial communication is establishing a common communication speed in bits (binary digits) per second, 9600 baud, is 9,600 bits per second. This drop down allows you to modify this setting, the default is 9600.
Serial plotter
The serial plotter is a way to visually graph the data being received, a common way to transmit multiple values is in a format called CSV (comma-seperated values) this is because when transmitting numbers you need to be able to distinguish between each number, if I transmitted the number 100 and the number 50 without a seperator they would look like this: 10050 and it would be impossible to decypher where one numbers starts and the next begins, instead we use a comma to seperate each value, thus the number becomes 100,50 and now we can easily see each value.
Also because we print a newline character (using println) after each loop we can see when each frame of data ends, thus allowing us to presume the numbers between the newline and the comma must be the first number.
Some Arduino boards transmit data much faster than others, in the case of the Arduino Leonardo it is perfectly possible to overload the computer with too much information and crash the Arduino application, so by adding a 1/20th second (50ms) delay we can slow the rate to a more than acceptable level.
This code example outputs the value of all 6 analog input pins on the Arduino:
void setup() {
  Serial.begin(9600);
}

void loop() {
  Serial.print(analogRead(A0));
  Serial.print(",");
  Serial.print(analogRead(A1));
  Serial.print(",");
  Serial.print(analogRead(A2));
  Serial.print(",");
  Serial.print(analogRead(A3));
  Serial.print(",");
  Serial.print(analogRead(A4));
  Serial.print(",");
  Serial.print(analogRead(A5));
  Serial.println();

  delay(50);
}
The serial plotter has in built support detecting CSV data and displaying it as a graph over time. The biggest drawback is that it scales the graph to the current minimum and maximum, which can cause the graph to jump scale.
A simple fix to this problem is to include two fake piece of data which are the minimum and maximum of your data range, by modifying the Serial.println() to:
Serial.println(",0,1023");
In this case the minimum is 0, and because analogRead's on most Arduinos are only 10-bit this means the maximum number would be 1023.
void setup() {
  Serial.begin(9600);
}

void loop() {
  Serial.print(analogRead(A0));
  Serial.print(",");
  Serial.print(analogRead(A1));
  Serial.print(",");
  Serial.print(analogRead(A2));
  Serial.print(",");
  Serial.print(analogRead(A3));
  Serial.print(",");
  Serial.print(analogRead(A4));
  Serial.print(",");
  Serial.print(analogRead(A5));
  Serial.println(",0,1023");

  delay(50);
}
