How do I use classroom AV?
When you come into the room, you need to:
1. Power on
The lectern has a 7" touch panel, which may be blank to save energy. Tap it once to wake the screen and turn on the system again.
The TVs and projectors will power up, and the touch screen will look like this:
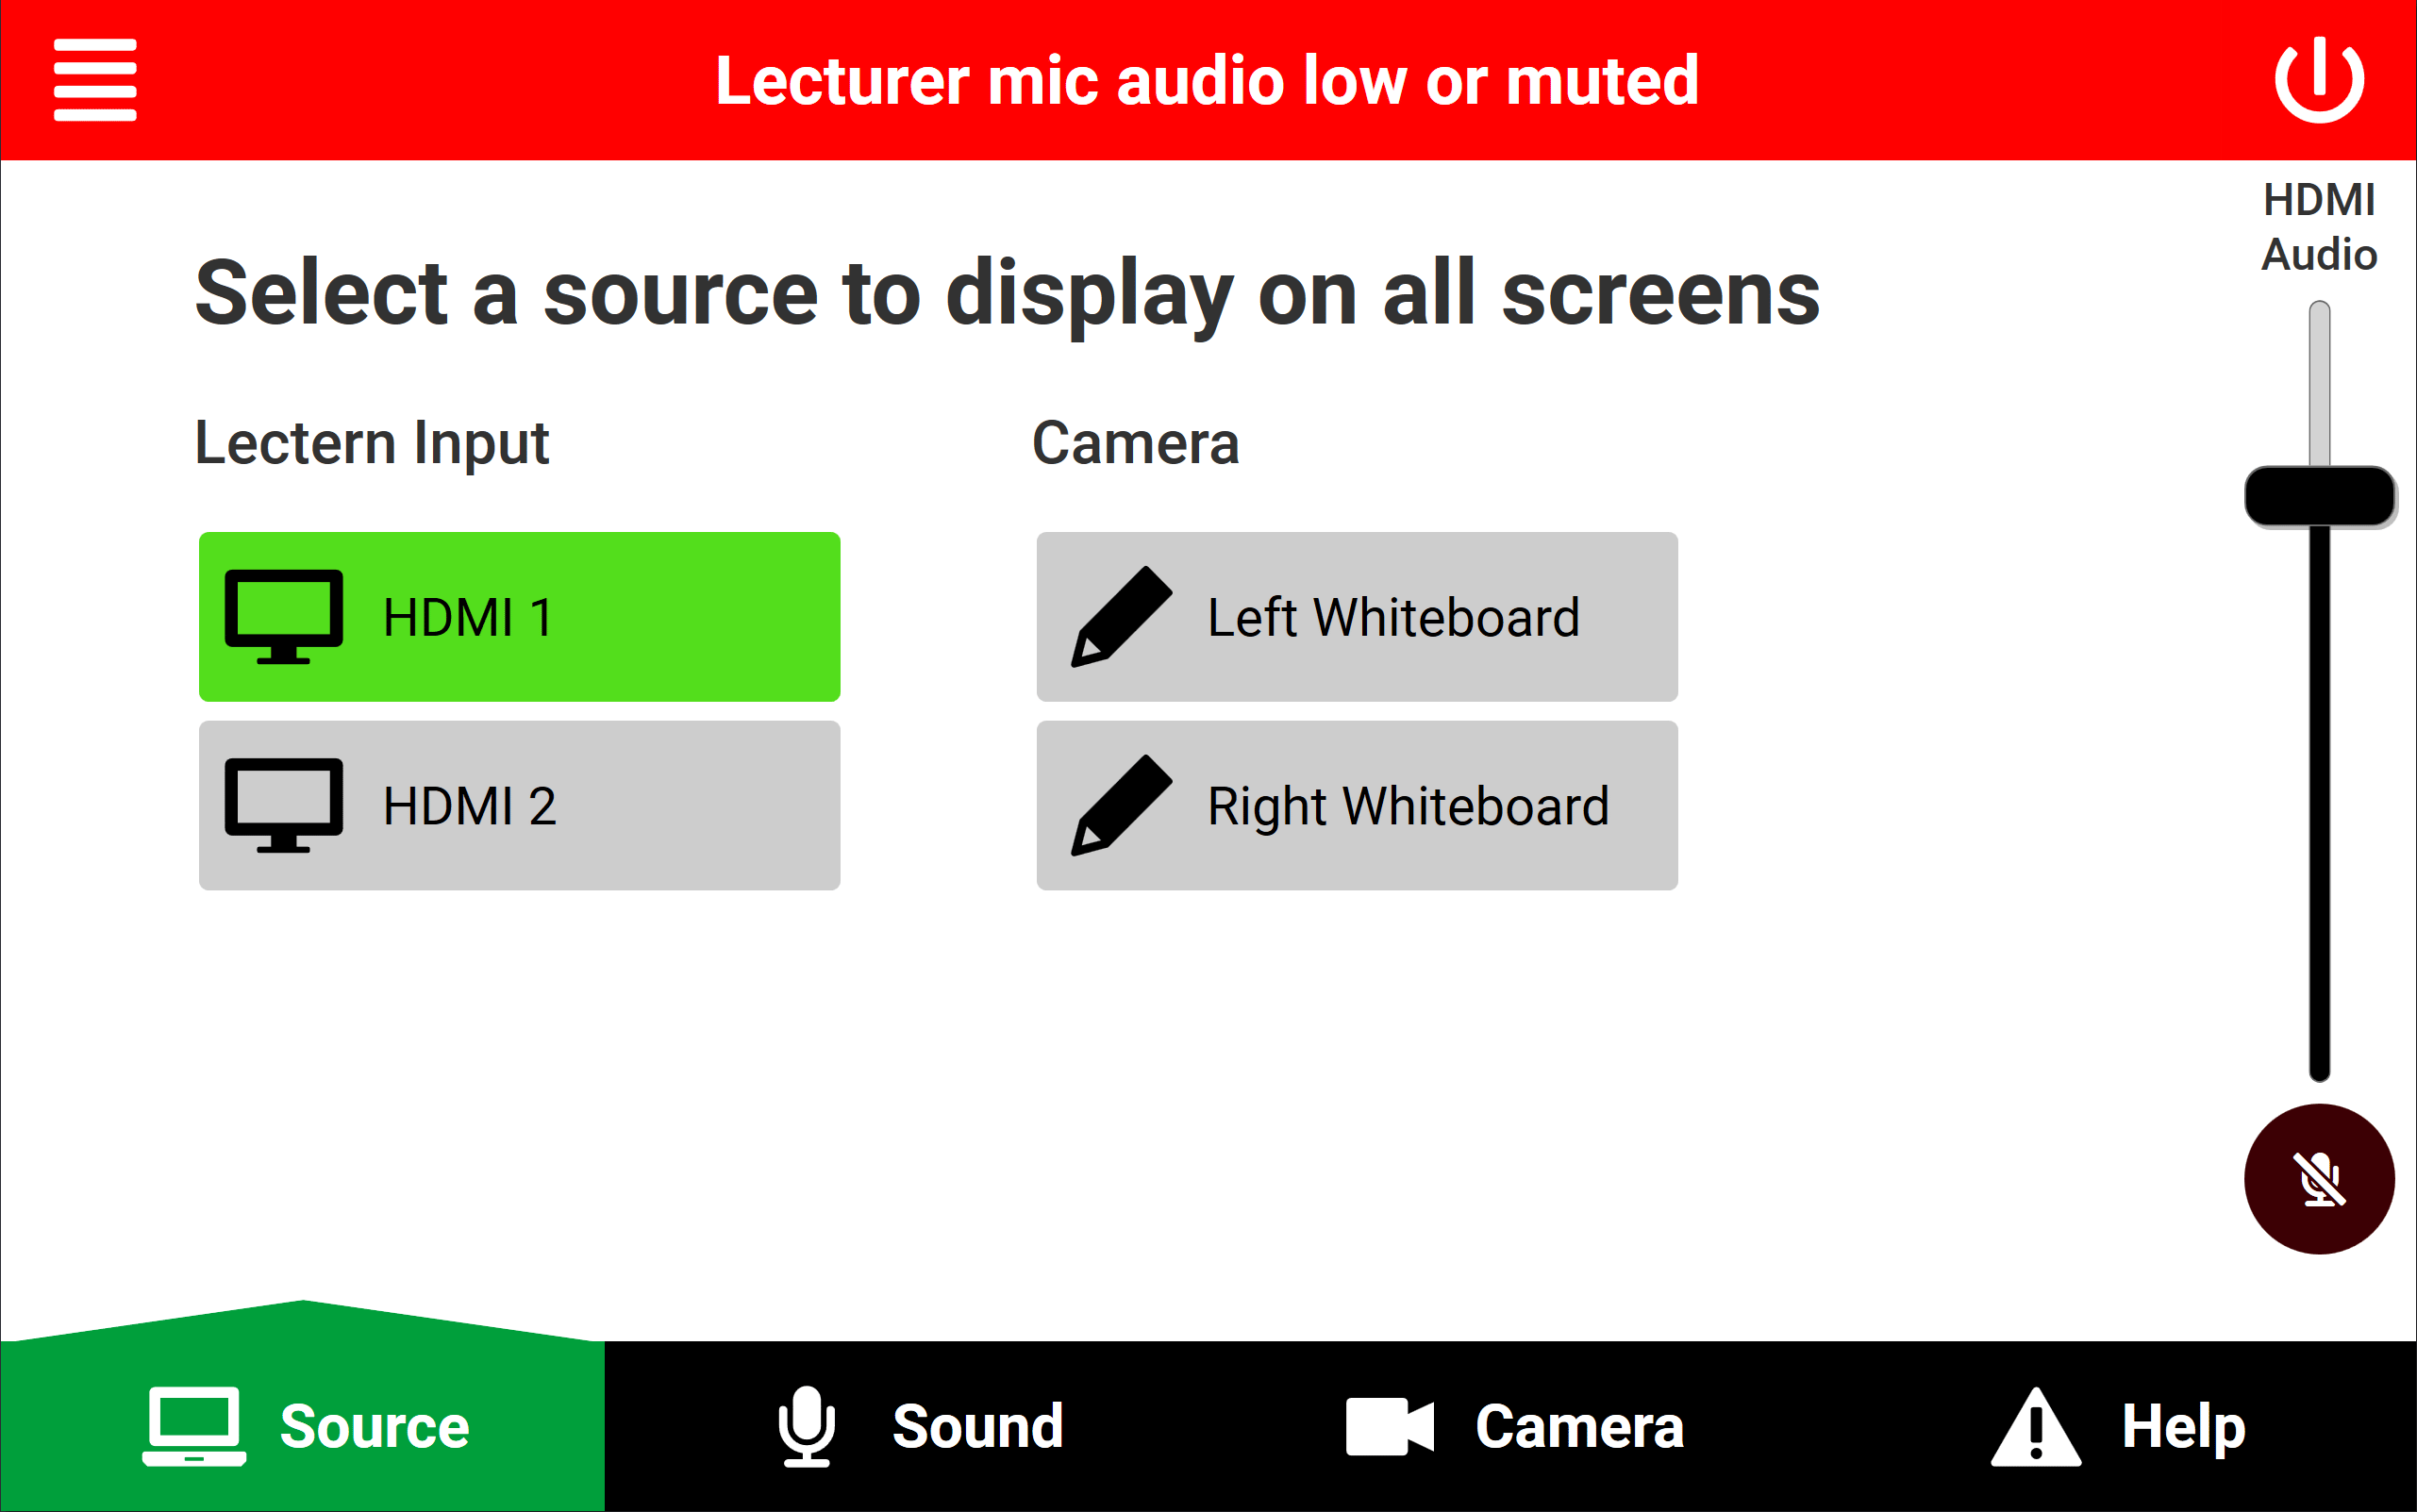
From here, you can select your source. Toggle voice lift on/off, set the program audio level, and turn off the system.
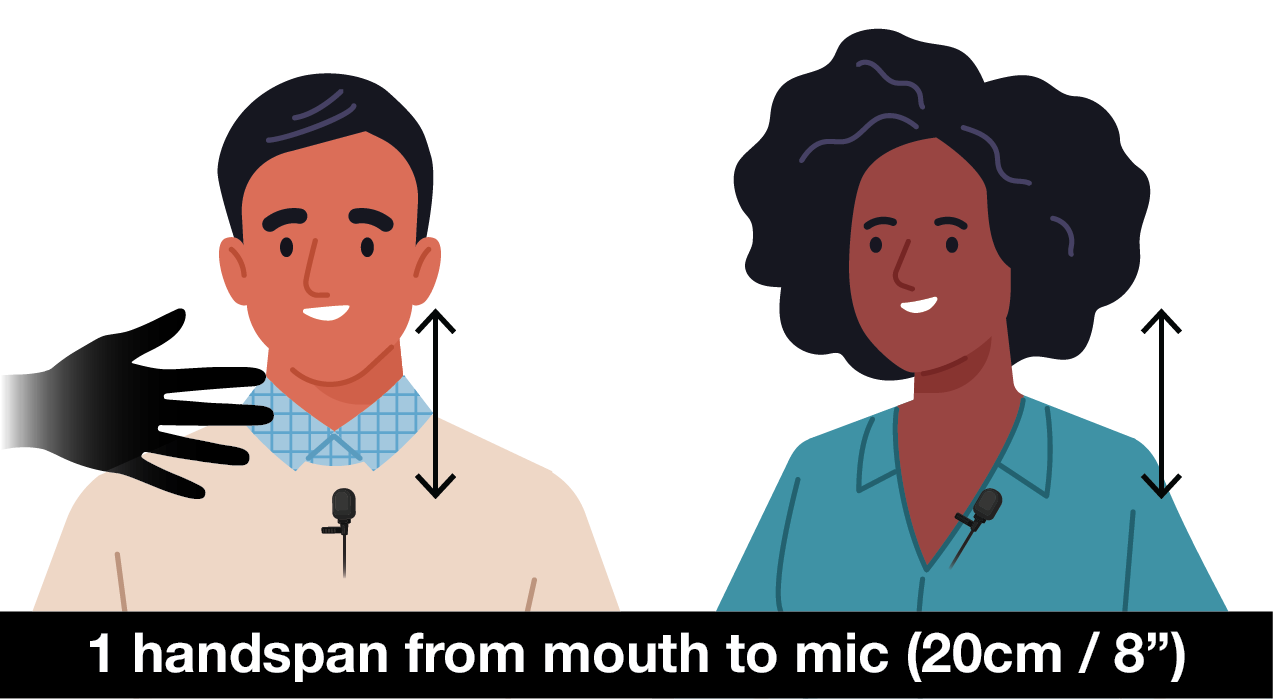
2. Put on your microphone
You should aim to clip the microphone about one handspan away from your mouth in a normal resting position, approximately 6-8 inches, somewhere in the middle of your chest, as pictured below.
Be careful to remove anything which could make a lot of noise near the microphone, such as earrings that clang with another piece of jewellery and lanyards.
3. Plug in your laptop
At the lectern, a USB-C HDMI adapter and an HDMI cable are plugged in next to the touch panel. The left HDMI port is HDMI 1, and the right is HDMI 2.
You should use HDMI 1 by default as this will mirror the signal to the lectern confidence monitor so you can see what's on the TVs behind you. It's also recorded to Panopto for lecture capture.
If you require the use of HDMI 2 for a document visualiser or similar, please be aware that this will not be recorded by Panopto automatically and needs to be requested in advance.