Creating Digital Knitting Patterns with DesignaKnit
DesignaKnit is a pattern drafting, garment design and interactive machine control software. It is compatible with multiple different kinds of knitting machines, including the Silver Reed SK840, which is the machine we use at the CCI.
This page gives an overview of each mode within DesignaKnit but video tutorials from Prism's Creations are also a great resource. They go through different features of the software one-at-a-time, eventually creating an asymmetric patterned jumper. To get into patterns, I would start with the second video: Stitch Designer Basics.
Using DesignaKnit, we can create two different types of file, shape files and stitch files. Shape files are for creating non-rectangular knit swatches, such as a circle or the sleeve of a jumper, and stitch files are for creating swatches with different stitch types such as fair isle (used for colour work), tuck, or slip.
Note: Within DesignaKnit, the word 'pattern' is used to refer to the shape of a swatch (see: sewing pattern) NOT the design of its colours (see: pattern).
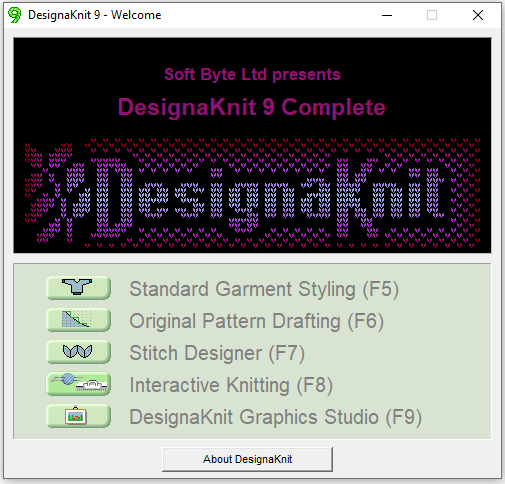
DesignaKnit has 5 different modes:
- Standard Garment Styling - for creating pattern pieces for garments
- Original Pattern Drafting - for creating shape files
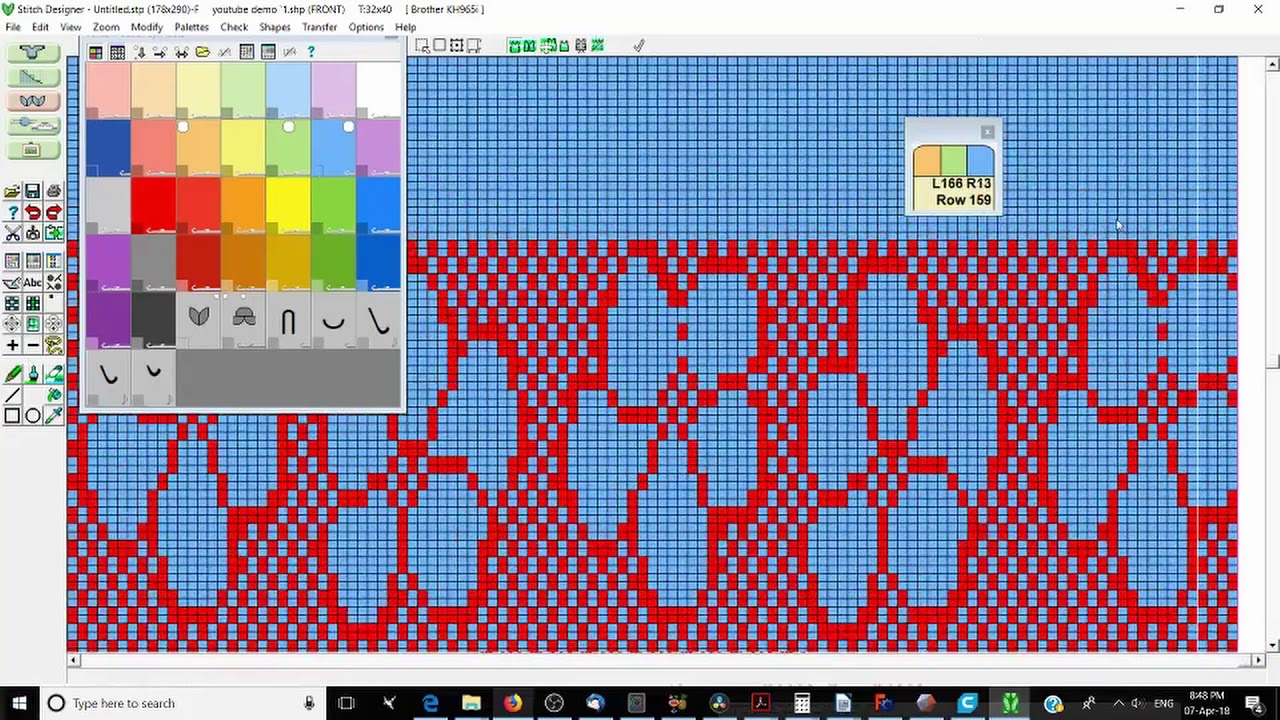
- Stitch Designer - for manually creating stitch files
- Interactive Knitting - uses the stitch or shape file to guide the user through creating the piece
- DesignaKnit Graphics Studio - for creating stitch files from images
Standard Garment Styling
coming soon...
Original Pattern Drafting
coming soon...
Stitch Designer
coming soon...
Interactive Knitting
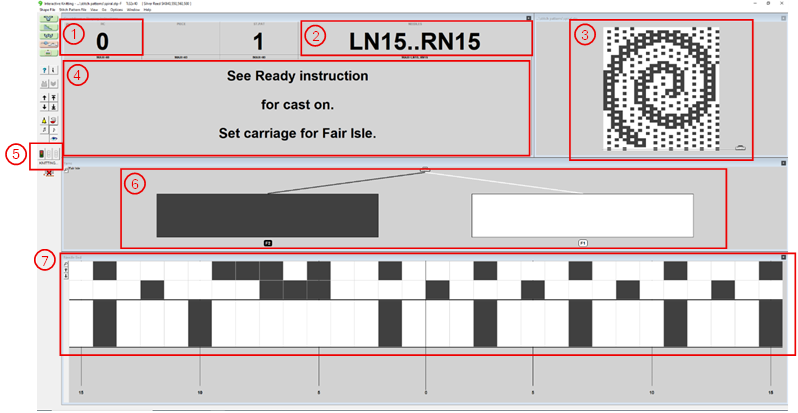
Below is the interface for the interactive knitting mode:
-
Row Counter - tells you the row number you are on in the pattern. It is useful to set the machines row counter to 0 when you start so that the two counts are in sync to help you keep track of where you are.
-
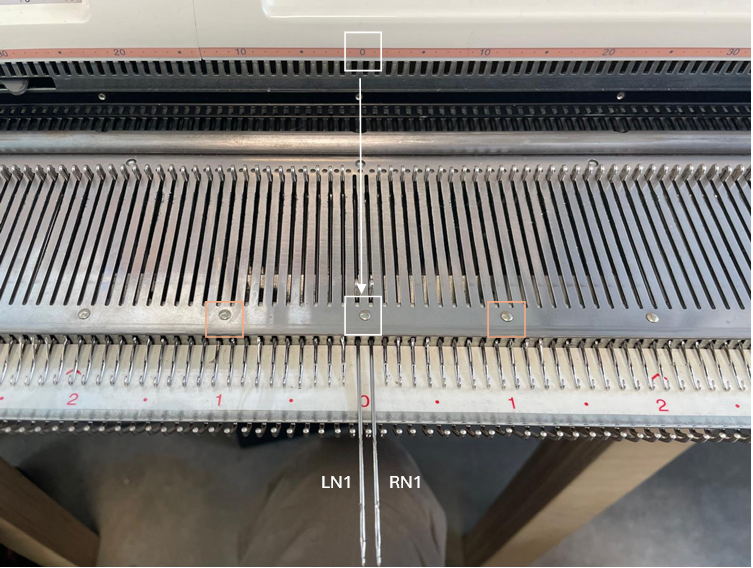
Needles - tells you which needles that you need to be working on. Each needle on the bed has a number. Starting from the 0 mark on the top band, move down to the small rivet (both outlined in white below), to find the centre of the bed. The needle to the left of this point is LN1 and to the right is RN1 (both labelled below) and the numbers count up as you move outwards. It is useful to remember that, moving along the bed, there are 10 needles between each rivet.
-
Pattern preview - gives you a preview of what your full swatch will look like. The small carriage graphic at the bottom shows which side of the piece the carriage needs to be on before you knit the next row.
-
Instructions - The text here gives you instructions for the next row. It will flash yellow if you need to take an action, such as decreasing a needle or changing yarn colour. If there is just a number in the box, this is the number of row you have to knit until the next action needs to be taken.
-
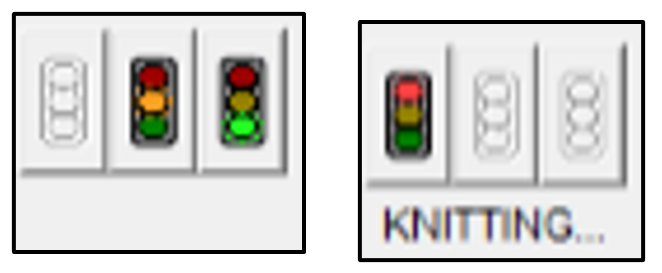
Start and stop - The green traffic light button is used to start the knitting mode, which will cause the word 'KNITTING' to appear underneath the buttons. This text is the only way to tell that the program is ready to go and that you can start knitting.
-
Yarn positions - To knit with fair isle, two different yarns need to be threaded into the carriage. This tells you which colour represented in your pattern should be threaded into which position. Under each coloured box, the text 'F1' or 'F2' represent positions 1 or 2 in the carriage, respectively.
-
Next row - This section shows the next few rows to be knit, with the next immediate one blown up slightly bigger. Each block represents one stitch and the numbers underneath show the needle numbers.


To begin knitting:
- Identify the needles you need to be using and cast on with these
- Make sure the carriage is on the correct side according to the pattern preview and click the green traffic light button to start the knitting mode.
- The below pop up will appear telling you to set the point cams to the correct positions.
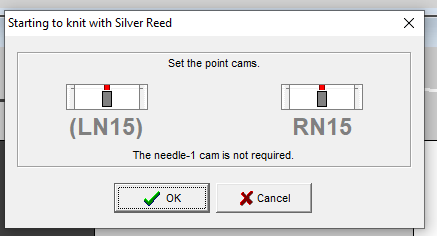
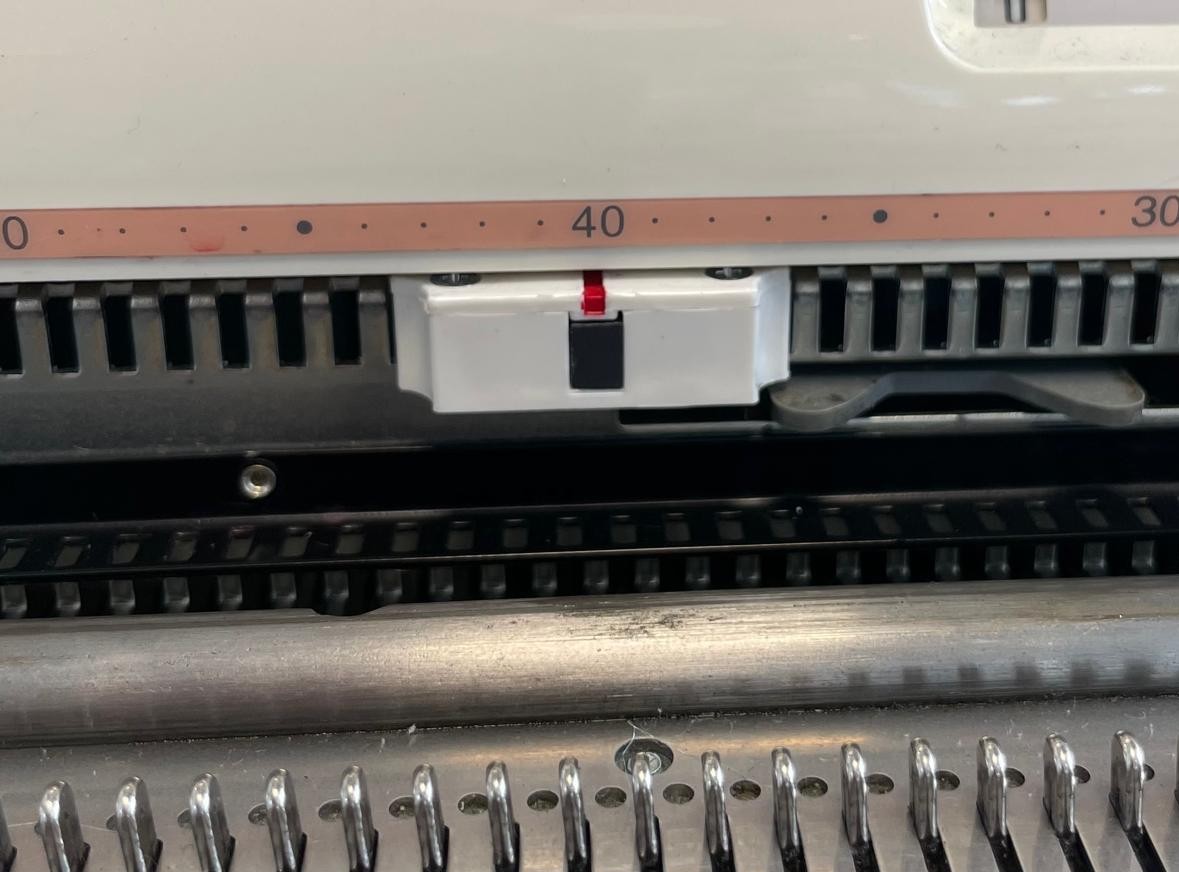
The point cams are as below. There is one on the left and right which both need to be positioned using the numbers on the band above them. Once this is done, click 'OK'.
You are now in knitting mode! This mode like the carriage movement to be smooth and confident, otherwise you may get this error.
You can manually move up through the pattern using the scroll or arrow keys. However, if you do this (or you ge the carriage wrong way error), it will drop out of knitting mode meaning you will have to click the green traffic light again to restart it.