DesignaKnit
To learn how to use DesignaKnit, you can attend one of the Advanced Knitting Workshops - bookable here. You must have already completed the Knitting Machine Induction to attend.
When you open the program on the computer in the lab on your account for the first time it will ask you for a key number, which is 16 50 20 70.
Overview
DesignaKnit is a pattern drafting, garment design and interactive machine control software. It is compatible with multiple different kinds of knitting machines, including the Brother KH940, which is the machine we use at the CCI.
DesignaKnit is used to create two different types of file:
- Shape files - for creating non-rectangular swatches, such as a circle or the sleeve of a jumper
- Stitch files - for creating swatches with colour work (e.g. Fair Isle or Intarsia) or different stitch types (e.g. tuck or slip stitches)
Note: Within DesignaKnit, the word 'pattern' is used to refer to the shape of a swatch (see: sewing pattern) NOT the design of its colours (see: pattern).
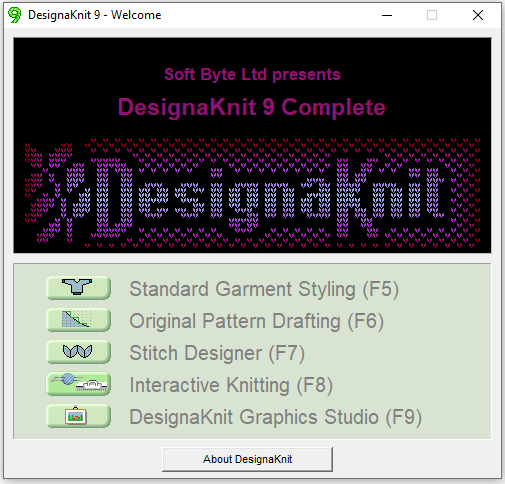
Modes
DesignaKnit has 5 different modes:
- Standard Garment Styling - for creating pattern pieces for garments
- Original Pattern Drafting - for creating shape files
- Stitch Designer - for manually creating stitch files
- Interactive Knitting - uses the stitch or shape file to guide the user through creating the piece
- DesignaKnit Graphics Studio - for creating stitch files from images
Original Pattern Drafting
This mode is used to make shape files which allow you to create non-rectangular shaped swatches. To begin, select Piece > New Piece from the top bar which will bring up the below pop-up.
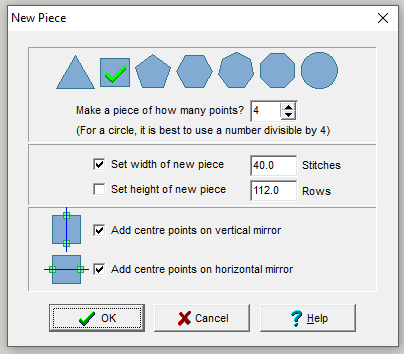
From here you can select the shape to start from, set its height, and decide which mirror lines you want the piece to have. This will then bring you to the next page where you can drag each point to create your desired shape.

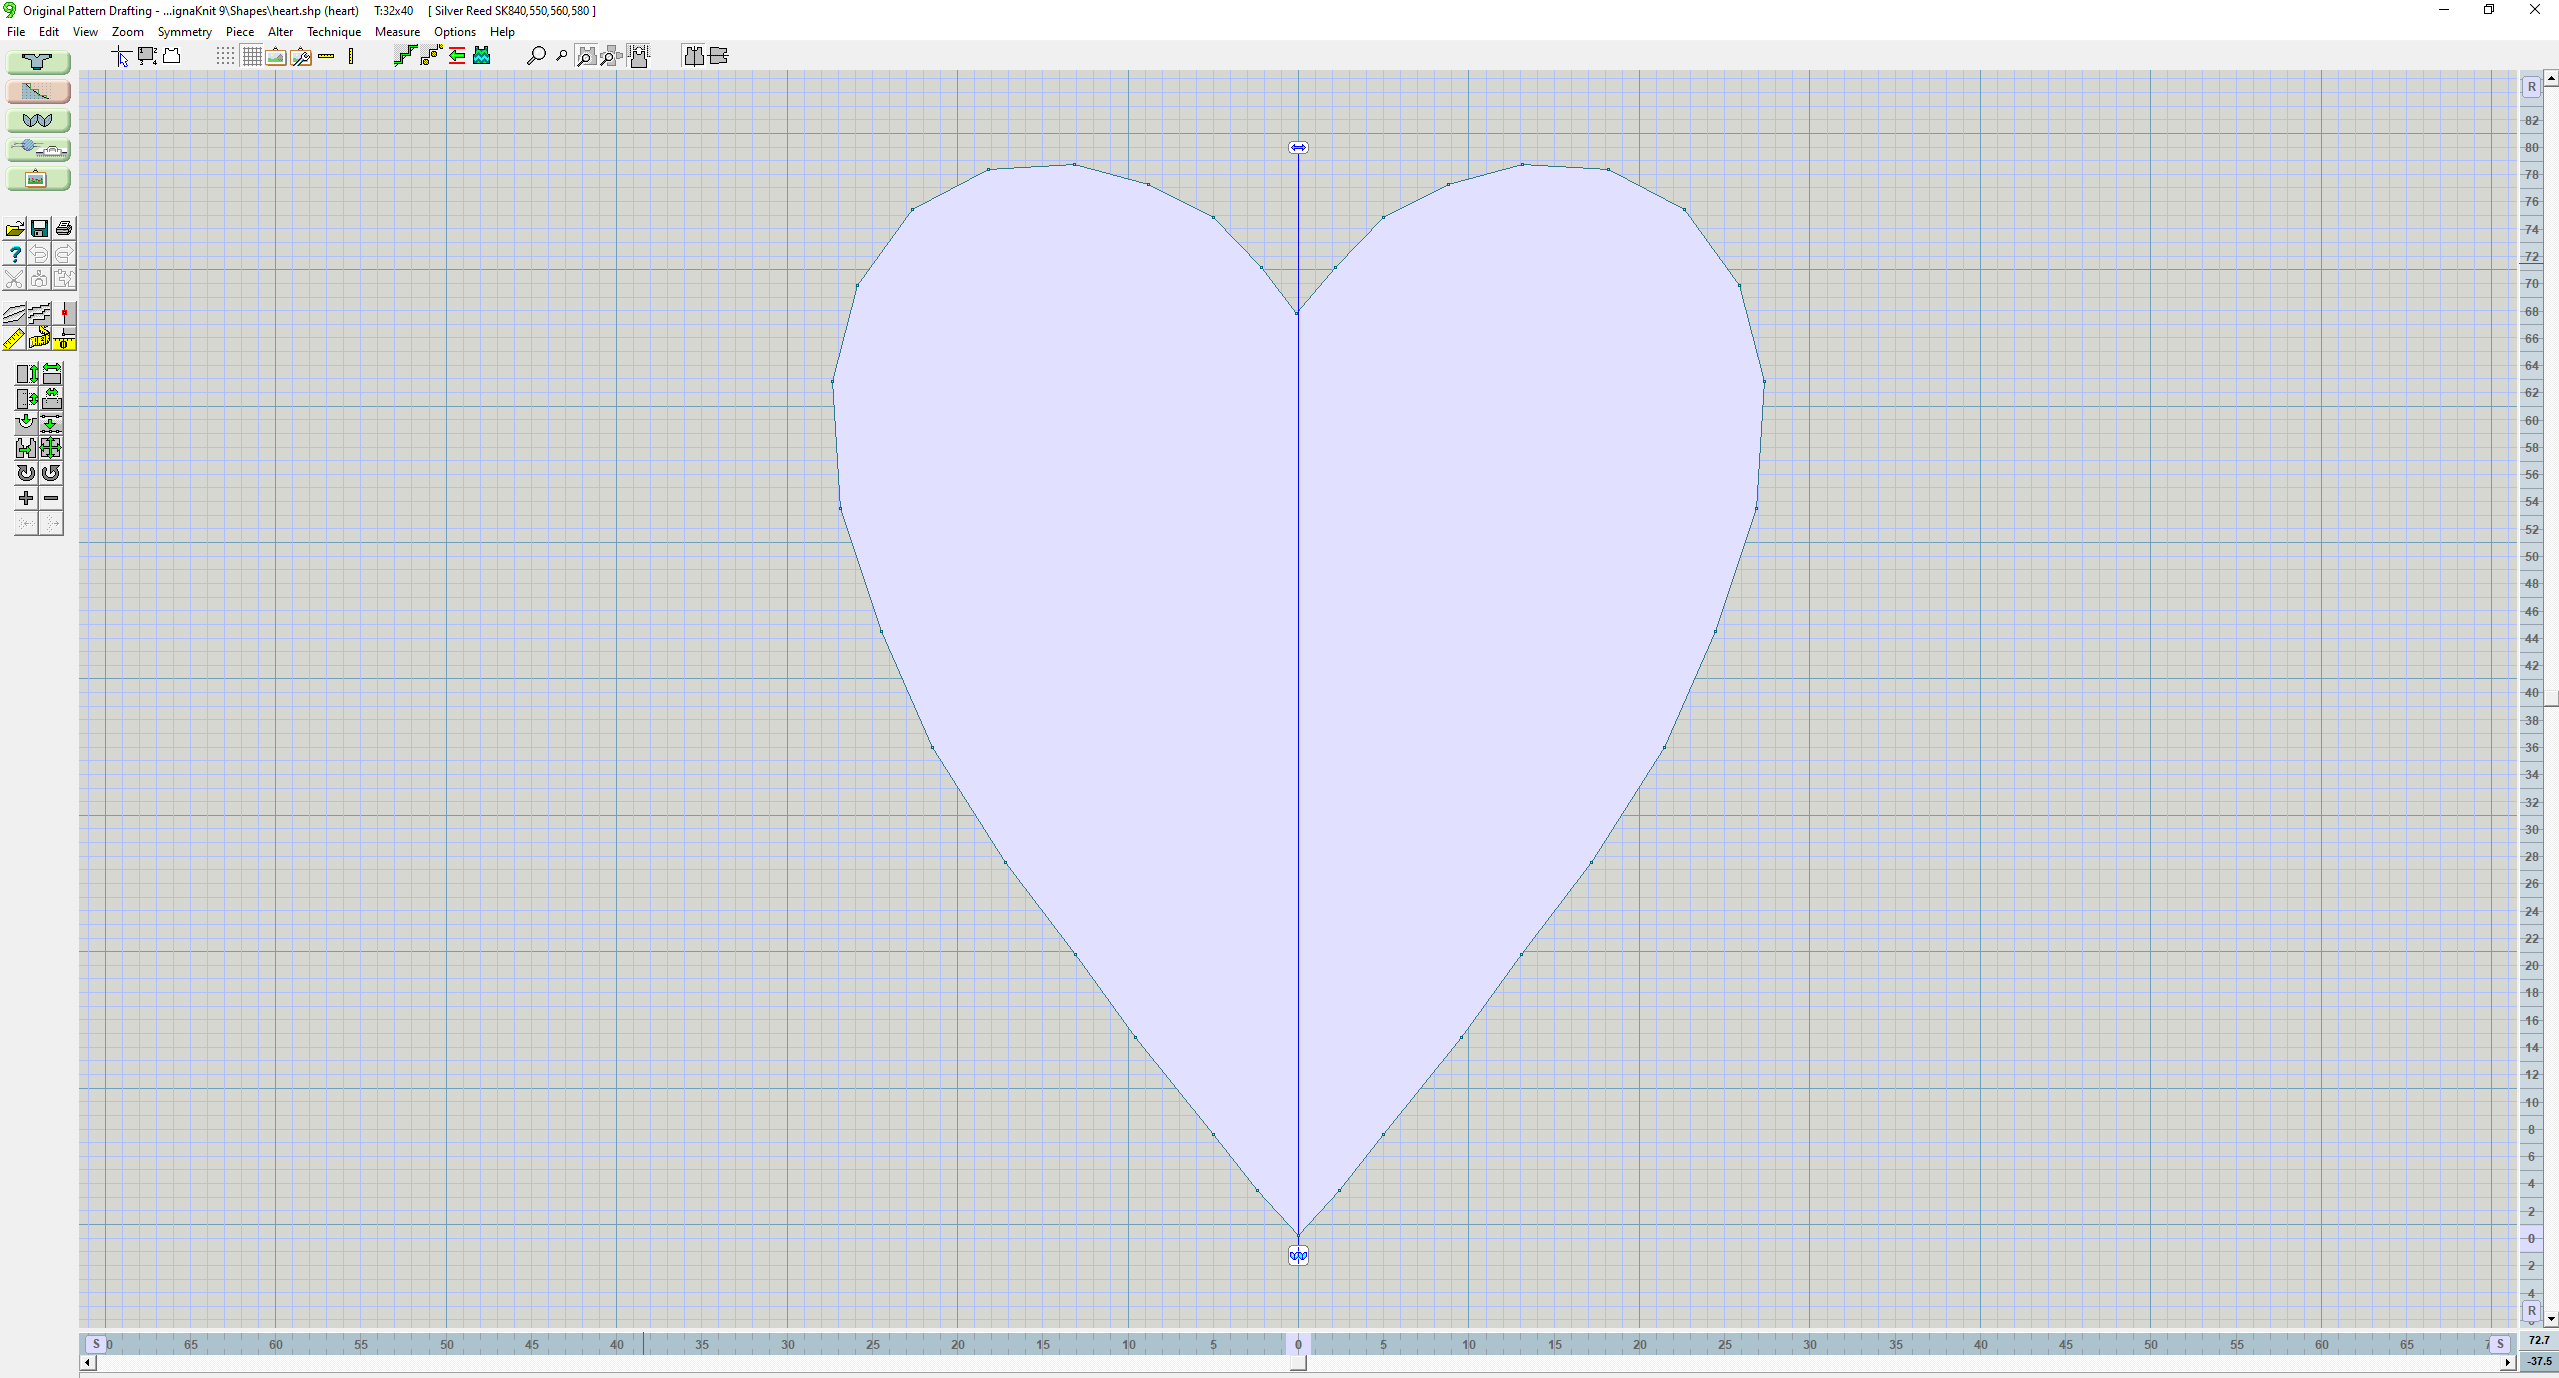
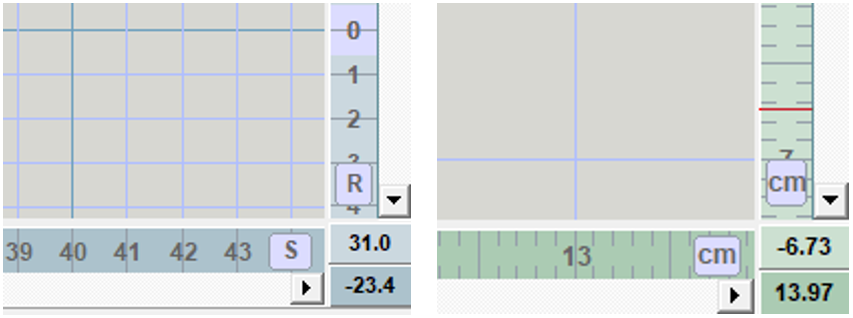
To make sure your piece is the desired size, pay attention to the axis along the border. They can either be show in rows (R) and stitches (S) or centimetres which can be changed by clicking one of the lilac boxes containing the units.
Be aware that, especially for smaller pieces, the smooth curves that you see in this window may not be accurate to the actualy shape of the swatch.
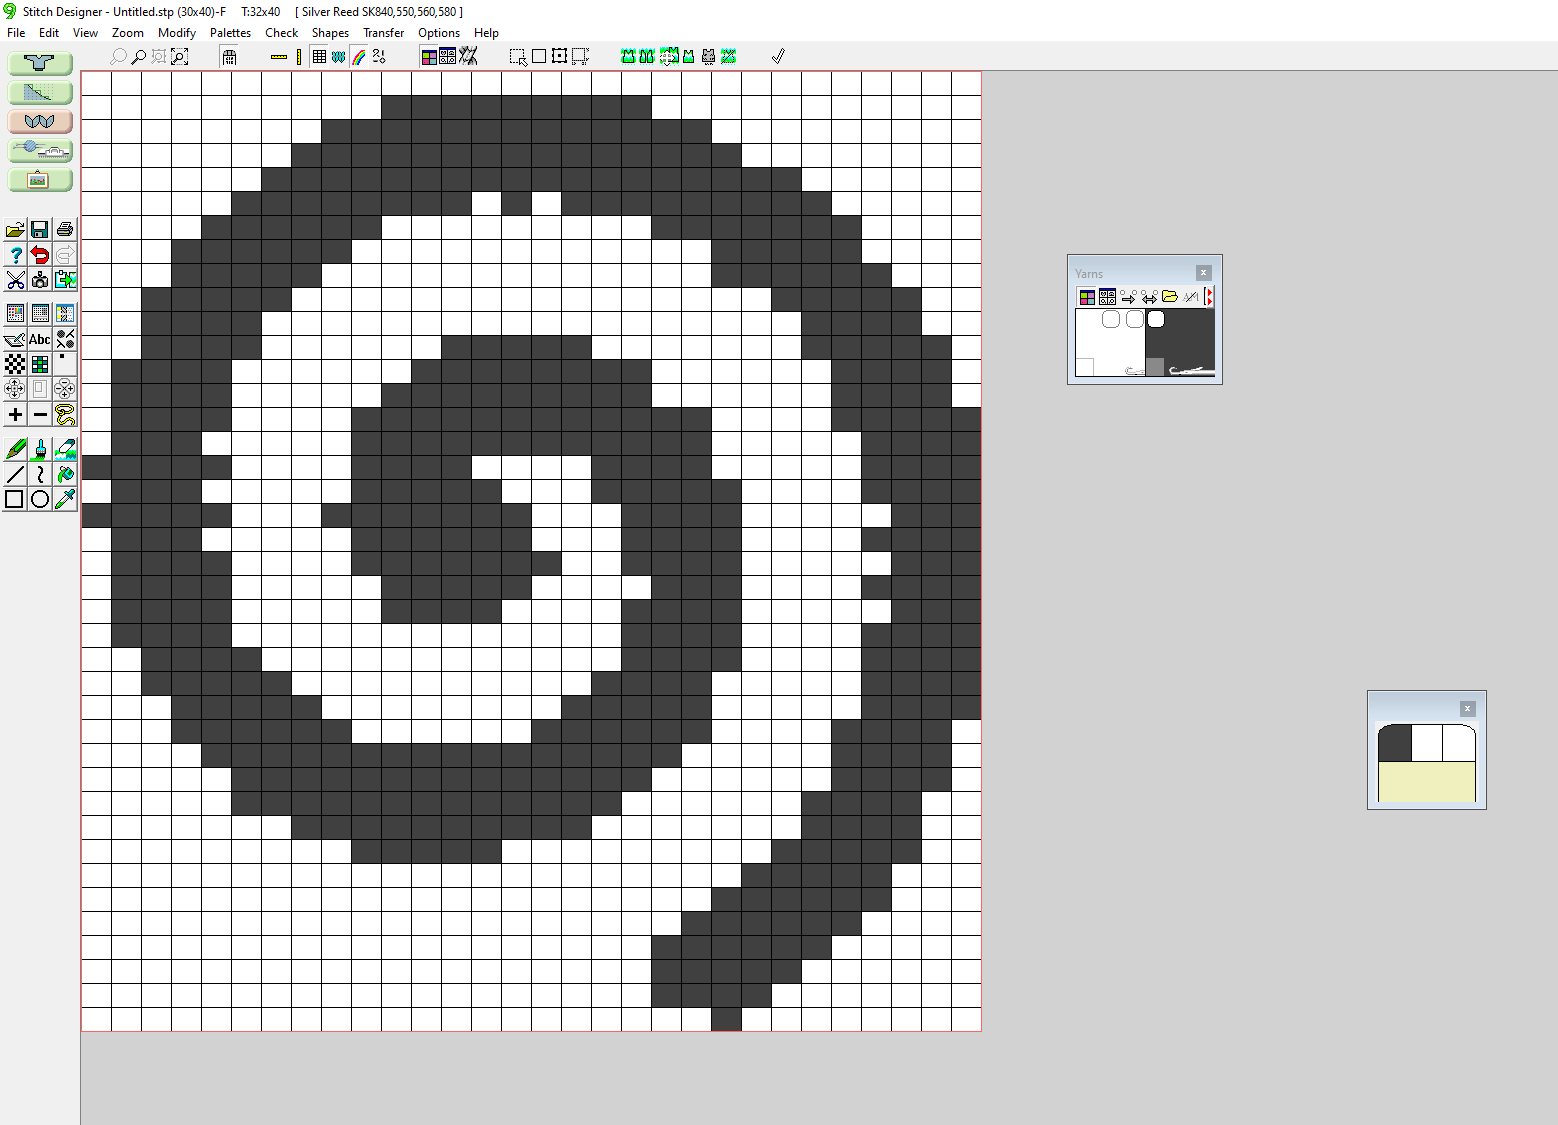
Stitch Designer
This mode allows you to create stitch patterns using an MS Paint/pixel art type interface with each block representing one stitch. Note that a single stitch is wider that it is tall so you don't get a perfect square grid to work on.
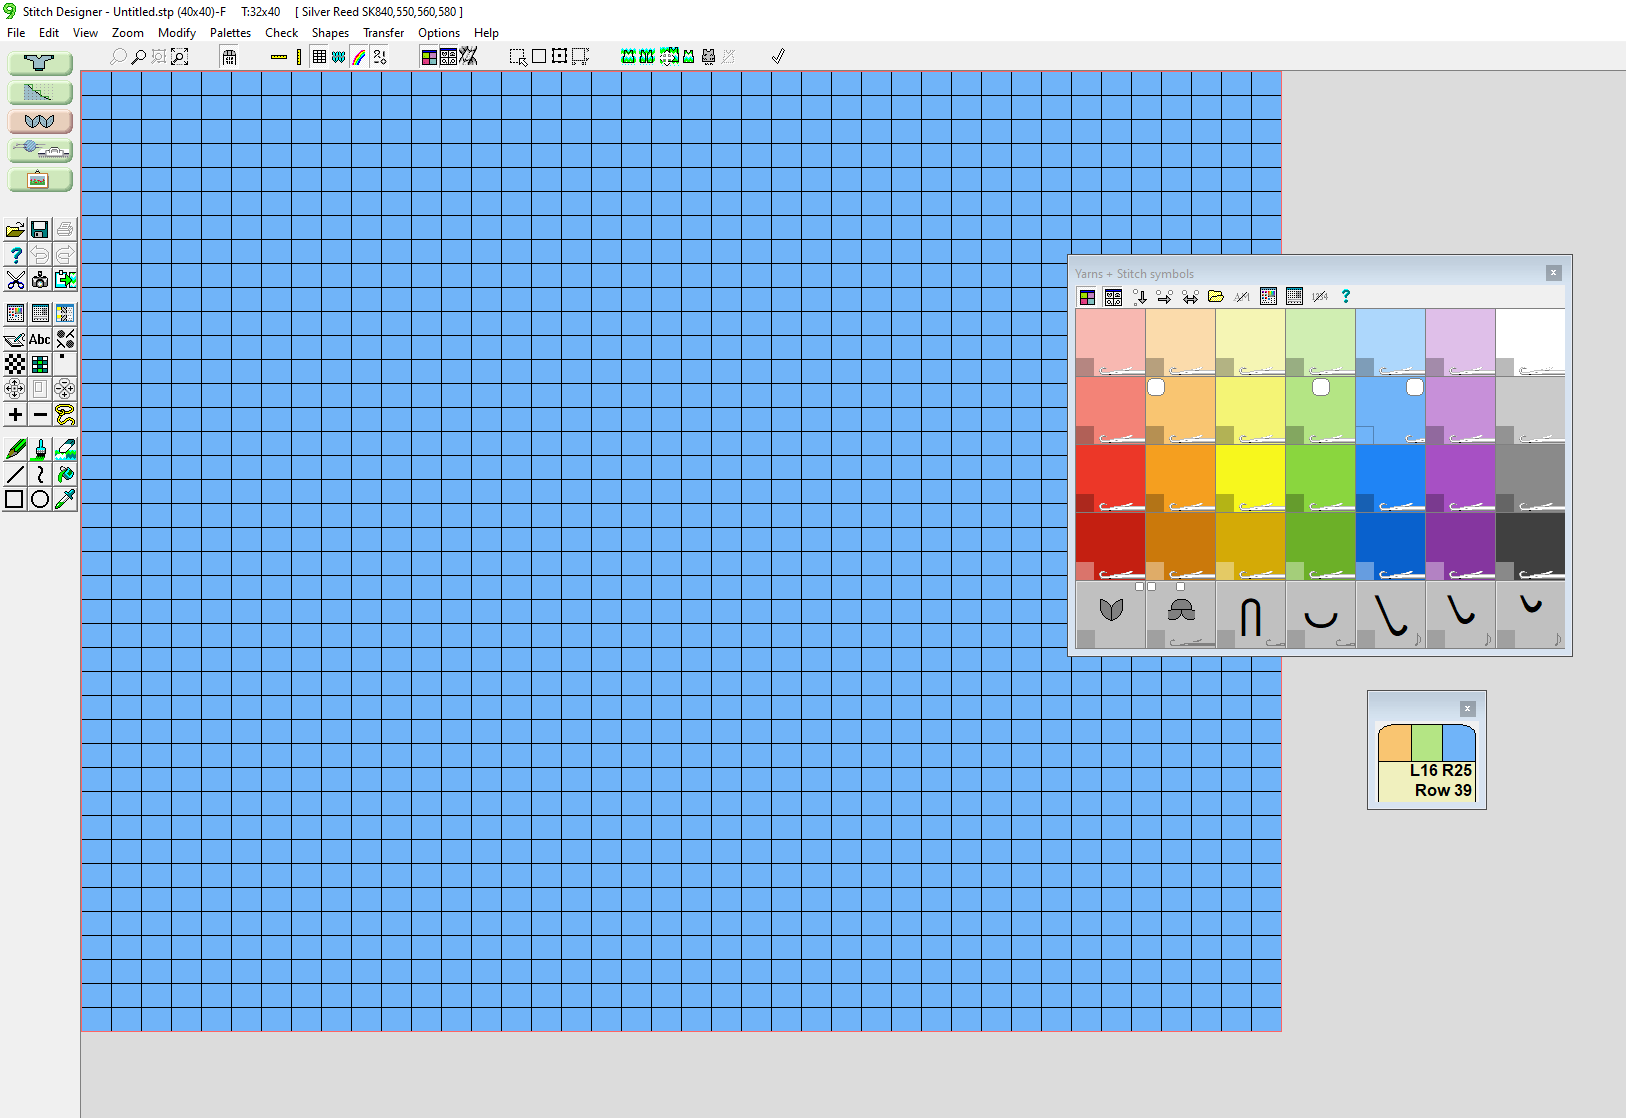
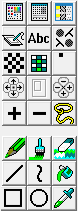
The side panel (shown below) gives you options such as pencil, fill bucket, text, shapes, and lines. The + and - buttons allow you to alter the size of the canvas and the checker board button used with the fill bucket adds a bird's eye pattern.
The colour palette allows you to select which colour to draw with. The smaller window on the right below shows the current colours that are selected for the different mouse buttons (e.g. left click will draw orange, middle click green, and right click blue). To change colours, click with the mouse button you want to change on your chosen colour in the palette window.
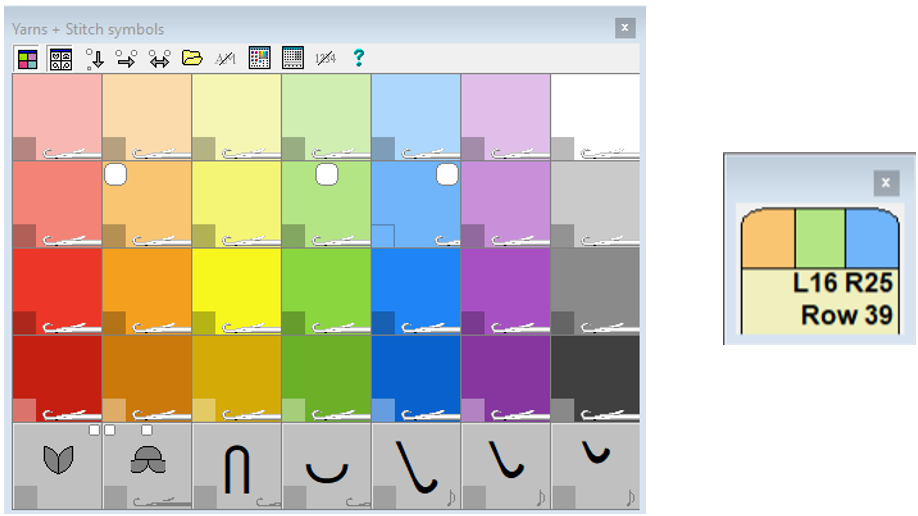
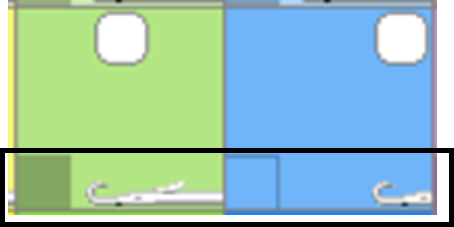
If you are using fair isle, there can only be two colours per row with one being selecting and the other deselecting. This can be shown by the small needle graphic at the bottom of each colour on the palette with the tucked in needle being selecting and the extended one deselecting. Clicking on the needle graphic will switch that colours status.
Interactive Knitting
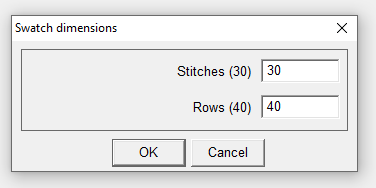
When you enter the interactive knitting mode from the stitch designer, you will get the below pop-up. The numbers in the brackets is the size of your design and it is asking you how large you want your full swatch to be. If you want to knit just one copy of your design, match the values. If you want it to repeat, enter in a multiple depending on how many repeats you want.
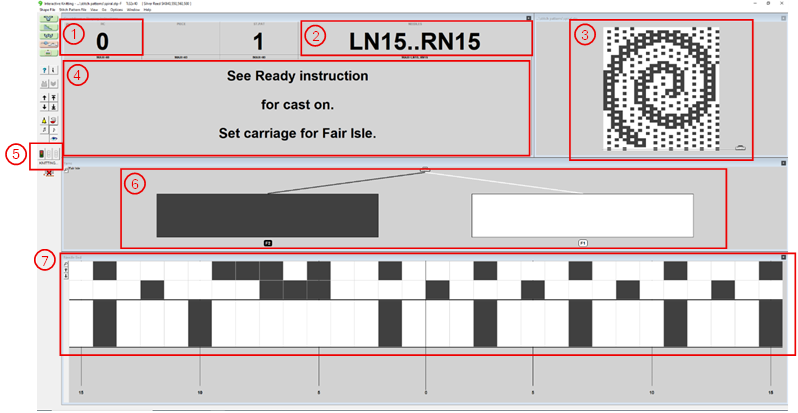
Below is the interface for the interactive knitting mode:
-
Row Counter - tells you the row number you are on in the pattern. It is useful to set the machines row counter to 0 when you start so that the two counts are in sync to help you keep track of where you are.
-
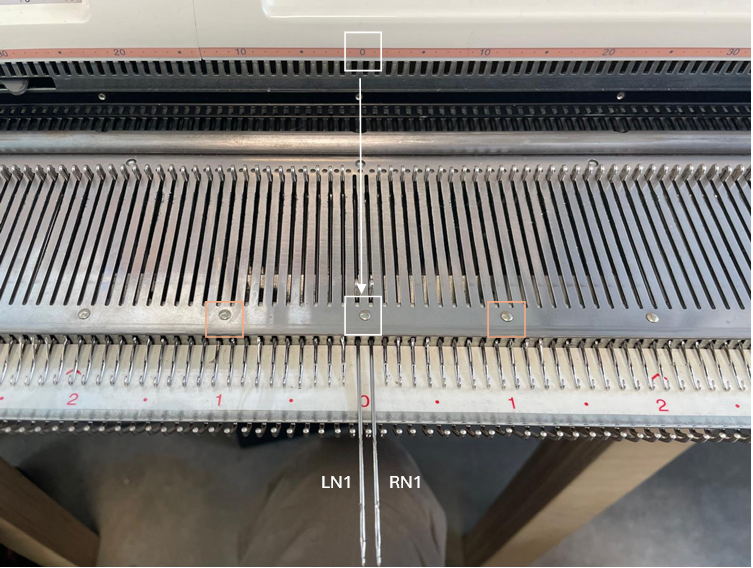
Needles - tells you which needles that you need to be working on using each needles assigned number. Starting from the 0 mark on the top band, move down to the small rivet (both outlined in white below), to find the centre of the bed. The needle to the left of this point is LN1 (left needle 1) and to the right is RN1 (right needle 1) and the numbers count up as you move outwards. It is useful to remember that, moving along the bed, there are 10 needles between each rivet.
-
Pattern preview - gives you a preview of what your full swatch will look like. The small carriage graphic at the bottom shows which side of the piece the carriage needs to be on before you knit the next row.
-
Instructions - The text here gives you instructions for the next row. It will flash yellow if you need to take an action, such as decreasing a needle or changing yarn colour. If there is just a number in the box, this is the number of rows you have to knit until the next action needs to be taken.
-
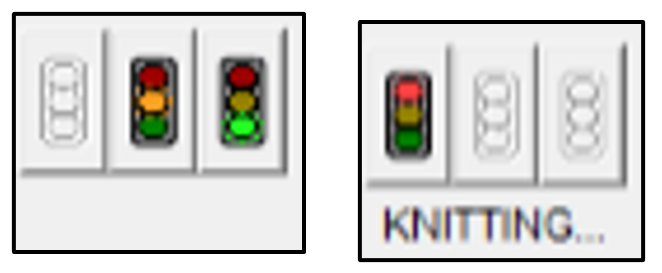
Start and stop - The green traffic light button is used to start the knitting mode, which will cause the word 'KNITTING' to appear underneath the buttons. This text is the only way to tell that the program is ready to go and that you can start knitting.
-
Yarn positions - To knit with fair isle, two different yarns need to be threaded into the carriage. This tells you which colour represented in your pattern should be threaded into which position. Under each coloured box, the text 'F1' or 'F2' represent positions 1 or 2 in the carriage, respectively.
-
Next row - This section shows the next few rows to be knit, with the next immediate one blown up slightly bigger. Each block represents one stitch and the numbers underneath show the needle numbers.


To begin knitting:
- Identify the needles you need to be using and cast on with these
- Make sure the carriage is on the correct side according to the pattern preview and click the green traffic light button to start the knitting mode.
- The below pop up will appear telling you to set the point cams to the correct positions.
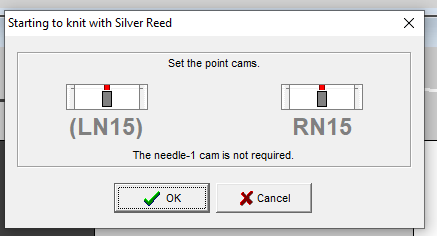
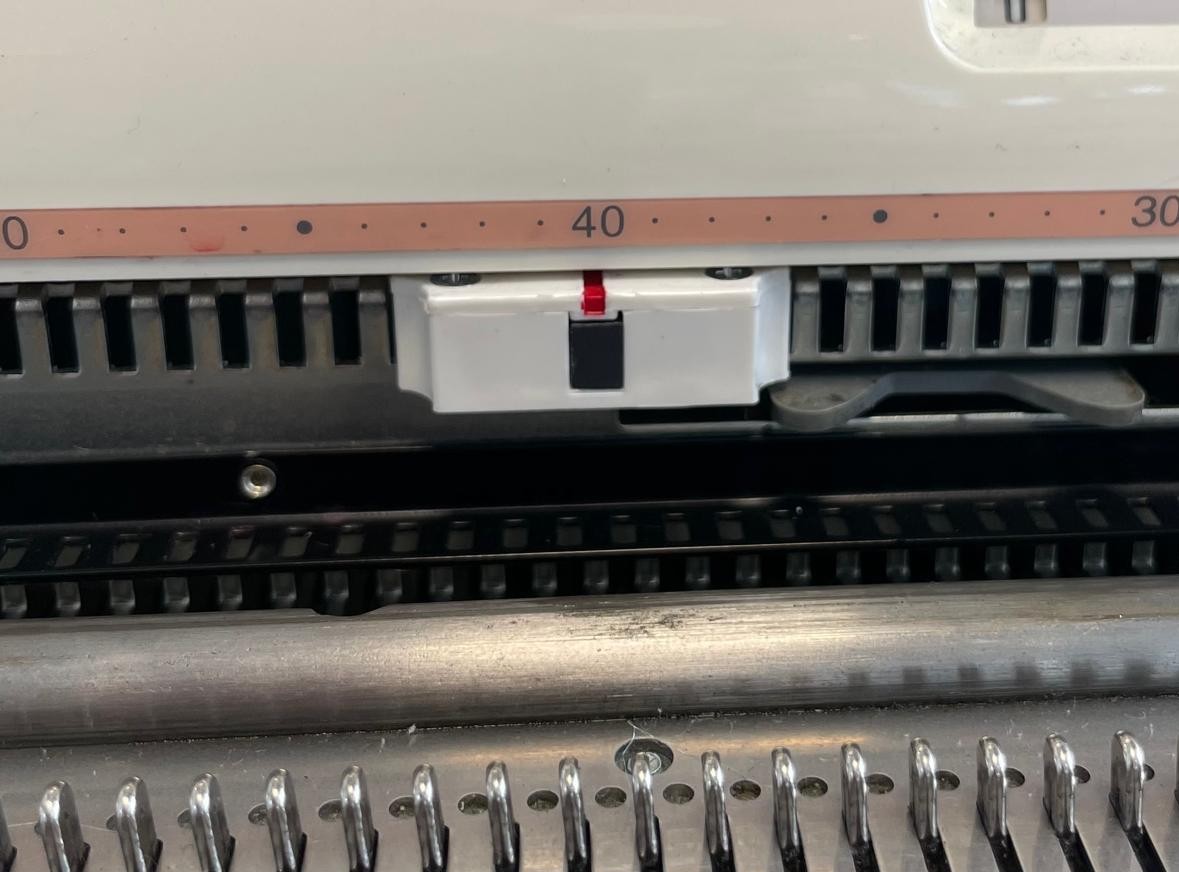
The point cams are as below. There is one on the left and right which both need to be positioned using the numbers on the band above them. Once this is done, click 'OK'.
You are now in knitting mode and can begin! Try to make the carriages movements as smooth and confident as you can otherwise you may get an error saying that the carriage is travelling in the wrong direction.
You can manually move up through the pattern using the scroll or arrow keys. However, if you do this (or you get the carriage wrong way error), it will drop out of knitting mode meaning you will have to click the green traffic light again to restart it.
DesignaKnit Graphics Studio
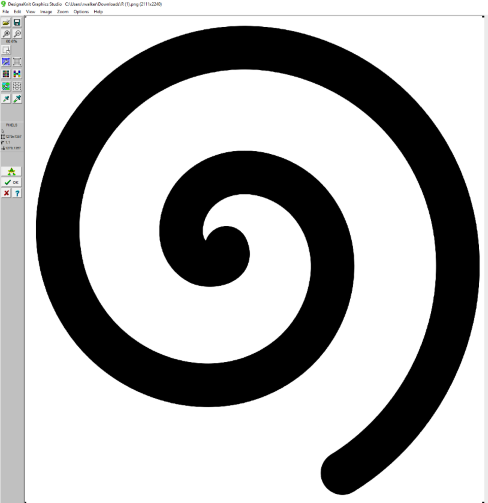
The DesignaKnit Graphics Studio is used to convert an image into a knitting pattern. The image must be monochromatic as we are only able to knit with two different yarn colours per row.
To start, click File > Open Graphics and select your image. To start the graphics studio wizard click the button on the sidebar with the small wizard drawing.
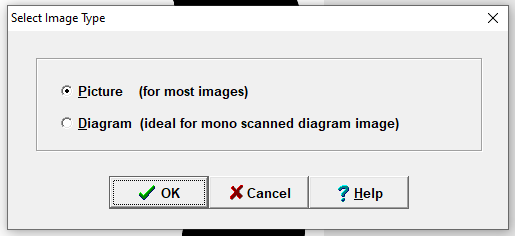
The first option is Picture or Diagram, select which is appropriate for your image.
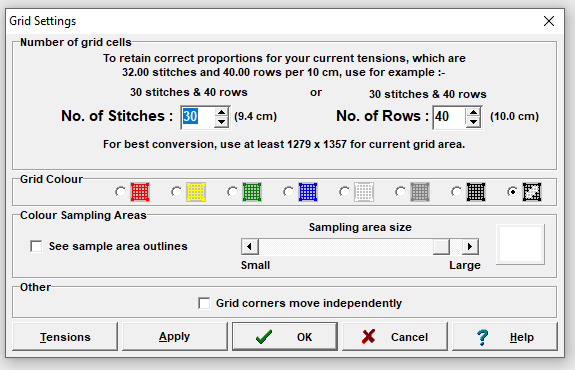
The next pop up determines the grid settings. Here you can set the number of stitches and rows you want the design to have. When you enter in a specific number of stitches (or rows), the text above the box will tell you the corresponding number of rows (or stitches) to keep the dimensions of your graphic the same. Most of the time you will set the number of stitches then enter in the corresponding row value it gives you.
Next, we look at the specifics for the image conversion. This process uses a graphics technique called dithering which is used to create the illusion of colour depth with a limited colour palette.
There are three options here; fine-grained dithering, coarser dithering, and no dithering. Different options will work best for different types of images. Have a play around and see which gives you the best result. When trying them out, select 'Apply' rather than 'Ok' as this will allow you to change between each option without having to go all the way back to the beginning of the wizard.
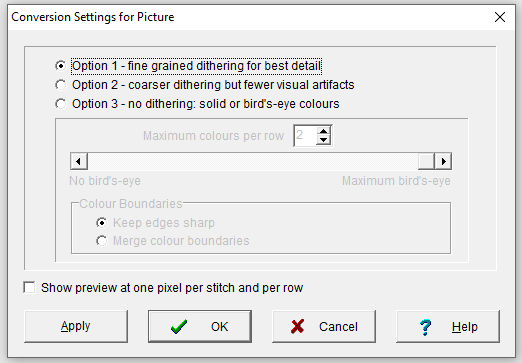
The last option allows you to select the yarn colours that will be used. However, to get the best representation of your graphic, it is best to select the two colour of the monochromatic image - normally black and white.

Once you are happy with this, click 'Ok' from the sidebar on the left. This will take you to the stitch designer mode where you can edit your design before going to the interactive knitting mode to create your piece!
Resources
This page gives an overview of each mode within DesignaKnit but video tutorials from Prism's Creations are also a great resource. They go through different features of the software one-at-a-time, eventually creating an asymmetric patterned jumper. To get into patterns, I would start with the second video: Stitch Designer Basics.
Using DesignaKnit with the Brother KH940
Using DesignaKnit with the new Brother machine is more complicated than with the old Silver Reed. But after a bit of practice it will become second nature!
Preparing the machine
- Cast on and knit a few rows in stockinet on the required needles.
- Add the extension rail to the left hand side of the machine

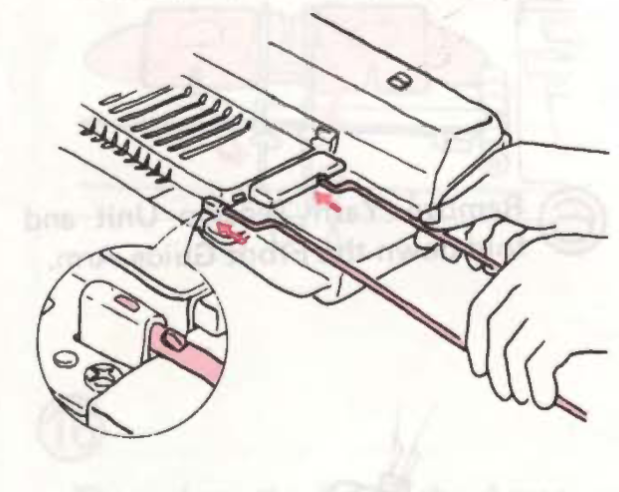
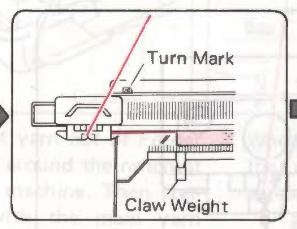
- Bring the carriage all the way to the left, outside the left turn mark, on top of the extension rail
Uploading your pattern
In order to knit your designs, you must first upload the files onto knitting machine.
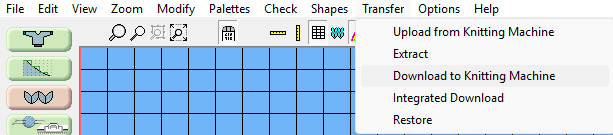
- In the Stitch Designer mode, select Tranfer > Download to Knitting Machine.
- Check that Brother KH940 is selected in the Knitting Equipment Selection window, then click OK.
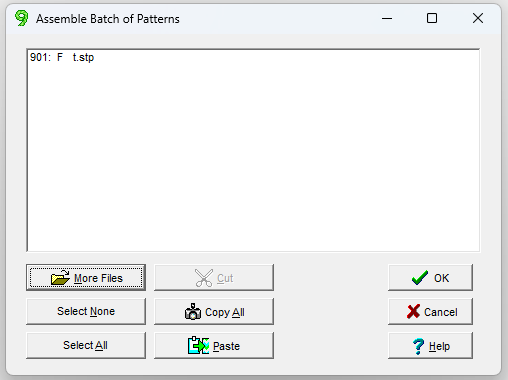
- In the Assemble Batch of Patterns window, select the pattern you want to upload by clicking More Files, choosing your design, and clicking OK. If there are already patterns listed the click Select All > Cut.
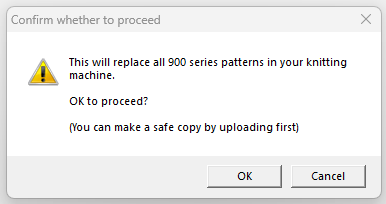
- Click OK on the below pop-up (you will not erase anyones work as they will be saved on the computer).
- Click download.
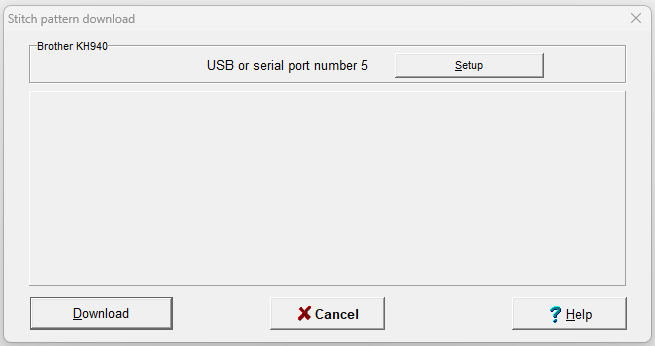
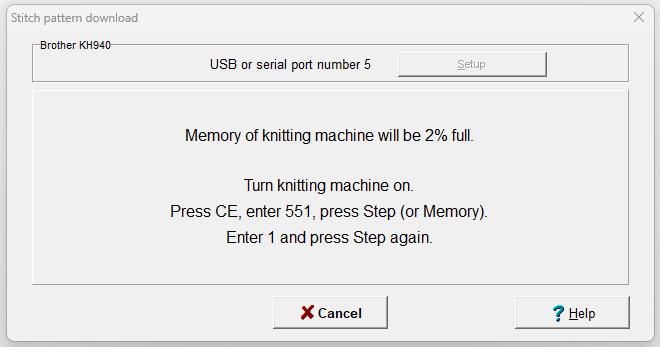
- Follow the instructions on the Stitch Pattern Download window.
- If you would like to use the interactive knitting, now open the file you have just uploaded in the interactive knitting mode.
Program the machine
- Switch the machine off then on again
- Push the Step key.
- If you have uploaded just one design, the number of your pattern will be 901. If this is not already visible on the display, push CE then type in 901, the push step
- Push step again (this number is the number of the furthest left needle you should have cast on).
- The Ready light should be lit with the number 1 on the display.
Start knitting


At this point, you are ready to start your patter. If you want to use interactive knitting alongside this, press GO on DesignaKnit at this point.