Workshop: How to make Cast Inflatable Soft Robots
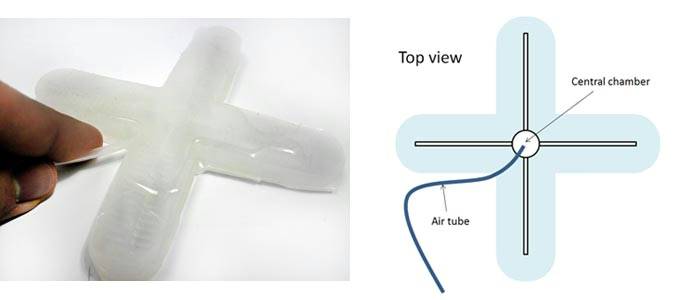
The general idea of cast silicone actuators is to create an air pocket that will change the internal shape of the component when the air pressure increases. The shape of this internal section will totally change the behavior of the actuator you are making.
Casting is a great way to make arbitrary shapes of air pockets, and it is a good choice for projects where you need a high level of deformation, or you want to experiment with lots of different shapes.
NOTE: because of the time taken for mould making, it can take around a week to develop a cast silicone actuator. Make sure you are leaving adequate time for your project. Materials are also expensive, and not available to all students by default -- if you're interested in using the silicone, you need to meet first with Alex and Rohit to discuss your project. We have some example moulds and tentacles in the hack space, that can potentially speed up the process.
Process Overview
From start to finish, the process of making a cast silicone mould contains the following steps:
- create or find an existing mould to use
- mix silicone or other elastomer material
- pour initial casts and wait to cure
- seal cured halves of mould and insert tubing
- test and repeat
Materials
We have Ecoflex 00-30 and 00-50 Silicon Cure Rubber in the prototyping lab (00-50 is harder, 00-30 is softer and stretchier). This is a skin-safe silicon rubber that can be cast into 3D-printed moulds. We supply small amounts to students -- you can also source your own from Bentley Advanced Materials It's also possible to make cast inflatables from other materials, such as latex.
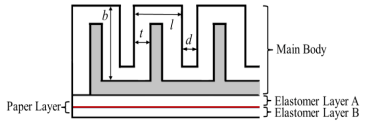
Many cast soft robotic actuators also include a layer of paper or fabric to make the actuator stiffer in one direction -- this can be interesting to experiment with, and there are a wide range of materials to try.
Making a Mould
Moulds can be 3d printed, laser cut, or made by hand. In each case, you are trying to make a shaped pocket that will change the shape of the actuator when inflated.
3D Printing Moulds
Advantage Very precise, can make complex shapes, has a good seal
Disadvantage Takes a long time to 3D print, and can be challenging to design! Check whether the mould you want to print already exists
Tools for making 3D printed moulds:
- Guide to the Pneunets bending model, from the Whitesides lab, and another model made using OpenSCAD
- 3D print files and instructions for a 3-arm gripper (note -- ask if a mould exists first before just printing files you've downloaded!)
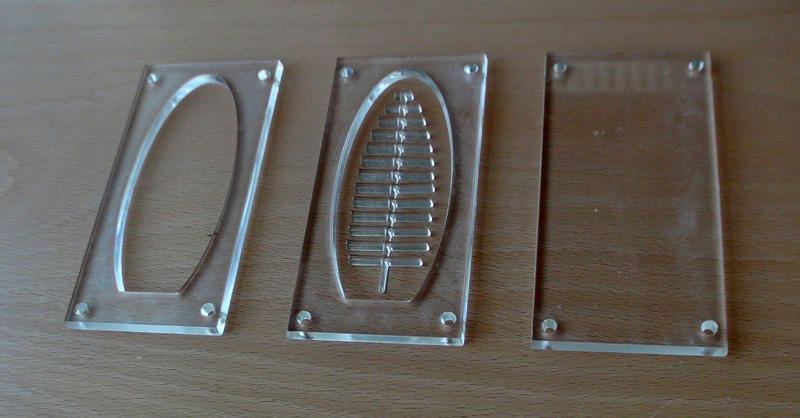
Laser Cutting Moulds
Advantage Quick to make while still being precise, much easier to design
Disadvantage Requires manual sealing, shapes might be less complex, tend to be much flatter (this can also be an advantage!)
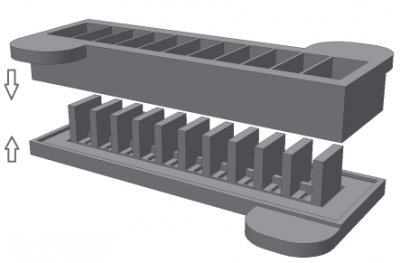
Each part of the mould requires a base plate, and then one or more layers to make up the volume of silicone. In the image below, you can see that one layer has the negative for the air pocket, and then there is a second layer to allow silicone to be poured over the top.
Before silicone is poured into the mould, each layer of the mould should be sealed together with glue to prevent leaking.
- Whitesides lab laser cut soft robotics mould for a leaf-shaped actuator guide
Handmade Moulds
Advantage Doesn't require specialised tools, potential for sculptural/expressive work
Disadvantage Requires manual sealing, shapes might be less precise, more danger of leaks
As in the laser cutting example, moulds should be manually sealed with glue, and should be constructed on a base plate.
Casting Process
At this point, you should have your moulds ready, and have decided which material you want to use, and approximately how much of it you will need. In this example, we will use images from making a two-part mould with Ecoflex 00-50. The 'working time' of ecoflex is around 20 minutes, so once the liquid is mixed, all your moulds must be poured within that time.
If you are a CCI student, you should only be casting in the prototyping lab, and you should first have permission from Alex. You can do this safely at home, but we recommend using the facilities we have here.
- Make sure the workspace is clear and free from dust. Assemble the equipment you need: weighing scale, plastic cup, stirrer, moulds.
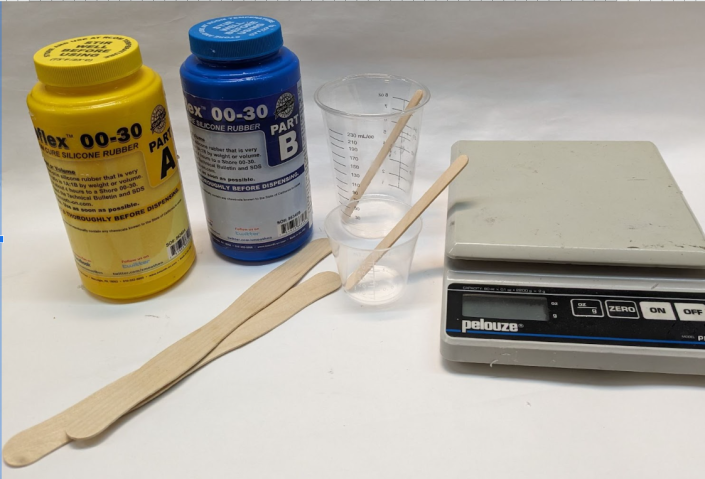
- Wear appropriate PPE: Ecoflex is non-toxic, but extremely sticky. Wear nitrile gloves, and an apron.

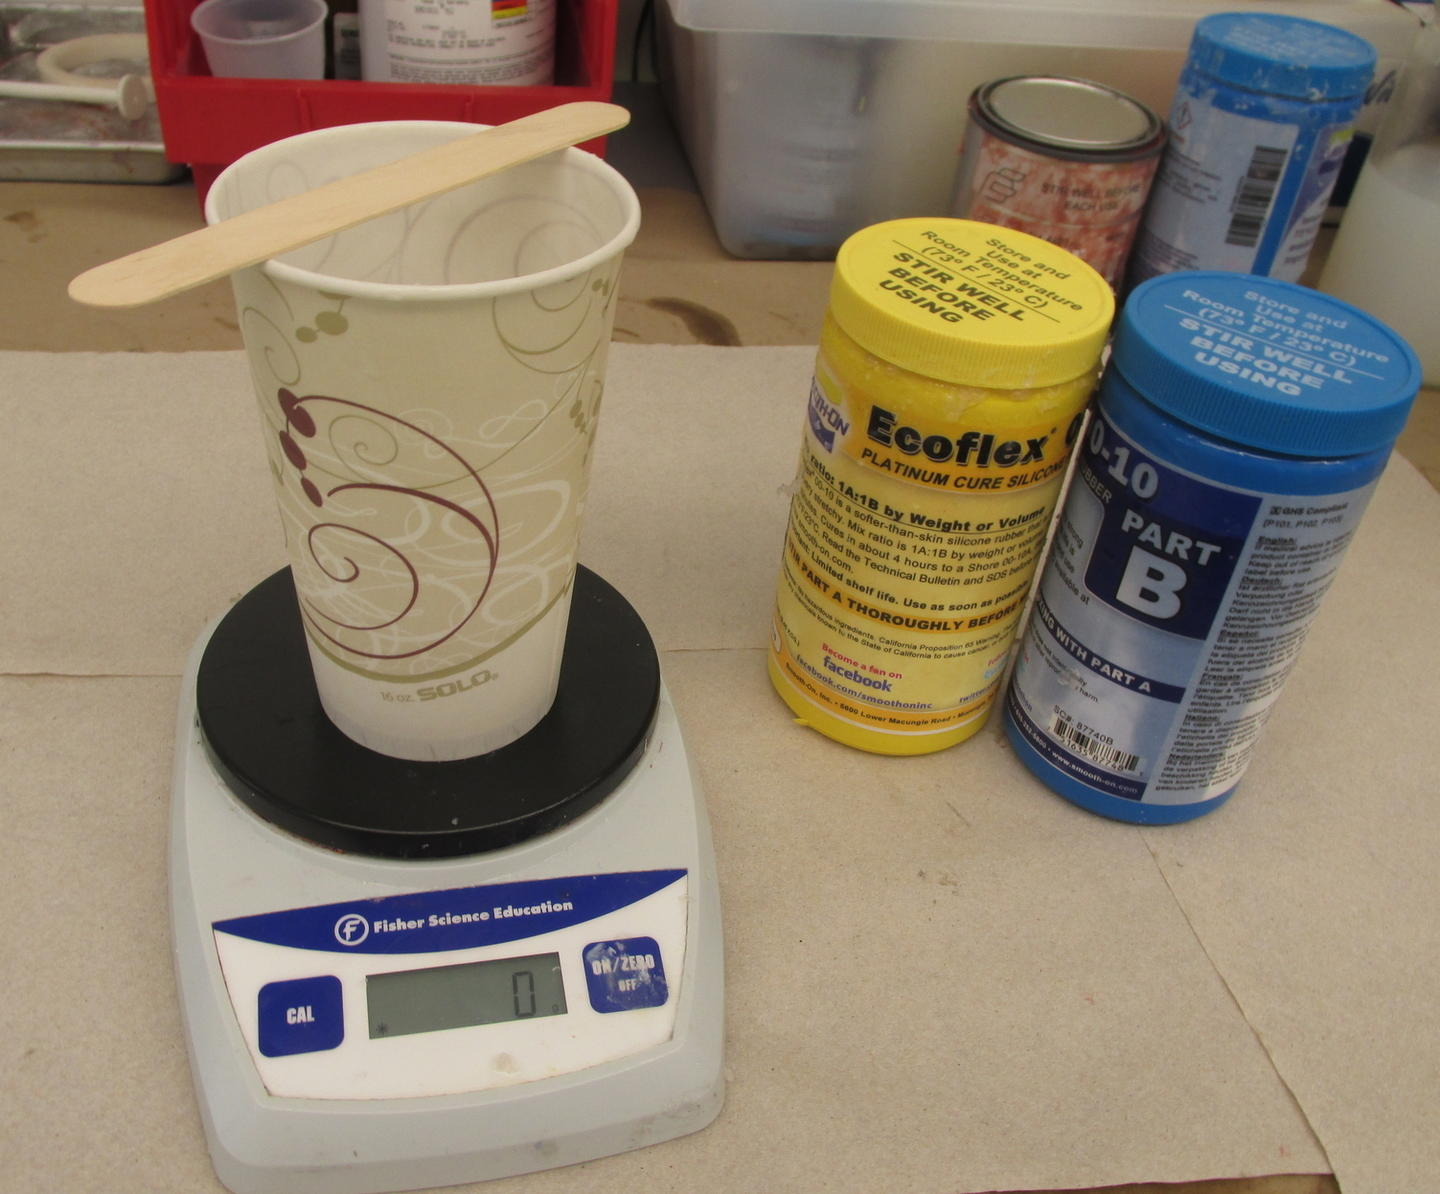
- Mix the Ecoflex. The casting silicones we stock in the CCI come as mixtures of 2 parts, which must be mixed together in a separate container (e.g. a plastic cup). First, place the cup on the scales and zero the scales. Then pour Ecoflex A to half the total volume that you will require. Take a note of the weight. Zero the scale again, and pour the same weight of Ecoflex B into the container. Mix thoroughly together for 3 minutes.
- Pour the Ecoflex into the mould, making sure to only fill the 'flat' part of the mould halfway (note for more complex moulds this might be different! This is for a simple actuator).
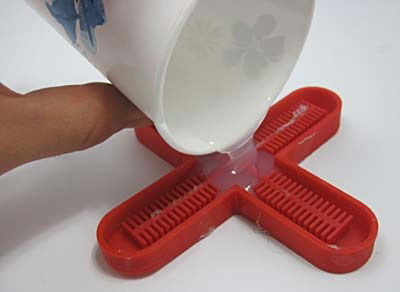
-
To remove air bubbles, either hit the mould on the desk several times (to cause them to pop), or, if available, place the moulds in a vacuum chamber.
-
Leave the moulds to cure for at least 3 hours. Gently demould your designs -- you can use tweezers and/or spudgers to do this, but be careful not to pierce the silicone.
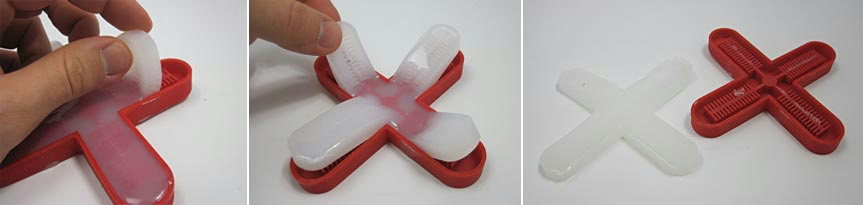
-
Repeat the above steps to make more pourable Ecoflex. Place a piece of paper or fabric (if using) in the the remainder of the flat half of the mould, and then pour a layer of Ecoflex on top. Gently place the section with the air pockets on top of this layer, to seal them together.
-
Wait another 3 hours for the mould to finish curing. Insert a pipe, and seal around the edge.
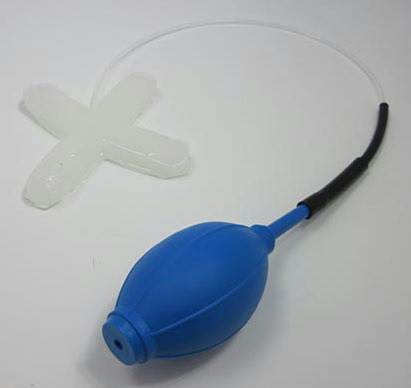
- Use a syringe, hand pump or 5V air pump to gently test your design (it's best to test with a manual pump first).
(Image Credits: Ben Finio, Science Buddies / Creative Commons Attribution Non-Commercial Share Alike)
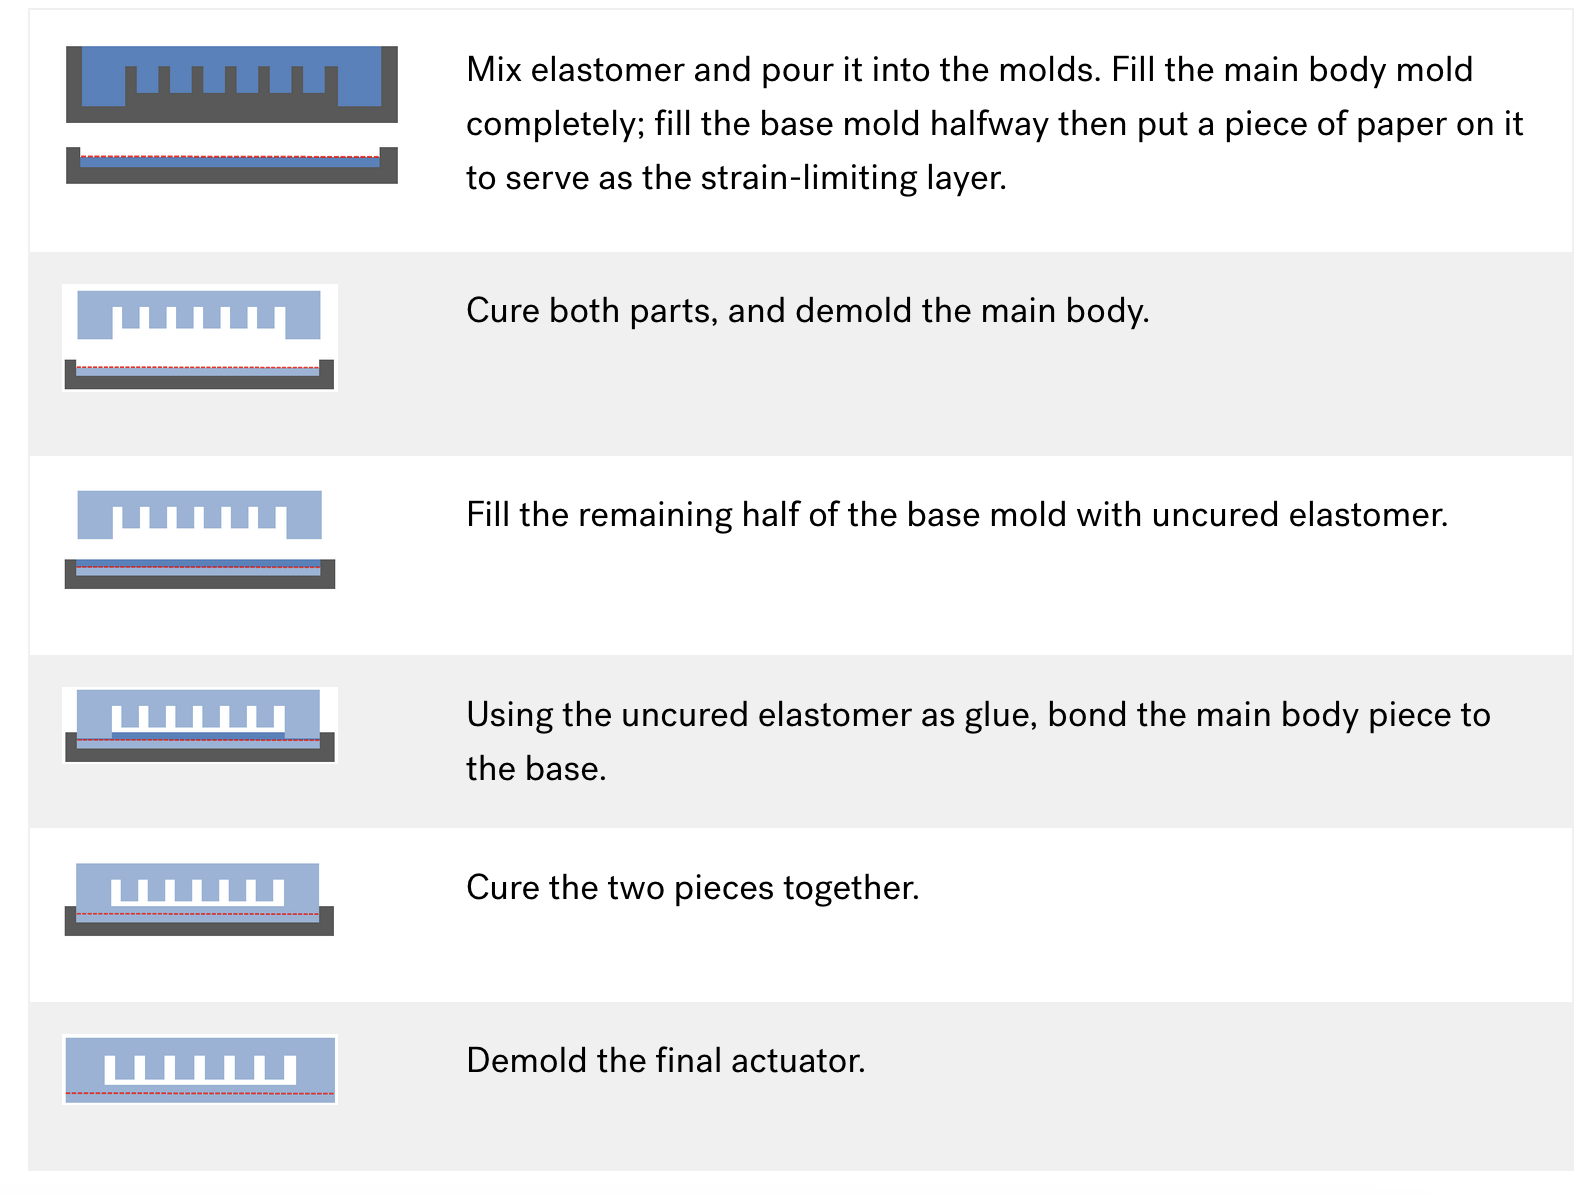
Here are the same steps as a visual guide, from the Whitesides Lab soft robotics guide.