Using Adeept robot arm kit
What is it?
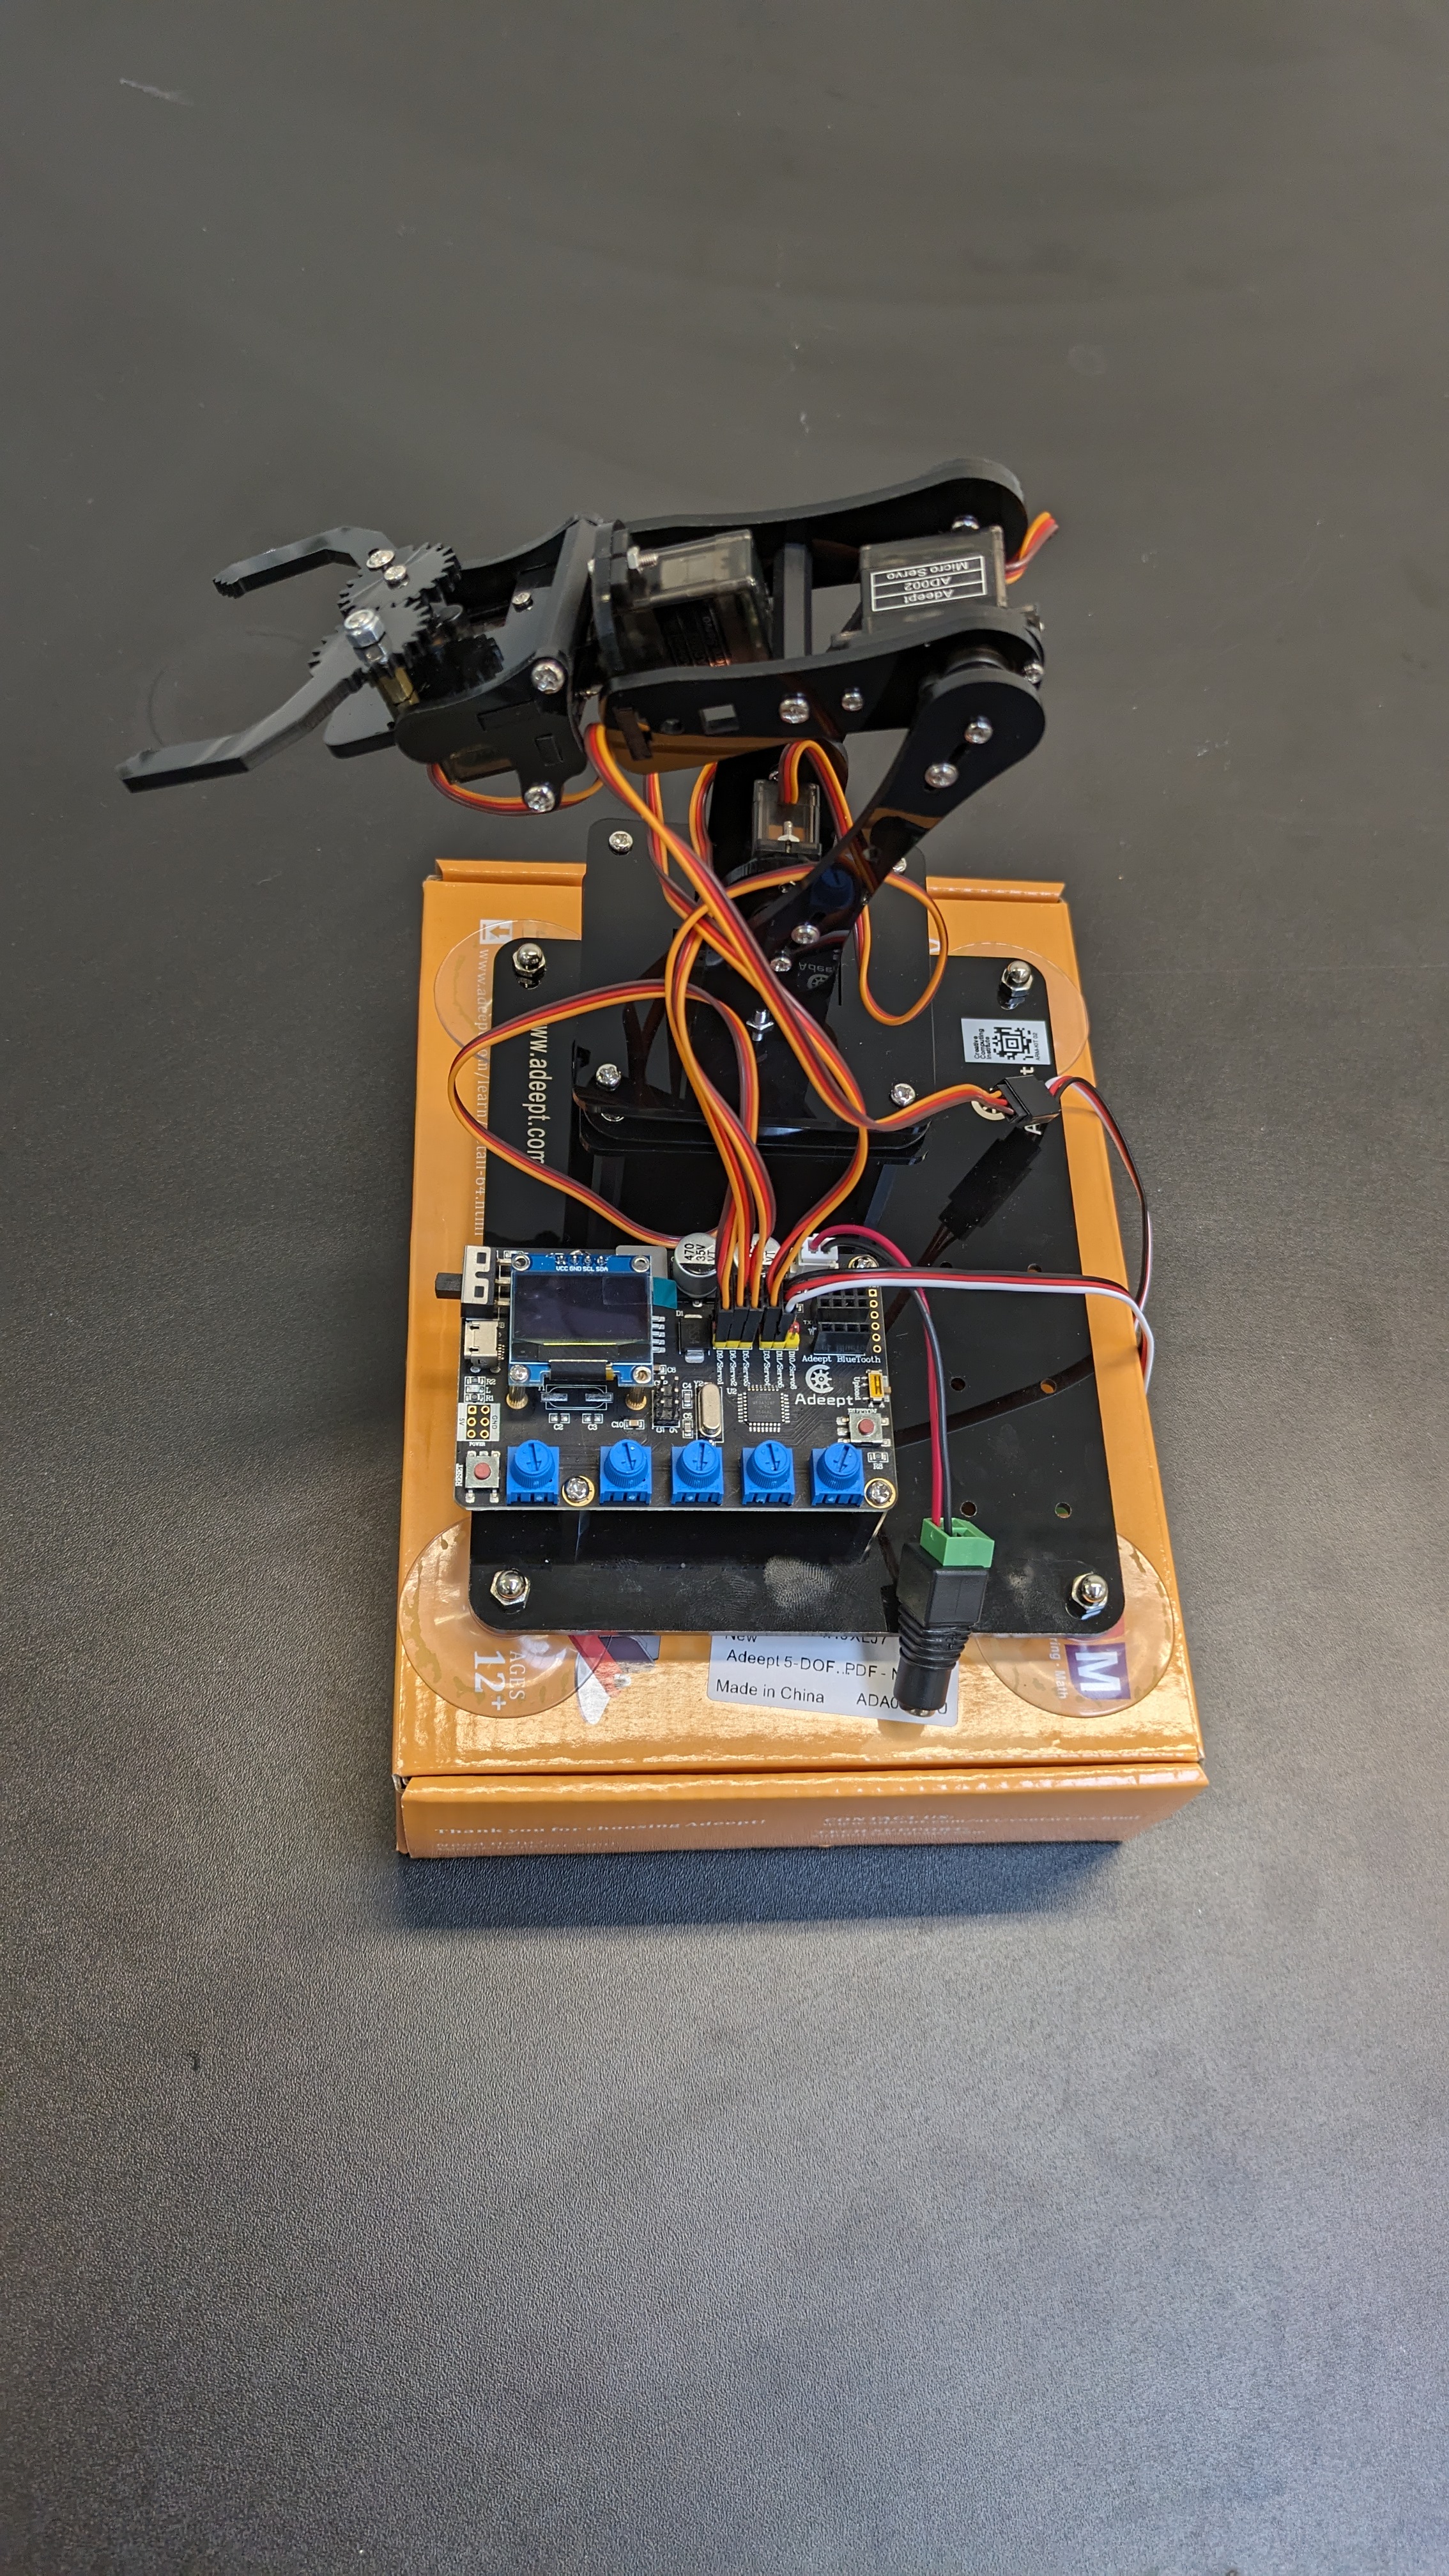
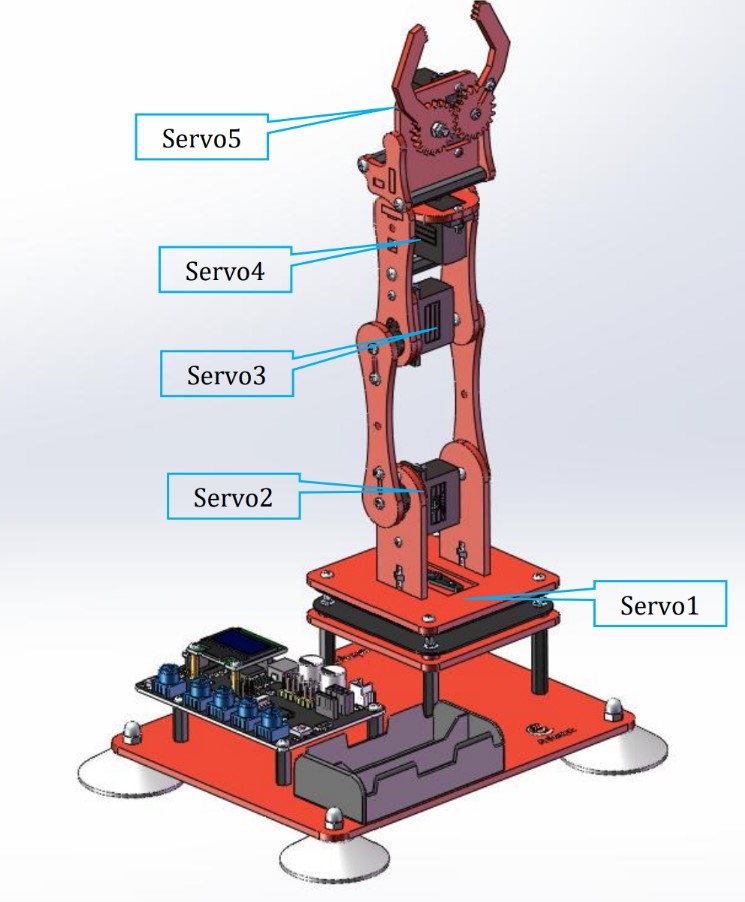
The robot arm kit from Adeept is an eduational robotics kit that is mainly aimed towards begineers. This robotics kit consists of a 5 degree of freedom robot and the Adeept Arm Drive Board which is based off an arduino uno. This means users can programme this robot arm using the Arduino IDE and the most of the libraries that arduino provides.
To learn more about this robot, please click here
Getting started
Setting up
-
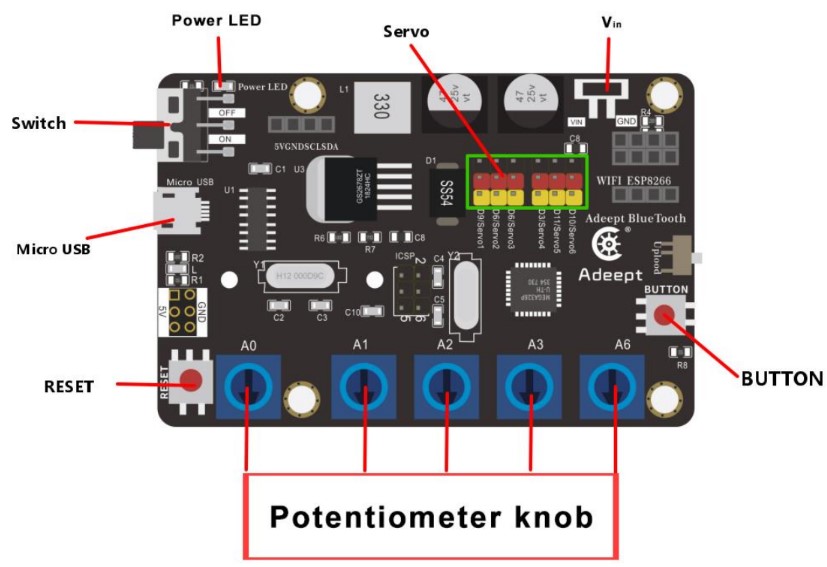
Connect the Adeept Arm Drive Board to your laptop/PC using the correct USB cable.
-
To power on the robot, connect an appropriate 5V 3Amp or 5V 5Amp power supply to the barallel jack of the robot.
-
Ensure to switch on the Arm Drive Board, otherwise the servo motors will not receive any power.
Setting up Arduino IDE to use with the robot
If you already have Arduino IDE installed and worked with igt in the past, then all you need to do is to change the board to Arduino Uno.
To do this:
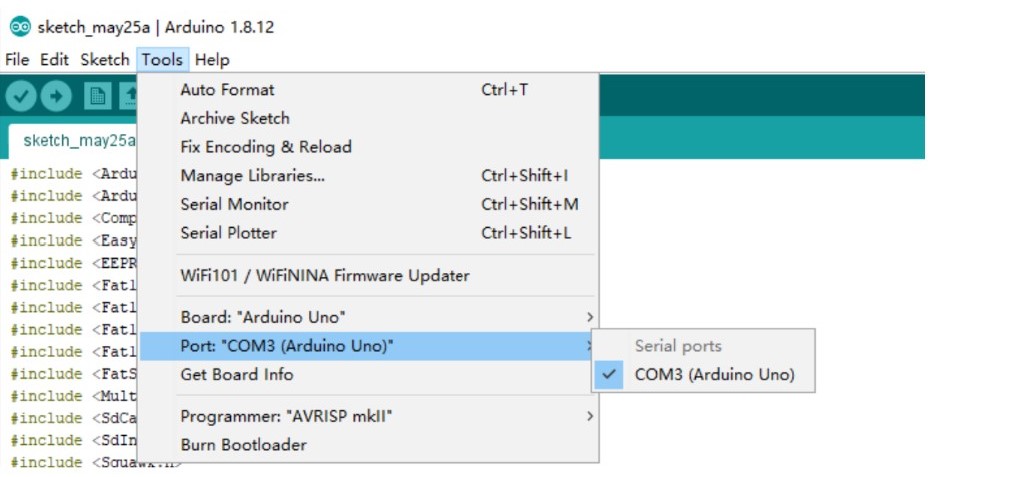
- Go to the Tools -> Board.
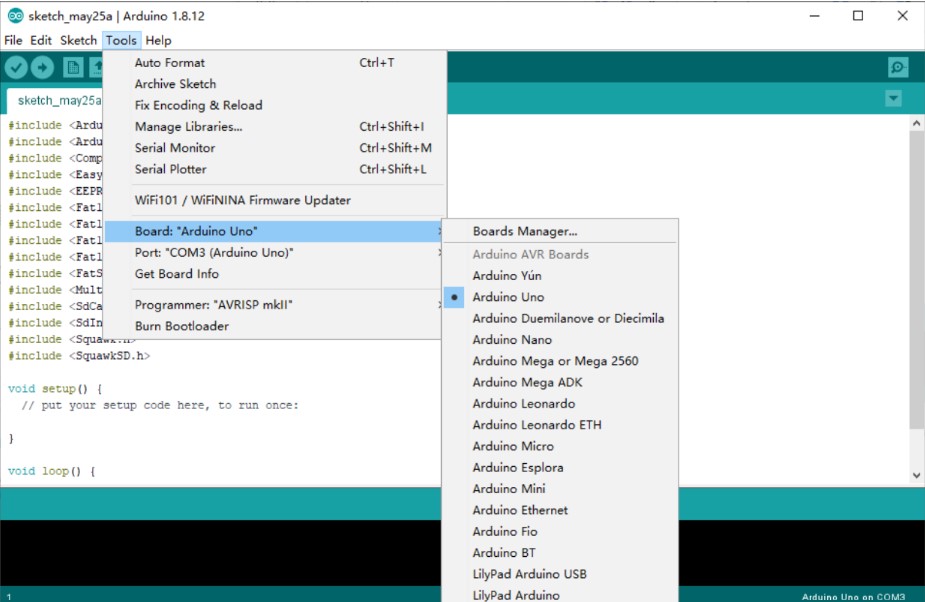
- From the drop down list, choose
Arduino Uno. - Make sure to choose the correct COM port as well.
Setting up from scratch
If you are setting it up from scratch, as in you do not have Arduino IDE installed and setup, then click here
Required Libraries
These extra libraries will be required if you plan to utlise the OLED screen within the Arm Driver Board.
The instructions for configuring the libraries can be found here on page 21 under the heading 8. Configuring the "libraries" folder of the Arduino IDE.
You can find the libraries here, please download all of them.
Verification
Try uploading the blink example sketch to verify comminication between the Arm Driver Board and your machine.