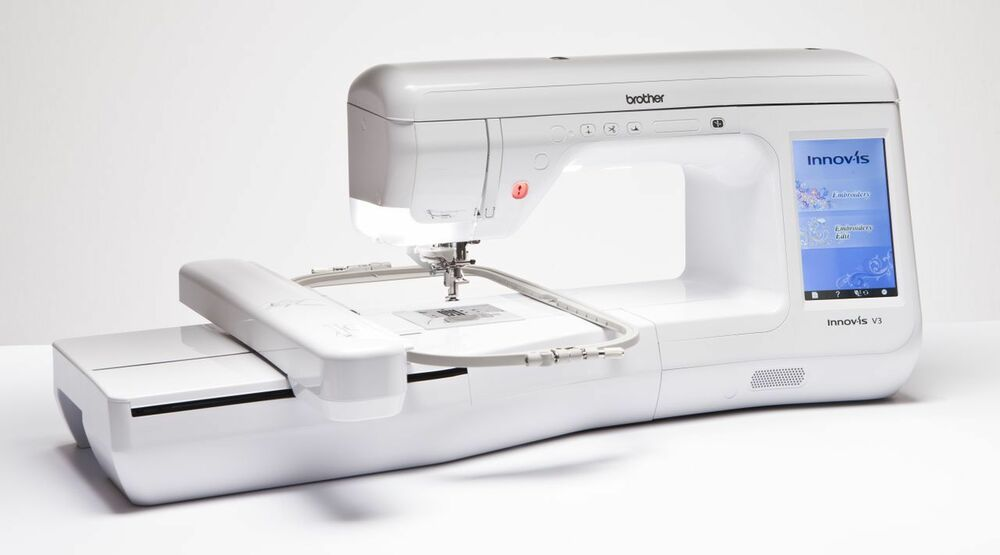
Using the Brother Innov-is V3 Embroidery Machine
To use this machine, you must have had an induction from one of the technical staff. This guide is to serve as a reminder for students who have already had this induction.
For troubleshooting advice, go to the bottom of the page.
Overview
The Brother Innovis V3 is a top-end domestic embroidery machine that can be used to produce high-quality digital embroidery.
Embroidery machines work by moving a piece of fabric (fixed within a hoop) in the x-y direction, beneath a needle that stitches by moving up and down. In this sense, they have a lot in common with many other 2-axis CAD machines (like laser cutters, routers, plotters), though because of the paticular qualities of working with stitches as opposed to straight toolpaths, embroidery software weirdness, and working with different fabrics, there's some practice involved in getting consistent results.
This guide is a condensed overview of the machine operation -- if you'd like a more detailed reference, see the Brother Innovis V3 User Manual.
Producing embroidery files
In order to embroider your design, you must first create a file in the .PES format (there are other embroidery file formats, but they are not typically compatible with Brother machines). At CCI, there are 2 main ways that this can be done:
- using the open-source PEMBroider package with Processing
- using Brother's PE Design 11 software
Both approaches have their advantages and disadvantages depending on the kind of design you want to make. In general, PEMBroider gives you a huge amount of control over how the design is stitched, whereas PE Design auto-generates stitches for you, allowing you to choose from a few different presets, and has a lot of features. As such, the learning curve with PEMBroider is a bit steeper, and generally requires a bit more tinkering to achieve a result, but is programmable, so can make generative designs, and can produce things that can't be made using PE Design.
As PEMBroider is just an extension of Processing, it can be run on your computer. PE Design is a piece of proprietary Windows software, for which we have one license, so it must be used on the dedicated Windows machine next to the embroidery machine. There is a Windows-only trial version available here.
Machine Setup
Changing the top thread
While this machine is threaded using a similar approach to most domestic sewing machines, it has some specific features that are a little less common.
This is the thread that will be on the top side of your fabric, and
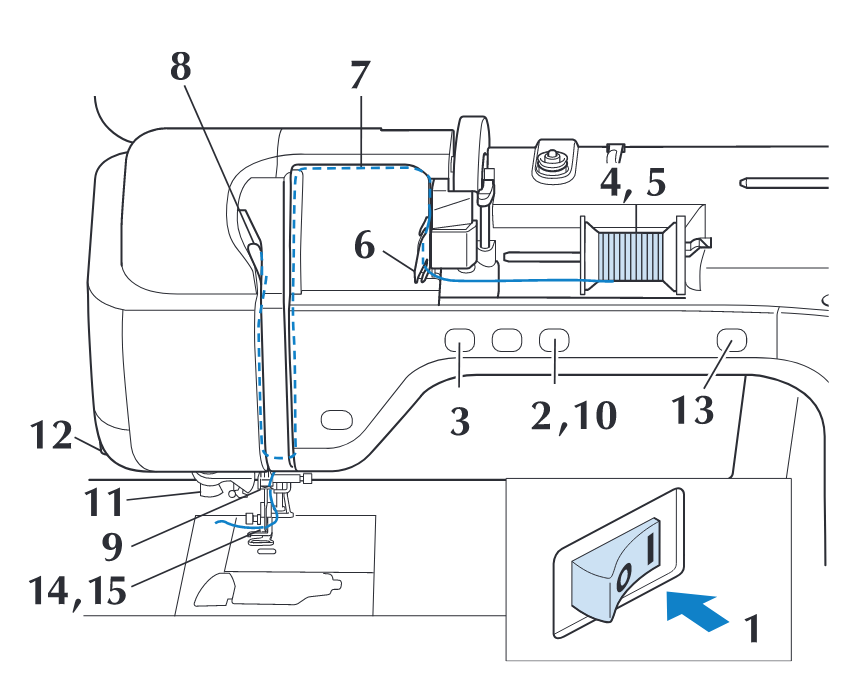
The diagram below shows how the top thread should look when properly threaded through the machine. For a full step-by-step instruction, the guide in the manual is very thorough (page), though if you are unsure then please ask for a refresher.
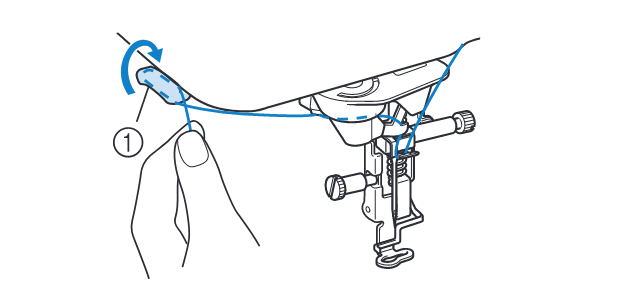
The final step of threading the top thread is shown below -- pull the thread through the thread cutter, and then press the 'auto thread' button for the machine to automatically thread the needle. (it's also possible to do this by hand but much less efficient).
Changing the bobbin thread
The bobbin thread is what binds the top thread to the fabric, and sits underneath. Typically, this thread is either black or white -- if you are sewing
IMPORTANT: make sure the bobbin thread is the correct way round (it will be the source of endless mystery issues if not). It has a little picture of the correct thread direction on the bobbin case,
Hoop Setup
In order to embroider fabric, the fabric must be stretched taut in an embroidery hoop, which is then mounted on the arm of the machine. It is this component that moves the fabric relative to the needle.
There are a set of 3 hoops . In general, try and use the smallest possible hoop that will fit your design -- the larger the hoop, the less supported the fabric is, and the more likely you are to encounter distortion. This is particularly relevant if you are using a thin or stretchy fabric.
iron on stabiliser
Troubleshooting
The top thread keeps breaking
First of all, check that you are using the correct thread (you cannot use this machine with regular thread). All of the CCI embroidery threads are Brother brand, which will appear on the top of the spool.
If you have brought your own embroidery thread, that does not necessarily mean that it will work well on this machine. Check first that the thread is suitable for machine embroidery. Cheap embroidery threads (even if they are the correct type) can sometimes be poor quality and break easily on the machine. To test this, if you can fairly easily break the thread with your hands, it's probably too weak to avoid this issue. If you do want to buy your own thread, I would personally recommend Madeira thread.
If you are using Brother thread, then check that the top thread is threaded correctly, either by referring to the manual, or asking one of the technical staff. Check in particular that the
The top thread broke and some stitches got skipped
This is gladly a really easy issue to resolve. You need to open up the 'stitch count' menu on the touch screen, where you will see . For most cases (unless a lot of stitches were skipped), I'd recommend going back 10 at a time, then using +-1 stitch to line up the needle with the last proper stitches (go a couple in to ensure they can't come loose). The handwheel can be used to lower the needle toward the fabric and check alignment.
The bobbin thread is coming through the top of the fabric
This is a really common issue, and may have a few root causes. A very common mistake when starting to use the machine is putting in the bobbin thread the wrong way round: if you have anything more than 1mm thread showing on top I would suggest addressing that first.
-
adjust the tension:
If the pull-through effect is quite slight, you might just need to correct the tension for the fabric you are using. This can be done without needing to remove anything from the machine. Press the needle button to move it out of the way of the fabric, then
-
re-thread the bobbin
Thread pull-through is very often associated with an incorrectly threaded bobbin. You can correct this without restarting the design. Raise up the needle and presser foot, and gently remove the hoop. Open up the bobbin case, and remove the bobbin. You will want to check 3 things:
- is the bobbin properly wound? -> if the bobbin thread looks loose, or not like bobbin thread, I would cut the remaining thread from the bobbin and totally re-wind, or exchange for a prewound bobbin if there is one available.
- is there thread/dirt/fluff in the bobbin case? -> if there are small amounts of thread or dust, gently clean around the bobbin area. If there is a large amount, or anything is caught, please get a member of staff and we can help. Don't unscrew anything!
- IMPORTANT: is the bobbin the correct way round? -> when you replace the bobbin in the case, ensure that it matches the direction in the picture below. This is the root of almost all beginner problems, and gladly easily resolved.
-
re-thread the top thread
This is less usually an issue, but worth checking if you've tried the other steps.
-
turn it off and on again
If none of the above approaches work, try restarting the machine. Before you do this, note down the position and stitch number in your design (if you want to continue to stitch your design) as restarting will start sewing from scratch. If this approach is effective, that's great, but let us know as it might indicate that the machine needs a service.
Using Conductive Thread
this part is yet to come as we need to do some tests! To do this, we will get hold of some conductive embroidery thread to do this -- the generic conductive thread is too thick to use on the machine.


