PEmbroider
PEmbroider is an open-source library for embroidery design, maintained by CMU's Studio for Creative Enquiry. Designs are created using Processing code, particularly the Processing Drawing API which can be used to generate embroidery designs computationally. PEmbroider is well-documented online -- this tutorial page is here to point you to existing resources, and explain a couple of foibles with the software.
For a good overview of where to start, use the PEmbroider Cheat Sheet.

Setup
Setup instructions are here. When running an example sketch, if you would like to use the design, make sure that it exports in the .PES file format, as this is the form used by the machine.
In the PEmbroider example files, the file format is always declared in the variable outputFilePath, normally in the setup() section of the code. So, to change this (e.g. in the example file PEmbroider_shape_hatching_experimental), from:
    ...
    E = new PEmbroiderGraphics(this, width, height);
    String outputFilePath = sketchPath("PEmbroider_shapes_hatching_experimental.vp3");
    ...
to:
    ...
    E = new PEmbroiderGraphics(this, width, height);
    String outputFilePath = sketchPath("PEmbroider_shapes_hatching_experimental.pes");
    ...
If you create a file in the wrong format, you can always re-run the code, but it is also possible to convert between different embroidery file formats online here.
Using PEmbroider
The full API for PEmbroider is documented here.
Setting up your sketch
Below are templates for both a looping and non-looping sketch that you can start from when creating your design.
The non-looping sketch does everything within the setup() function meaning that it runs once then produces the file whilst the looping sketch includes a draw() function that will repeat whilst the program is running.
Which one you want to use depends on how you want your code to produce the pattern. If you are using any kind of interaction, such as data from an Arduino, then the code must loop in order to use the data as it is received.
Non-looping
// Example non-looping PEmbroider program
import processing.embroider.*;
PEmbroiderGraphics E;

void setup() {

  // Starting up:
  noLoop();
  size(800, 600);
  E = new PEmbroiderGraphics(this, width, height);
  String outputFilePath = sketchPath("filename.pes");
  E.setPath(outputFilePath);
  E.beginDraw();
  E.clear();

  //-------
  // Content goes here:
  E.fill(0, 0, 0);
  E.circle(200, 200, 200);

  //----------
  // Visualization and export:
  // NOTE: Leave optimize() and endDraw() commented out,
  // until you are ready to export the embroidery file!
  // Don't forget to un-comment them when you want to export!
  //
  // E.optimize(); // VERY SLOW, but essential for file output!
  E.visualize();   // Display the embroidery path on-screen.
  // E.endDraw();  // Actually writes out the embroidery file.
}
Looping
// Example looping PEmbroider program
import processing.embroider.*;
PEmbroiderGraphics E;

void setup() {

  size(800, 600);
  E = new PEmbroiderGraphics(this, width, height);
  String outputFilePath = sketchPath("filename.pes");
  E.setPath(outputFilePath);
}

void draw() {
  background(220);
  E.beginDraw();
  E.clear();

  //-------
  // Content goes here:
  E.fill(0, 0, 0);
  E.circle(200, 200, 200);

  //----------
  // Visualization and export:
  // NOTE: Leave optimize() and endDraw() commented out,
  // until you are ready to export the embroidery file!
  // Don't forget to un-comment them when you want to export!
  //
  // E.optimize(); // VERY SLOW, but essential for file output!
  E.visualize();   // Display the embroidery path on-screen.
  // E.endDraw();  // Actually writes out the embroidery file.
}
Stitch size and spacing
Because of how Processing generates images, measurements are in pixels, not in mm -- this can make it a bit trickier to compare with other pieces of software.
In my experience, the default stitches used in PEmbroider are very small and very dense, much moreso than the defaults used by Brother software. Partly, this is a matter of taste, however, when using finer or stretchier fabrics, such tight and dense stitches can cause puckering (and these designs also take a lot longer).
This is something that's best to test out yourself and adjust, but I have included the presets I use below as a guide:
PEmbroiderGraphics E;
...

void setup() {
    ...
    E.strokeSpacing(2.0)    // this spaces the stroke (outline) stitches by 2 pixels
    E.hatchSpacing(3.0);    // this spaces hatch (fill) stitches by 3 pixels
    E.setStitch(5, 15, 0.0) // this sets minimum stitch to be 5px
                            // desirable stitch length to be 15px
                            // resample noise to be 0.0
    ...
}
(note: you set both the minimum and desired stitch length, as when embroidering curved shapes not all stitches will be the same length).
Warnings and errors
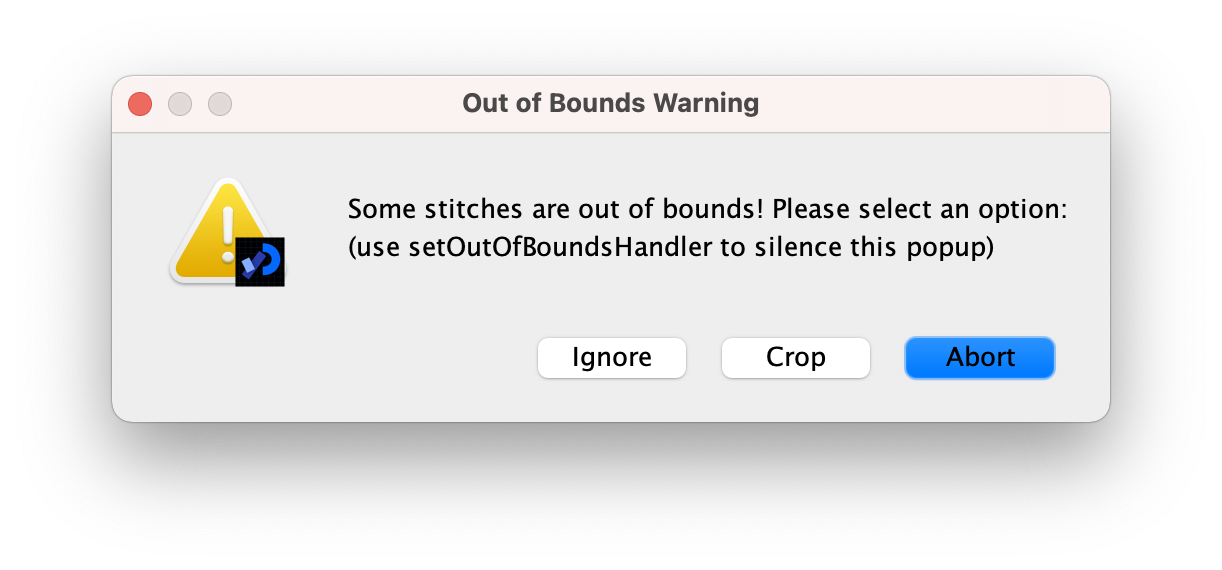
Stitches are out of bounds
A common warning is this one: it occurs when you have a design that goes right to the edge of the canvas. In my experience, so long as the design looks OK to you, this is normally fine to ignore, but it's worth making sure that the the design looks right before embroidering.
Designs don't display on the Brother embroidery machine selection menu
This only applies to the selection menu: if you click into the file, the design should show up, and the information the machine gives you about the design's size (and corresponding hoops) should be correct. If this is an issue, you can use the machine to save a copy of the file, which will be recognisable: if you are embroidering multiple designs in one session, I would recommend either doing this or giving your files distinctive names to prevent confusion.
Examples
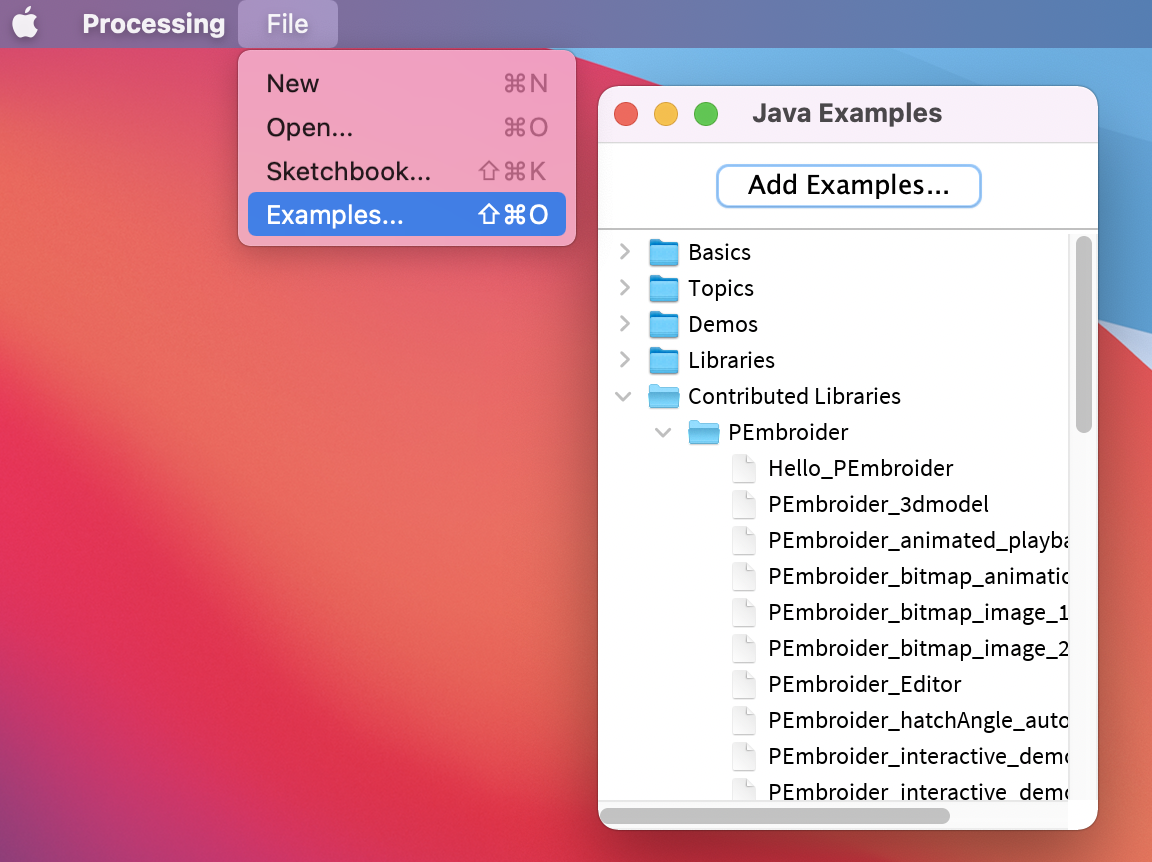
PEmbroider comes with a wide range of examples, that give a good idea of a number of different features of the machine. These are also good things to modify if you want to test out different stitch lengths and densities. Once you have installed PEmbroider, these may be accessed through the Processing examples menu. Many of these have already been stitched on the Brother machine as demos, and can be found behind the machine.
I've included some additional examples below that make use of some of the affordances of programmatic stitch generation.
Creating pixellated designs
One thing that programs like PEmbroider are particularly well adapted for is designs where the stitches need to be very precisely laid-out. It's much harder to get stitches to do what you want in software like PE Design, where you can control the parameters but not the actual stitch placement.
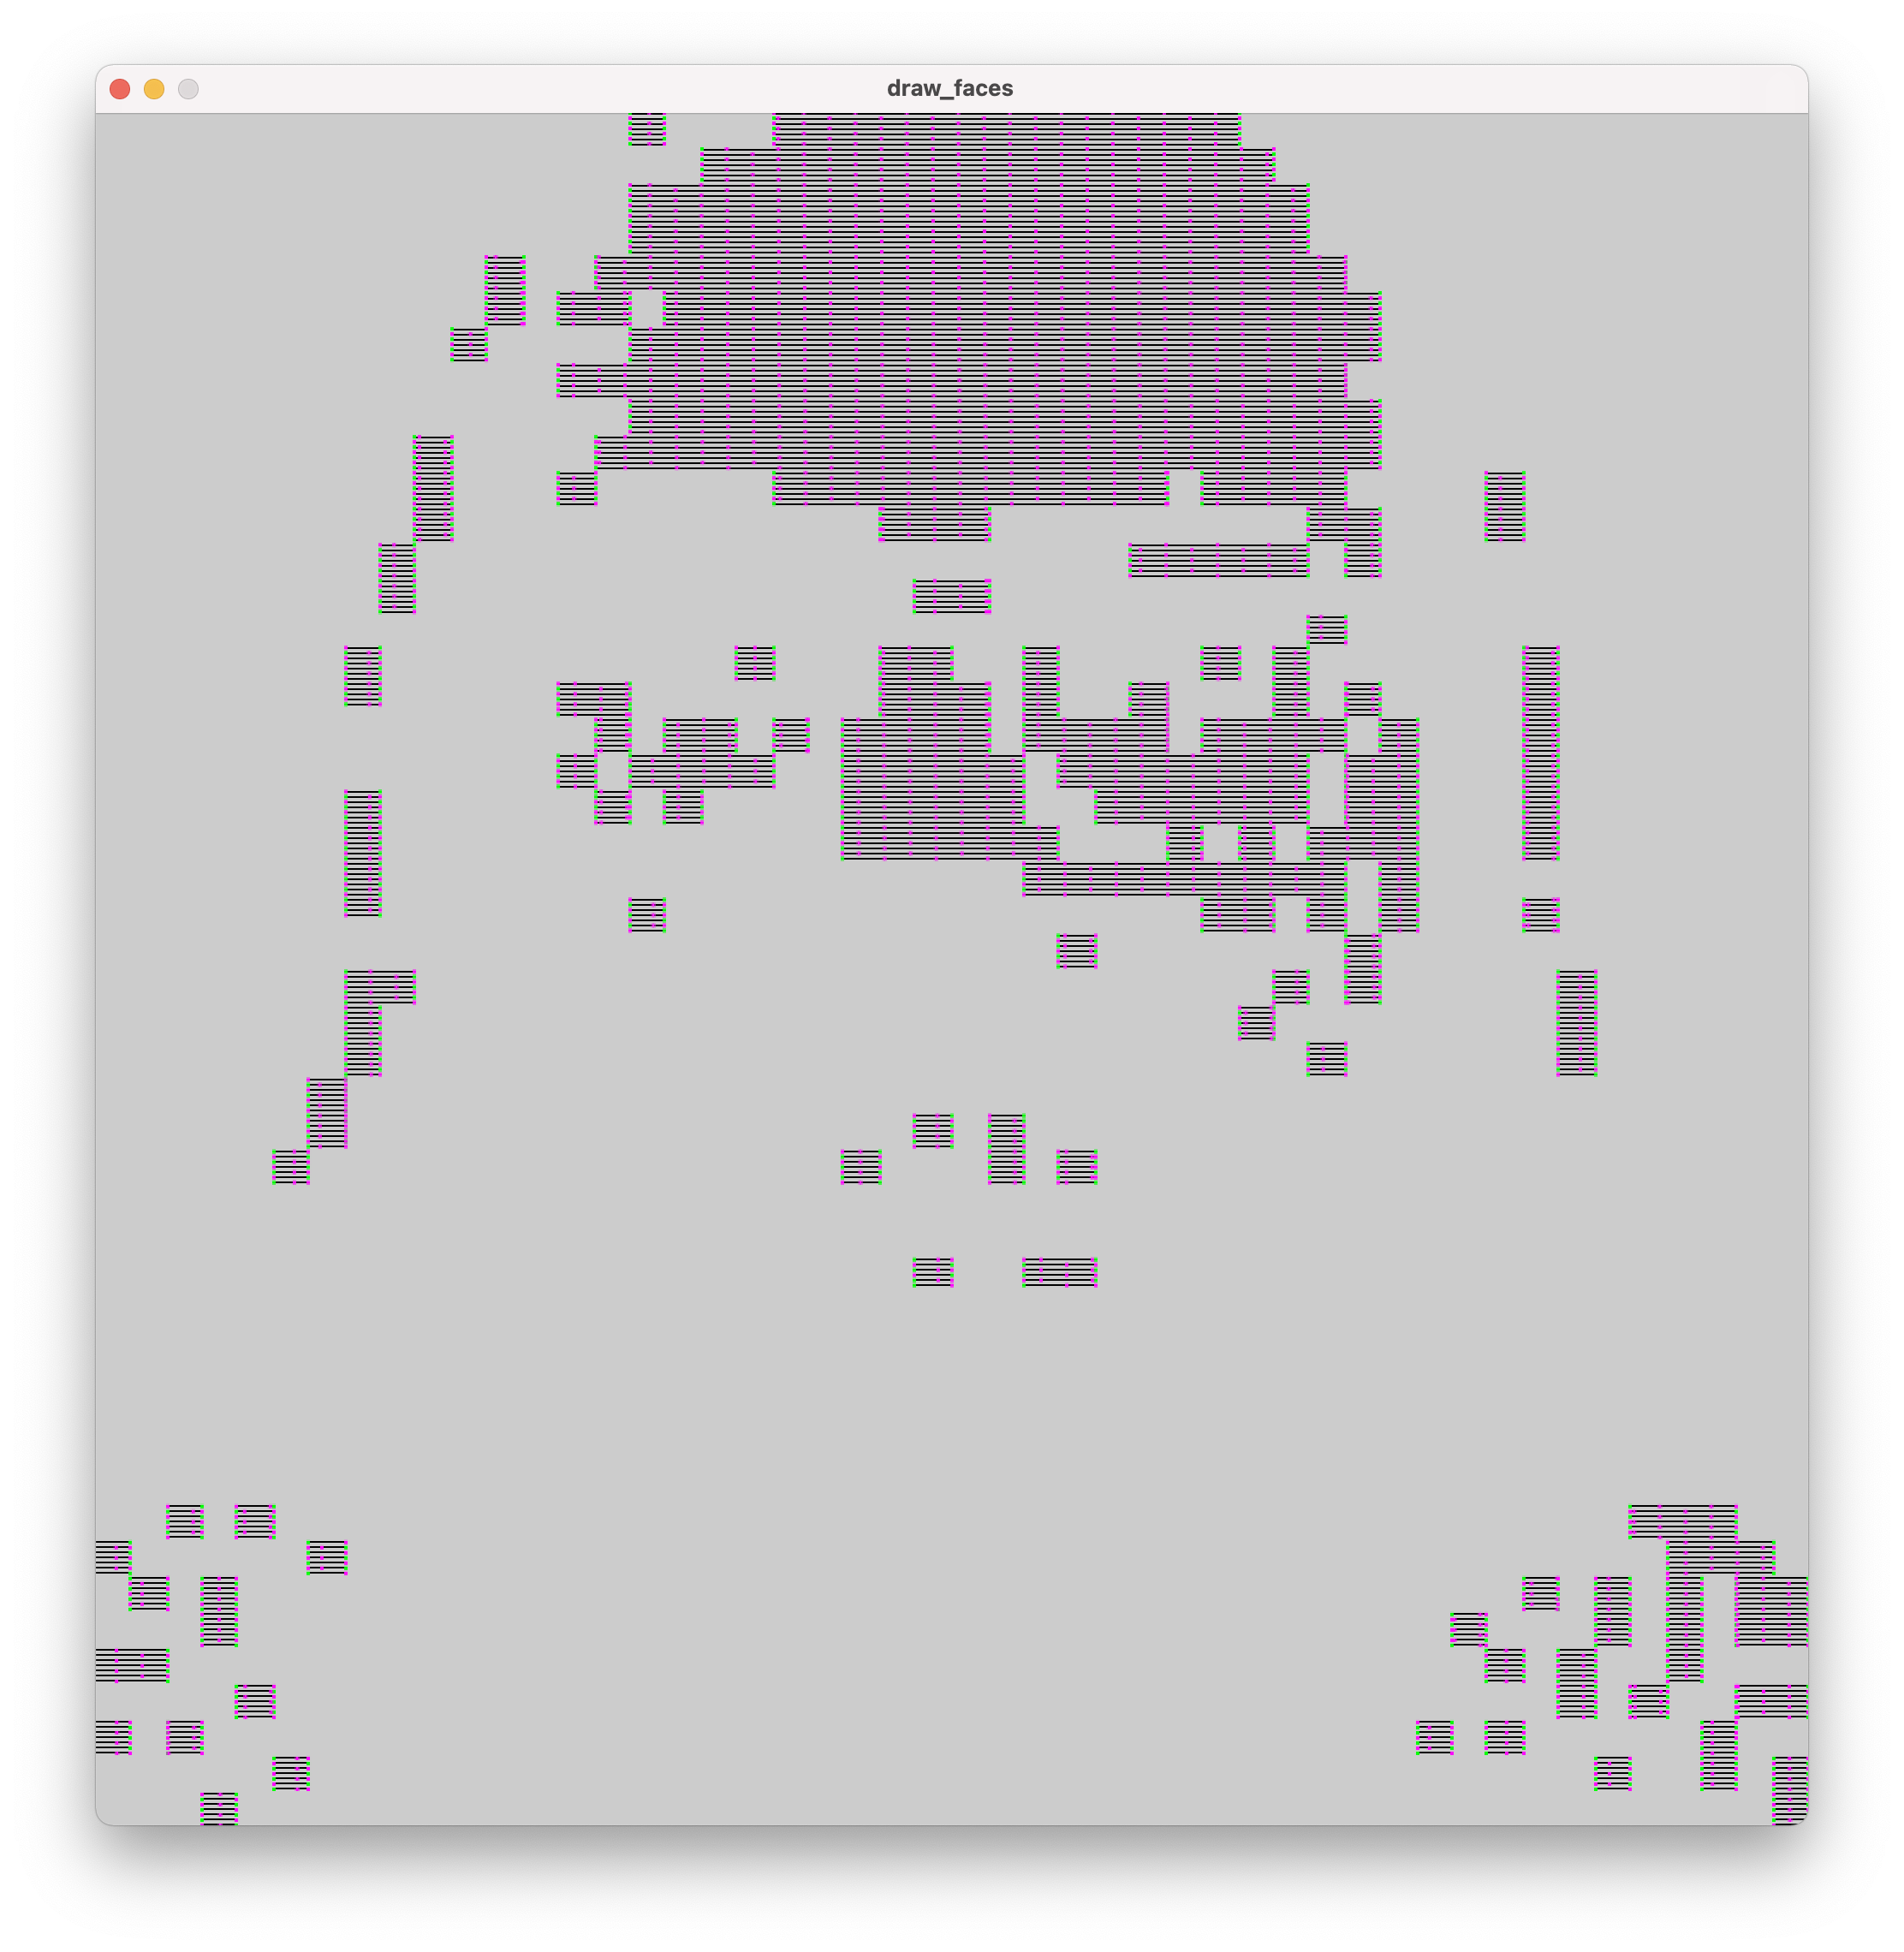
One such use-case is creating pixellated designs -- below is an example image and code that I have used in the past, that demonstrates how to manipulate stitches on a grid basis.
// PEmbroider script to stitch pixellated images
// author: Agnes Cameron

import processing.embroider.*;
PEmbroiderGraphics E;

void setup() {
  size(1000, 1000);
  noLoop();

  // Load the bitmap image to embroider.
  // Should consist of white shapes on a black background.
  PImage myImage = loadImage("ken.gif");

  // Create and configure the PEmbroider object, E
  E = new PEmbroiderGraphics(this, 1000, 1000);
  String outputFilePath = sketchPath("ken.pes");
  E.setPath(outputFilePath);

  // Initial setup of PEmbroider object.
  E.beginDraw();
  E.clear();
  E.fill(0, 0, 0); // start the design at 0
  E.noStroke();

  // Parallel hatch
  E.setStitch(5, 30, 0); //set the stitch to be the same size as the 'pixels'
  E.hatchMode(PEmbroiderGraphics.PARALLEL);
  E.hatchAngleDeg(0);   // you want to set this to 0 for a 'pixel' effect -- default is angled
  E.hatchSpacing(3.0);  // this is nice and not overly dense
  E.image(myImage, 0, 0);

  // finishes the file and shows
  E.optimize();
  E.visualize();  // show the file
  E.endDraw();    // write out the embroidery file
}
This code is created to run with a 1000x1000 .gif image, with a 'pixel' size (e.g. white squares) of
To run this code, create a folder called 'data' in the same folder as the processing file, and then save this image as 'ken.gif'. You can test this out with your own images, too.
The output should look something like this: