Using the Brother PR1055X Embroidery Machine
To use this machine, you must have had an induction from one of the technical staff. This guide is to serve as a resource for students who have already had this induction, as a reminder of setup steps and as a troubleshooting guide.
Overview
The Brother PR1055X is a top-end commercial embroidery machine that can be used to produce high-quality digital embroidery on a range of fabrics.
Embroidery machines work by moving a piece of fabric (fixed within a hoop) in the x-y direction, beneath a needle that stitches by moving up and down. In this sense, they have a lot in common with many other 2-axis CAD machines (like laser cutters, routers, plotters), though because of the paticular qualities of working with stitches as opposed to straight toolpaths, embroidery software weirdness, and working with different fabrics, there's some practice involved in getting consistent results.
This guide is a condensed overview of the machine operation -- if you'd like a more detailed reference, see the Brother PR1055X User Manual.
Producing embroidery files
In order to embroider your design, you must first create a file in the .PES format (there are other embroidery file formats, but they are not typically compatible with Brother machines). These are then loaded onto the machine via memory stick. At CCI, there are 2 main ways that this can be done:
- using the open-source PEmbroider package with Processing -> tutorial
- using Brother's PE Design 11 software
Both approaches have their advantages and disadvantages depending on the kind of design you want to make. In general, PEmbroider gives you a huge amount of control over how the design is stitched, whereas PE Design auto-generates stitches for you, allowing you to choose from a few different presets, and has a lot of features. As such, the learning curve with PEmbroider is a bit steeper, and generally requires a bit more tinkering to achieve a result, but is programmable, so can make generative designs, and can produce things that can't be made using PE Design.
As PEMBroider is just an extension of Processing, it can be run on your computer. PE Design is a piece of proprietary Windows software, for which we have one license, so it must be used on the dedicated Windows machine next to the embroidery machine. There is a Windows-only trial version available here.
Machine Setup
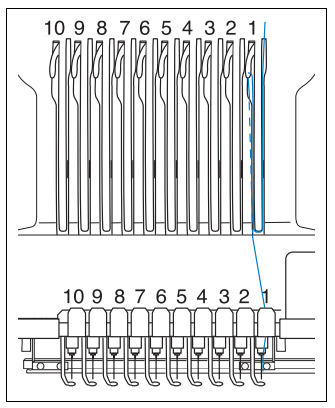
Changing the top thread
This machine can be threaded with 10 different colours at the same time meaning that you shouldn't have to change the threads very often. If you do want to change a colour, the manual has a detailed description of this process which you can find here. You can, for the most part, just copy the path of a different thread to show you where to go.
Here are some main points to remember:remember (these are not necessarily in order):
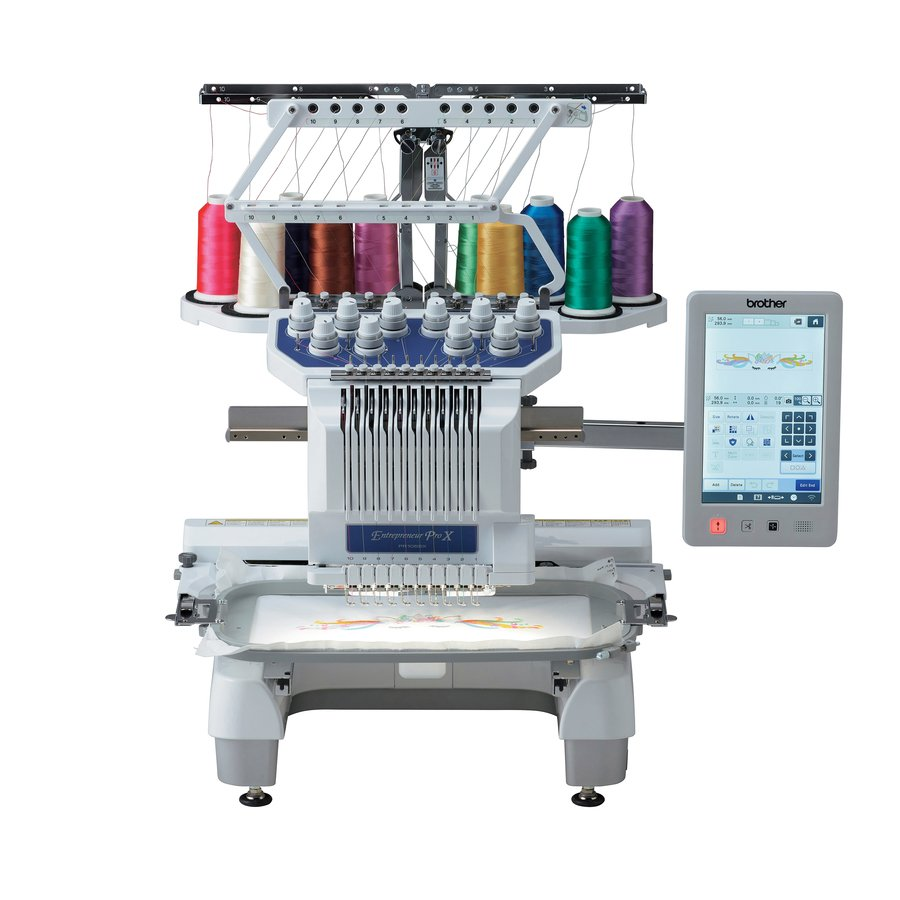
Thread tension guide
The thread tension guide has a sliding part that helps control the tension. To thread the machine you must slide this to the left to reveal the holes but remember to slide it back once you have finished threading!
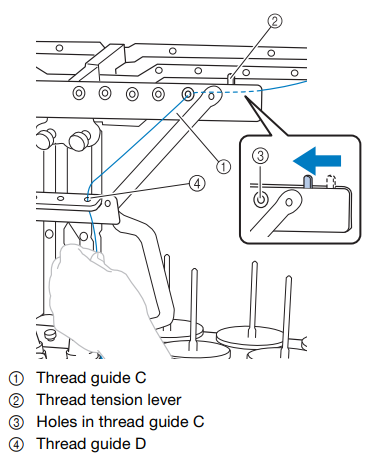
Guide Plates
Twice along the threading mechanism, there are these guide plates.

To feed the thread underneath, hold it with both hands and slide it under the guide plates from the right.
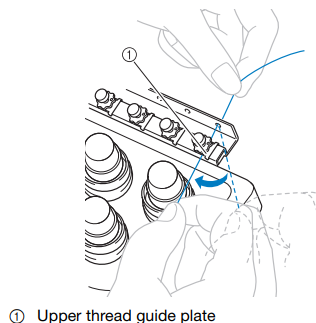
Tension Disks
Each thread has its own tension disk to be able to individually adjust the tensions. To thread it, wrap around once in a clockwise direction as shown by the arrows.
Thread guide pins
This part is very similar to a traditional sewing machine. The thread follows a path as below, going down the right hand side, scooping under and back up to feed through the take-up lever hole and back down again.
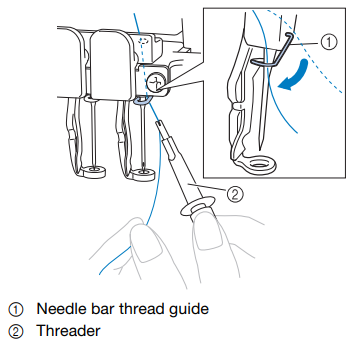
Needle Bar Thread Guide
This is definitely the most fiddly part. Using the threader tool (which should be on the magnetic strip on the wall to the left of the machine), hook the thread around the needle bar thread guide. It helps to hold the end of the thread and pull gently to get it to properly slot in.
Threading the needle
- To thread the needle, the machine must have the correct one selected. To do this, touch
 from the bottom bar menu and select the needle that you want to thread.


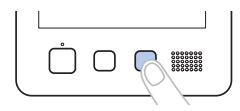
- Press the automatic threader button.
- As seen in the illustration below, pass the thread under the fork of the automatic needle threading mechanism from the right, and then catch the thread with the hook that passes through the eye of the needle.

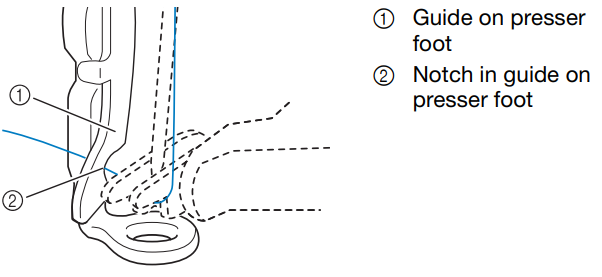
- Pass the thread under the guide on the presser foot, as seen below.
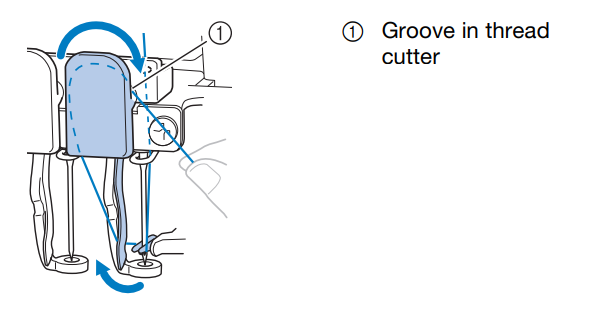
- Securely pass the thread through the groove in the thread cutter, then lightly pull the thread to cut it.
- Press the automatic needle threading button again to thread the needle!