Workshop: Generative Embroidery with PEmbroider
This is the written version of an embroidery workshop in the CCI, and can either accompany the live workshop or be worked through by itself. As we go through the exercises, it's a good idea to have the PEmbroider Cheat Sheet open in a tab for reference. These notes are also heavily adapted from the cheat sheet. This workshop is based on Carpentries format, which means that participants should code alongside whoever is running it.
Copies of the files used for each of the exercises that can be downloaded here, but I'd recommend trying to generate the files yourself where possible.
1. Hello World: Drawing a Line
Follow the instructions here to set up PEmbroider on your computer. You will need Processing 4. The first thing we will do in PEMbroider is draw a single line, which we can also use to test everything is working correctly.
Template File
All files in PEmbroider have a similar structure, and the cheat sheet helpfully provides a template, which I've adapted slightly to match the file format we use in the CCI. We'll be using this as the basis for all the files in the workshop. This file draws a single line, but we can change that to anything we like.
// Example PEmbroider program
import processing.embroider.*;
PEmbroiderGraphics E;

void setup() {

  // Starting up:
  noLoop();
  size(600, 600); // 100 is 1cm
  E = new PEmbroiderGraphics(this, width, height);

  // change this line you want a different file type
  String outputFilePath = sketchPath("filename.pes");
  E.setPath(outputFilePath);
  E.beginDraw();
  E.clear();

  //-------
  // Content goes here:
  E.line(0, 0, 600, 600);

  //----------
  // Visualization and export:
  // NOTE: Leave optimize() and endDraw() commented out,
  // until you are ready to export the embroidery file!
  // Don't forget to un-comment them when you want to export!
  //
  // E.optimize(); // VERY SLOW, but essential for file output!
  E.visualize(true, true, false);   // Display the embroidery path on-screen.
  // E.endDraw();  // Actually writes out the embroidery file.
}
In order, this file:
- sets up a new canvas, of size 600x600 pixels
- tells the computer that it's an embroidery canvas, and sets an output file path
- draws a line on the canvas
- shows it to us (visualize) -- the
true, true, falsepart tells the computer whether to draw colours, stitches and the routes taken by the machine. I prefer these settings but they can all be helpful
There are some other lines that are 'commented out' (have slashes in front of them) and don't run. These we might use later but for now we don't need to use them.
When you run this file, you should see an output that looks like this (if you don't see this, you will want to check over the setup steps again):
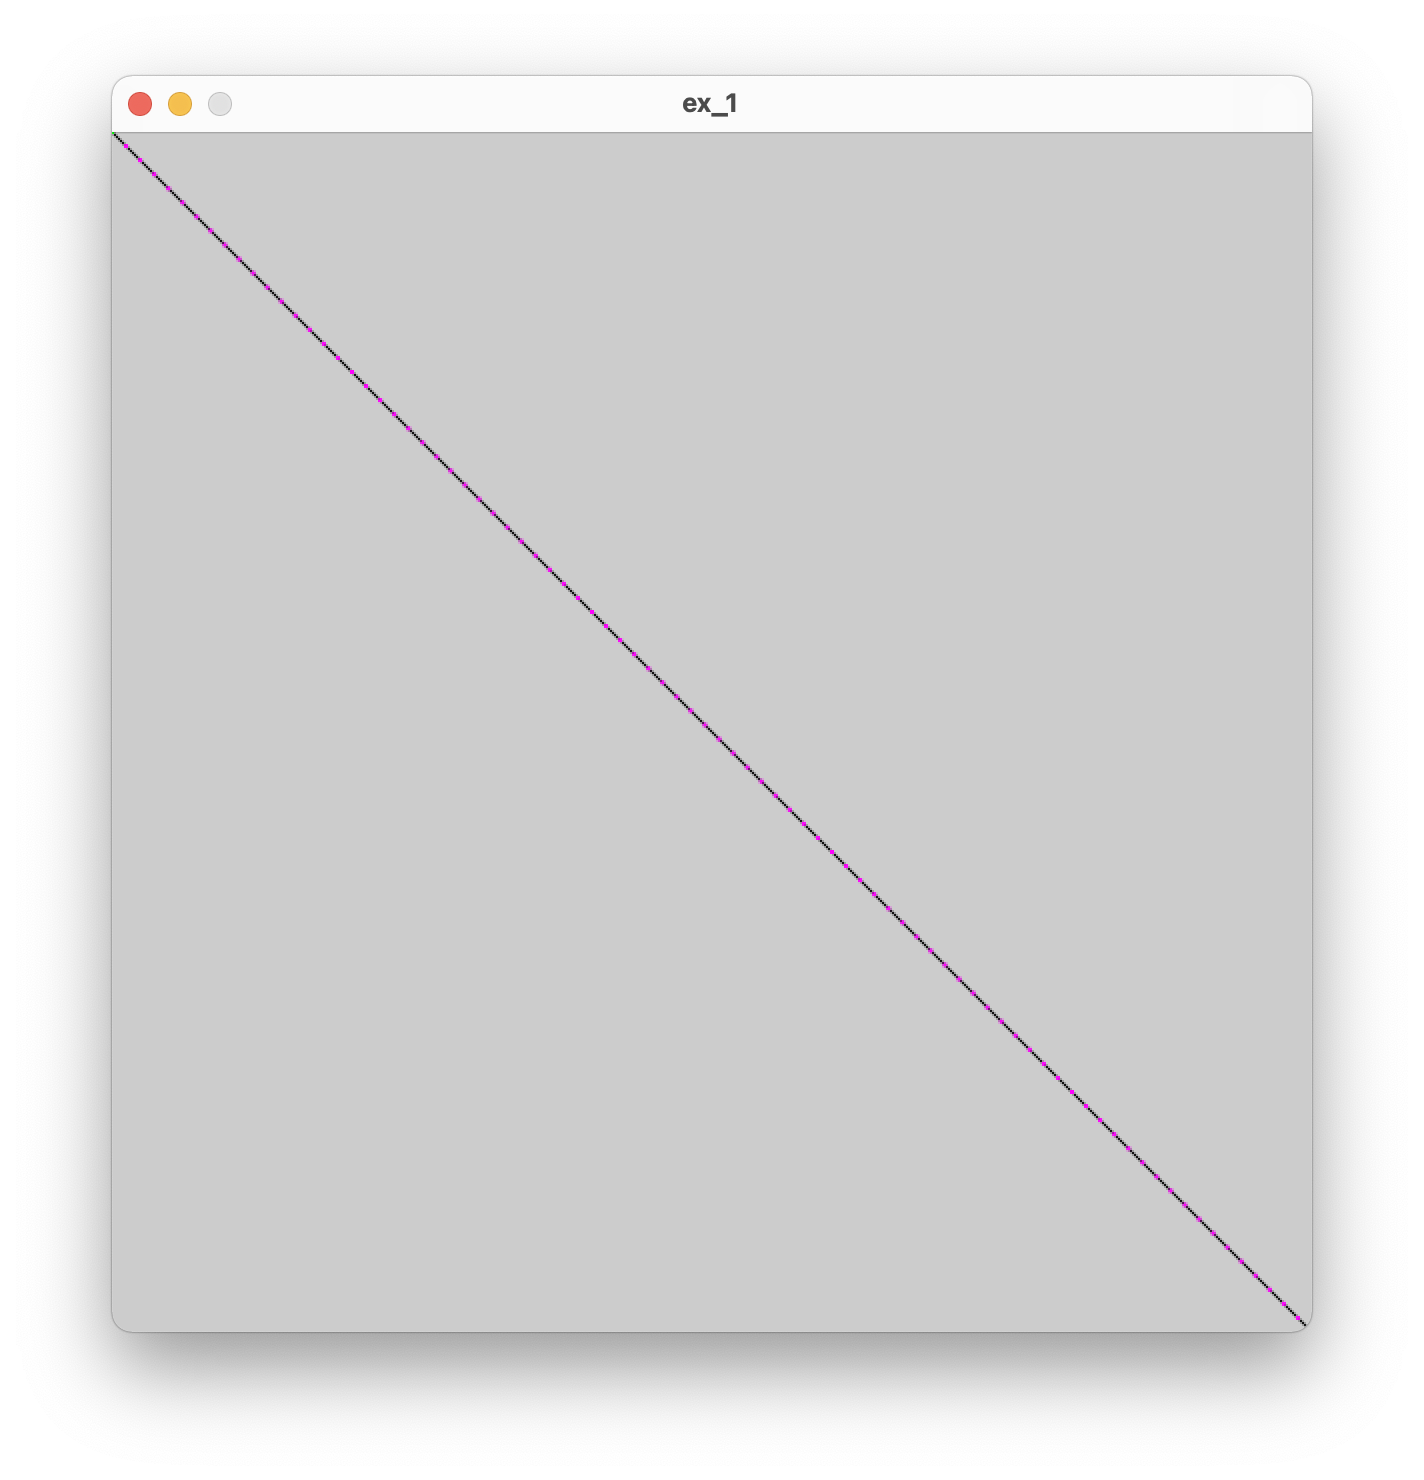
The pink dots represent the ends of stitches, where the needle enters the fabric. Shortly we will experiment with different stitch types and lengths, but for now we are using the default settings.
The first thing we will look at is the structure of the canvas. If you like, you can also try 'commenting out' the content line, to just see a plain canvas.
Exercise 1.1
- Can you make the canvas larger?
- Can you make the canvas rectangular rather than square?
Drawing lines
The PEmbroider code for drawing a line is:
E.line(x1, y1, x2, y2);
This means that (x1, y1) is the coordinates of the point where the line starts, and (x2, y2) is the point where the line ends. The E.line() part means "use the line function that belongs to PEmbroider, which is represented in our code by the letter E". We call this a 'method' In our code, we get a diagonal line because we draw from the point (0, 0) to the point (600, 600) (the edge of the canvas).
Exercise 1.2
- Can you make the line draw only halfway across the original canvas?
- Are you able to draw a vertical line? What about drawing 2 lines?
You might find these notes on coordinate grids in Processing helpful here!
2. Playing with shapes
From now on, unless we're changing more of the file, I'm going to list just the 'content' code that we're changing, using ... to represent the rest of the file. In our last exercise, the content was a single line -- the E.line() method -- but it can be more -- the important part is that it goes in the same place in the file each time.
Try changing out the line for a circle:
...
E.circle(200, 200, 200);
...
You should see a slightly off-center circle. In the documentation, the E.circle() method is listed as:
E.circle(x, y, r);
Exercise 2.1
- What do you think
rrepresents in this method? - Can you place the circle in the center of the canvas? What about a circle that fills the whole canvas?
- The PEmbroider method for drawing a rectangle is
E.rect(x, y, w, h);. Can you replace the circle-drawing line with a line that draws a rectangle instead? What do you thinkwandhrepresent?
Composite Shapes
PEmbroider also allows us to merge outlines to make composite shapes. This can quickly allow us to create more complex drawings. In this example, we merge together 2 circles:
...
E.beginComposite();
  E.composite.circle(320, 250, 200);
  E.composite.circle(420, 250, 200);
E.endComposite();
...
Exercise 2.2
- Experiment with changing the size and the position of the circles. What happens when you make one of the circles very large?
- Try adding a third circle. Can you make a clover shape? What about a snowman?
- What happens when you move the line
E.composite.circle(420, 250, 200);to after the lineE.endComposite();? Why do you think that happened? - Can you make a composite from a rectangle and a circle? Do you need to add anything to the original rectangle-drawing method?
- The PEmbroider method for drawing a triangle is
E.triangle(x1, y1, x2, y2, x3, y3);. Can you make a composite shape from a triangle and a circle? - Can you draw 2 separate composite shapes on the same canvas?
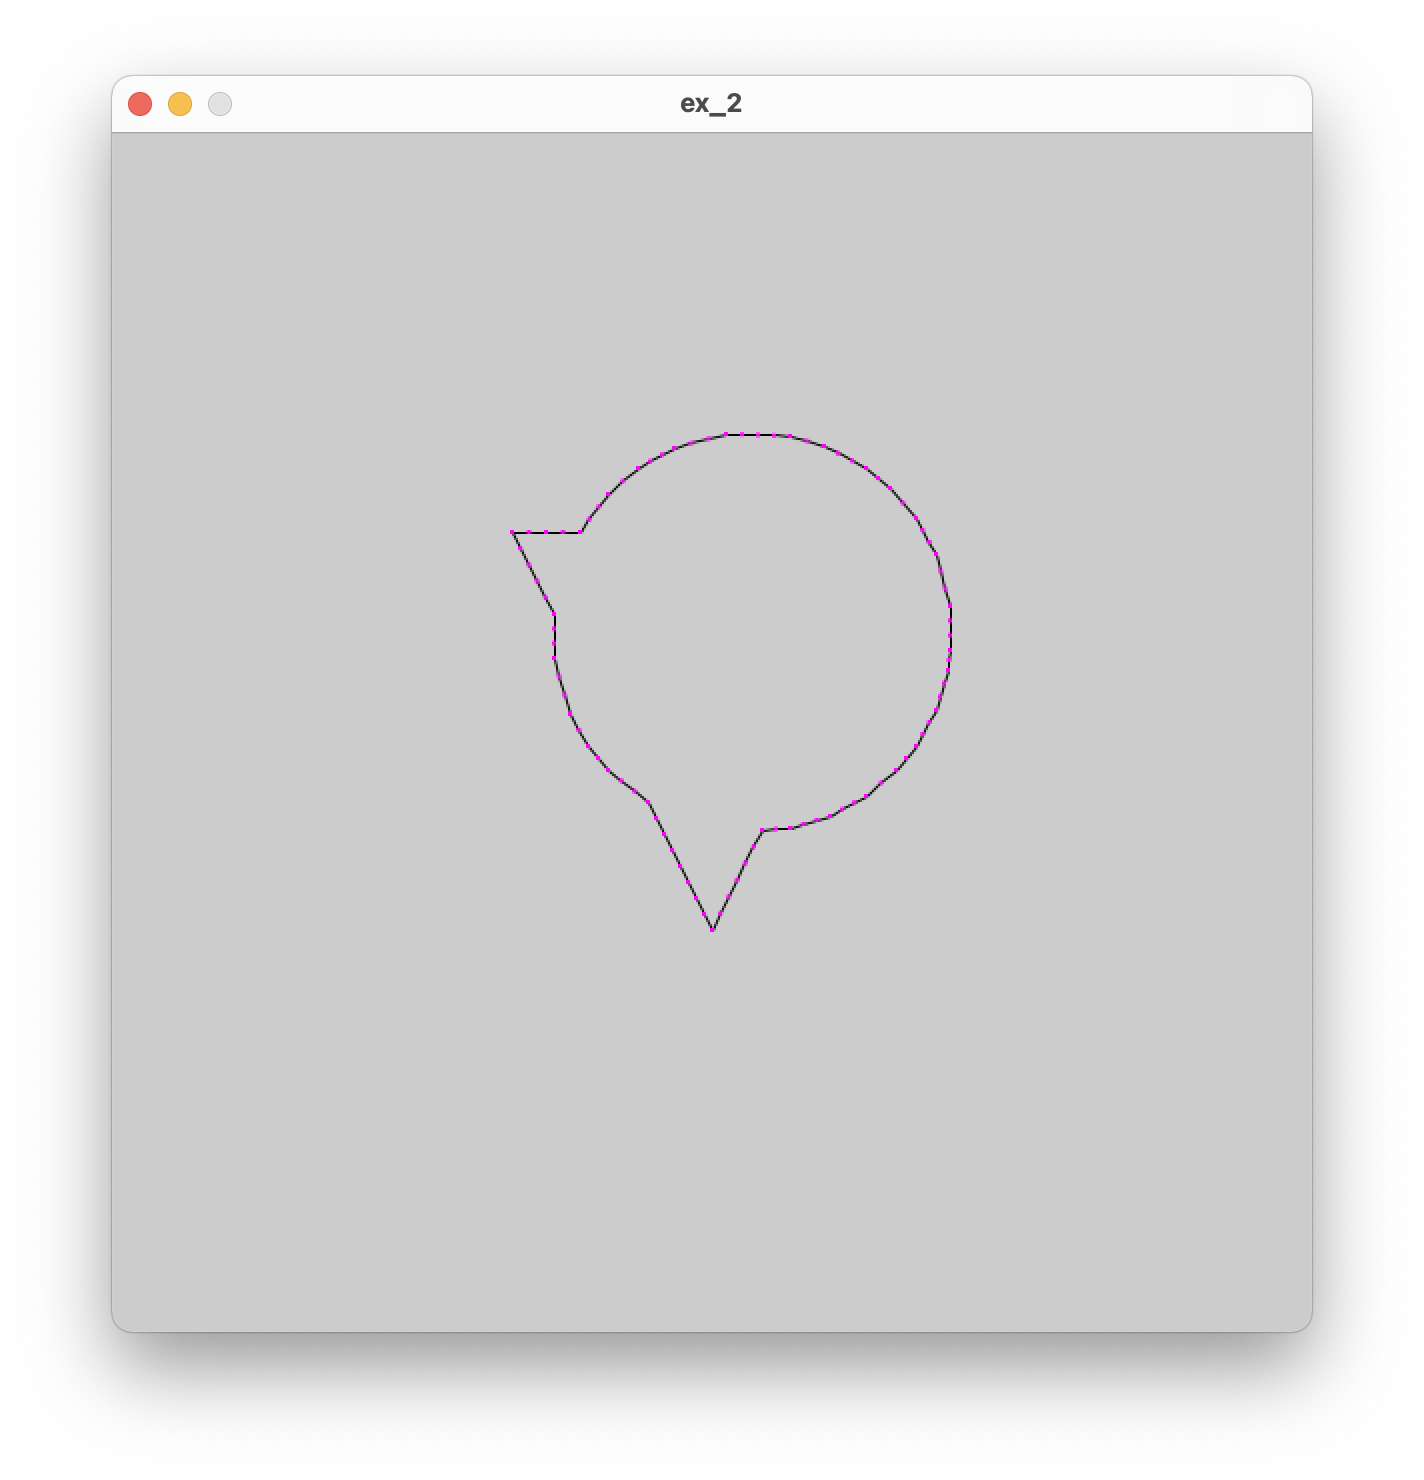
here's one I made earlier:
3. Fills and Hatching
Up until now, all the shapes we've been drawing have been outlines. PEmbroider supports several kinds of fills, which we will experiment with now. The way settings work in PEmbroider (and in Processing!) is that you set a bunch of settings, then draw the thing you want the settings to apply to, and then if you want to draw something with different settings, you change the settings and then draw the thing. For example, the order you'd do things if you wanted to draw a red square and a blue square would be:
> set fill to red
> draw square
> set fill to blue
> draw square
In our case, what this means is that if we add some code that adjusts the fill settings, this needs to go before the part where we draw our shape. Let's try drawing a filled circle:
...
E.hatchMode(E.PARALLEL);
E.fill(0,0,0);
E.circle(300, 300, 200);
...
Fill Types
There are 6 different fill types in total in PEmbroider. These can each be set using the following lines of code:
    E.hatchMode(E.CONCENTRIC);
    E.hatchMode(E.PARALLEL);
    E.hatchMode(E.SATIN);
    E.hatchMode(E.SPIRAL);
    E.hatchMode(E.PERLIN);
    E.hatchMode(E.CROSS);
Exercise 3.1
- Instead of drawing a circle, try and fill one of the shapes you made in the last exercise
- One at a time, try out the different fill types on your shape. Which is your favourite?
Fill Settings
As well as being able to change the type of fill, it's also possible to change the fill settings, namely the spacing of the fill lines, the colour of the fill, and the angle of the fill lines (for satin and parallel fills, where the lines have a prevailing angle).
We can do this using the same principles as before (e.g. putting the settings before the thing we want them to apply to). The methods to adjust the settings are listed below (note that we always need to specify a fill colour, even if it's just black):
E.hatchSpacing(spacing); // sets the density of adjacent runs (in machine units)
E.hatchAngleDeg(angle);  // sets the orientation for SATIN & PARALLEL (in degrees)
E.fill(R, G, B);         // sets your thread color (numbers between 0-255)
Exercise 3.2
- Try making one shape with a diagonal hatch fill, and another with a vertical fill. What happens when you place them on top of each other?
- What happens when you adjust spacing on concentric mode? What about Perlin mode?
- To un-set fill settings, you can use the line
E.noFill(). Can you use this line to make some code that draws a filled shape, and then draws an outline shape afterward?
Another really important line is the setStitch() property. This sets the length of the stitch. Unlike hatch spacing, setStitch takes 3 arguments:
E.setStitch(minLength, desiredLength, noise);
- minLength: the shortest the stitch can possibly be
- desiredLength: what length most stitches should be
- noise: how much this should vary (e.g. should the stitches be very even). The noise property changes the texture of fills significantly.
Exercise 3.3
- experiment with modifying the stitch lengths in your fills
4. Stroke and Stitch Settings
The final group of settings we're going to look at is modifying the stroke (line) style. Similarly to fills, you need to modify the settings before drawing your line.
There are 2 stroke types in PEmbroider; tangent is the one we've been using by default, but perpendicular can be used to get a thicker, more defined outline.
E.strokeMode(E.PERPENDICULAR);  // Stitches are perpendicular to the stroke
E.strokeMode(E.TANGENT);         // Stitches go in the same direction as stroke
As before, stroke color can be set using RGB values. The other settings are the thickness of the line (stroke weight) and the stroke spacing (e.g. for perpendicular strokes).
E.stroke(R, G, B);         // sets the stroke color, just like Processing.
E.strokeWeight(width);     // sets the thickness of the stroke (in machine units)
E.strokeSpacing(spacing);  // sets the density of the hatching within the stroke
Exercise 4.1
- create a file with 4 different lines, each with different stroke settings. How much variation can you get?
5. Loops and Randomness
Now we have a good idea of what you can do with PEmbroider's API, we can try out some generative code.
For loops
For loops are structures that allow the same piece of code to be repeated multiple times with different inputs. We will have a go with them here, but for a full tutorial it's worth going through this page on for loops in Processing.
We're going to try out a for loop that repeatedly draws lines on the canvas, changing the position of the line each time it draws.
...
for (int i = 1; i < 10; i++) {
	E.line(50, i*50, 550, i*50);
}
...
In this code, we create a number, i, that will go from 1 to 10, increasing every time. The first time the code runs, i is equal to 1, and so i*50=50. The next time, i=2, so i*50=100, and so on, up till i reaches 9. i cannot reach 10 (as the code will only run for i<10) and so the for loop ends.
Exercise 5.1
- What happens when the number multiplying
iis different fory1andy2? - Can you make a series of vertical lines instead of horizontal lines by changing where
iis used? - Can you draw a grid?
- What happens when you increase and decrease the number of repeats (e.g. the number 10 in the example)
- Experiment with using
iin different positions. What happens when you add or subtract it (or multiples of it)? Can you make a radial pattern?
Random numbers
Another very useful tool for making generative patterns is randomness. Unlike the code we were using before (which used scaled variations where we could predict what the outcome would be), randomness adds an element of chance. In Processing, the function random(50) will return a random number between 0-50. This number will be a decimal (float) rather than a whole number (int), so if we want to use it like a whole number we also need to use the int() method.
...
for (int i = 1; i < 10; i++) {
	E.circle(50 + i*50, 100, int(random(50)));
}
...
Exercise 5.2
- Run this code a few times. What do you notice? What is being randomly varied?
- What happens when you add a number to the random number? What if you multiply it by something?
- Can you make the randomness affect the y position?
Nesting for loops
The last thing we will look at is using 2 nested for loops to create 2D designs. This isn't the only way to achieve this -- remember the grids from exercise 5.1 -- but this will help us a lot.
Before we get there, we could also look at what happens when we nest for loops inside other things, in this case, the composite shapes code from before.
...
  E.beginComposite();
  for (int i = 1; i < 10; i++) {
    E.composite.circle(50 + i*50, 100, 50 + int(random(50)));
  }
  E.endComposite();
...
By putting the for loop inside E.beginComposite(); and E.endComposite();, it's the same (from the point of view of the computer) as writing 10 separate composite circle lines, but for us it's a whole lot quicker.
and look! A beautiful worm:
We can use the same principle to put one for loop inside another:
  for (int i = 1; i < 10; i++) {
  	for (int j = 1; j < 10; j++) {
    E.circle(i*50, j*50, 50 + int(random(50)));
    }
  }
Now we get a whole grid of circles!
Exercise 5.3
- You can also use
random(-60, 60)to generate a number that can be positive or negative. Try using this in one of the position values. - Have a go at making these circles into a composite shape. What happens when you change the numbers that are multiplied and added? Have a go at playing with these till you get an image that you like.
- Can you do this with a different shape? What about triangles?
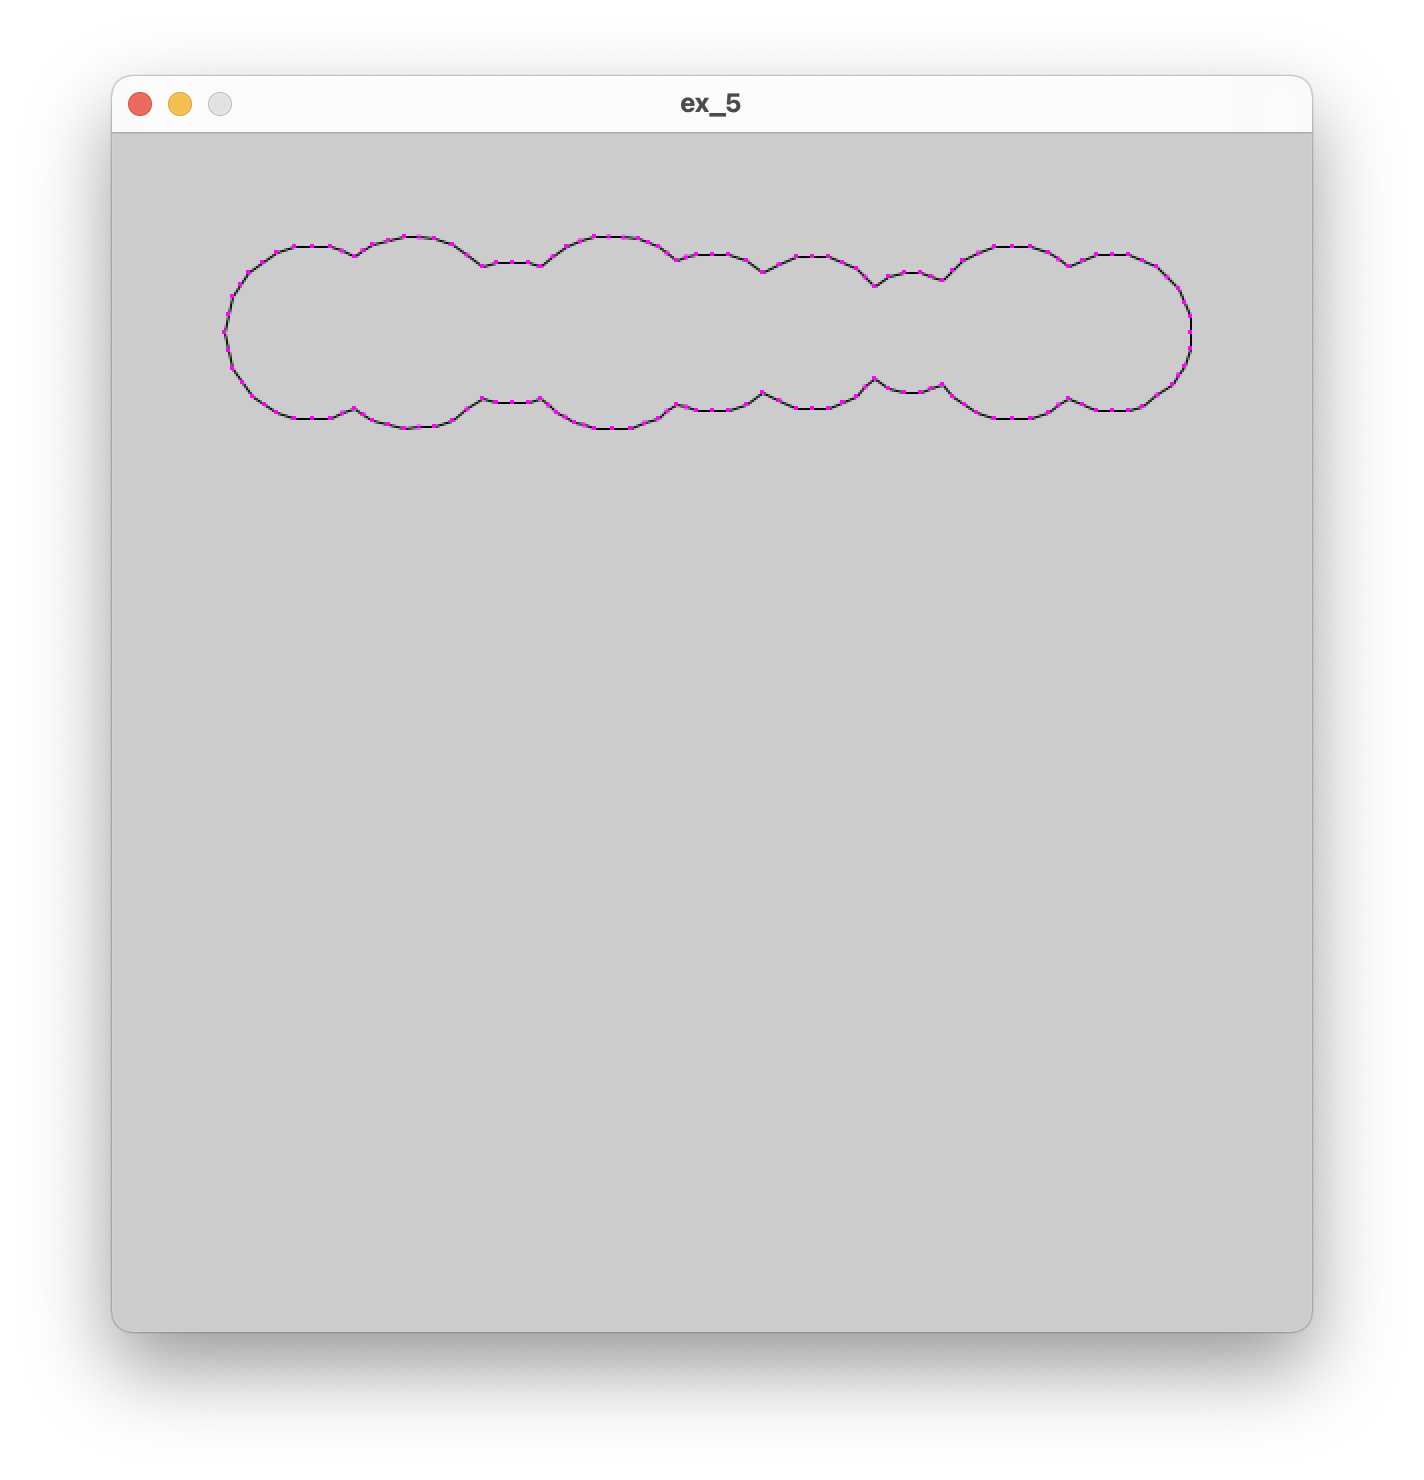
Here's one I made earlier:
6. Polylines and curves
As well as having preset shapes, PEmbroider (like Processing) supports making custom shapes by defining a set of points along a line. To start one of these shapes, you need to bookend the line with:
E.beginShape();
	// ...points
E.endShape();
If the final co-ordinate matches the first co-ordinate, we can also fill the shape: if not, it's just a stroke. Polylines are also great as within the line the machine doesn't need to make a jump; this is helpful for avoiding too many floats later on.
Each point on the line is given by E.vertex(x, y), a single point in space. To draw a spiky shape, we can draw a bunch of points:
E.beginShape();
	E.vertex(10,10);
	E.vertex(500,50);
	E.vertex(450,250);
	E.vertex(350,140);
	E.vertex(200,300);
	E.vertex(10,10);
E.endShape();
Exercise 6.1
- Have a go at making a shape of your own: can you make a 5-pointed star? Can you add a fill?
Curves
There are a number of different ways to render curves in Processing, which inherit from the different curve-drawing techniques in computer graphics. These are: arcs, splines and Bézier curves. The Processing curves tutorial has a good summary of this:
- Use
arc()when you need a segment of a circle or an ellipse. You can't make continuous arcs or use them as part of a shape. - Use
curve()(the spline function) when you need a small curve between two points. UsecurveVertex()to make a continuous series of curves as part of a shape. - Use
bezier()when you need long, smooth curves. UsebezierVertex()to make a continuous series of Bézier curves as part of a shape.
The tutorial gives a great overview of the different types and I'd recommend experimenting with all of them.
7. Generating embroidery from data
Processing allows data to be loaded in CSV and JSON formats. For this exercise, we're going to use NASA's Land Ocean Surface Temperature dataset, which gives the mean global temperature since 1880 till present-day. To do this task, I have created a folder called datasets within the processing sketch folder, and created a file inside that called temp.csv.
First, make an empty sketch and try to read in the data from the .csv file:
Table table;

void setup() {

  table = loadTable("datasets/temp.csv", "header");
  println(table.getRowCount() + " total rows in table");

  for (TableRow row : table.rows()) {

    int year = row.getInt("year");
    float temp = row.getFloat("unsmoothed");
    println("year " + year + " temp " + temp);
  }
}
You should see the data from the csv printed to the terminal.
The for loop that starts for (TableRow row : table.rows()) is where we're going to use our values. First, we can try a simple example of drawing circles for each entry in the table, with the radius proportional to the temperature. As some temperature values are negative, we will need to adjust these up.
We want to add the embroidery template setup before the table is created (and also E.optimize()) after! To draw our circle, we can add directly to the for loop:
...
  for (TableRow row : table.rows()) {

    int year = row.getInt("year");
    float temp = row.getFloat("unsmoothed");
    float radius = (temp + 1.0)*45;
    E.circle(100, 100, radius);
  }

...
This code will create all the circles drawn in the same place. Ideally we'd like to space them out! We can do this by adding a counter:
...
  int counter = 0;

  for (TableRow row : table.rows()) {

    int year = row.getInt("year");
    float temp = row.getFloat("unsmoothed");
    float radius = (temp + 1.0)*45;
    E.circle(100, counter*20, radius);
    counter = counter + 1;
  }

...
7.1 Creating a grid from linear data
An issue we have here is that the data comes as one long list, which makes it hard to generate a tractable embroidery file. There are a number of ways around this, one of which is to use the modulo operator. This gives you the remainder when a number is divided by another number. This means, we can define a row length and count along our dataset in rows.
  ...
  int counter=0;
  int rowLength = 13;
  int spacing = round(900/(rowLength));

  for (TableRow row : table.rows()) {
    int i = counter % rowLength;
    int j = floor(num/rowLength);

    int year = row.getInt("year");
    float temp = row.getFloat("unsmoothed");
    float radius = (temp + 1.0)*45;

    E.circle((i+1)*spacing, (j+1)*spacing, radius);

    counter=counter+1;
  }
  ...
8. Tips, notes, further reading and extension exercises
We've scratched the surface of PEmbroider's full capabilities, which include things like image imports, interpolation, clipping and more.
8.1 Saving files + naming
To save the file as an embroidery file, you need to
String outputFilePath = sketchPath("triangles" + str(int(random(0, 100))) + ".pes");
8.2 Scale, density and stitch sizing
I personally find PEmbroider's presets a bit dense, and think they make for quite tough-feeling embroidery. My main recommendation is to make a sample sheet where you experiment with different fill densities, stitch lengths and stroke widths till you find some you like, but failing that, my defaults are:
    E.strokeSpacing(2.0)    // this spaces the stroke (outline) stitches by 2 pixels
    E.hatchSpacing(3.0);    // this spaces hatch (fill) stitches by 3 pixels
    E.setStitch(5, 30, 0.0) // this sets minimum stitch to be 5px
If you want to use these throughout, just stick this above the 'content' section of your file.
Extension exercises
- Have a go at using randomness to control the fill, colour, and spacing properties of different shapes.
- Take a look at the
shape_cullingexample in the PEmbroider examples folder. Have a go at using your favourite of the culling options on different overlapping shapes. Can you add composite shapes to their code? How do they compare? - Take a look at the
hatchangle_autodemo. What lines are they using to follow the mouse? Could you use those numbers to generate other things?