Ruby: Prepare Screen
Once you've pushed your design over to the Prepare Screen you'll see it sitting in the working area. This area shows the entire working area of the laser bed, with the top left corner reprisenting the back left of the laser cutter bed.
When the machine is running you'll find the red dot laser position matches an icon on the work area in this screen.
This screen will allow you to take one or more designs and position them onto a material in the working area ready to be lasered.
Typically you would come to this screen by pressing "Create Job" on the Design Screen, but you can also create a new job and then add designs from your library directly into a job.
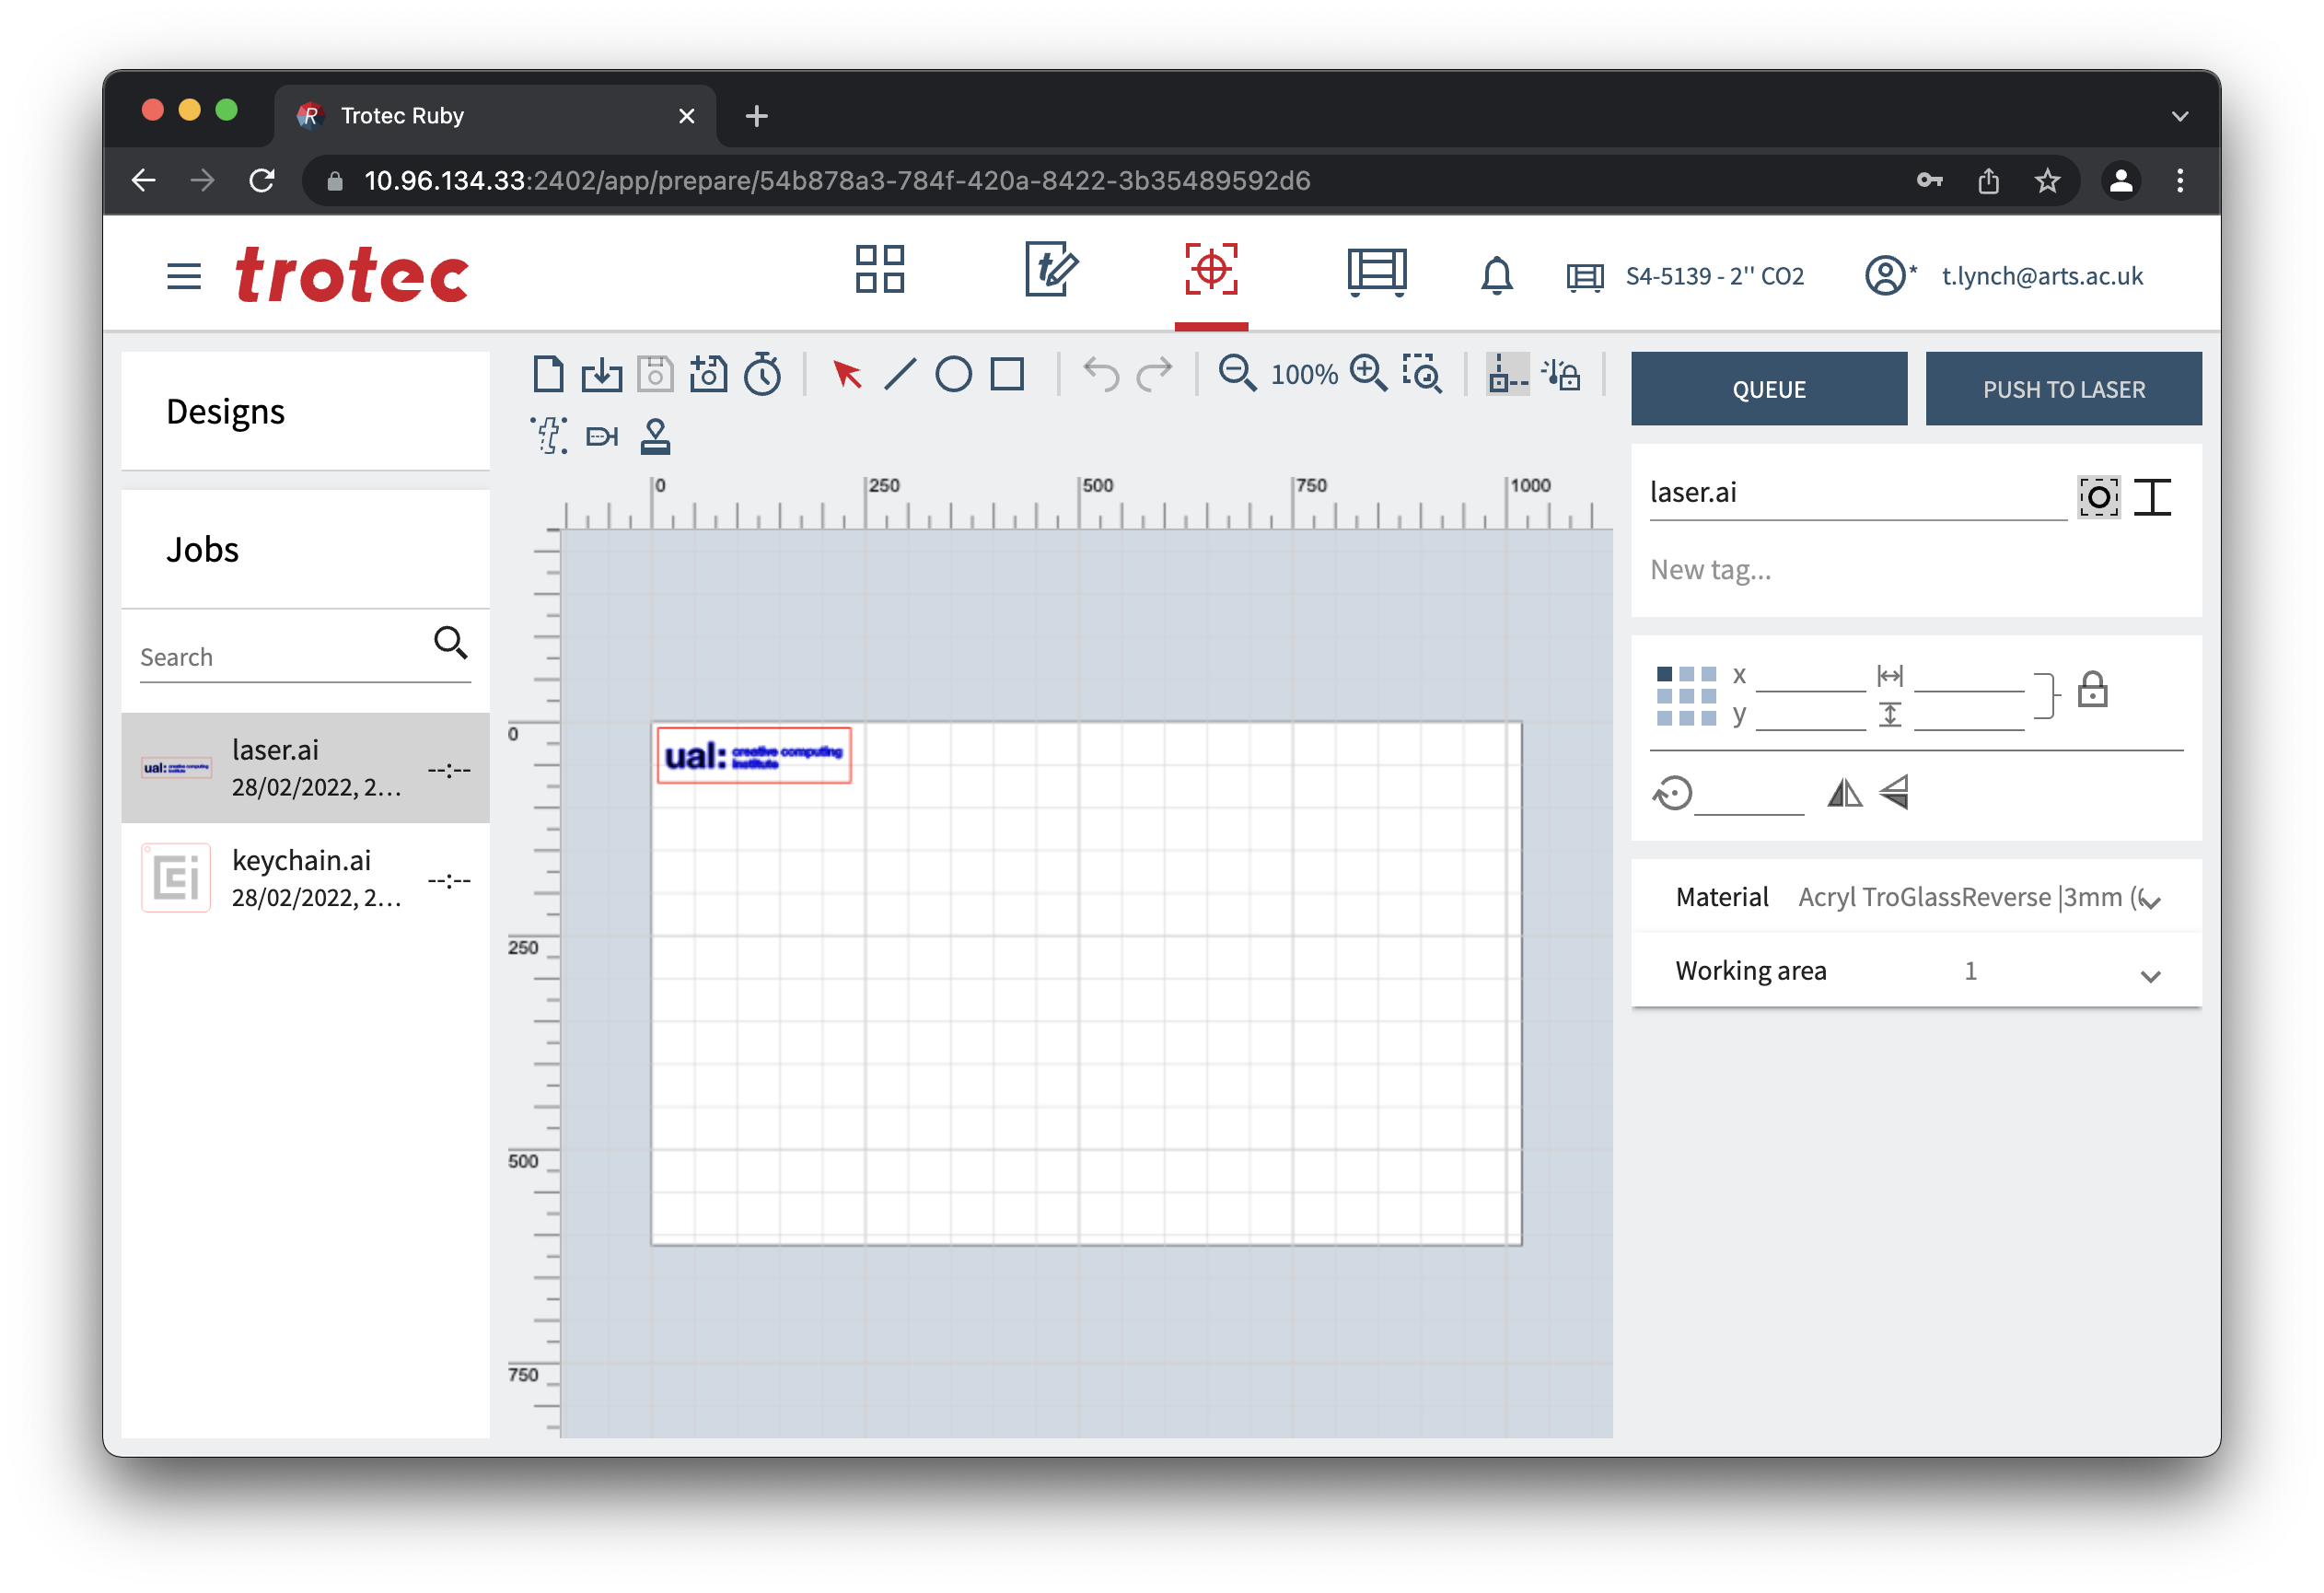
The Prepare Screen is split into 3 columns:
- Left: Browsers
- Top: Design browser
- Bottom: Job browser
- Middle: Work area
- Top: Toolbar
- Bottom: Working area
- Right
- Top: Job name and tags
- Middle: Design parameters
- Bottom: Materials and list of designs included in the job
Toolbar
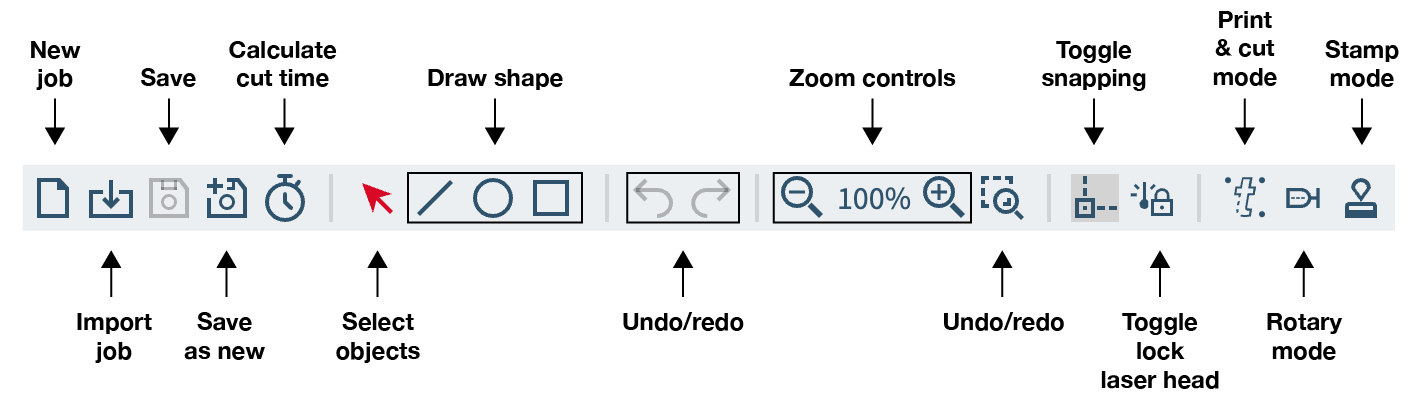
- New job - Create a new job.
- Import job - Upload a file from your computer.
- Save - Save the open job. Greyed out means there are no changes to save.
- Save as new - Save the open design as a new job.
- Calculate cut time - Calculated how long the job will take.
- Select objects - Switches the active tool select objects.
- Draw shape - Switches the active tool to draw the selected shape.
- Undo/redo - Undo the previous action or redo it. Greyed out means there are no further undo/redo steps available.
- Zoom controls - Zooms the viewport in and out on the job.
- Zoom selection - Lets you draw a selection box to zoom into.
- Toggle Snapping - Toggle object snapping.
- Toggle lock laser head - We're not sure what this does.
- Print & cut mode - Used with the computer vision camera attachement.
- Rotary mode - Used with the rotary engraver attachement.
- Stamp mode - Used when creating a stamp.
Adding a design
If your design isn't on the working area open the designs browser on the top left, and drag the design(s) out into the working area where you want them.
Positioning a design
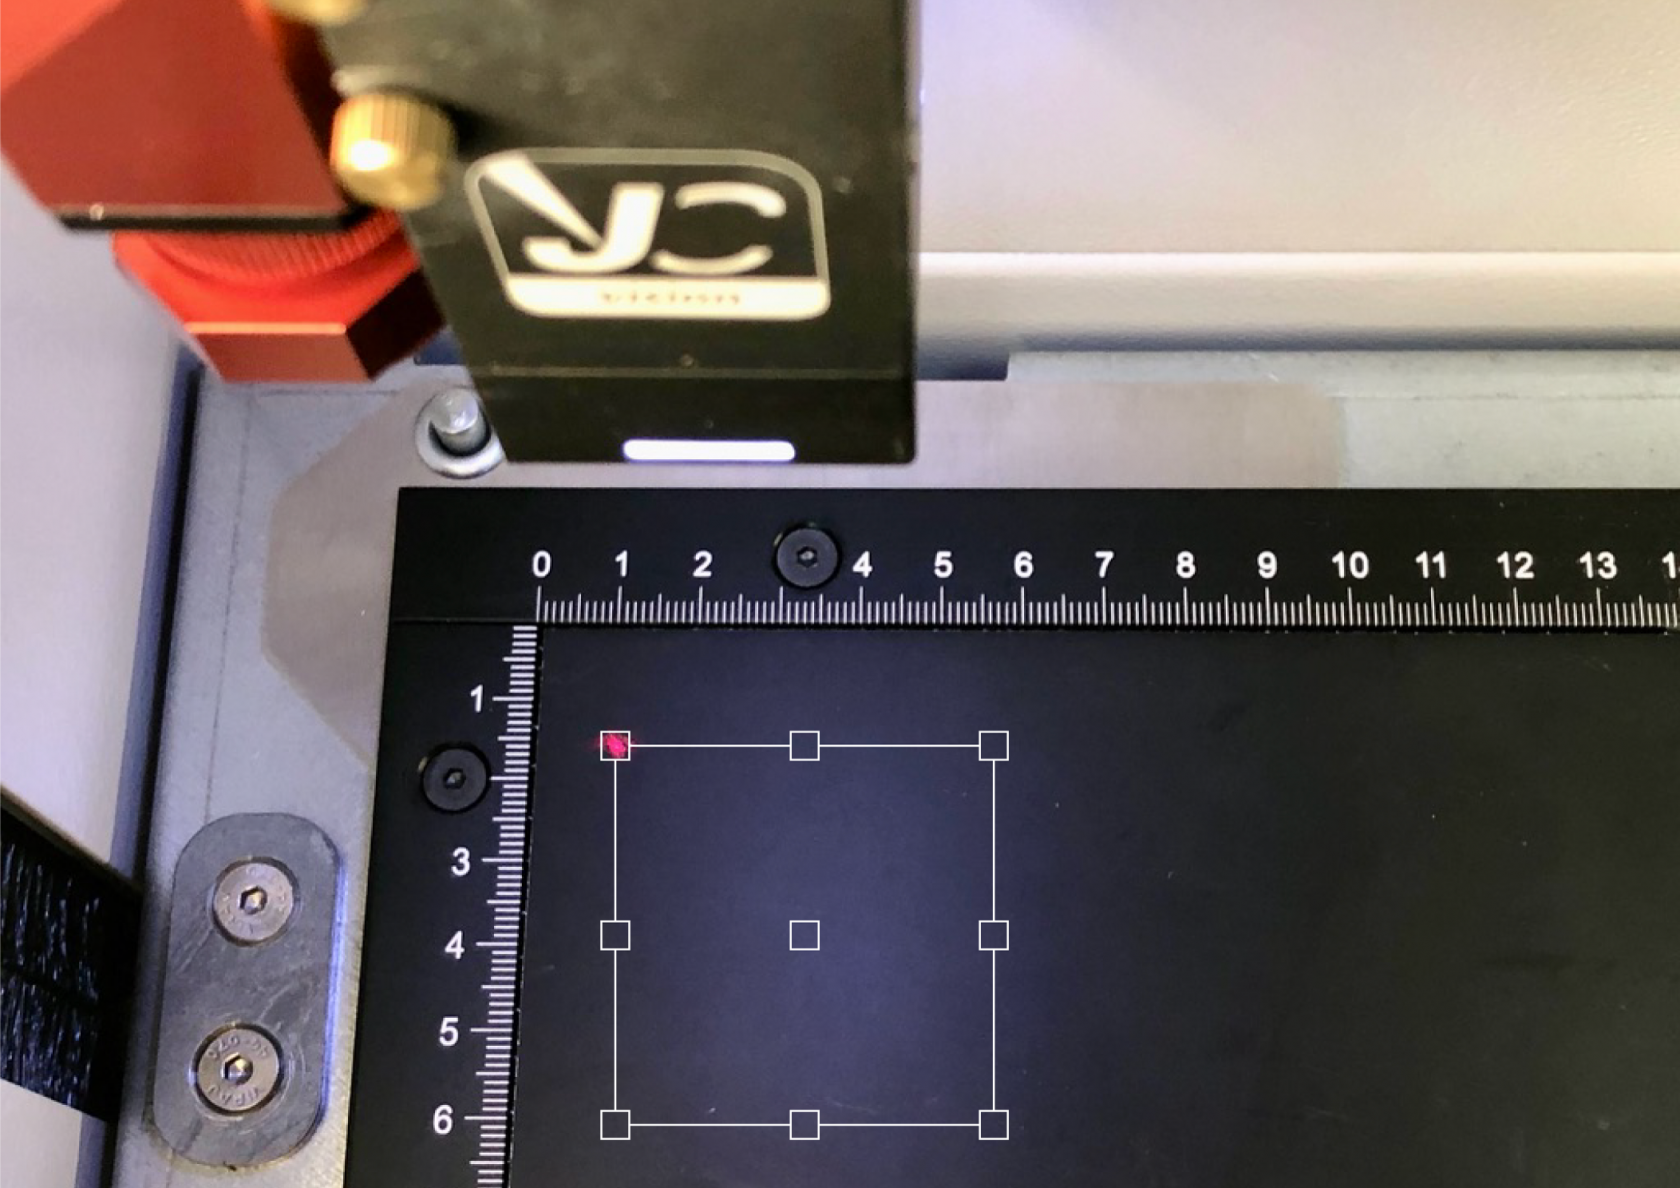
At this point in the process you'll want to put your material into the laser cutter and position the red dot laser on the material where you want it to cut.
Moving the laser X, Y and Z axis can cause damage to the machine if you crash the laser head, gantry or bed into your materials.
When the machine is on you can move the laser head around using the X and Y axis control buttons:
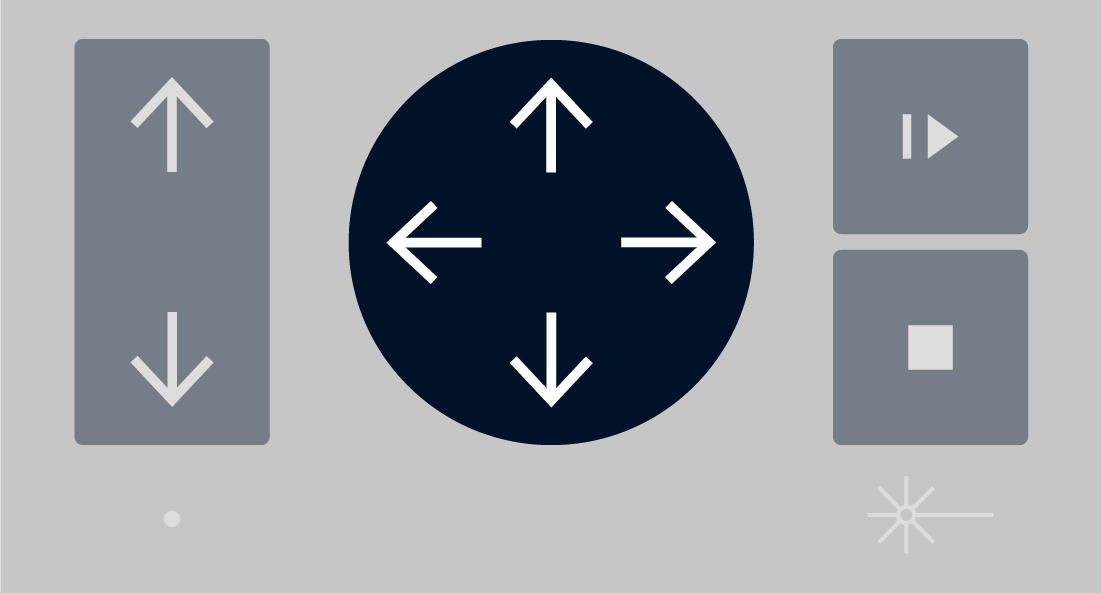
The red dot will be mirrored in the Prepare Screen by an icon, and you can position the design in relation to this icon, around any one of the 9 snappable positions around the bounding box of your design, most commonly people use the top left corner.
What are X, Y & Z axis?
- X axis is the left to right movement of the laser head.
- Y axis is the backward and forward movement of the laser gantry.
- Z axis is the up and down movement of the laser bed.
Selecting a material
Once you've got your design(s) laid out in the correct places you will need to set the material for the job.
You cannot have different materials for each design.
Select the material from the lower right corner, make sure you pick the exact material you have. The thickeness and the type are important.
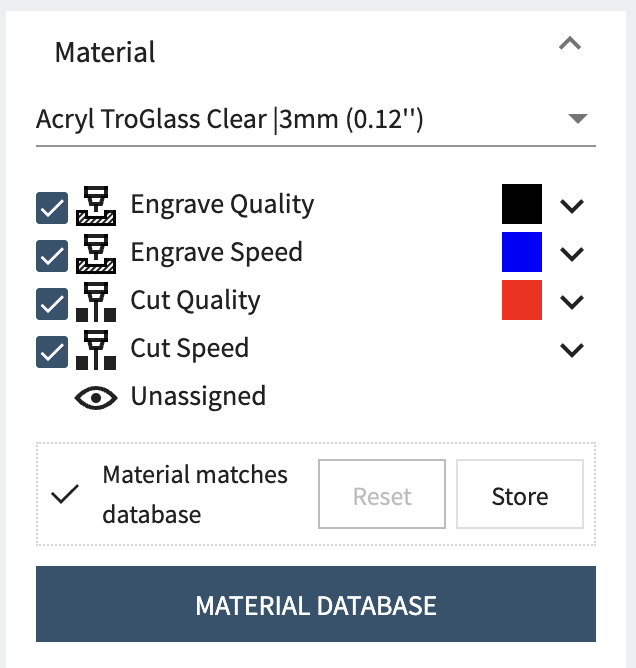
In this screenshot you can see we are using the black, blue and red colours but that the 4th "effect" is unassigned, this colour is RGB green #00ff00 but was not included in our example design so it is shown as unassigned.
From this area you can also disable certain effects if you want to skip them by unchecking the boxes next to them.
Tweaking effects
By clicking the dropdown icon to the right of an effect you can open the effect settings, this lets you get full control over the machines power, speed and other settings.

These settings are very granular, but we ask that you avoid adjusting without the support of a technician as there is a greater risk of fire or damage to the machine if you use these incorrectly.
Queue the job
Once you are ready to send the job to the laser cutter press Queue, the machine won't start until you press the start button on the laser cutter.
