p5.embroider
p5.embroider is a p5.js library for creating digital embroidery patterns. It takes your p5.js sketches and converts them directly to embrodiery meaning it is easy to take your sketches and create them on fabric!
Resources
Installation
To use p5.embroider in your project, include the library in your HTML file:
<script src="https://unpkg.com/p5.embroider/lib/p5.embroider.js"></script>
Template
Below is a template sketch for you to get started.
let _drawMode = "stitch";

let roygbiv = ["red", "orange", "yellow", "green", "blue", "indigo"];

function setup() {
  createCanvas(mmToPixel(150), mmToPixel(150));

  let exportPESButton = createButton("Export PES");
  exportPESButton.mousePressed(() => {
    exportPES("template_example.pes");
  });
  exportPESButton.position(0, height + 60);

  noLoop();
}

function draw() {
  background("#FFF5DC");
  let stitchWidth = 8;

  // Set the drawing mode to show stitches
  stroke(255, 0, 0);
  noFill();
  setDrawMode(_drawMode);

  // Begin recording stitches
  beginRecord(this);
  strokeWeight(stitchWidth);
  setStitch(0.1, 0.5, 0);
  setStrokeMode("zigzag");

  //p5 SKETCH CODE HERE

  // End recording stitches
  endRecord();
}
Let's take a closet look at some of the parts of this sketch
beginRecord() and endRecord()
Anything drawn between the beginRecord() and endRecord() functions will be converted into embroidery. This means you can add extra parts to your p5 sketch that then won't be included in the completed embroidery pattern, such as text to guide the user interaction or buttons to export the design.
Units and measurement
p5.embroider uses mm instead of pixels (like the rest of p5.js) for size specifications to create embroidery data at actual size. Anything inside of the beginRecord() and endRecord() functions will be in mm and anything outside will be in pixels.
For example, when creating the canvas, use the mmToPixel() function to specify your canvas size in mm and convert it to pixels, as this is outside of the recording.
function setup(){
    ...
    // Create a 100mm x 100mm p5 graphics instance
    createCanvas(mmToPixel(100), mmToPixel(100));
    ...
  }
Stitch parameters
There are a few functions that we can use to set the stitch parameters (length, width, stitch type, etc). For these, we will want the units to be in mm, therefore they need to be called within the beginRecord() and endRecord() functions
function draw(){
  ...
  beginRecord(this);
  ...
  setStitch(0.3, 1, 0); //setStitch(minLength, desiredLength, noise)
  setStitchWidth(0.1);
  setStrokeMode("zigzag"); //can be 'zigzag', 'parallel', or 'sashiko'

  //Alternatively, you can use the setStrokeSettings function
  setStrokeSettings({ // Configure stroke stitch settings
    stitchLength: 0.5, // Length of each stitch
    stitchWidth: 0.2, // Width of each stitch
    noise: 0.0, // Random coefficient
    strokeInterpolate: true, // Enable stroke interpolation
  });
  ...
  endRecord();
}
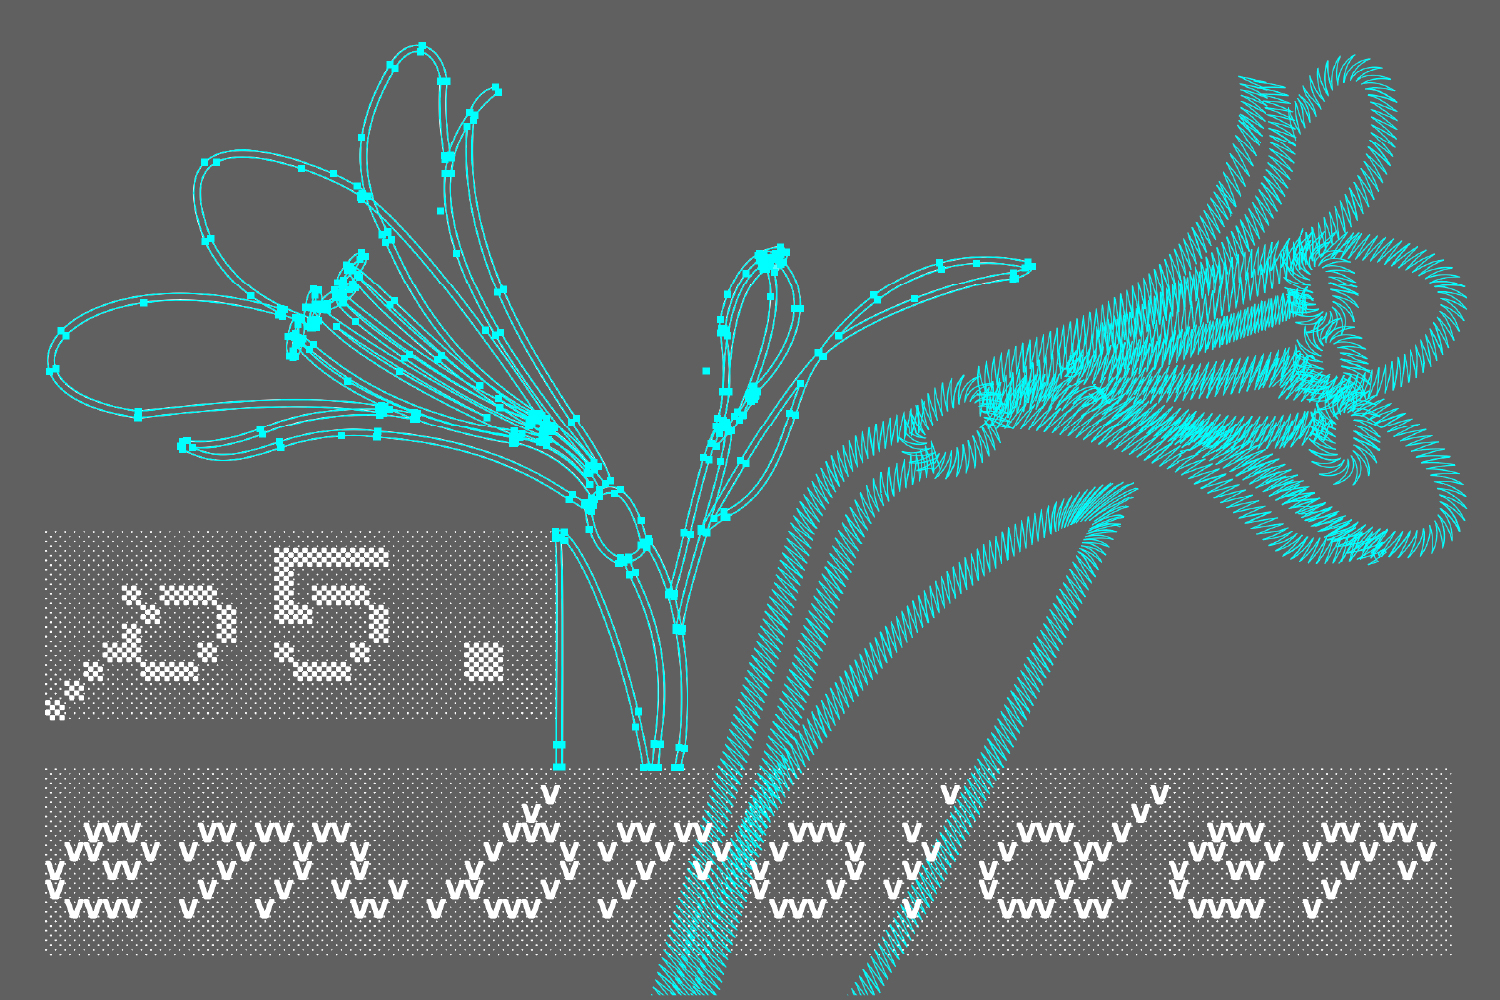
Draw Mode
There are three different drawing modes to view your sketch; stitch, p5, and realistic.
setDrawMode('p5'); //stitch', 'p5', 'realistic'
Below you can see the difference between the three (in order; stitch, p5, realistic). This setting will have no effect on your embroidery file, just the visualisation of it.
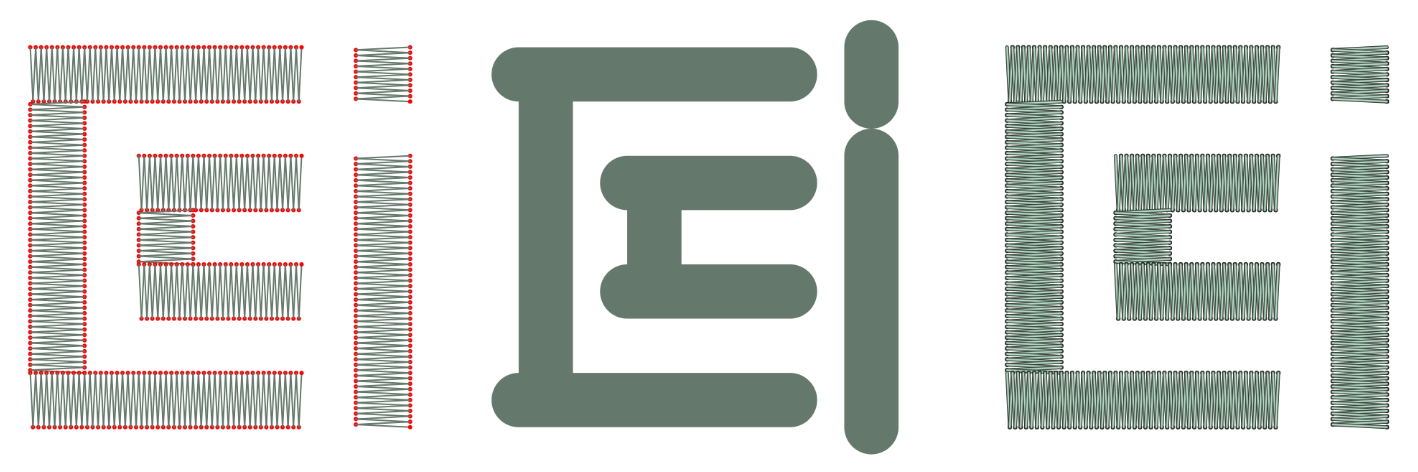
As you can see here, not everything that looks good in stitch will look good in p5 and vice versa.
Export PES
To be able to stitch your design with our machine, you must export it as a PES file. This can be done with the exportPES() function (written by agnes!!). In the examples from the library, the setup function contains export buttons for DST and GCode but we can change it to be a PES button with the code below.
function setup(){
    ...
    let exportPESButton = createButton("Export PES");
    exportPESButton.mousePressed(() => {
      exportPES("template_example.pes");
    });
    exportPESButton.position(0, height + 60);
    ...
  }