Short Rowing (Partial Knitting)
Short rowing is a method that allows you to put needles 'on hold' and knit a row without adding a new stitch onto every needle (called a short or partial row). This allows you to create interesting shapes including 3d and curved swatches (such as the heel or toe of a sock). It also allows you to knit swatches that have a concave shape, such as a star or the neckline of a jumper.

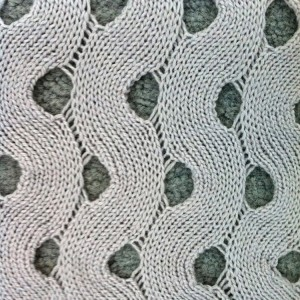
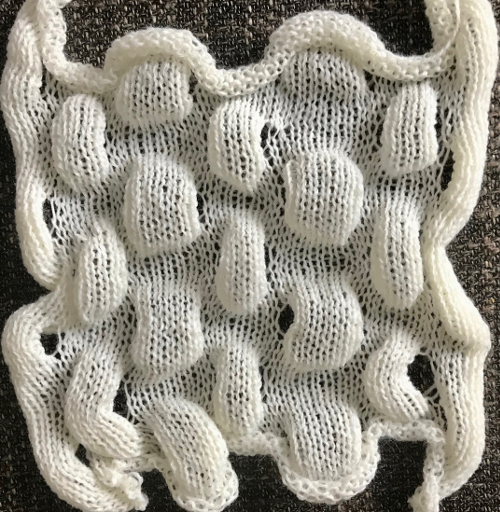
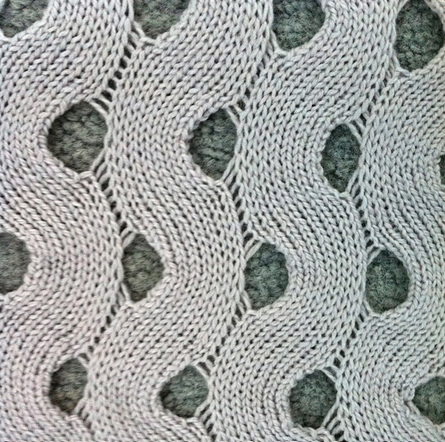
These examples are all from alessandrina.com.
Learning to short row
To learn how to do short rowing, you can attend one of the Advanced Knitting Workshops - bookable here. You must have already completed the Knitting Machine Induction to attend.
The terminology for this can be a little confusing so lets make some definitions:
- Working needle - a needle that is currently being knit with (so is in either B or C position)
- Working section - the section of needles that is currently in work
- Hold - the state of not being in work (i.e. in D position)
- Decreasing - reducing the number of working needles therefore means bringing more needles into D position
- Increasing - increasing the number of working needles therefore means bringing more needles back into B/C position
Decreasing
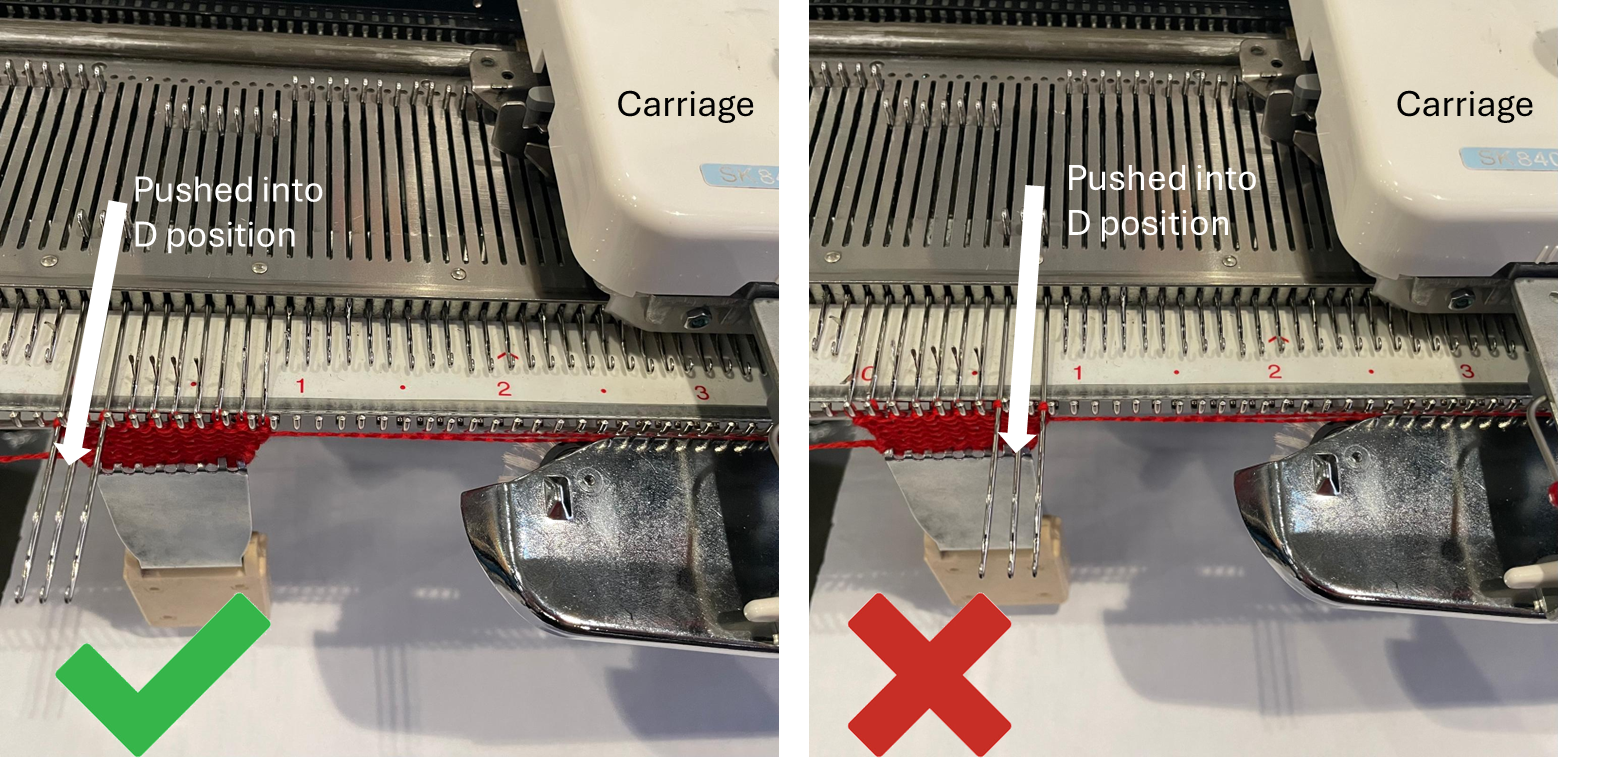
To decrease the number of working needles, we will put some on hold by pushing them out into D position.
There are 3 steps to this process:
- Push needles to be decreasing into D position (on the opposite side of the carriage)
- Knit 1 row
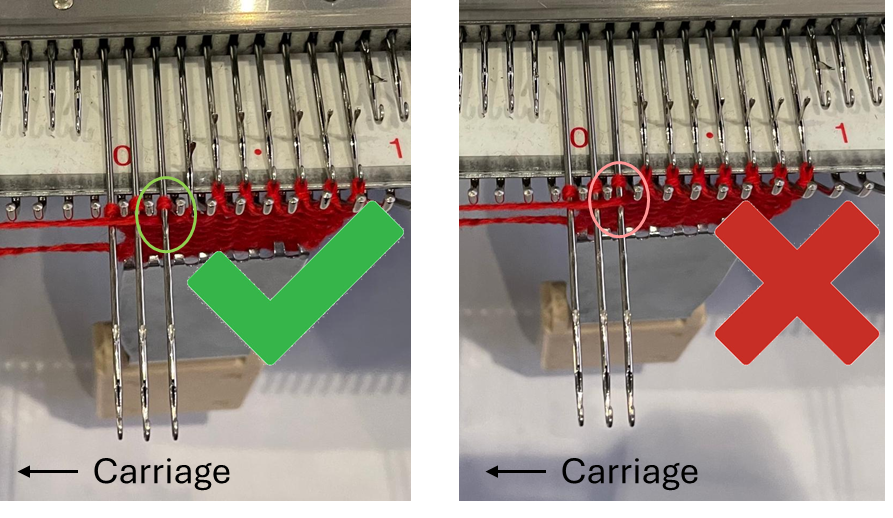
- Loop the yarn under the first inside needle in D position and over the remaining needles
If you want to decrease on alternating sides each row, the first and third steps of the left- and right- hand side processes will overlap. See the table below.
| Left-hand side | Right-hand side | |
|---|---|---|
| Row 1 | 1 | |
| Row 2 | 3 | 1 |
| Row 3 | 1 | 3 |
| Row 4 | 3 | 1 |
| ... | ... | ... |
Increasing
To increase the number of working needles, we need to bring them back into B position. The process for this changes slightly depending on the knitting method that you are using.
If knitting in:
- Stockinet - Push the needles to be increasing into C position.
- Pattern Knitting (e.g. fairisle) - Using a transfer tool, return the needles to be increase back into B position.
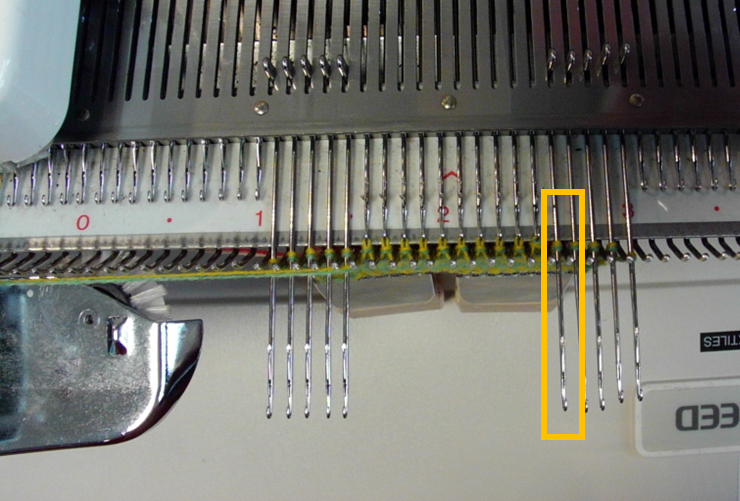
This increase can only be done on the opposite side of the working section to the carriage. In the image below, the highlighted needle is the first one that could be increased along with any other consecutive needles to the right of it.
Examples
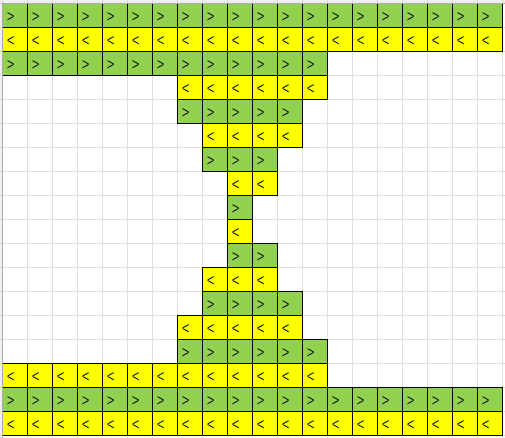
Bumps
To make short rowed bumps, decrease by one needle each row on alternating sides. The below image shows an example of how this would be knit. The different coloured rows show the direction of the carriages movement.
"Wisteria"
Here is a tutorial on how to knit the below swatch using short rowing. It is a good one to follow to help yourself fully understand how short rowing works.