Powering on the laser cutter
The laser cutter key is currently stored in the CCI staff office PR_B503.
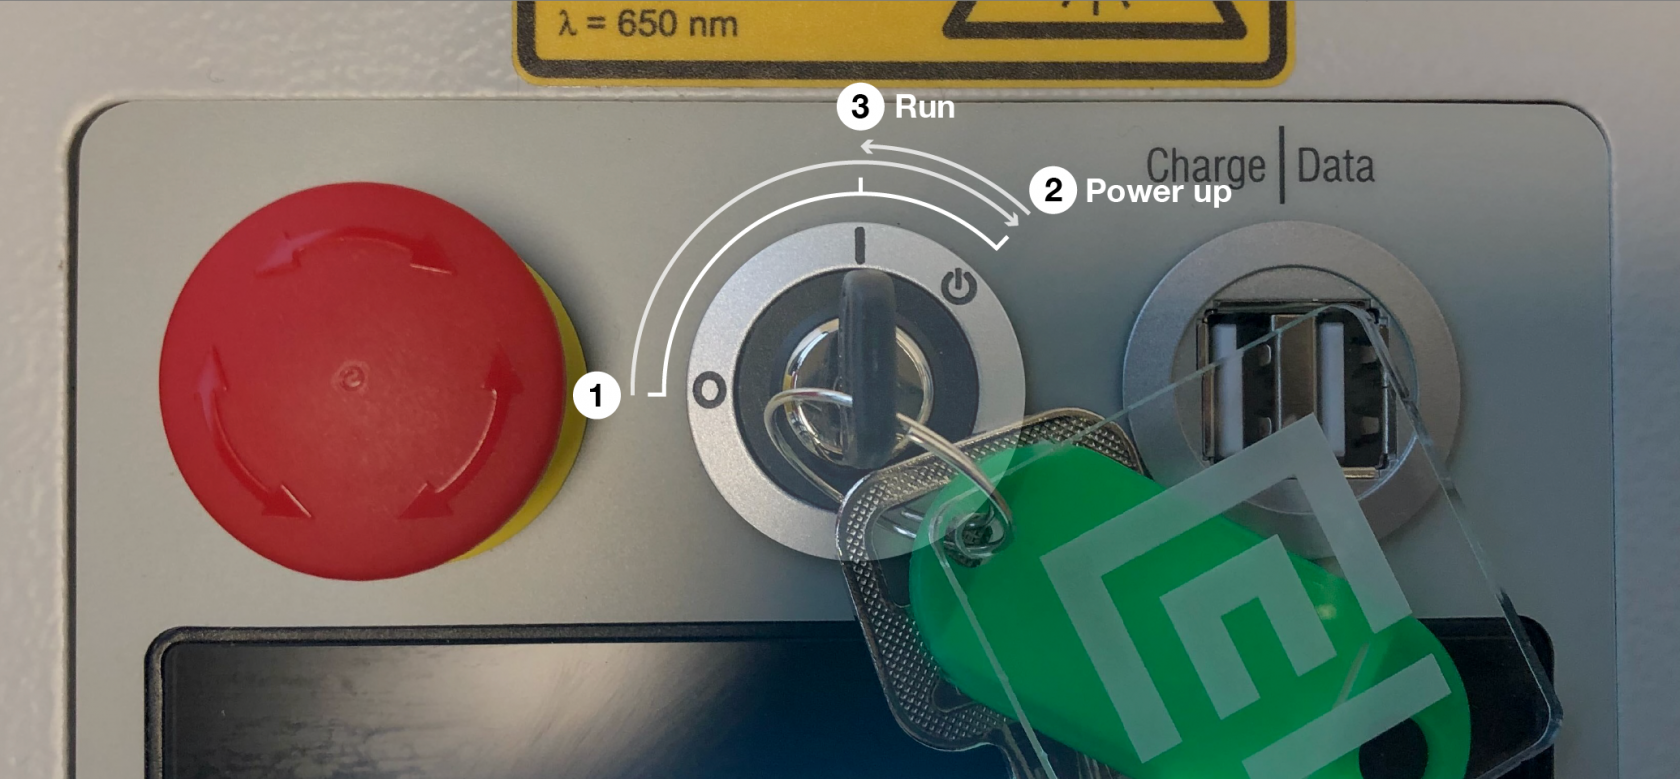
To turn on the laser cutter you will need the key.
- Insert the key into the key switch.
- Rotate all the way past the
Imark to the power symbol, the machine will click and power up. - Allow the spring to return the key to the
Imark.
What to check if the laser won't turn on
If the laser won't turn on normally there are 4 places to check, after each check try powering with the key switch:
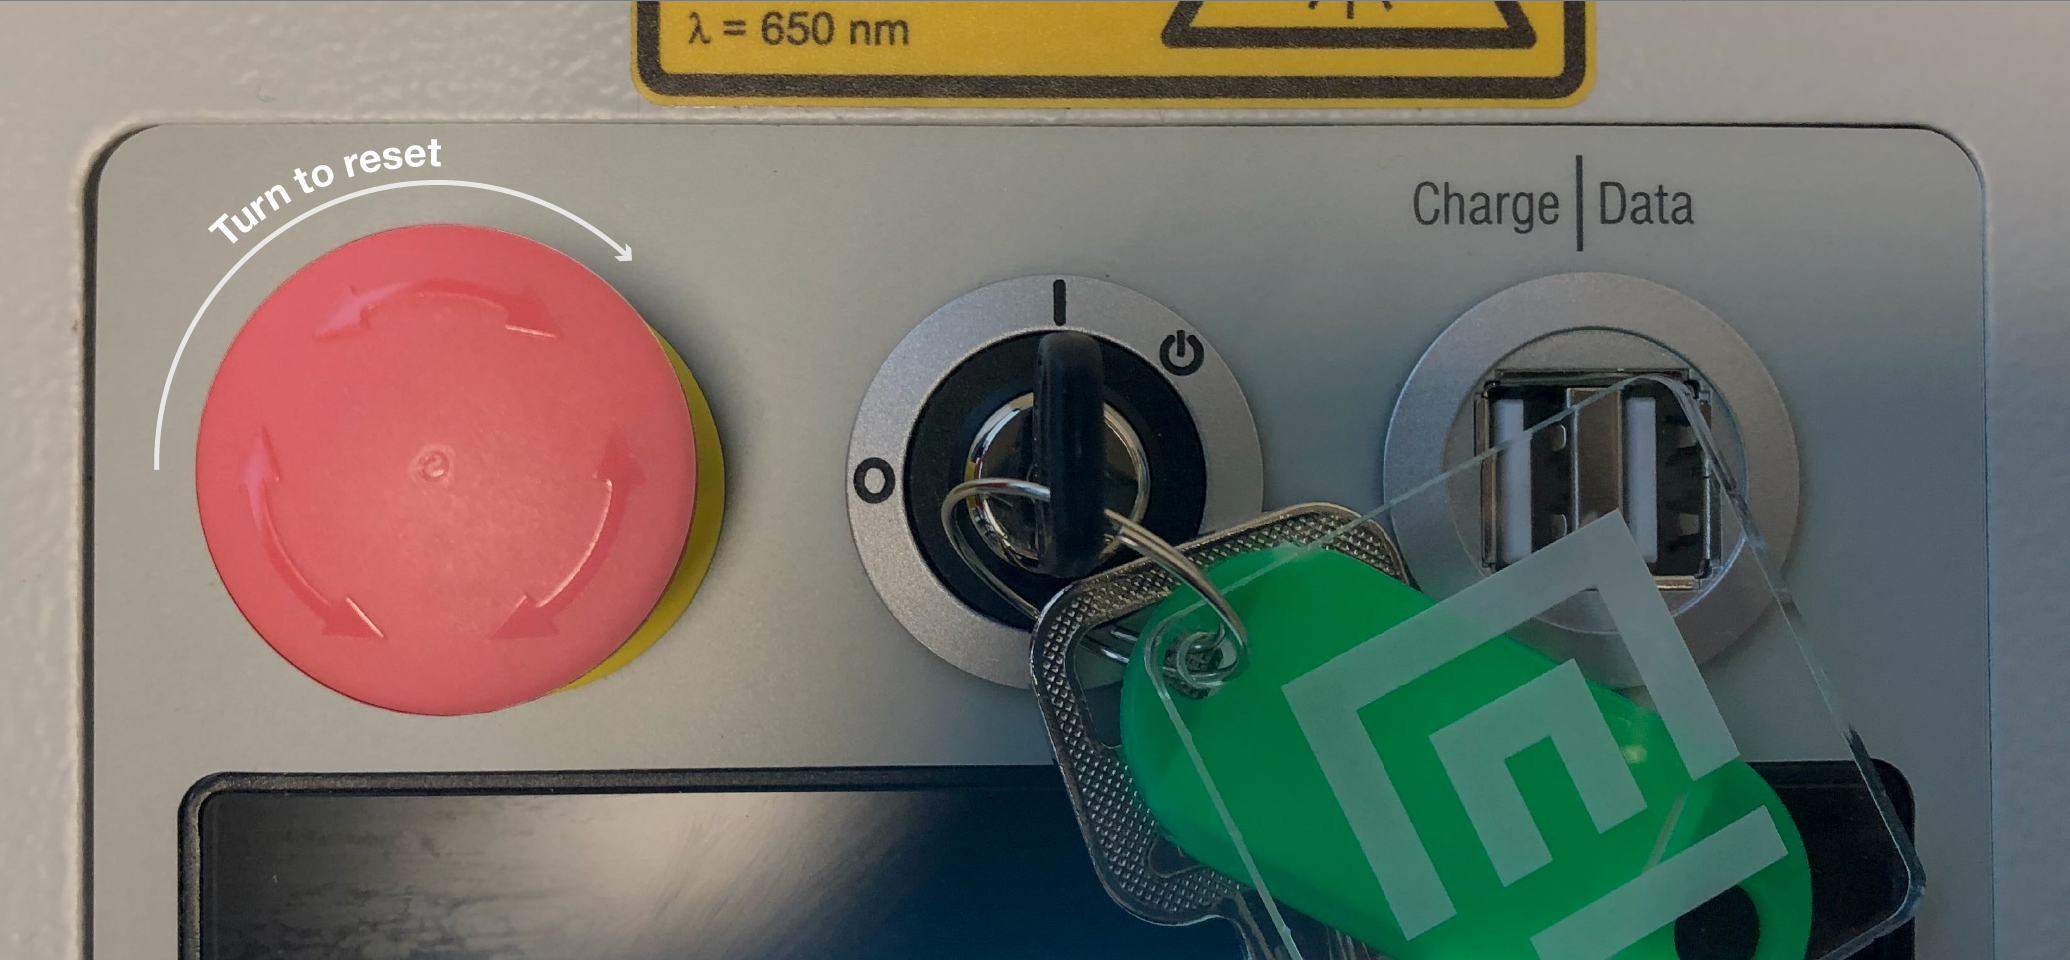
Step 1 - E-stop reset
Check the red e-stop mushroom next to the key switch, it will turn the machine off if it is pressed in.
You can reset it by turning it a fraction until it pops up from the down position.
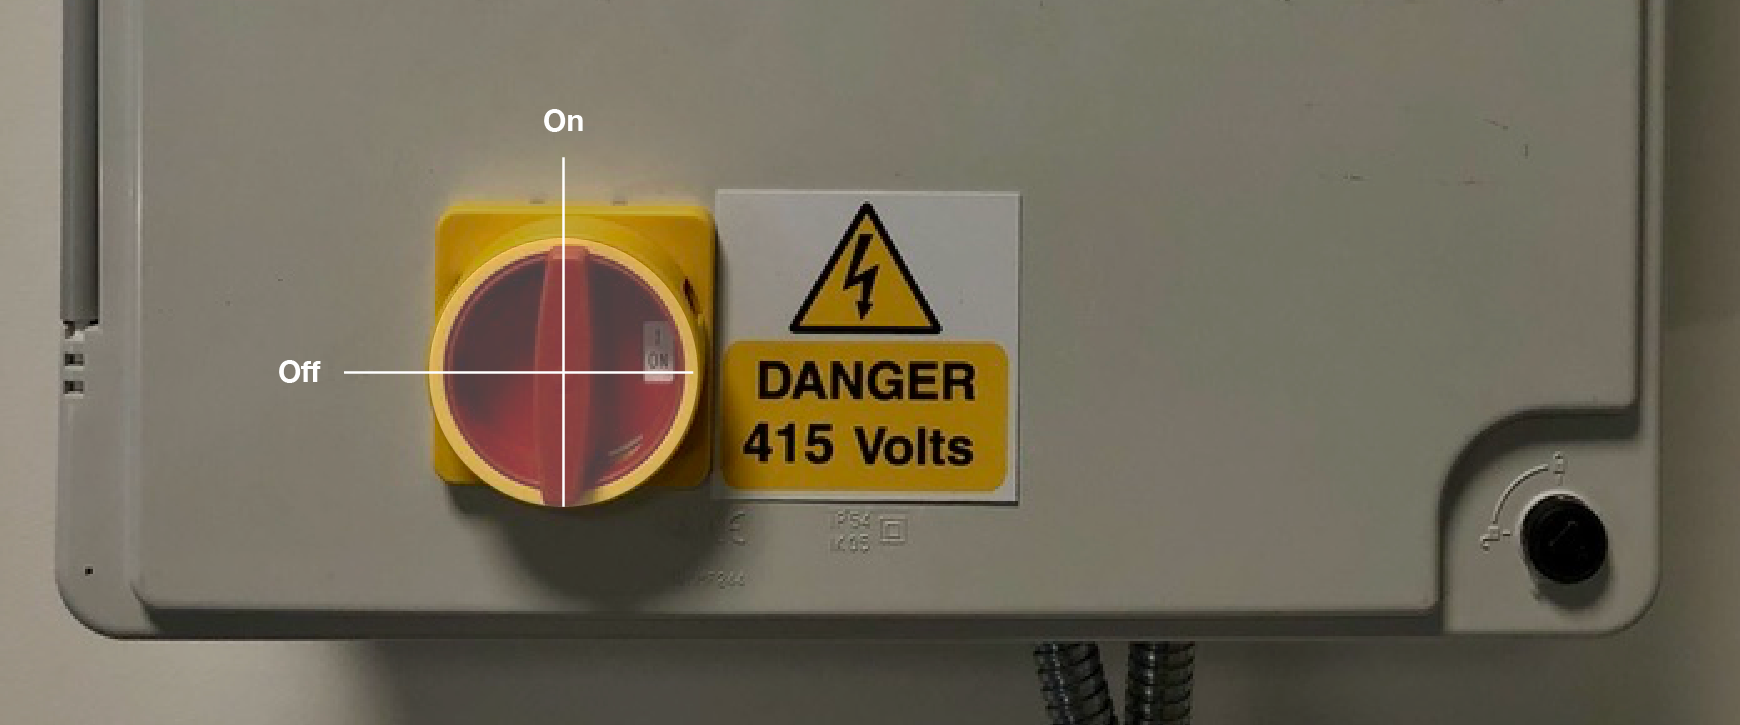
Step 2 - Wall isolator switch
On the wall box there is a red rotary switch, if this is off you will also find that the Ruby software isn't accessible from your computer.
Step 3 - Laser power switch
On the back of the machine there is a small rocker switch this should be on. If it is off you will find the Ruby software isn't accessible from your computer.
Step 4 - Power cable
Check the power cable running from the wall box to the back of the laser is properly inserted. If it isn't the Ruby software won't be accessible from your computer.