USB Printing Guide
Important: Dry the Filament Before Printing
Please dry the filament one day before you print anything.
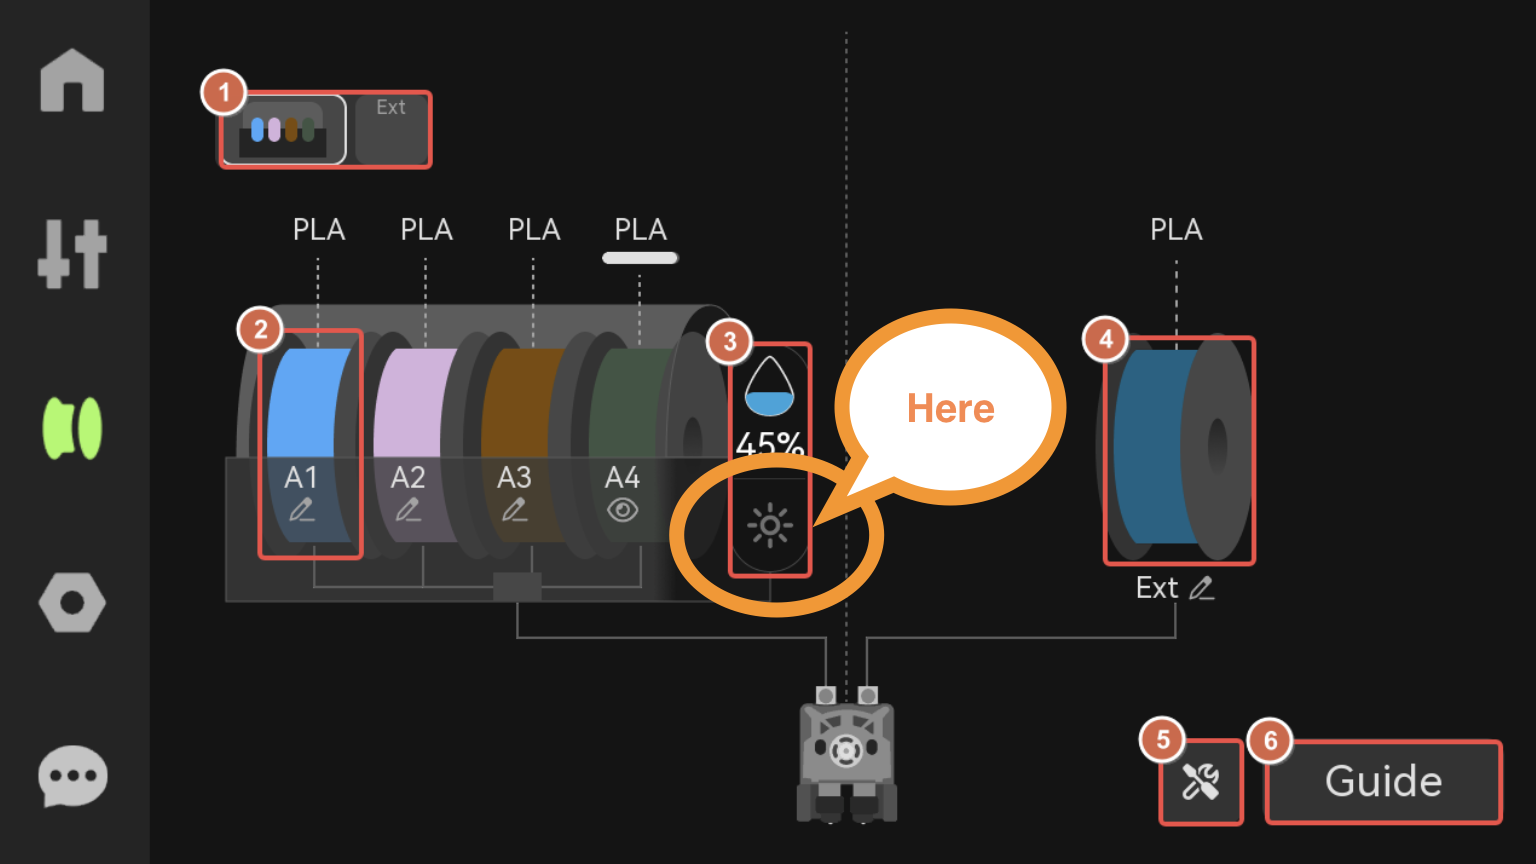
Go to the machine, tap the screen, select the filament icon, then tap the small sun icon next to the spool icon and start drying the filament. For quick use, you do not need to unload the filament or rotate the spools while drying. The technician will dry them properly on Friday and over the weekend.
Before Booking a Bambu Printer
Before booking a Bambu printer, please book a slot with a technician to check whether your print would be better suited to the Ultimakers.
Bambu slots are very limited and are usually fully booked 3–4 days in advance, as we currently only have two Bambu printers available.
Therefore, Ultimakers are still our safest option at the moment.
We will have more opportunities to use the Bambu printers once more machines arrive.
Important things to check
- Check how long your print will take, then book the slot according to that, + 20 mins file slicing and machine preparation time. Arrive before the slot started. None shown and not cancelled will get banned from the lab
- Whether Bambu Studio shows any warnings or errors - If there are issues, fix the model in CAD or use the Free Online STL Repair Tool.
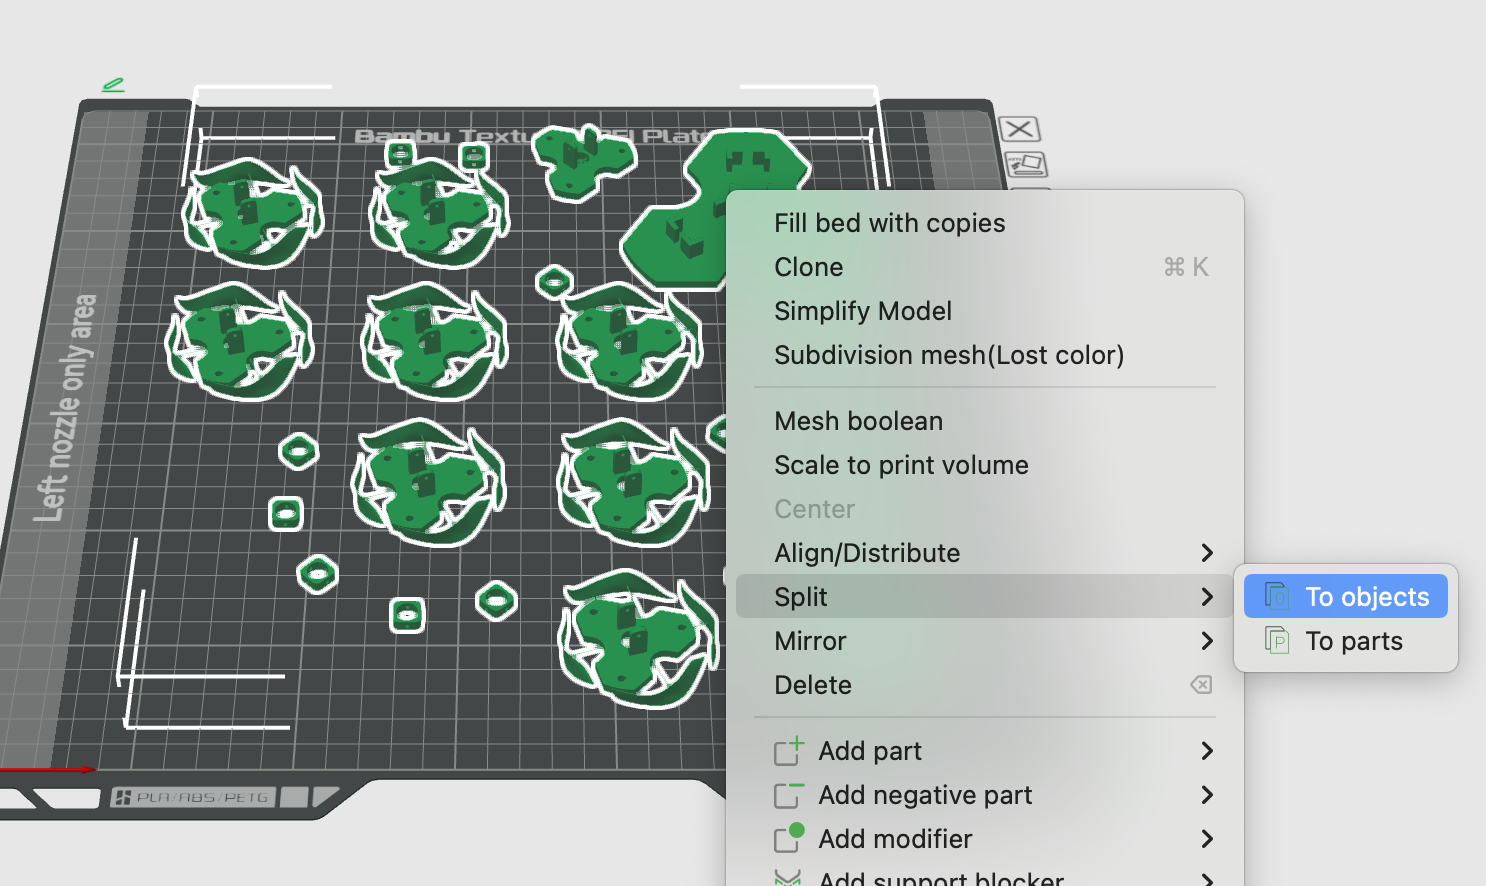
- Whether every object is attached to the build plate
If not, either split models into objects or enable support.

Book a slot on ORB
Once a Bambu Slot Has Been Booked
Please follow the preparation steps below.
Preparation Process
1. Download Bambu Studio.
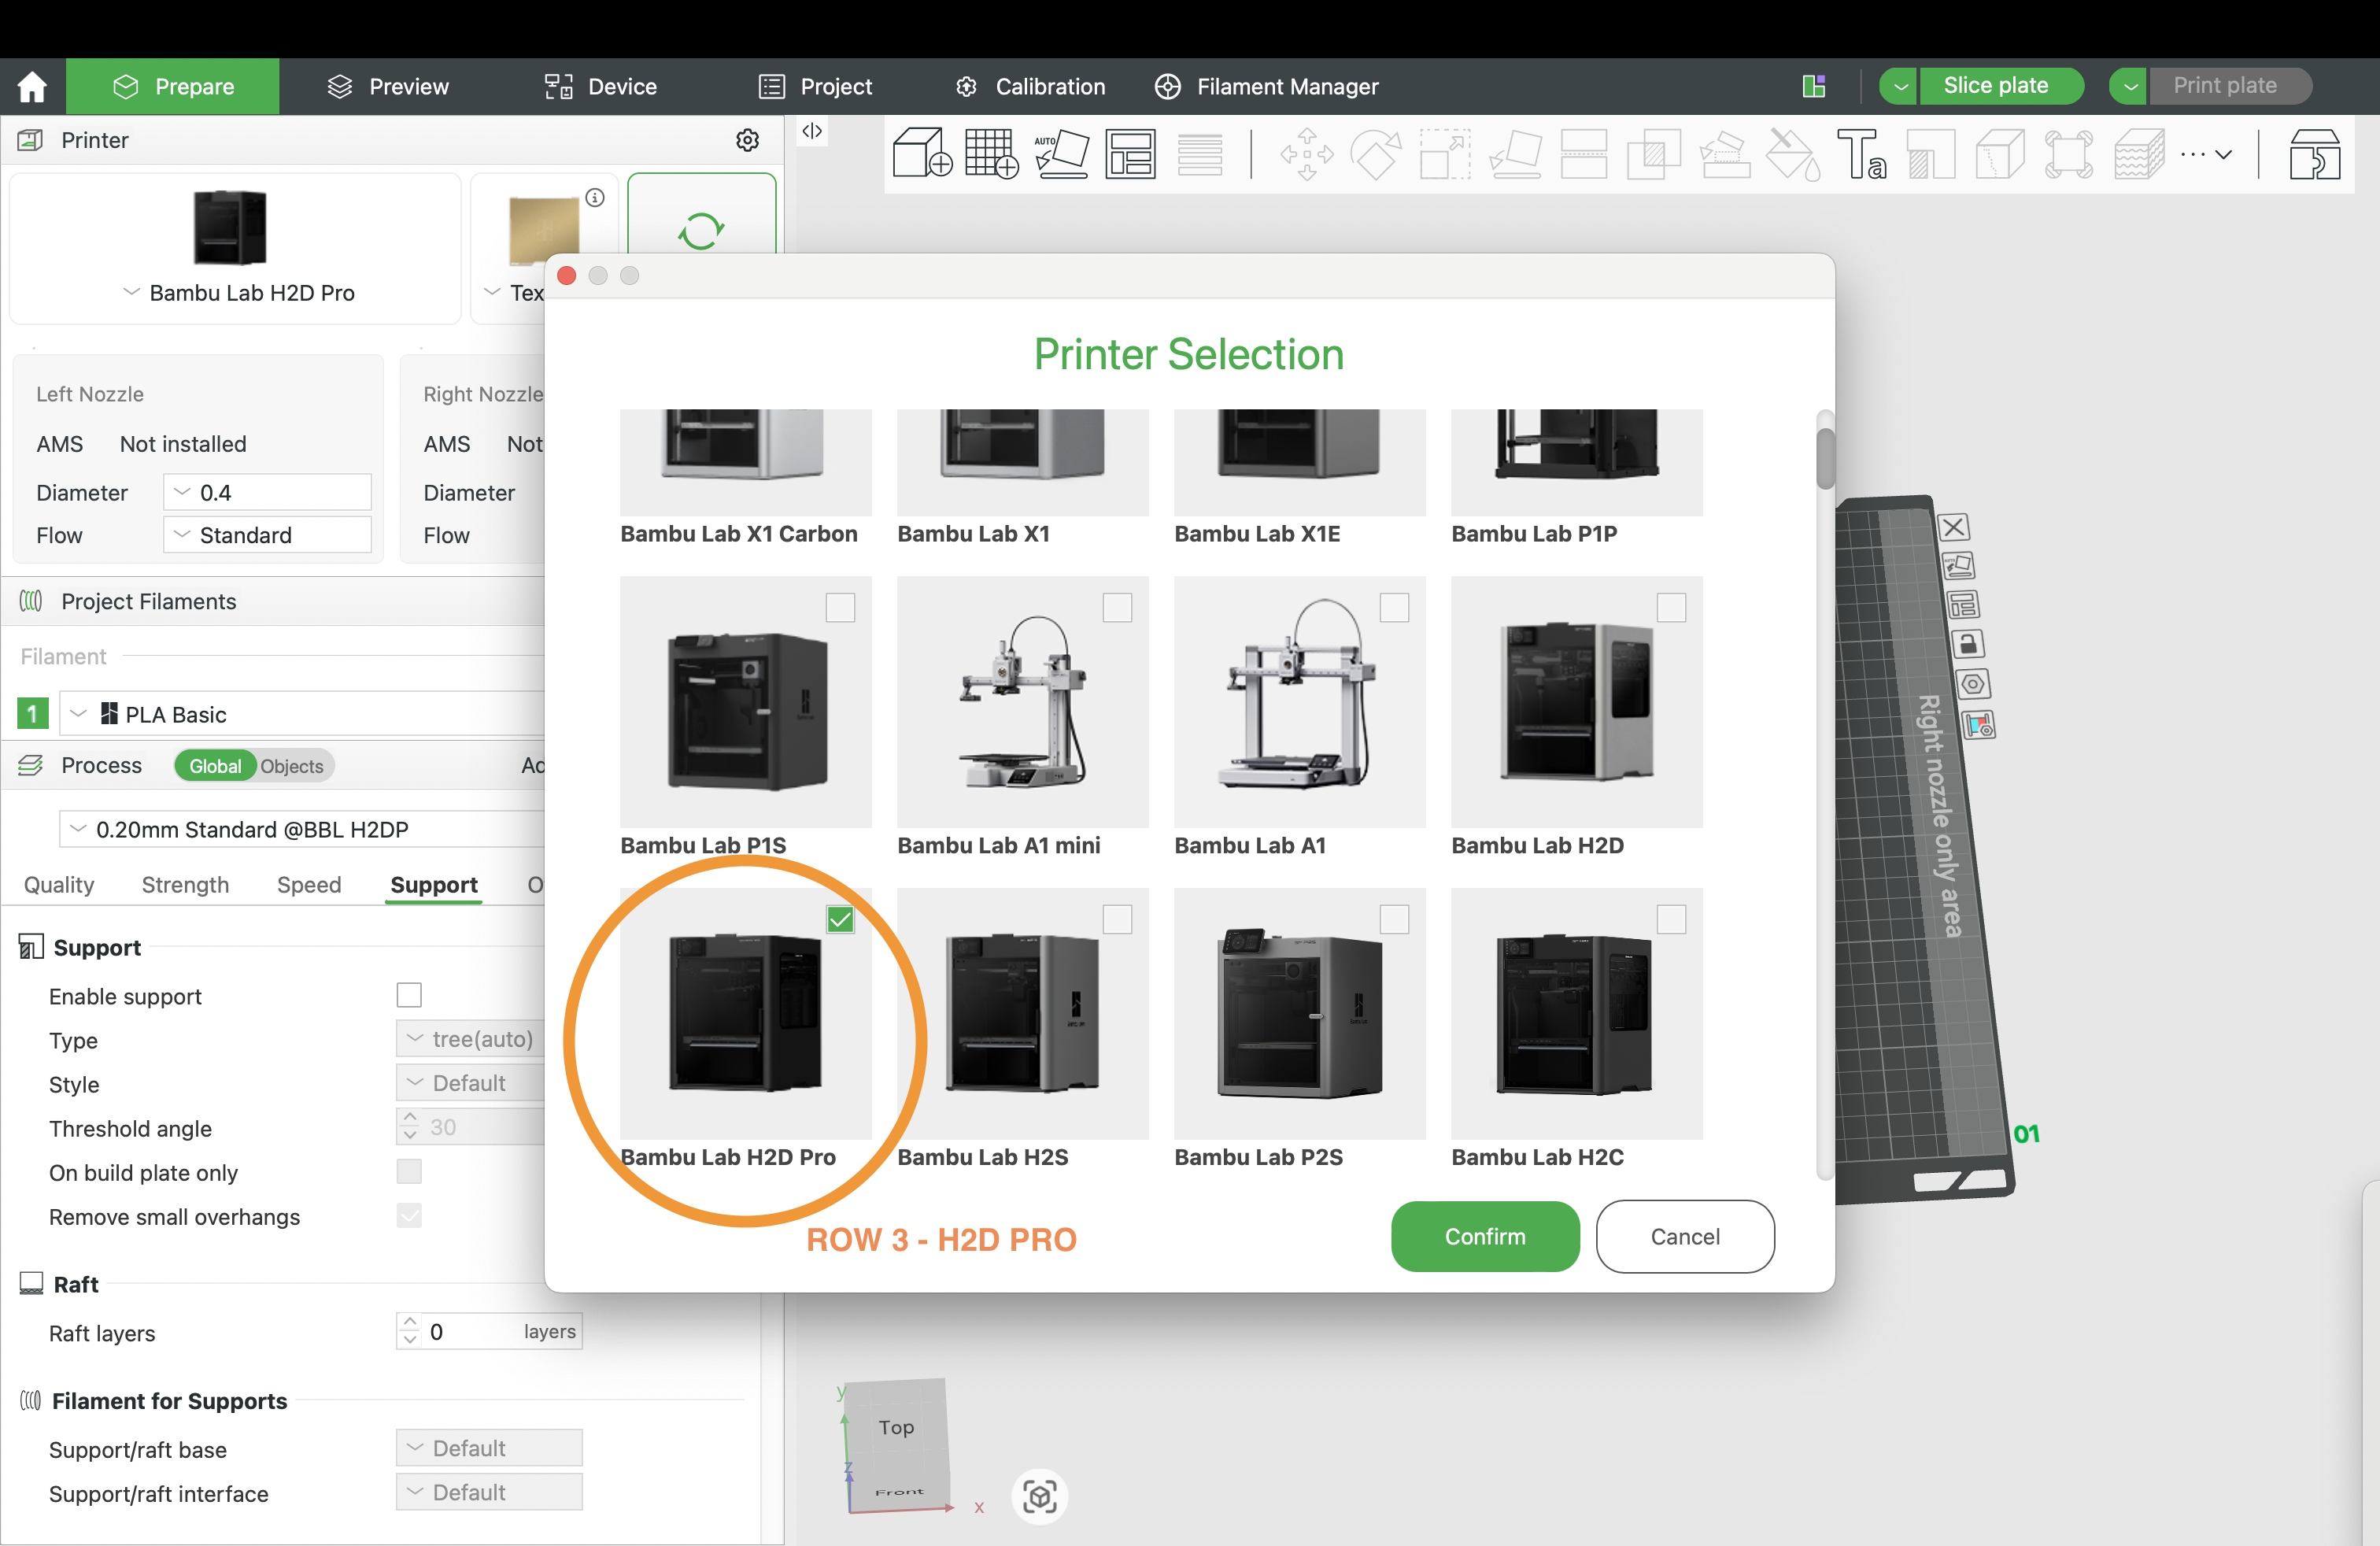
2. Set the printer model to H2D Pro, choose PLA filament
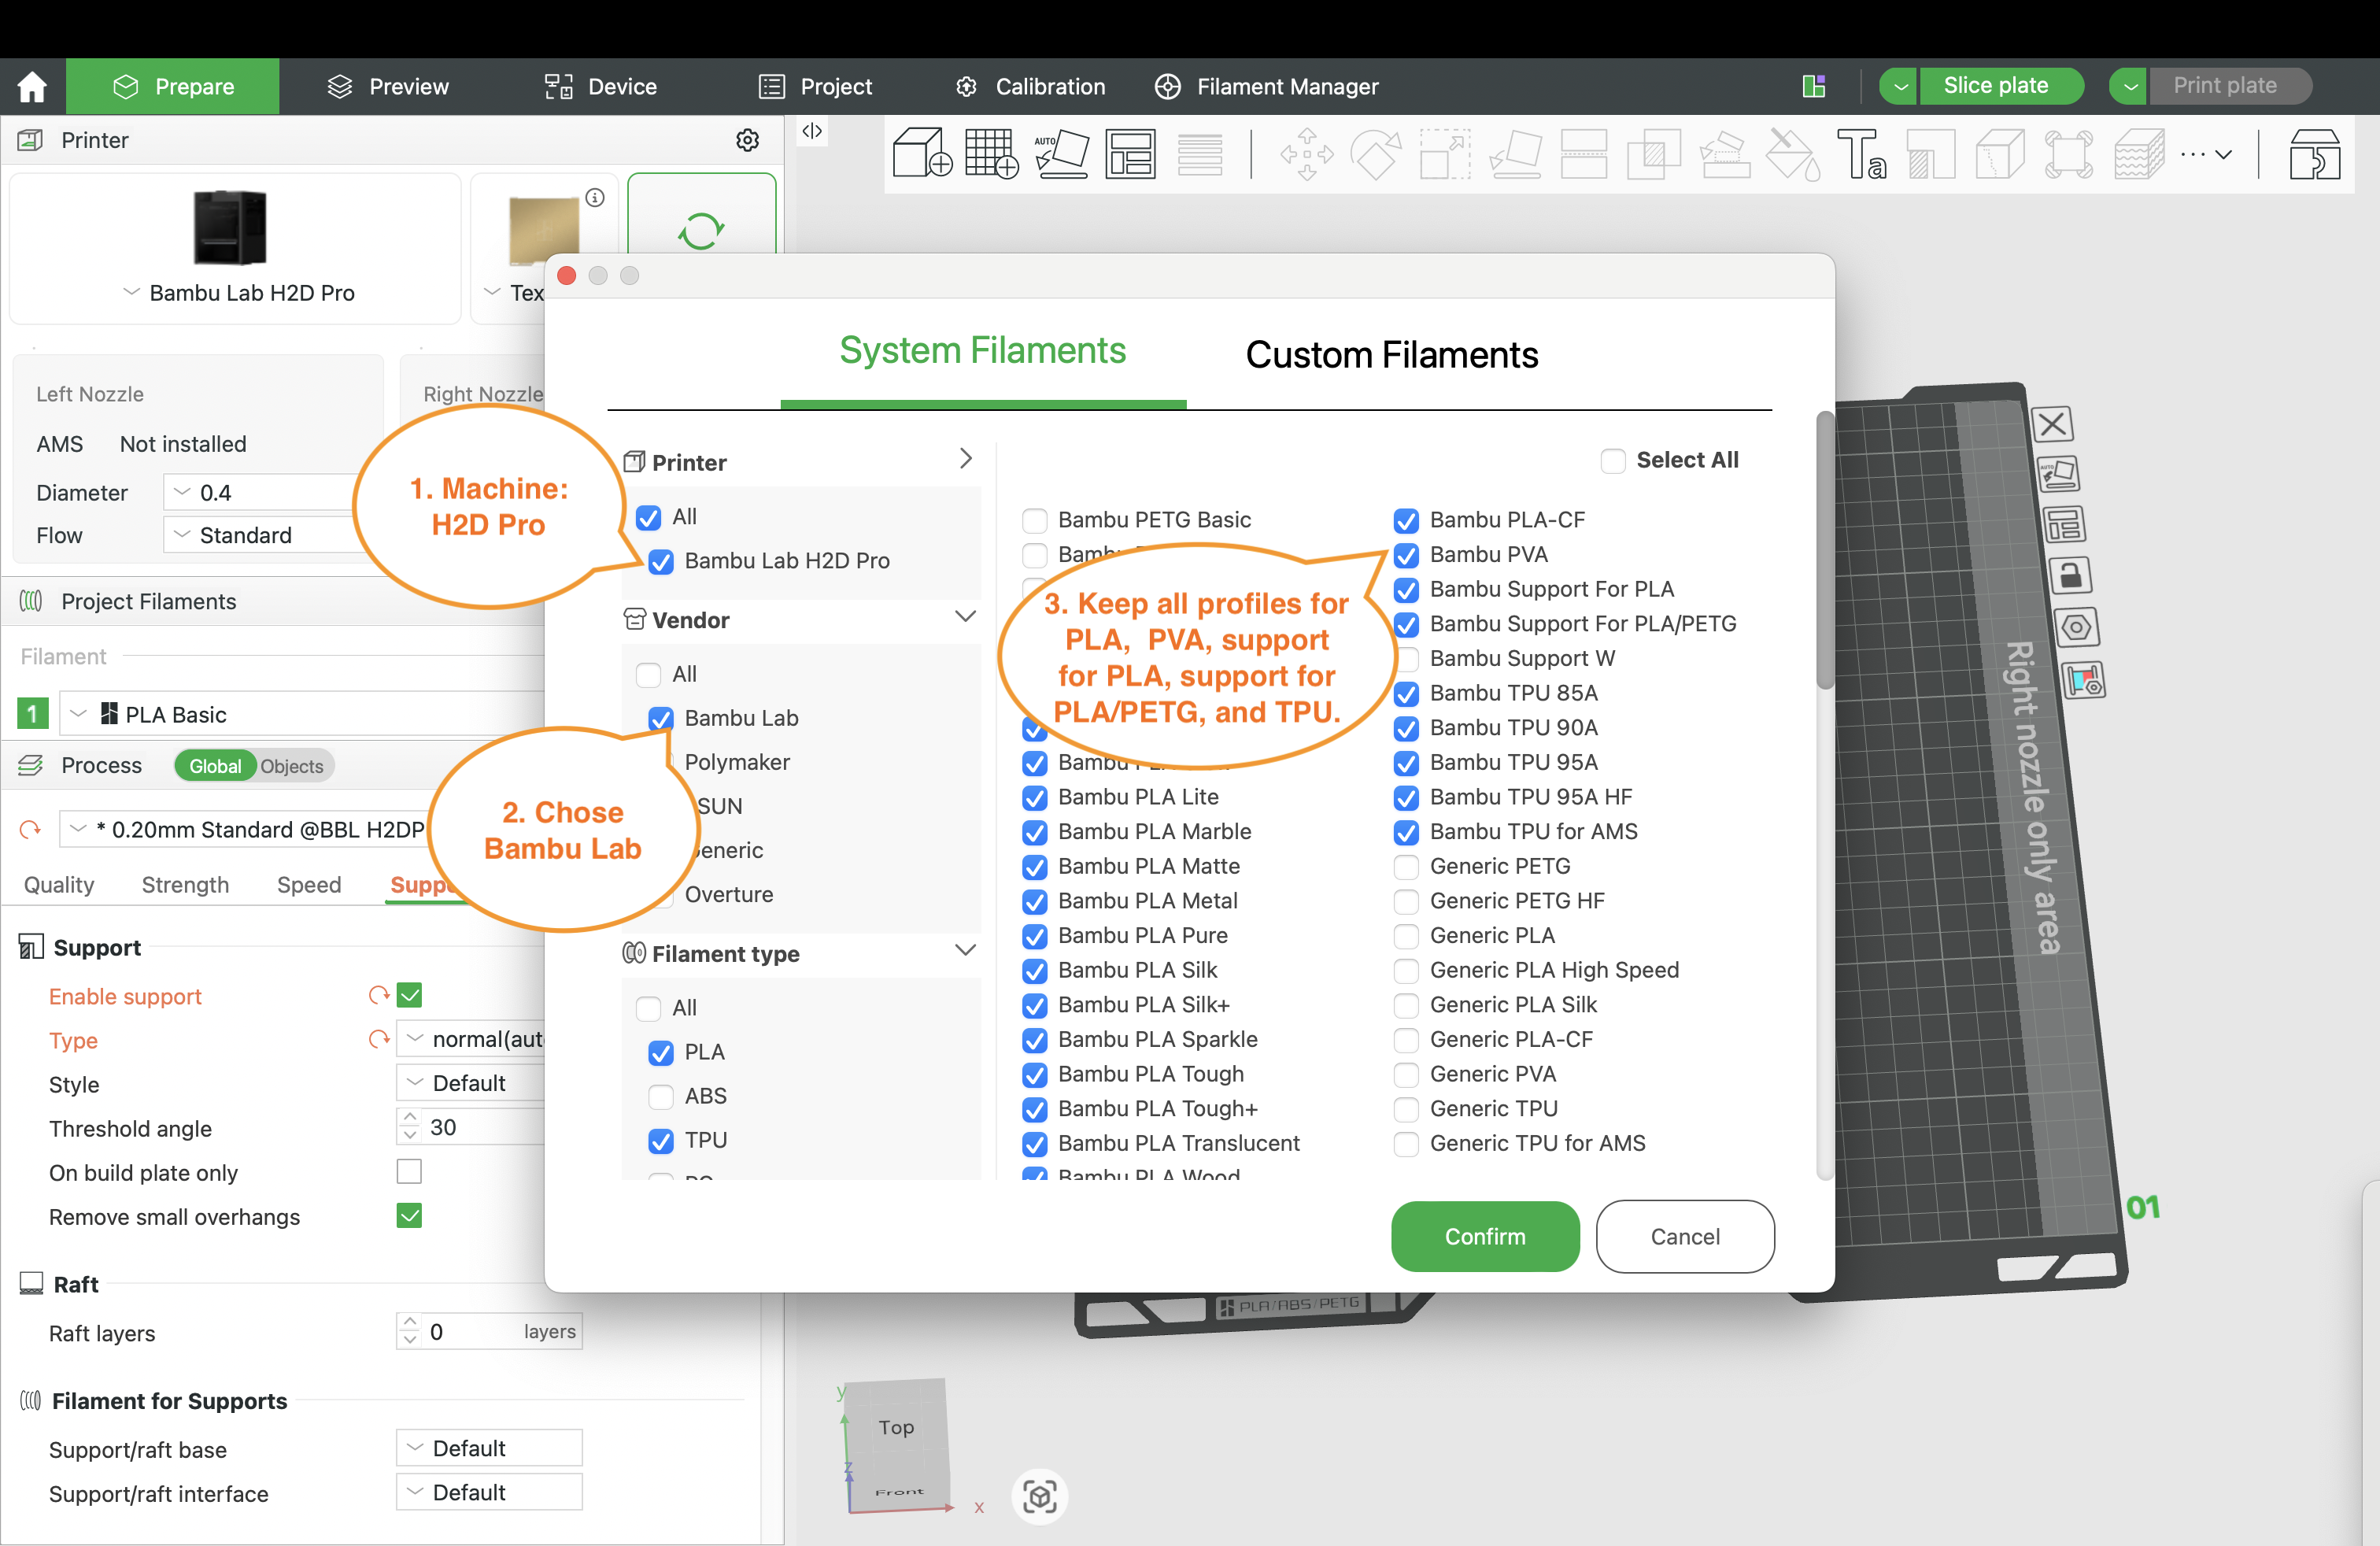
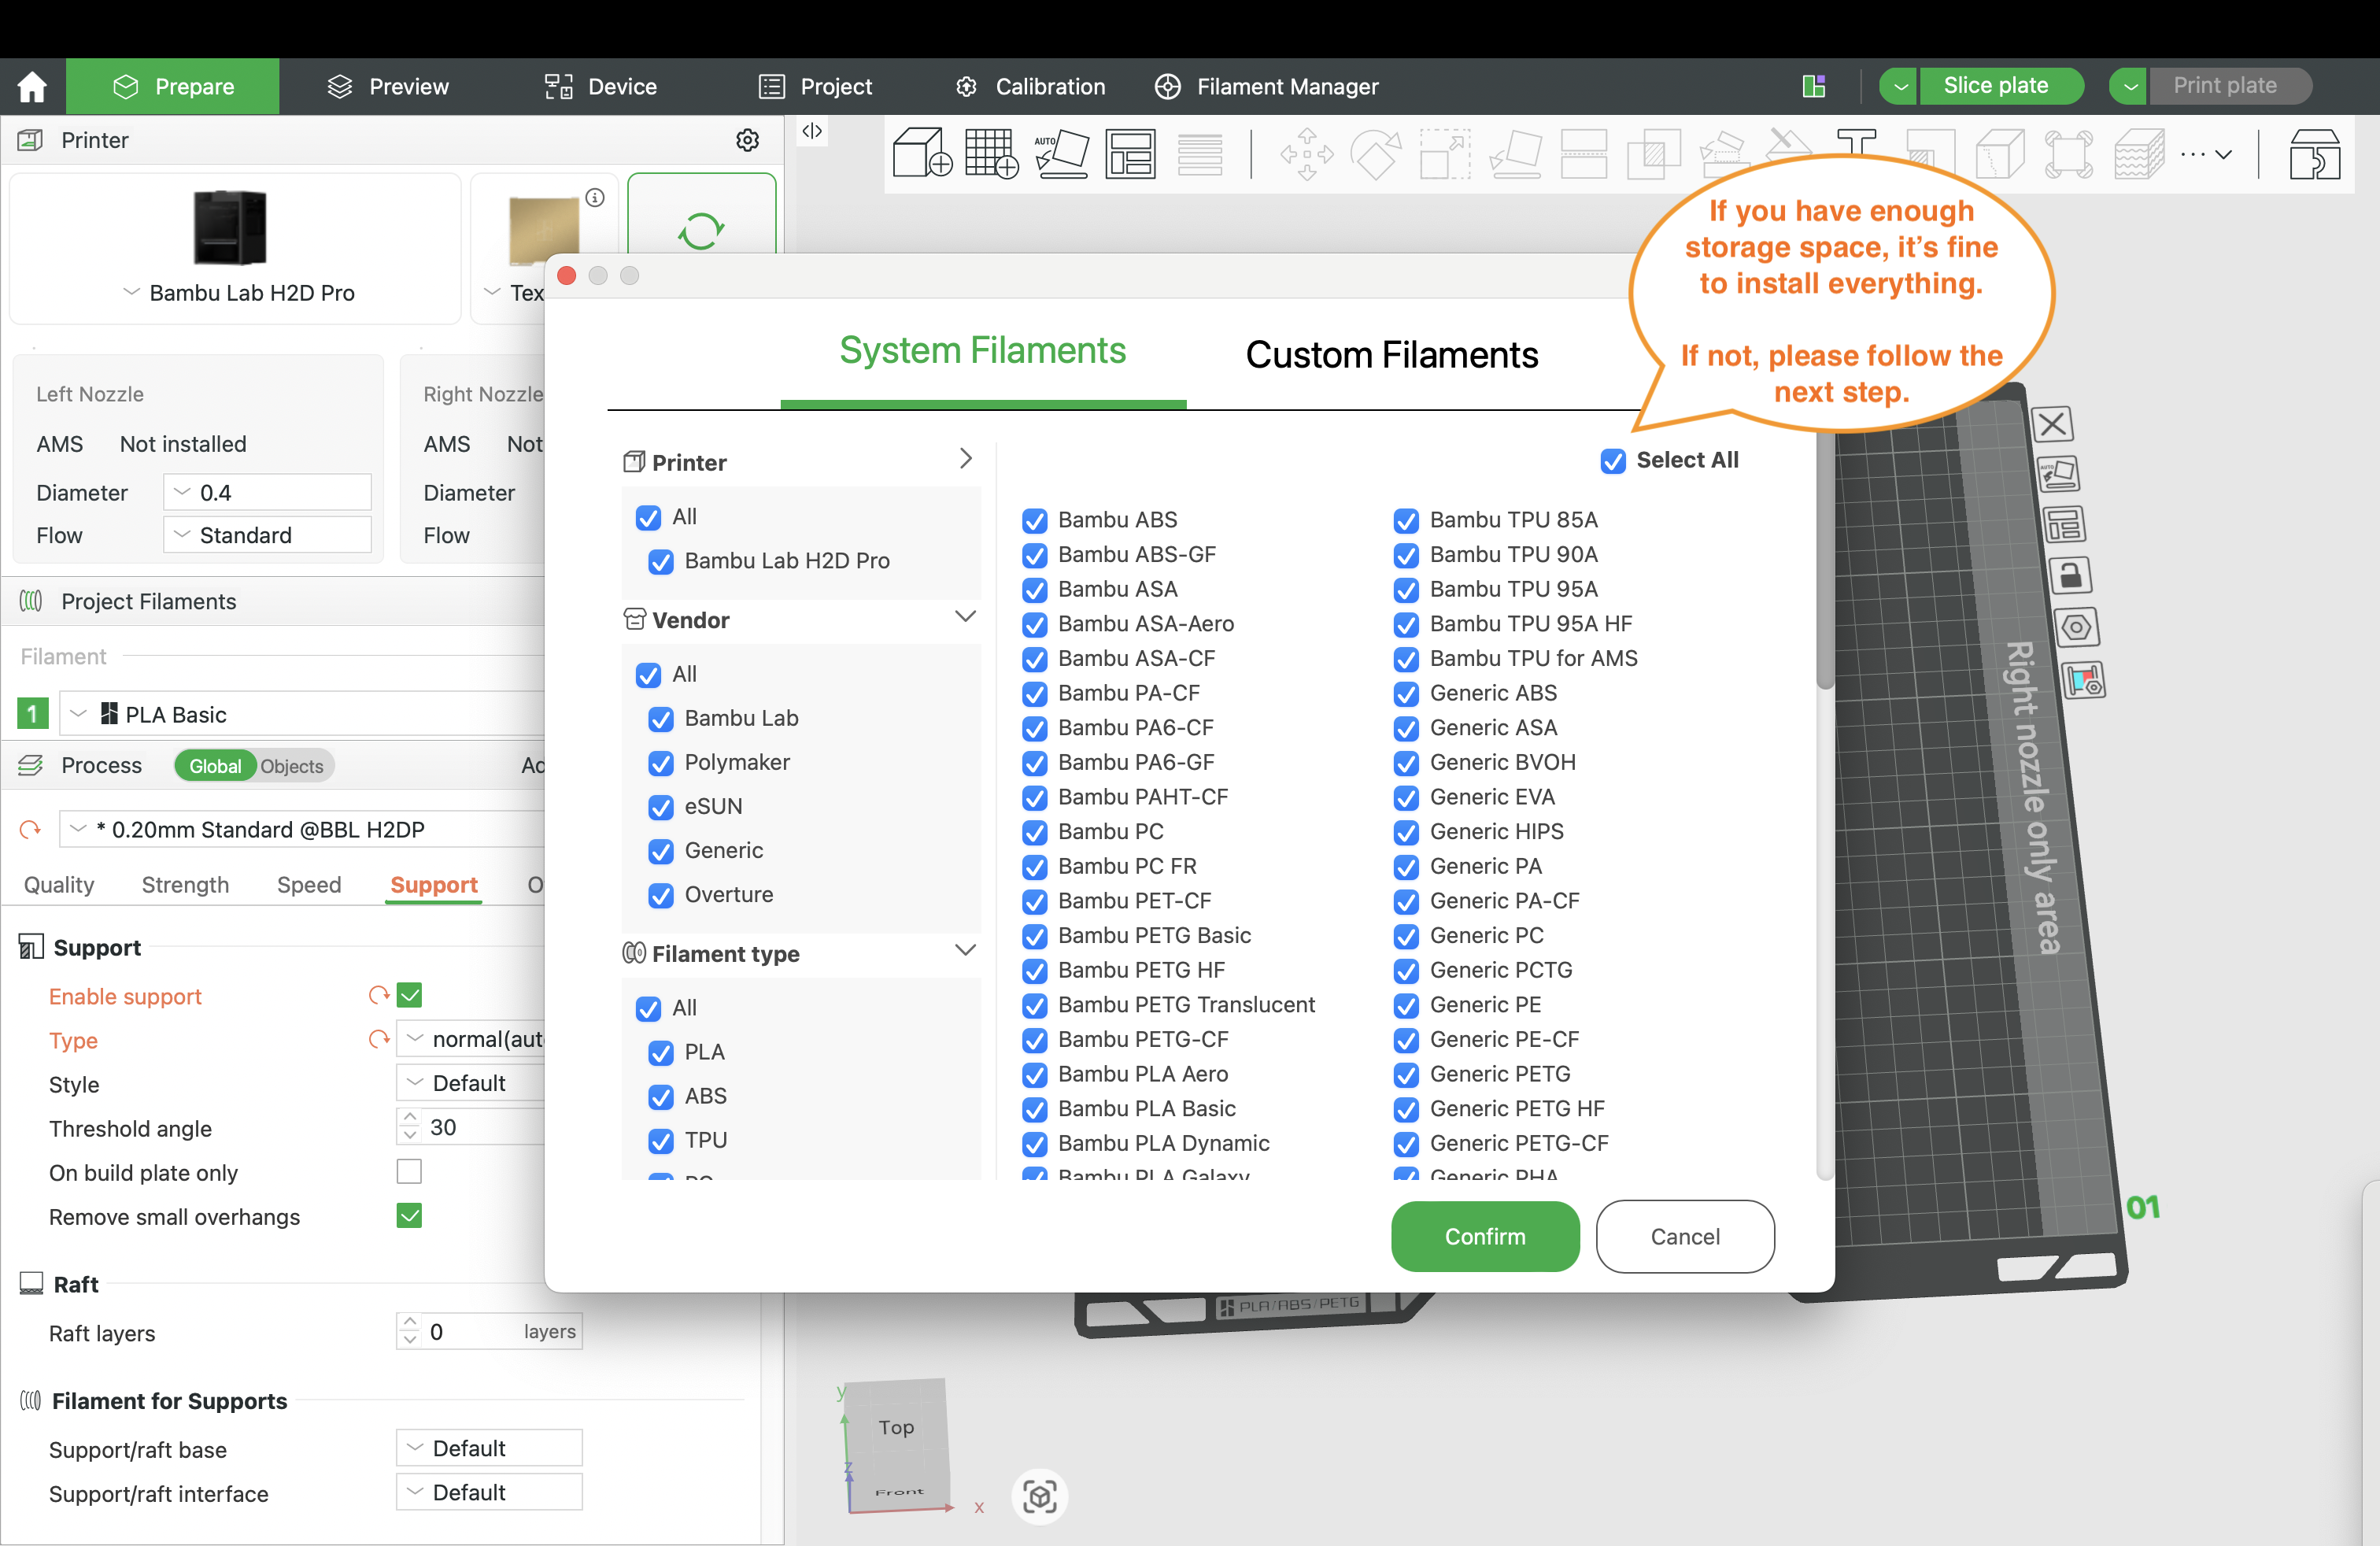
3. Choose the filament profile
4. The following settings should already be set by default:
(1) Equipment
- Bambu Lab H2D Pro
- Build plate type: Textured PEI Plate
- Nozzle diameter: 0.4 mm
- Nozzle type: Standard
(2) Set the filament to Bambu PLA Basic.
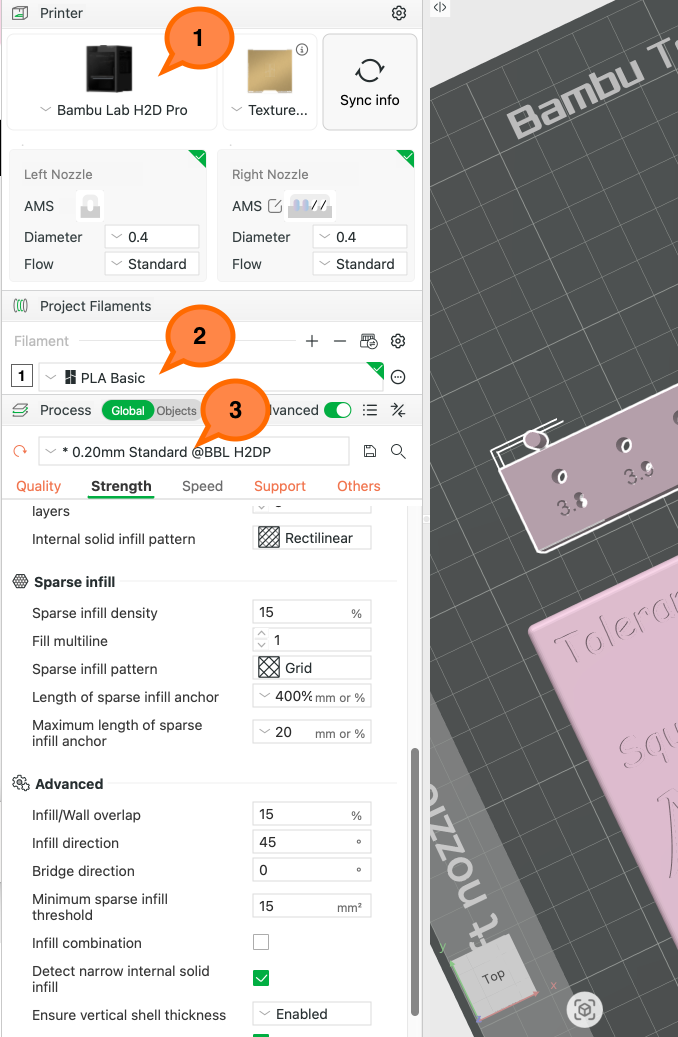
(3) The recommended basic print profile is 0.2 mm Standard. Please choose a profile according to your needs: the finer or stronger the print, the longer it will take. You can also use Variable Layer Height if super fine print quality is extremely important. 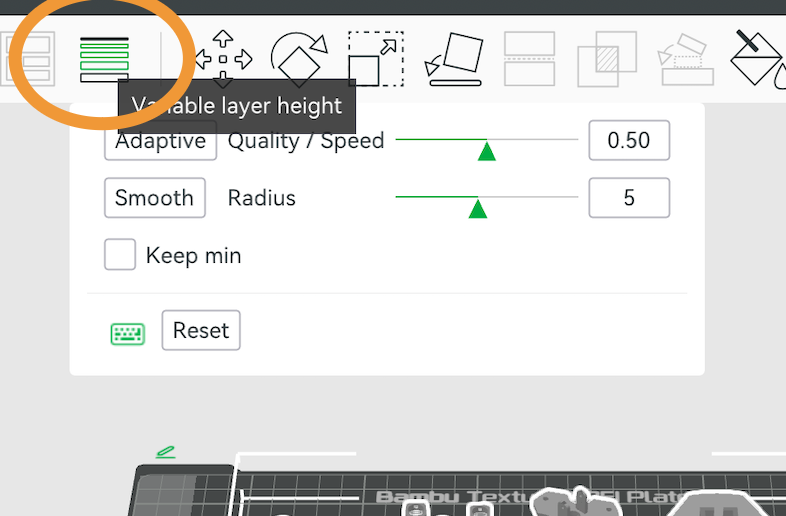
5. Speak to the technician if you need to print in multiple colours/types of filaments.
6. Check your model:
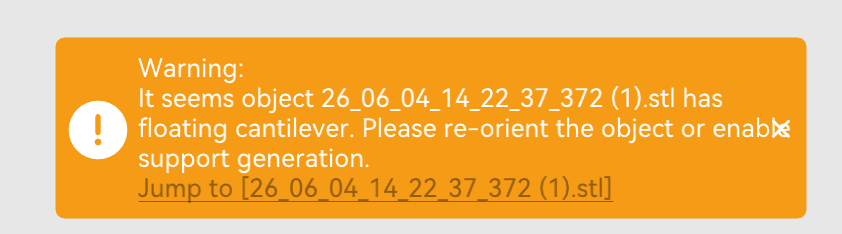
- Fix your model if there is a window pops up as below
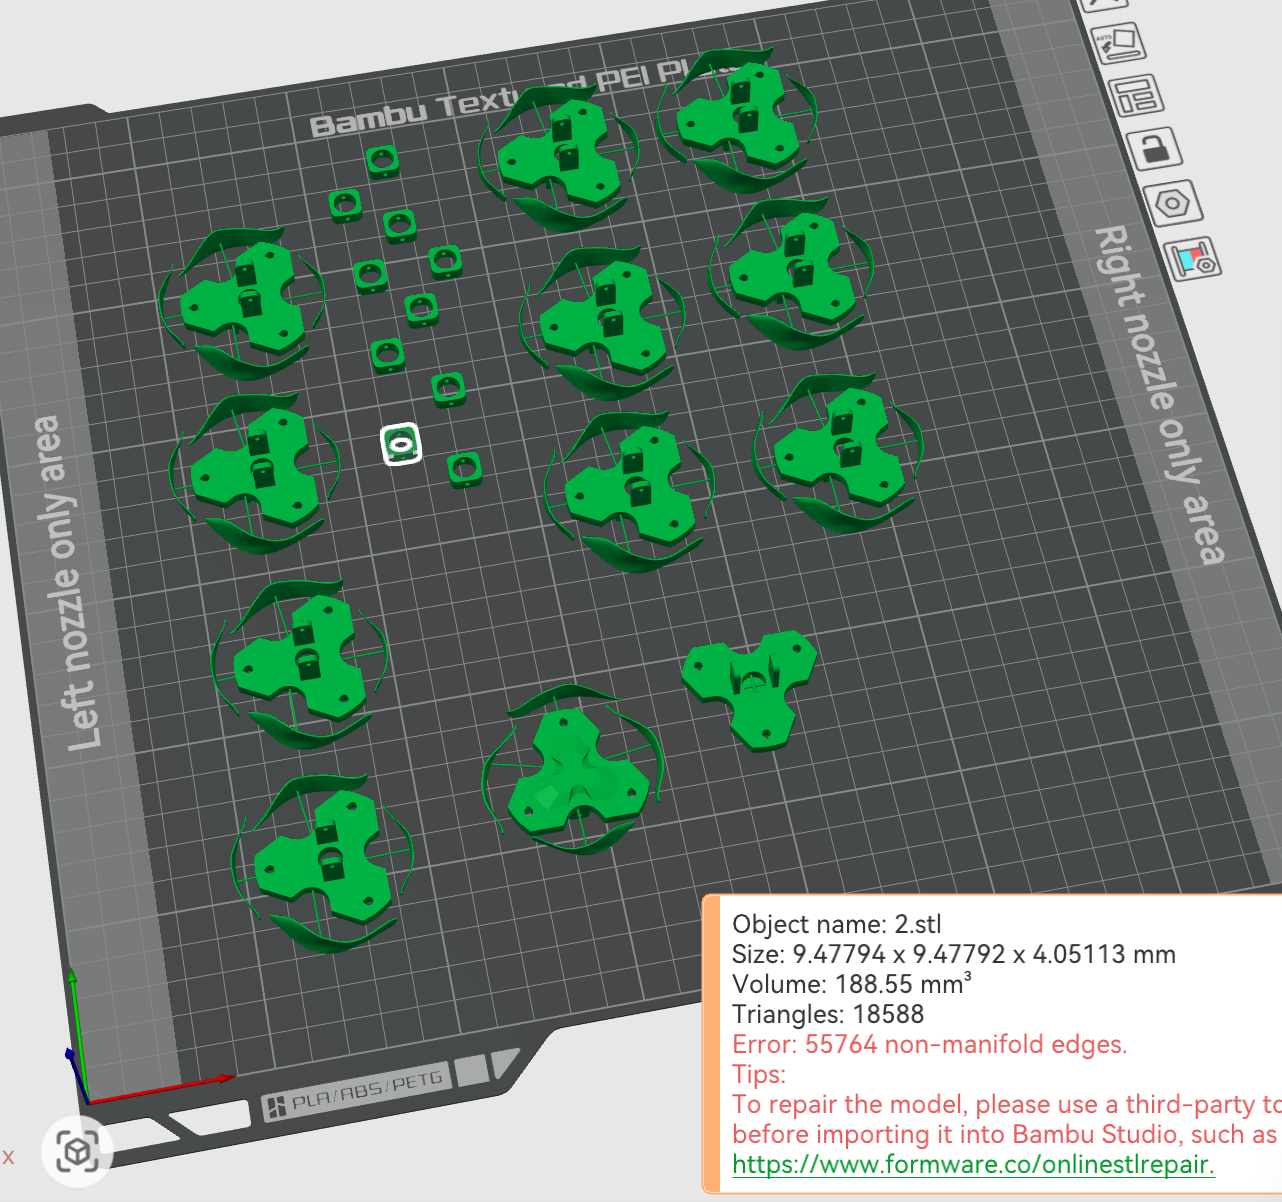 Ultimaker Cura is relatively forgiving with imperfect STL files, while Bambu Studio is stricter about mesh errors. If Bambu Studio asks for repair, the file likely contains non-manifold edges, open surfaces, overlapping faces, reversed normals, or very thin features. Please repair the mesh before slicing or return to the original modelling software to clean the geometry.
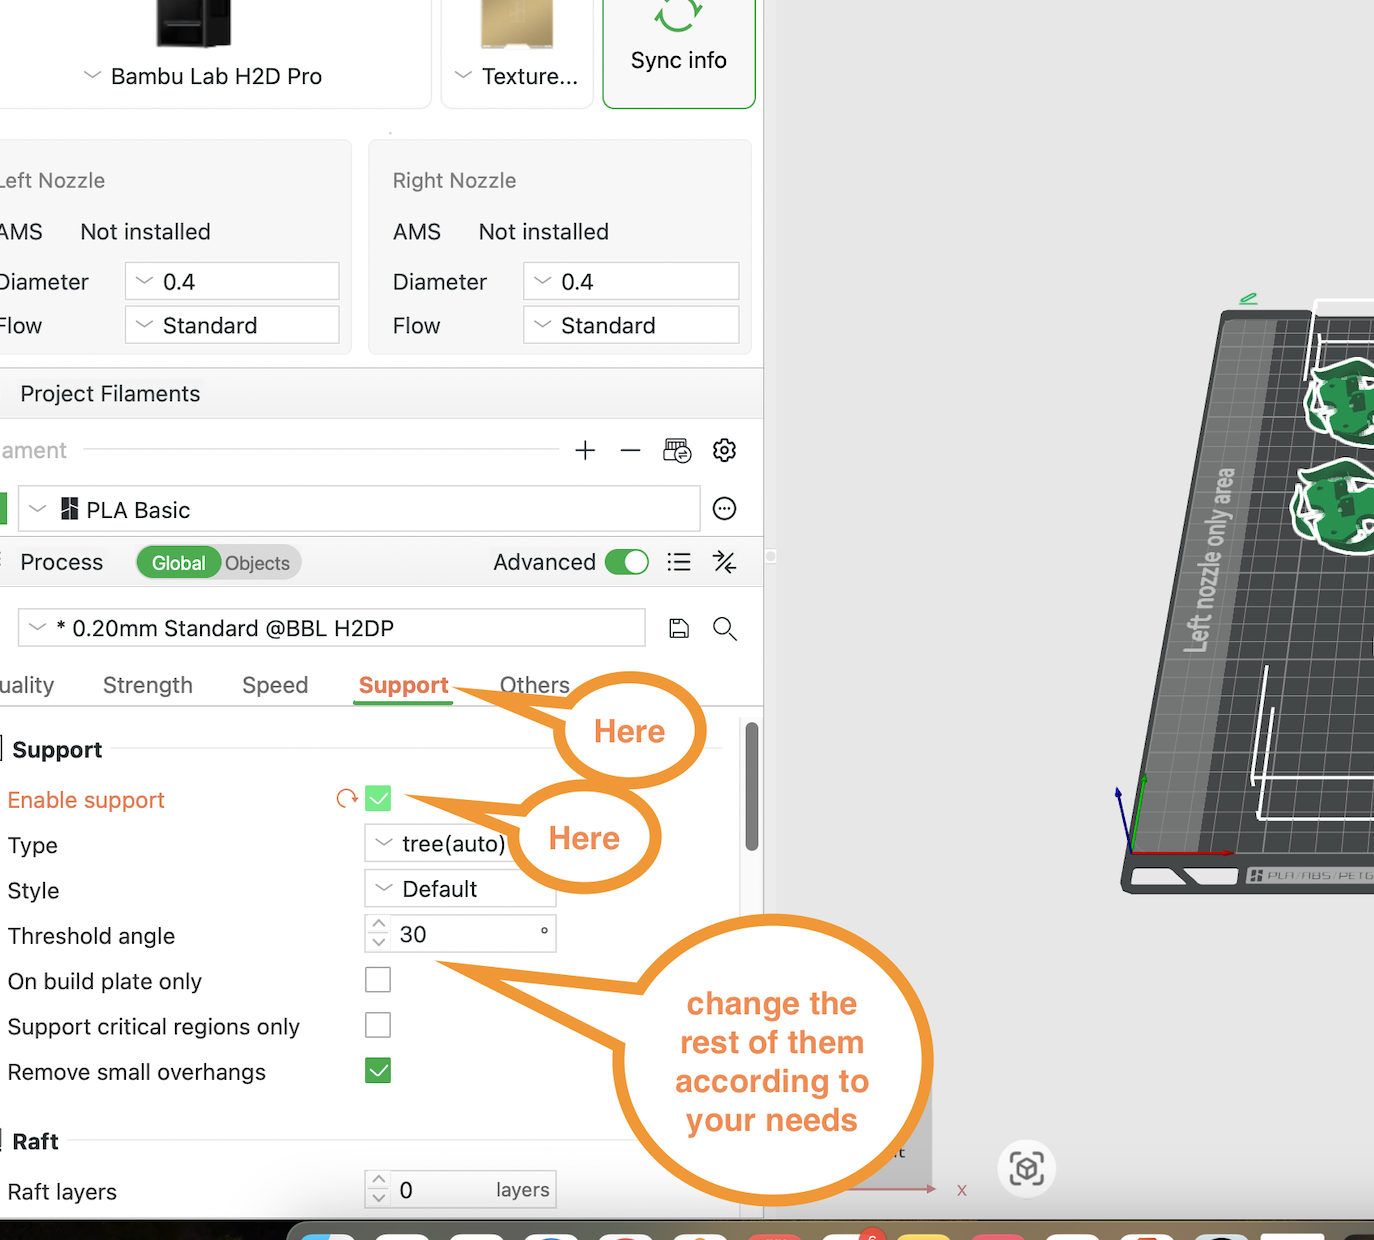
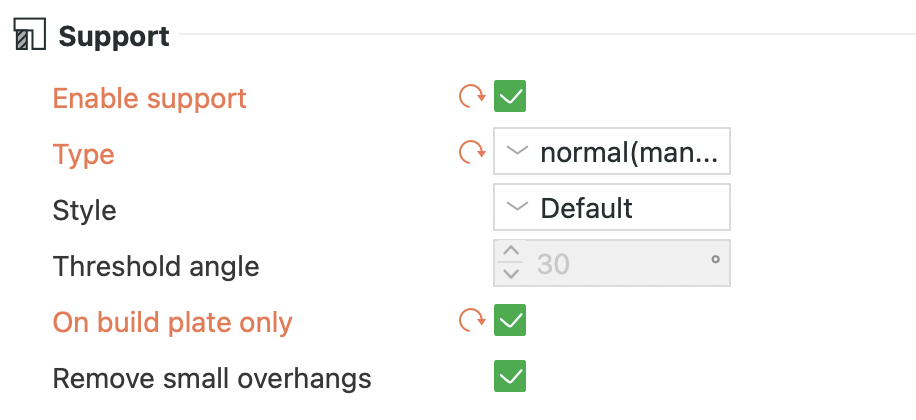
 - whether your model needs support and enable them if necessary, and select different settings according to your models


7. Slice the plate using Custom mode.
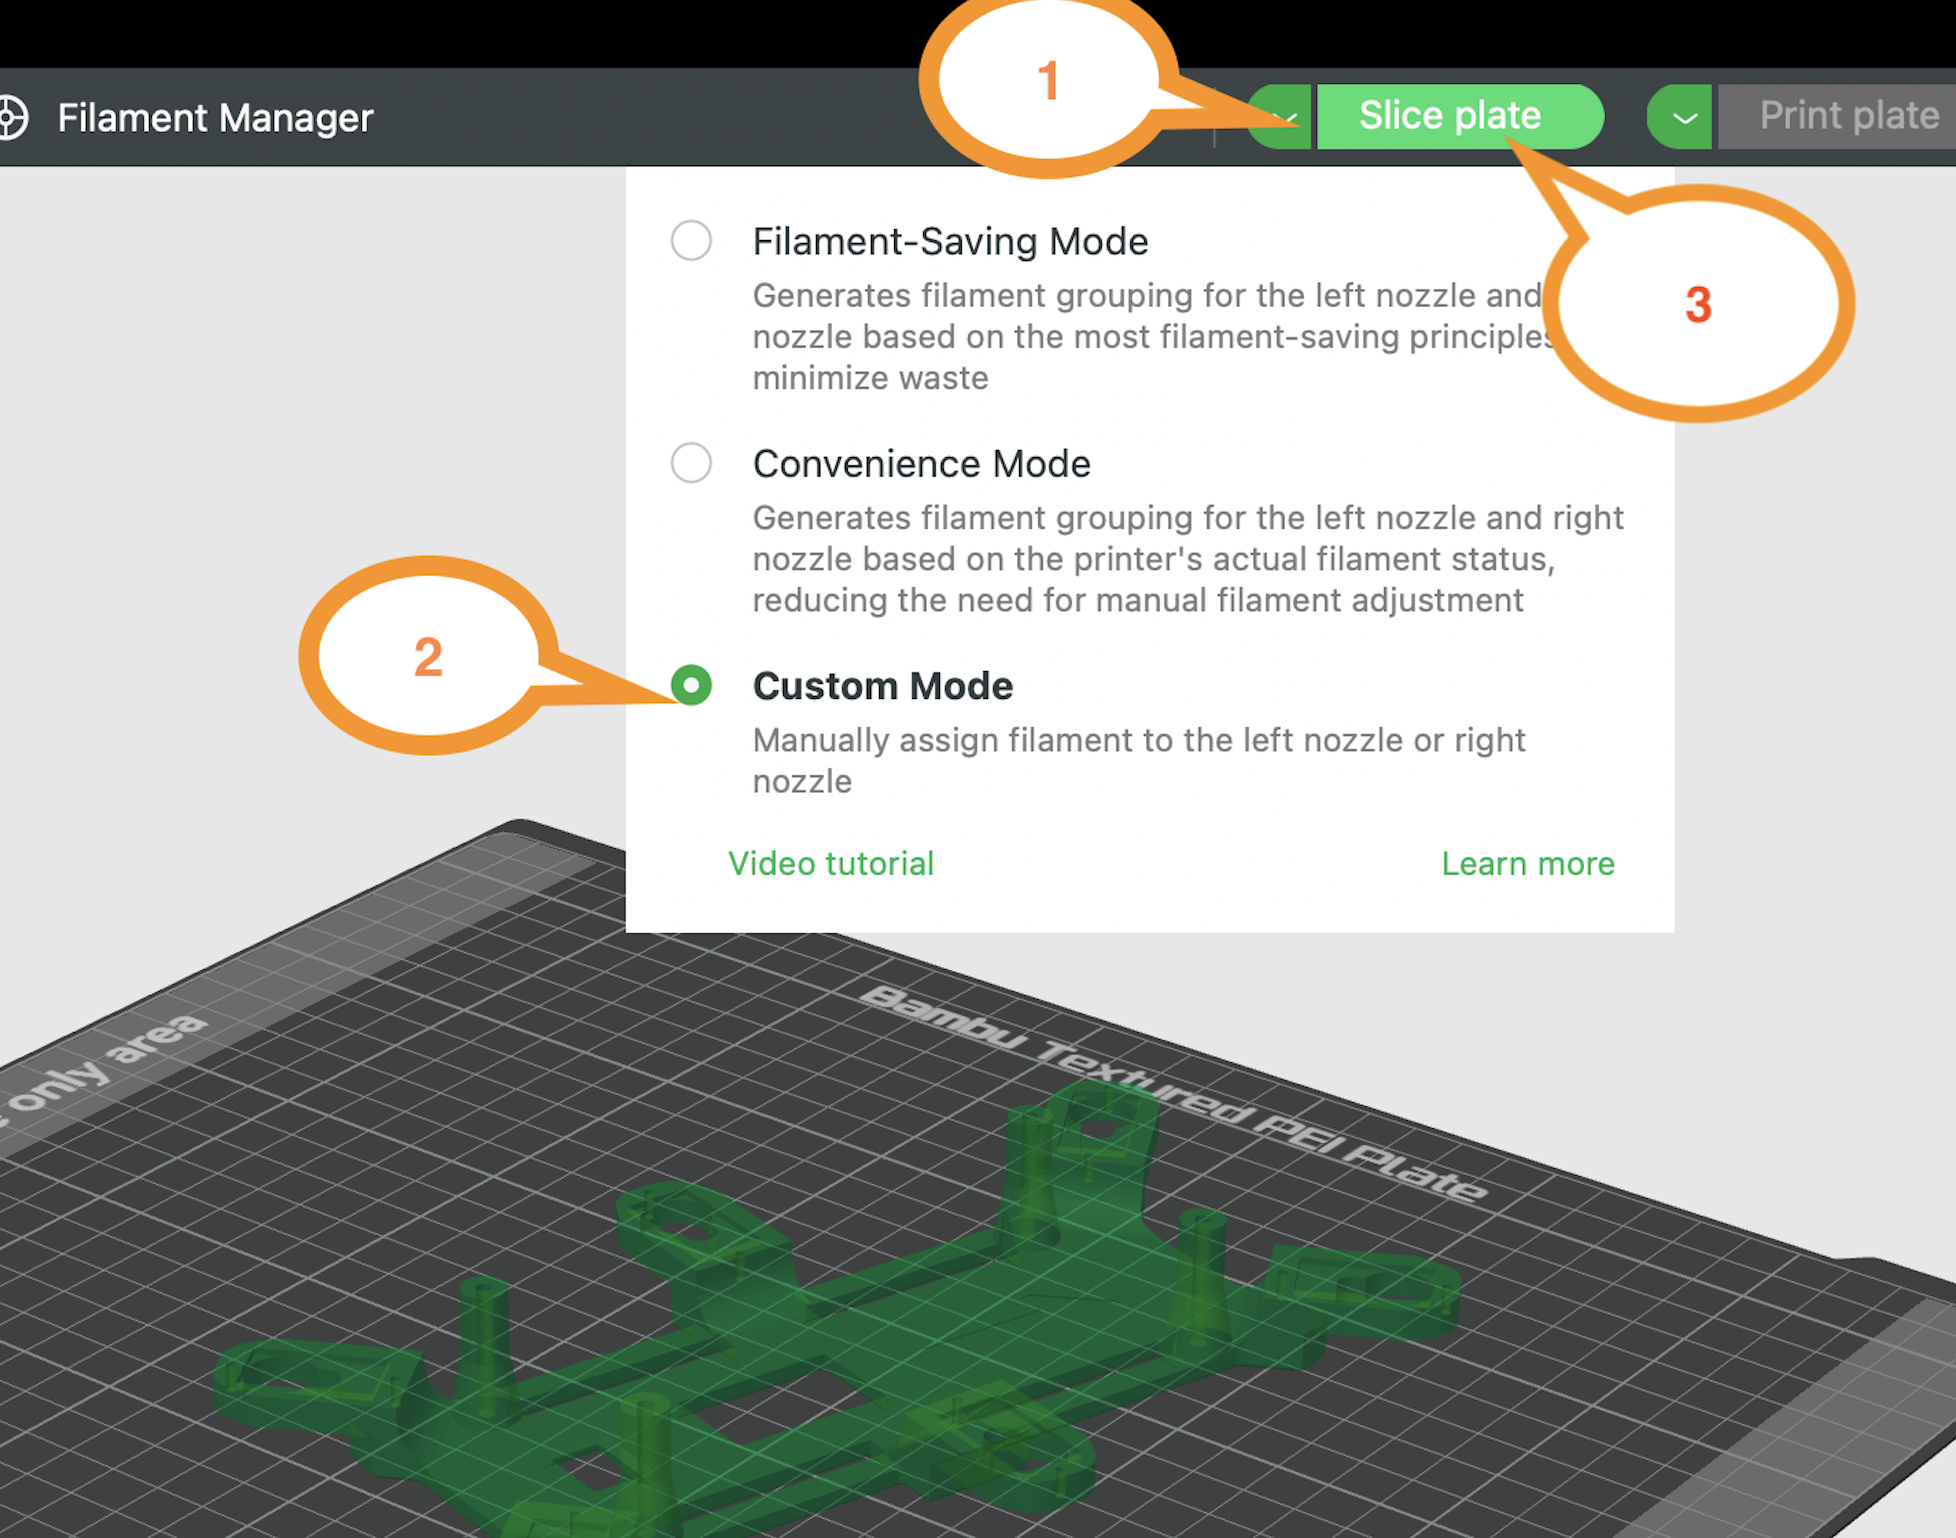
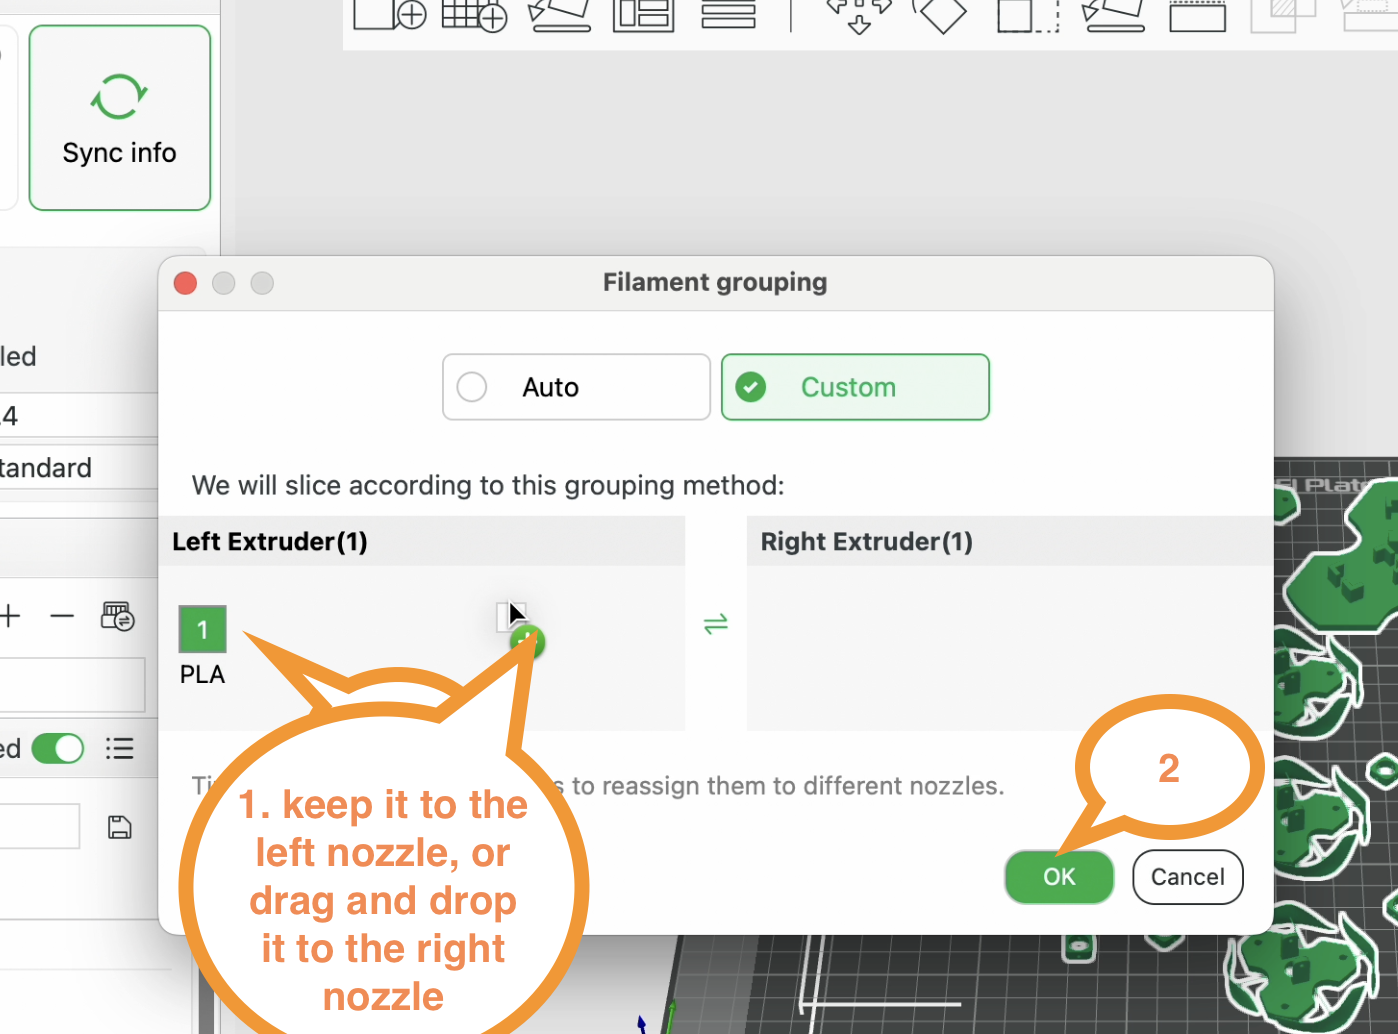
8. Arrange the filament.
Check the filaments in the machine first, and set the PLA Basic filament to the right nozzle if you are not sure.
8. Export .gcode and name the file as:
YourSlackName
Save it onto a USB stick. A USB stick under 64 GB is recommended. We also have some in the lab; feel free to use them as long as you keep them in the lab.