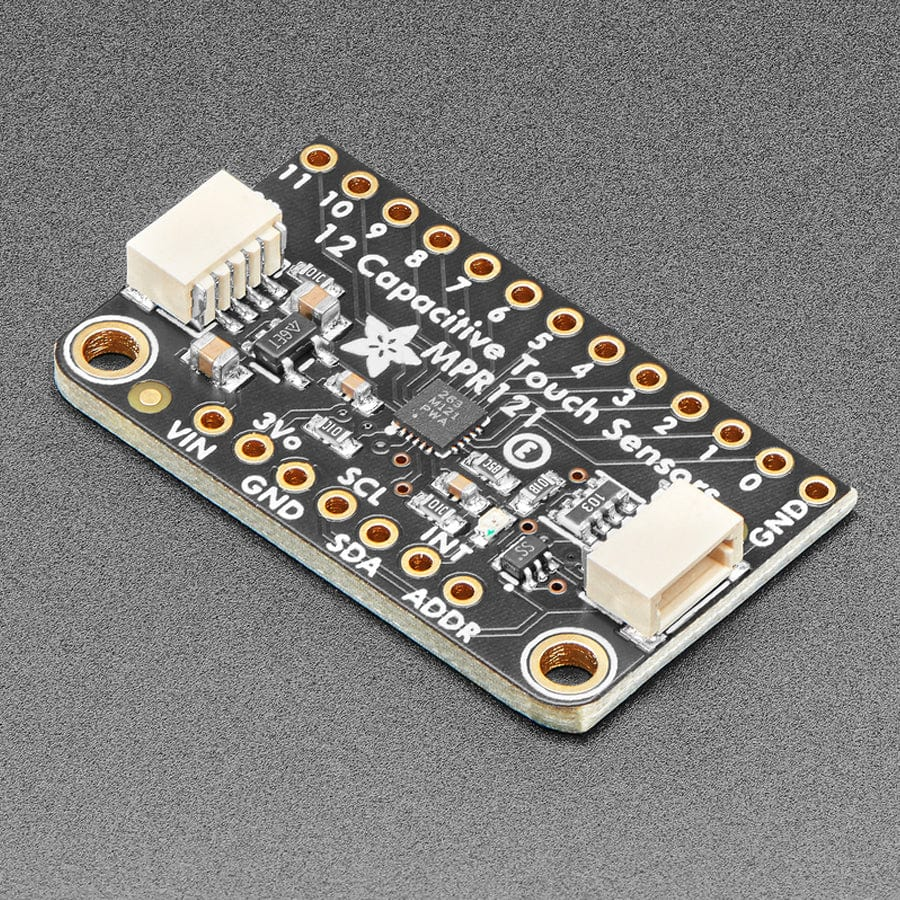
MPR121 Capacitive Touch Sensors
The MPR121 is a capacitive touch sensors that connects easily to Arduino using I2C. This specfic board has 12 channels that can each individually detect touch. It uses capacitive sensing which is able to detect contact with anything conductive (including humans!).
Arduino and Code
Connecting to Arduino
The MPR121 breakout board uses I2C (SDA and SCL pins) to connect to an Arduino as below:
| MPR121 | Arduino |
|---|---|
| Vin | 5V |
| GND | GND |
| SCL | SCL |
| SDA | SDA |
Addressing
If you want to connect more than one MPR121 to the same Arduino they must be given different addresses. You can connect a maximum of 4 MPR121 boards to one Arduino. To do this, the ADDR pin on the MPR121 is connected to other pins as below.
| Address | Pin connected to ADDR |
|---|---|
| 0x5A | n/a |
| 0x5B | 3V |
| 0x5C | SDA |
| 0x5D | SCL |
The default address is 0x5A, so nothing needs to be done for this. Once addressed, the boards can all be connected to the same SDA and SCL pins on the Arduino.
Sample Code
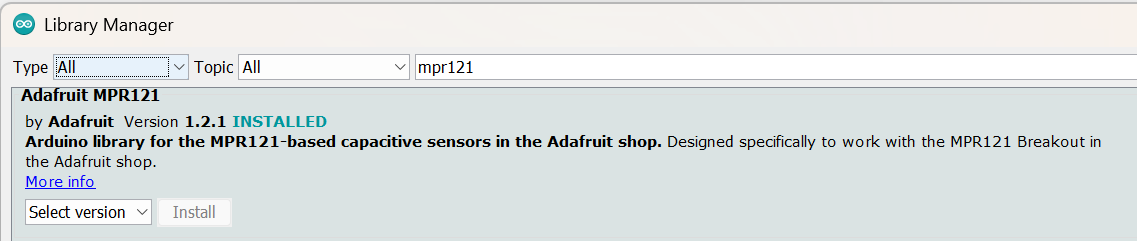
To start, you need to download the Adafruit_MPR121 library from the Arduino library manager (make sure it is specifically the Adafruit one).
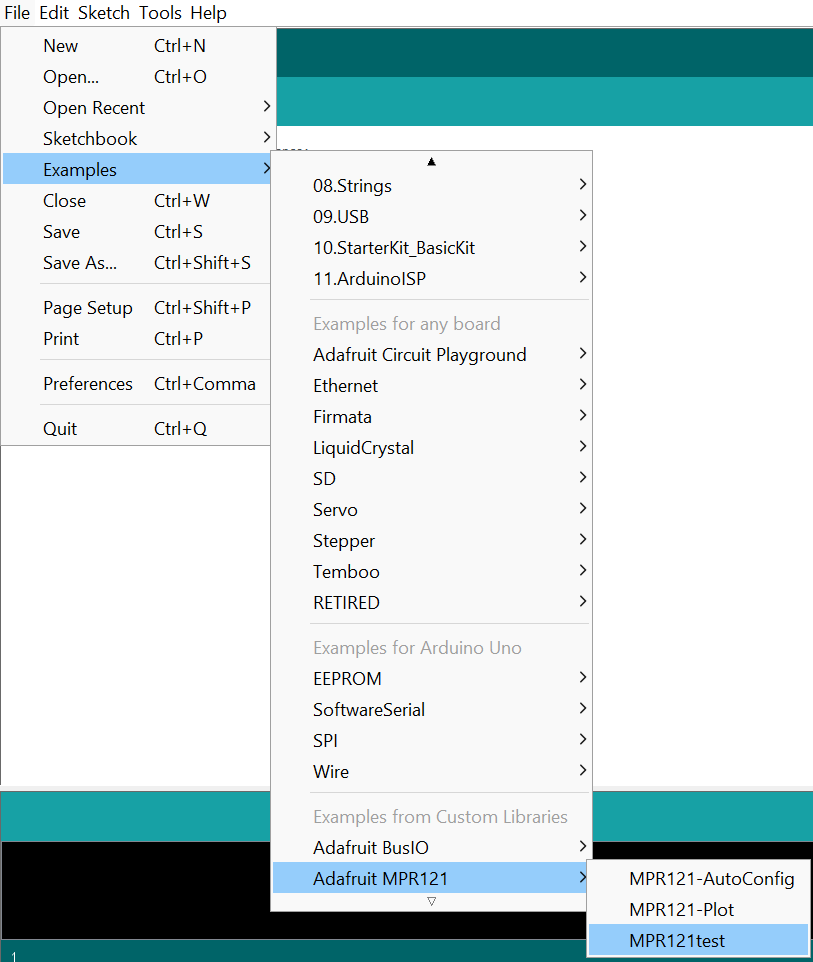
The example code 'MPR121test' gives a very good base to start from.
Adjusting the Sensitivity of the MPR121
When initialising the MPR121, the following lines are used:
Adafruit_MPR121 cap = Adafruit_MPR121();

void setup(){
  cap.begin(0x5A);
}
Here we can see the begin() function, which is defined as follows:
begin(uint8_t i2caddr=MPR121_I2CADDR_DEFAULT,
      TwoWire *theWire=&Wire,
      uint8_t touchThreshold=MPR121_TOUCH_THRESHOLD_DEFAULT,
      uint8_t releaseThreshold=MPR121_RELEASE_THRESHOLD_DEFAULT)
By default the values are MPR121_TOUCH_THRESHOLD_DEFAULT = 0x41 and MPR121_RELEASE_THRESHOLD_DEFAULT = 0x42. The 0x at the beginning of the number shows that they are written in hexadecimal, click here to understand how hexadecimal works and to convert between hexadecimal and decimal.
We can change these values to adjust the sensitivity. To do this, add arguments to begin() with new values for the thresholds, as below:
Adafruit_MPR121 cap = Adafruit_MPR121();

void setup(){
  cap.begin(0x5A, &Wire, 0x4, 0x5);
}
To see the full definitions for the MPR121 Arduino library, click here
Viewing the Raw Data
If instead, you want to be able to detect some variations in touch rather than just whether someone is/isn't touching, you can look at the raw data. To do this we can use the filteredData(i) function where i is the touch pin number that you want to see the data for.
The second half of the loop() function in the MPR121test sample code contains a section that will print out with baseline and filtered data readings, you just need to comment out the return above it.
If you are wanting to use this for multiple pins it can be very useful to use the Serial Plotter in the Arduino IDE to view the data. Instructions on how to use that are here.
Calibration
Each time you rerun the code, the MPR121 will calibrate its sensors. This means that if you want to detect touch, you must NOT be touching it whilst the code is loading otherwise the reading it is getting from the touch will be used as the baseline value.
Creating Textile Touch Sensors
Using the MPR121, we can create touch sensors from any conductive material. Within eTextiles this can include, swatches knitted with conductive yarn, conductive embroidery, metal haberdashery (e.g. buttons, zips, grommets), etc. To connect these to the sensor, you can initally use crocodile clips when testing but then will want to attach them more securely. Check out our page on Metal to Fabric Connections for some more info and suggestions.