Setting Up a Git Repository
Git is a tool for versioning code. A git repository is a folder of files where changes made over time have been recorded. You might have encountered version control using software like Dropbox, Google Drive or Fusion360, all of which automatically keep records of changes to files. Git is designed specifically for versioning code, and is used ubiquitously in a professional software development context. If you've ever broken some code and wished you could go back to an earlier version, this is a classic use-case for git.
Git is distinct from Github, which is a website used to host and share git repositories, though the two are very often used together. Github is an extremely useful complement to git, which not only provides a smooth way to share and collaborate on code, but also allows free (!) hosting of websites via a service called Github Pages.
There are lots of great tutorials for using all of these tools, so this page is mostly a list of useful links with a broad description of principles.
Setting up Git on Your Computer
The first step is to download the git Command Line application -- there are versions for Windows, Mac and Linux. When interacting with git on a Mac or Linux computer, you will want to use the Terminal (sometimes called Shell, or Command Line on Linux). If you have a Windows computer, you will want to use Git Bash (the shell that you get when you download git) rather than Command Prompt for the tutorials linked below. (the reason for this is that Git Bash is a Unix-type shell, not a Windows shell -- the two have different sets of commands).
Installing git on Windows will get you to go through mulitple setup stages: it's fine to just go with the default for each, though it's a good idea to set your default branch to 'main' when prompted.
It is possible to use git via a GUI (a graphical interface that you click on, as opposed to a Terminal interface), Github Desktop is probably the best of these. I'd recommend trying to use the terminal (Command Line) version if you can, though, as through doing so you get a much better understanding of the process.
Initial Setup
When we use Git on a new computer for the first time, we need to configure a few things so run the follow commands in the terminal to set your name and and UAL email address.
git config --global user.name "Your Name"
git config --global user.email "yourname@arts.ac.uk"
If you are unfamiliar with the terminal then we suggest using VScode and becoming familiar with its inbuilt terminal which has clear instructions for its use. For further information on the Git setup process read Getting Started with Git.
Making a local Git Repository
A 'git repository' is a folder full of versioned files that lives on your computer. To turn ANY directory (folder) into a git repository navigate to that diretory (see Navigating the Filesystem with the Unix Shell )
cd path/to/folder
mkdir new-repository
cd new-repository
Once you have a folder set up, and you have navigated to it, run the following command:
git init
Save changes to your local Git Repository
Run the following command to save any change to files in the current directory to the local got repository. 'git add' tells git to save all the changes you made. 'git commit -m "some message"' saves a note or comment to those changes.
git add . -- tells git you'd like to save *all* the changes you made
git commit -m "some message" -- versions files with a message
Connecting with remote Git repositories on git.arts.ac.uk
If you are linking a local Git repository to a repository on git.arts.ac.uk for the first time you will need to make a git.arts.ac.uk account, generate an SSH key, and save it to your git arts account using the following instructions:
-
Generate an SSH key on your computer. If you are on a Windows computer, you will want to run these commands in a Git Bash terminal. On a Mac or Linux, use Terminal (these screenshots are from a Mac but the commands will be the same)
-
check whether you have any ssh keys already: Do this by running the command
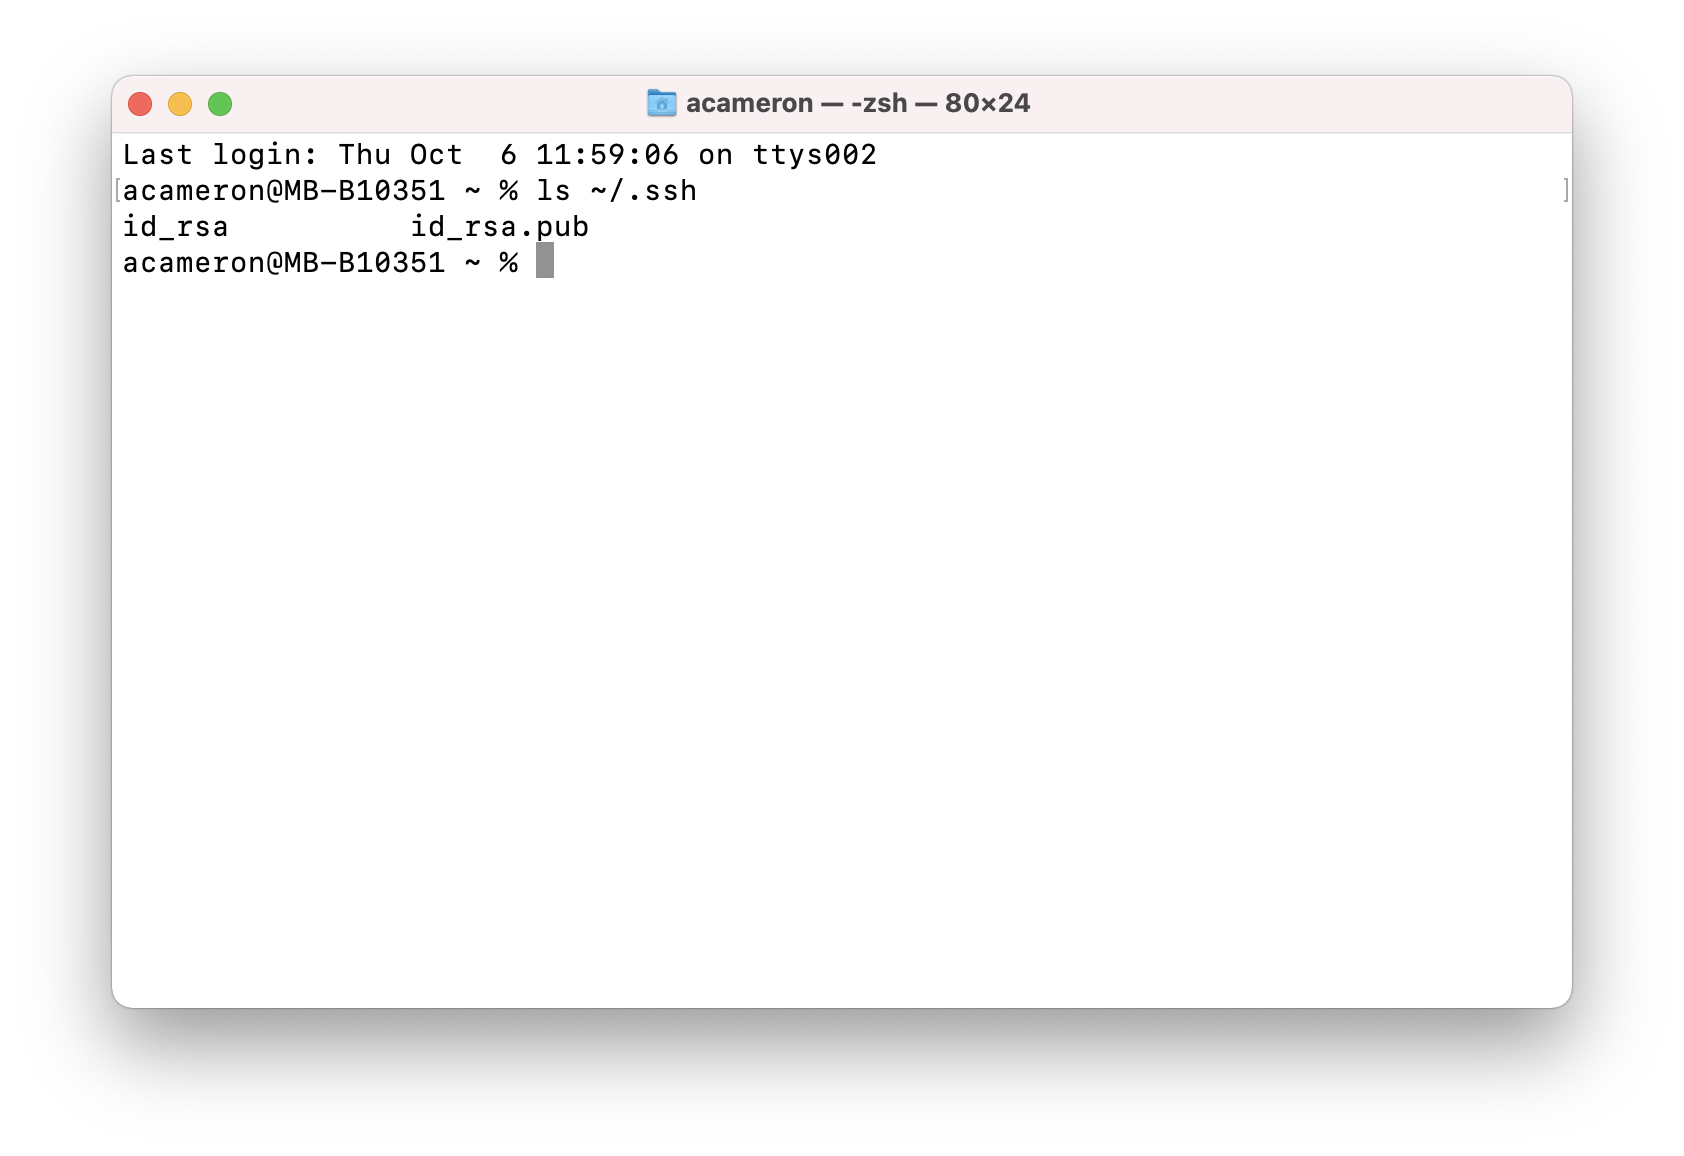
ls ~/.sshin your Terminal. What this will do is list ssh keys if they exist. There are 2 possible outcomes from this step, which will affect what you do next:- Outcome 1 -- your terminal prints out 2 filenames, like
id_rsaandid_rsa.pub, orid_ed25519andid_ed25519.pub. If your Terminal looks like this then it means you have SSH keys already and you want to keep them! skip to step 3.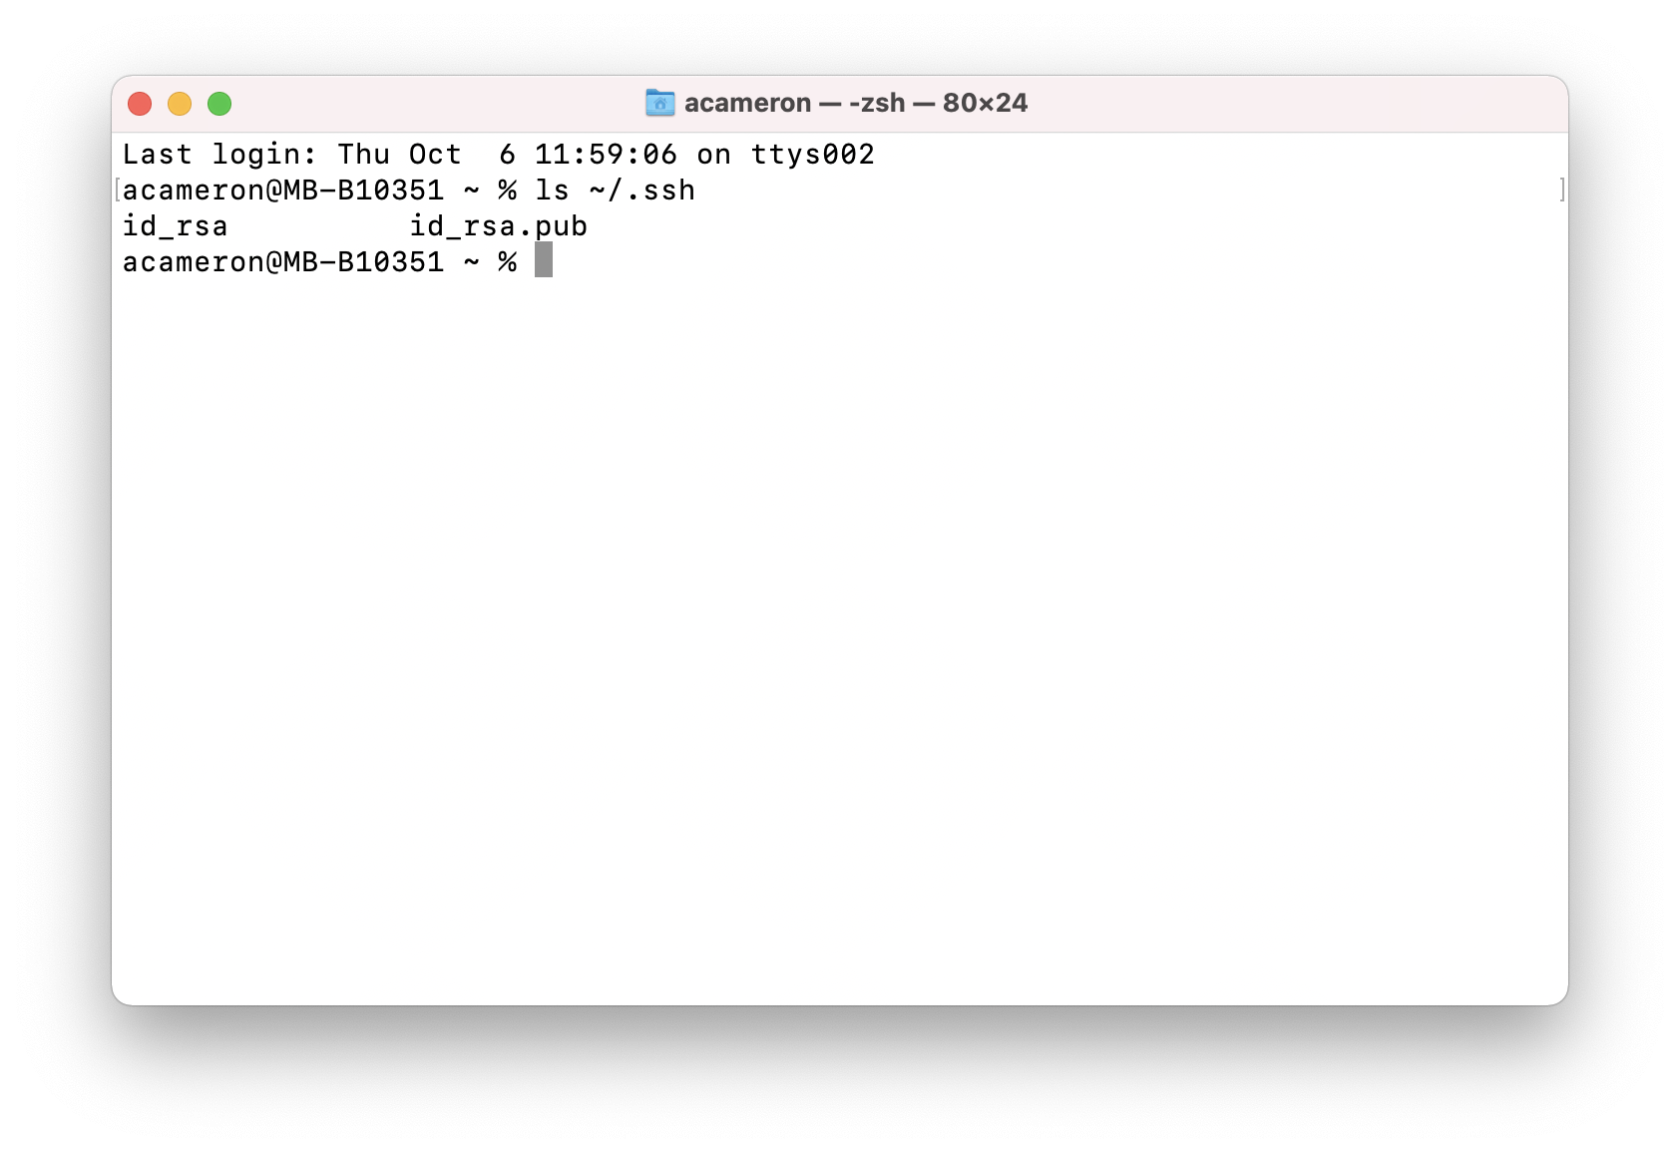
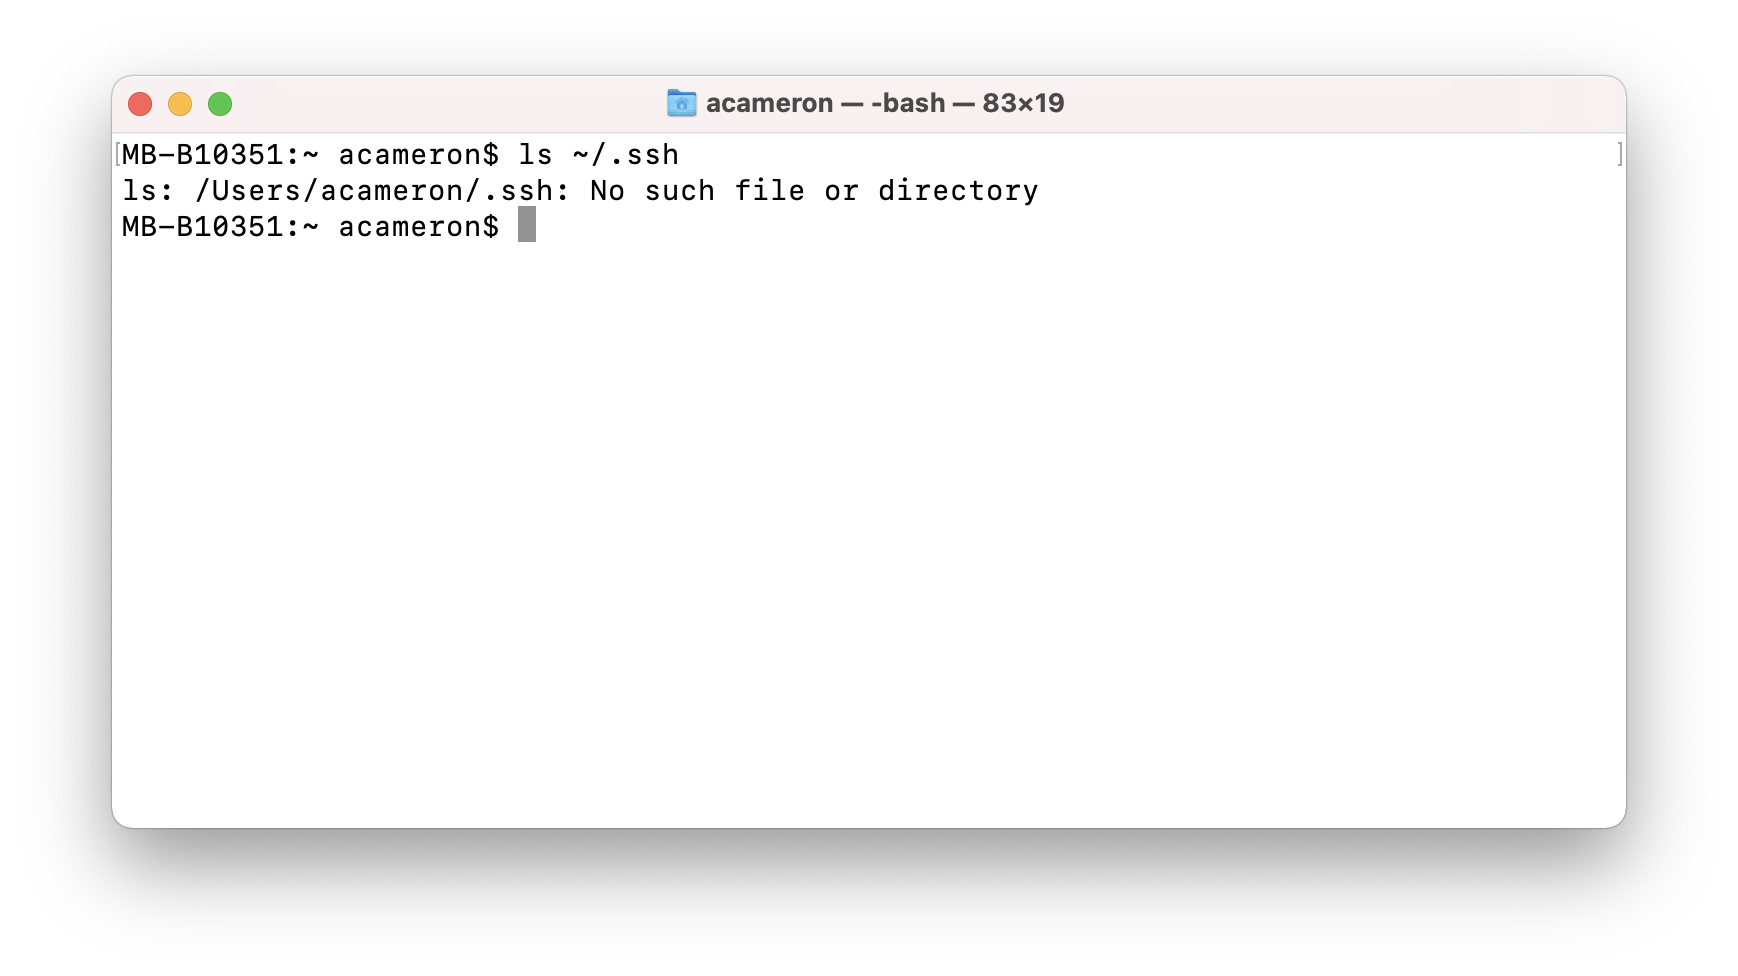
- Outcome 2 -- your Terminal says something like
No such file or directory, or prints a filename calledknown_hostsand nothing else. Go to step 2 -- you need to make an SSH key.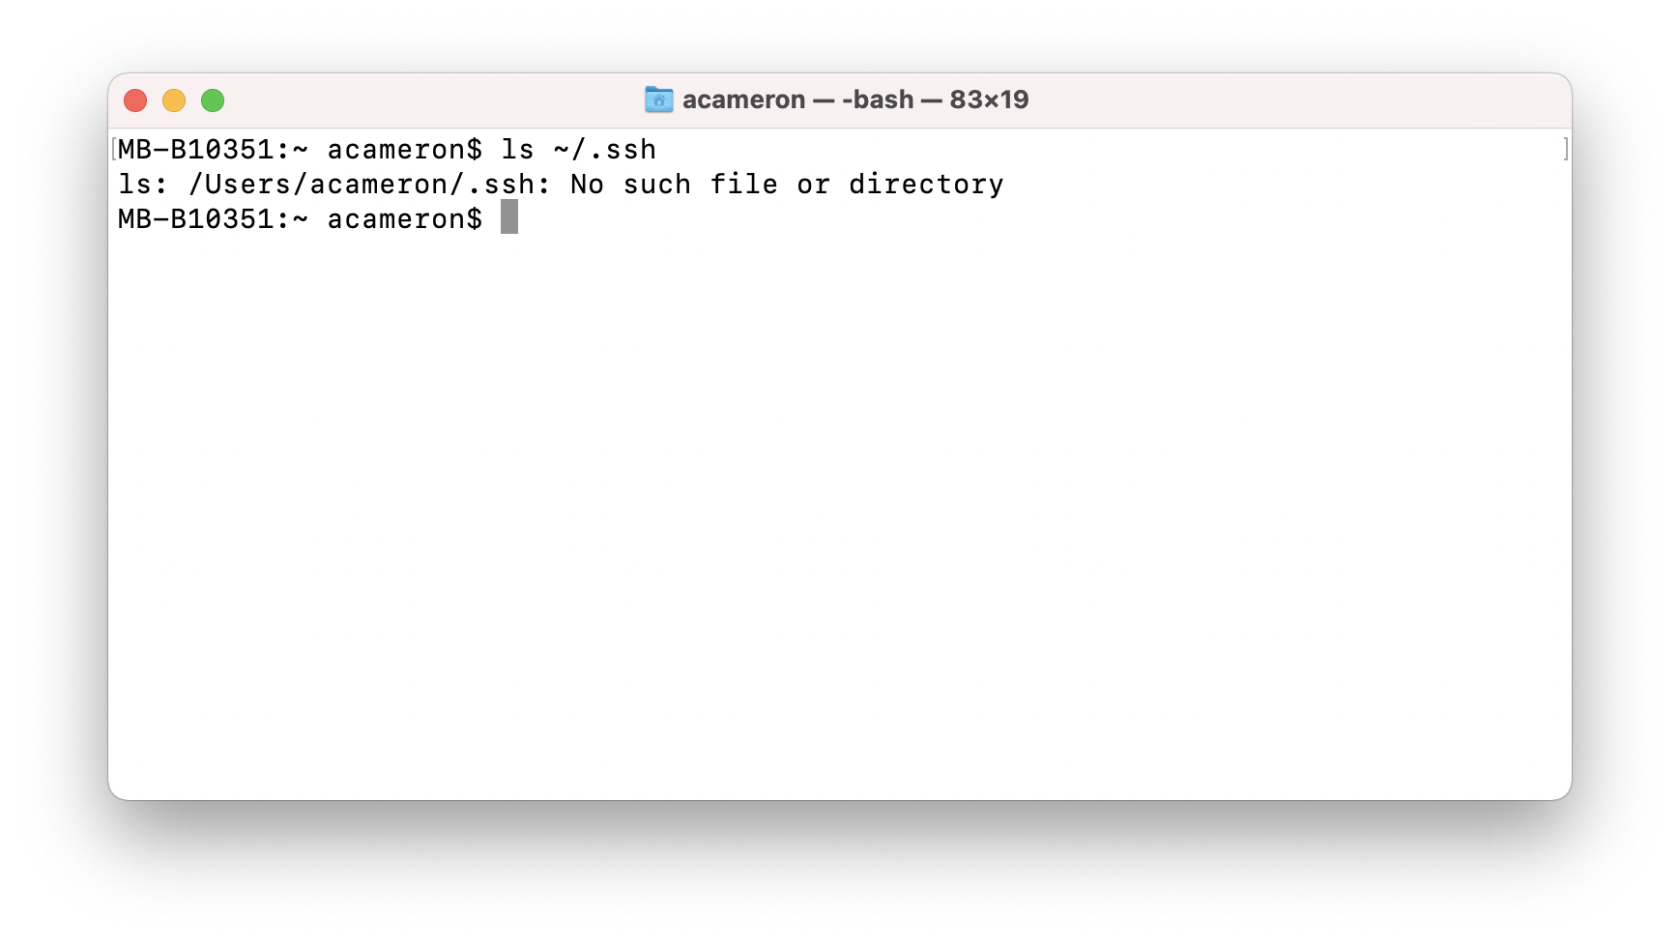
- Outcome 1 -- your terminal prints out 2 filenames, like
-
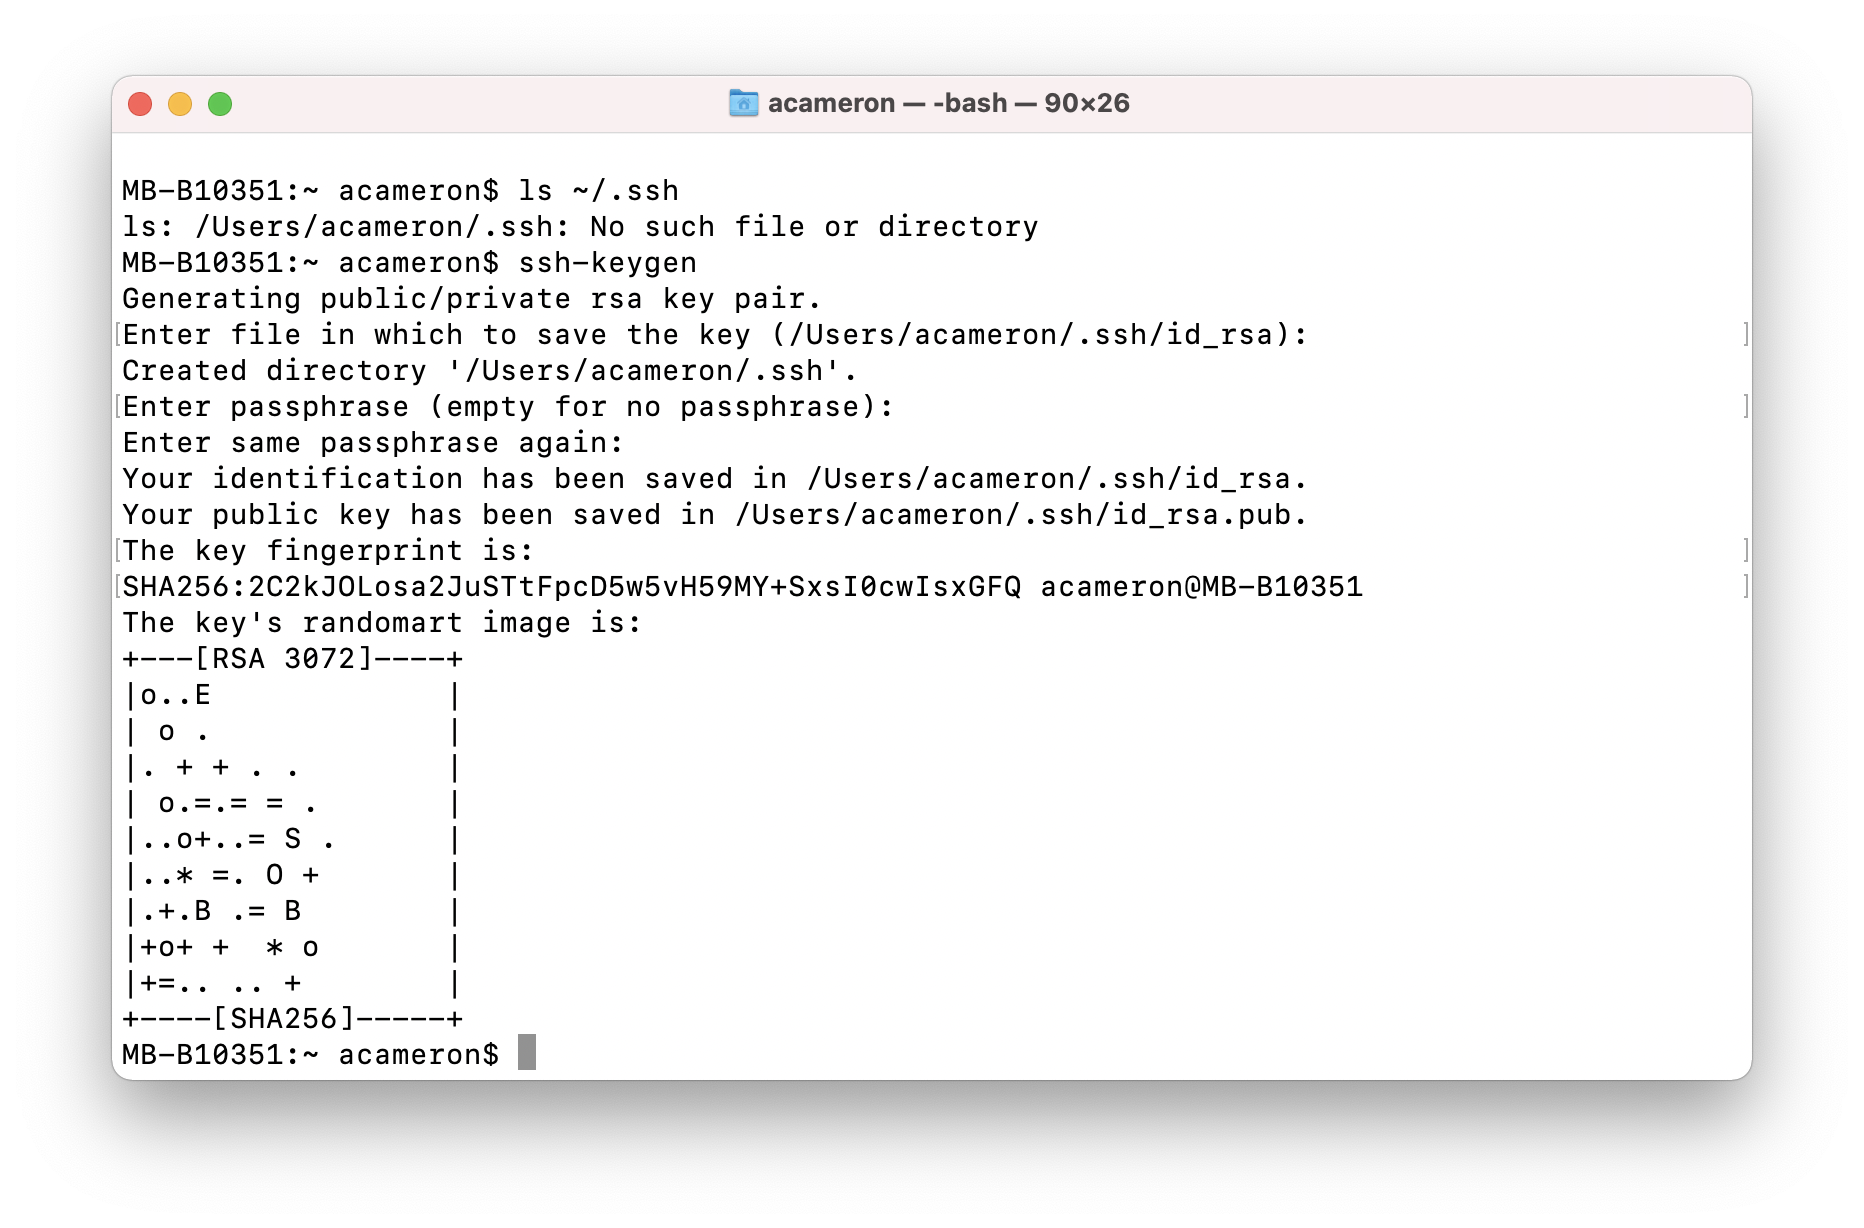
create an SSH key if you didn't have one in the first step: To make an SSH key, we are going to use a command-line program called
ssh-keygen. Make sure you don't already have an SSH key before running this (step 1) because it will overwrite old keys by default. To create the key, run the commandssh-keygenin your Terminal and press enter. It will launch a dialog, shown below: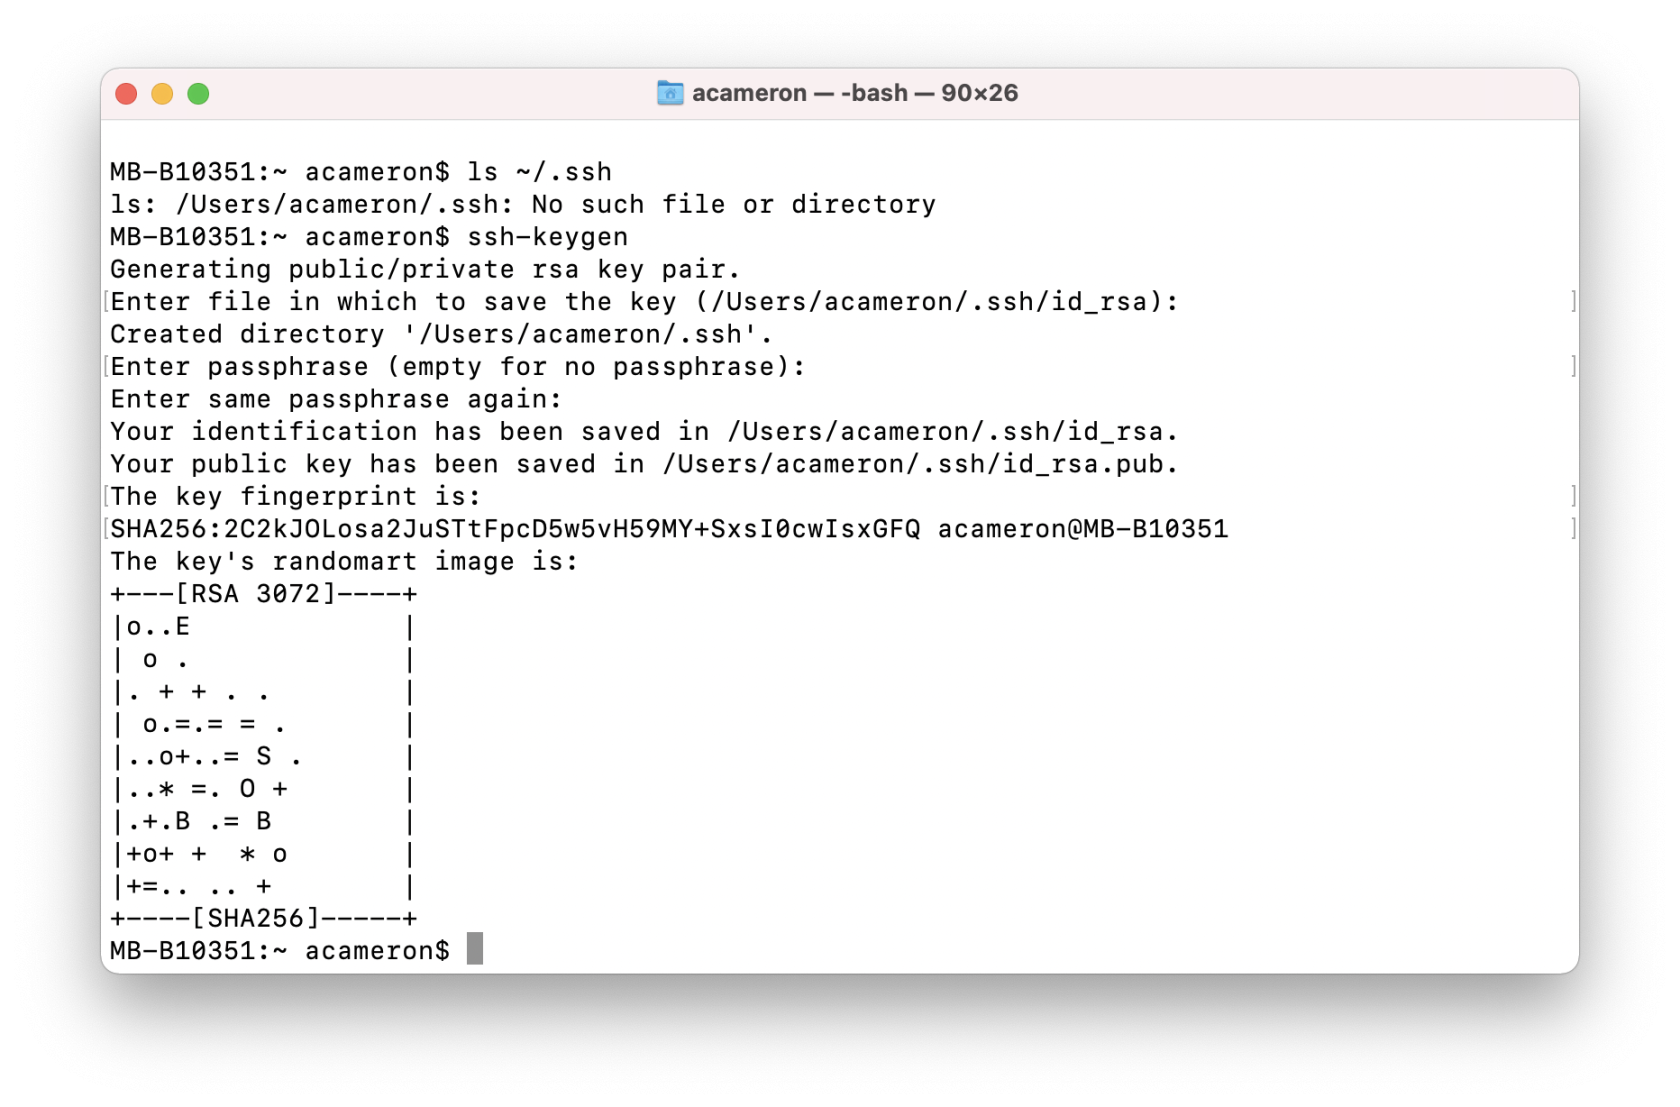 To create the key, press enter to accept each option. You don't need a passphrase, but you can set one if you like. When you see the randomart image (cute huh), the key has been completed.
 -
print your public SSH key to Terminal so we can use this in the next step Your public key is the keyfile that ends in
.pub. It's either going to be calledid_rsa.pub(by default it will be called this), though if your keys were calledid_ed25519in the first step it will be calledid_ed25519.pubinstead. Both will work. To print out your public key (we will want to copy it in the next stage of the process), use the concatenate commandcat ~/.ssh/id_rsa.pub, as shown below: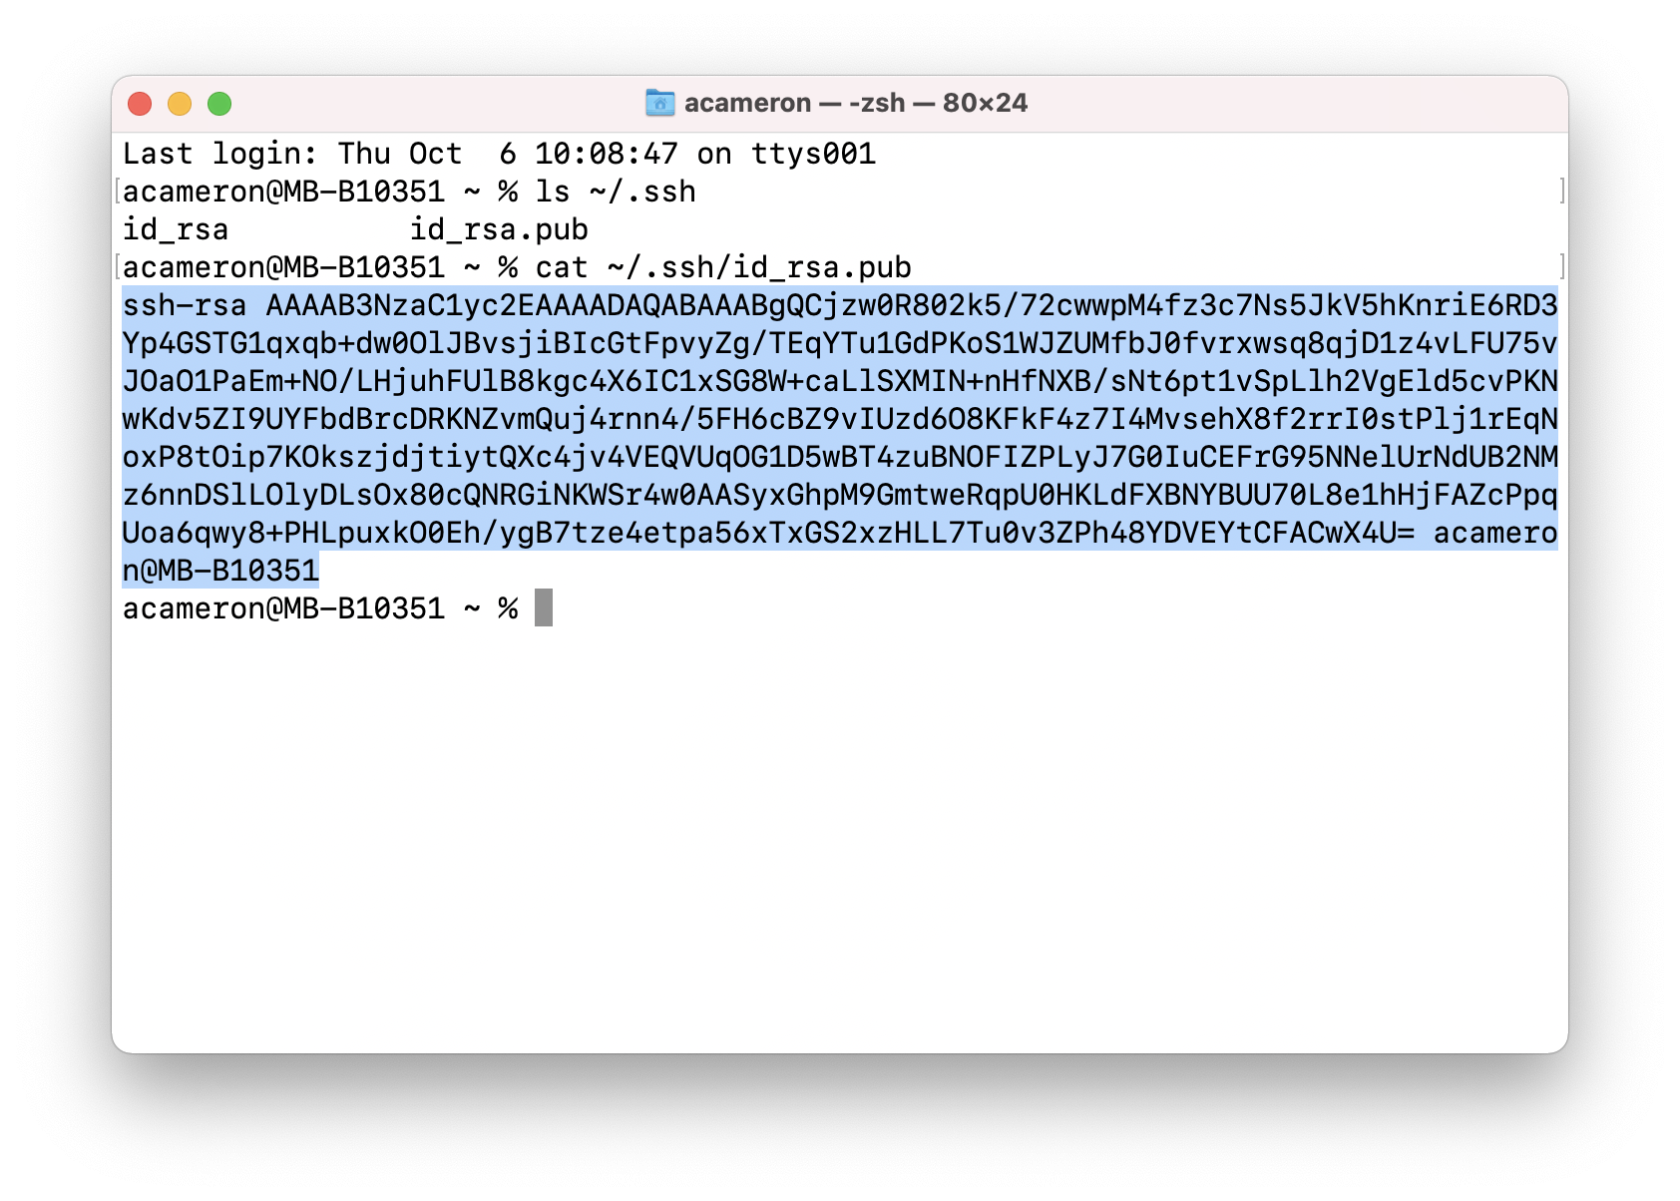 The part highlighted in blue is your key. You are going to want to copy the whole thing, including the bit that says
 ssh-rsaand your computer info at the end. Note that if the text at the start saysBEGIN OPENSSH PRIVATE KEYthen you've copied the wrong part of the key! Repeat the last step, and make sure you print the file that ends in.pub, notid_rsa
-
-
Now, we are going to add the SSH key to your git.arts account so you can connect to the server.
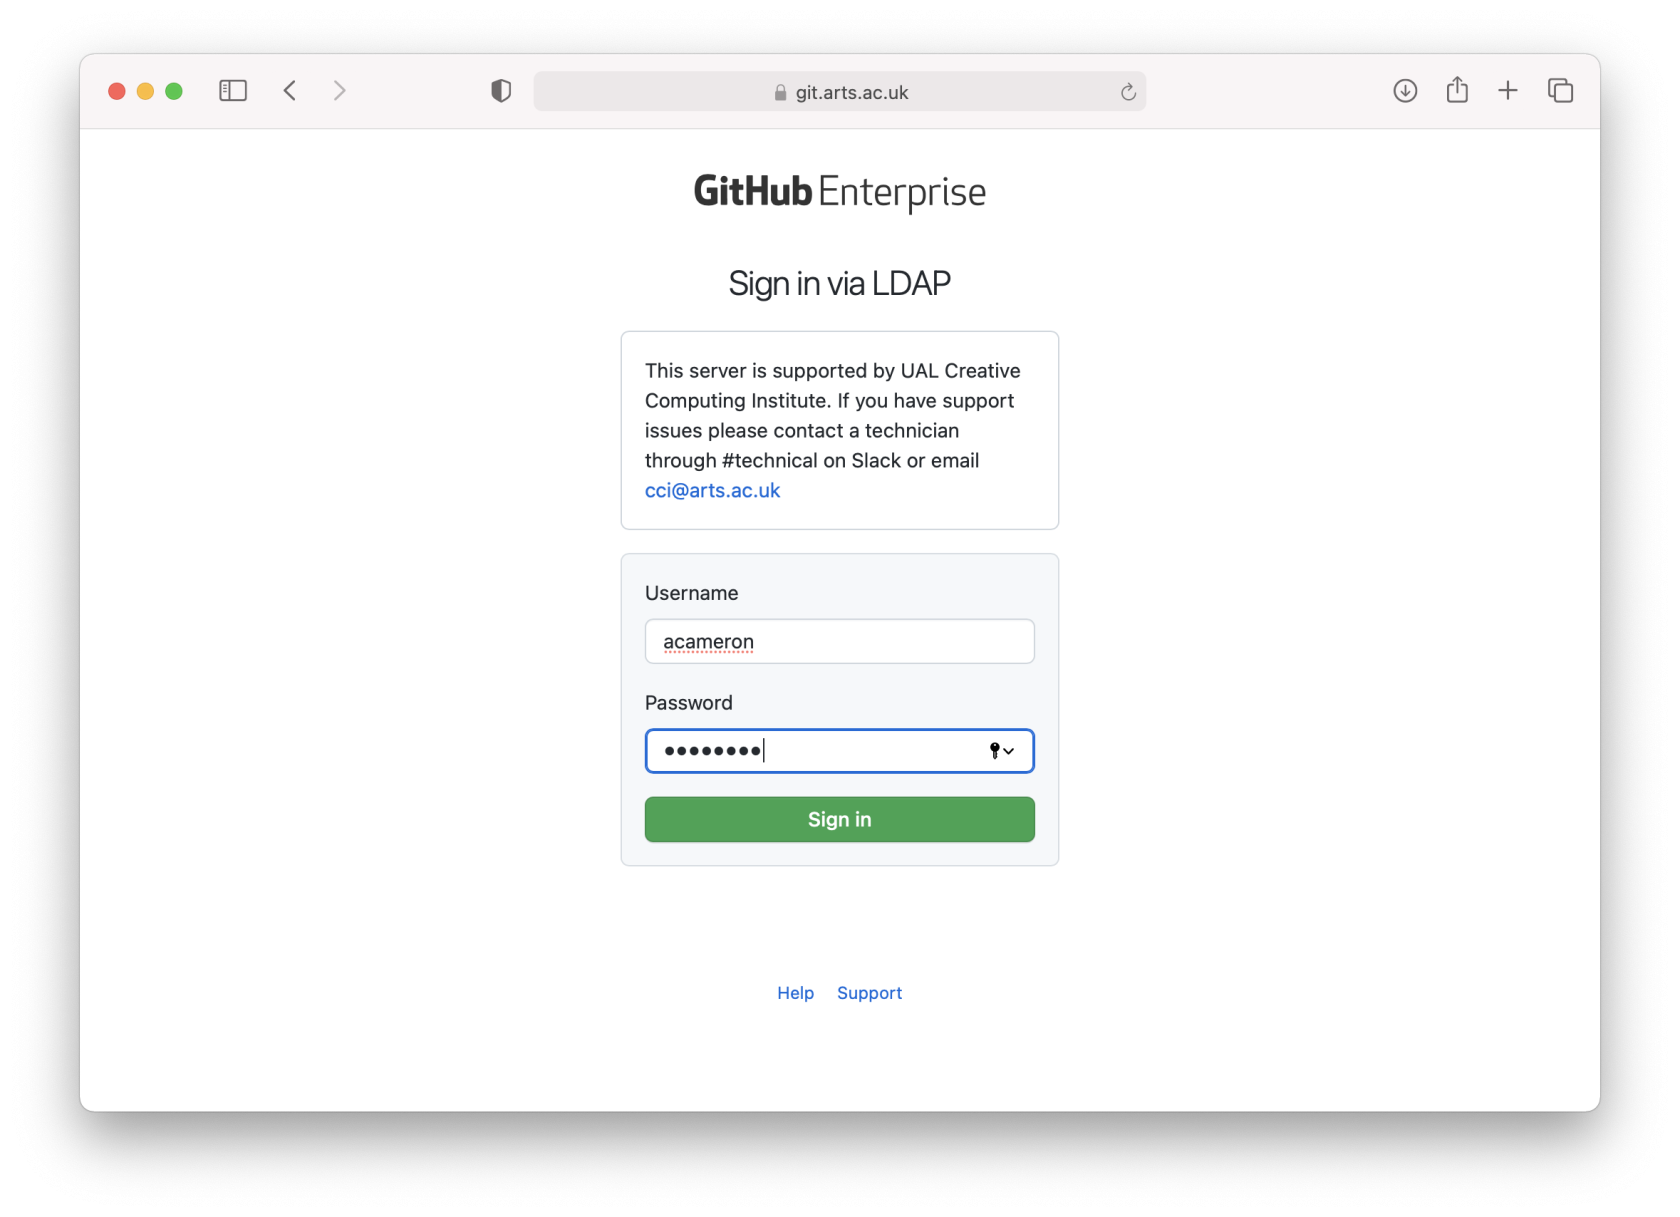
- Login to git.arts.ac.uk (not github.com) using your UAL login:
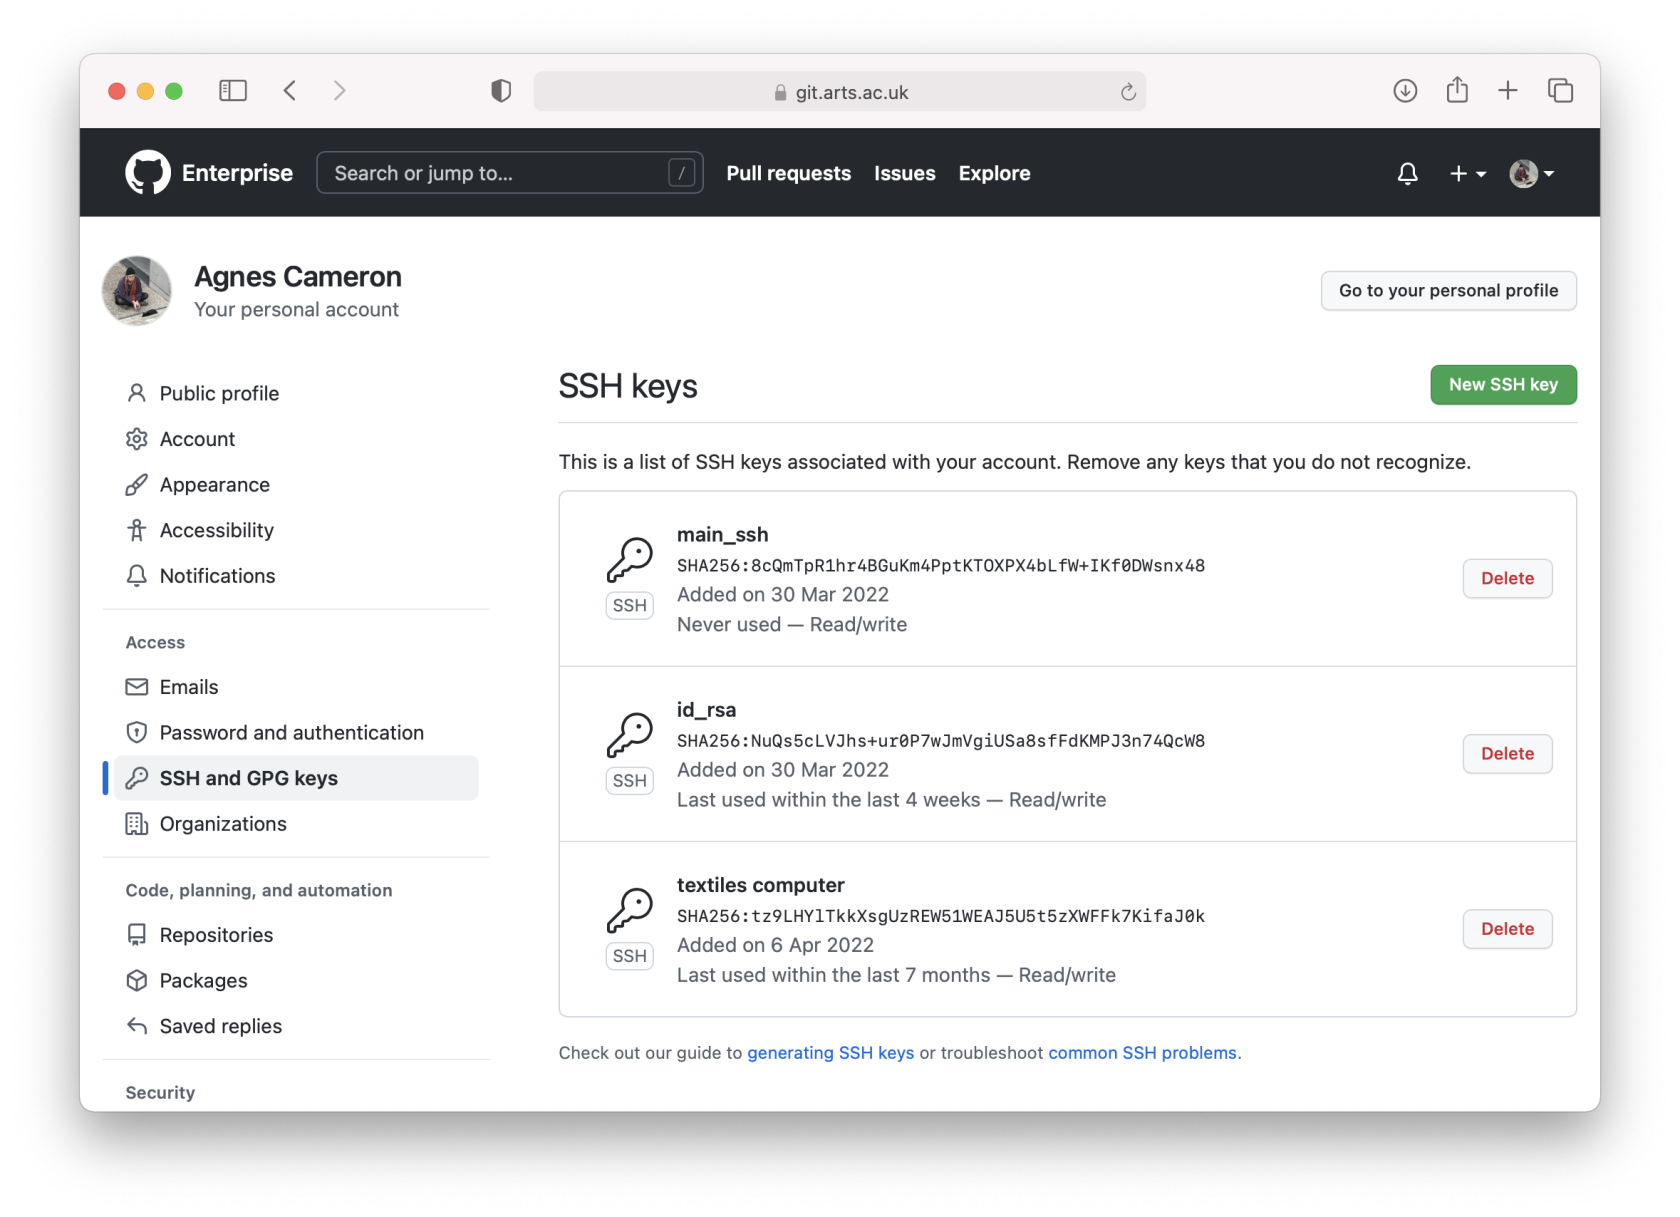
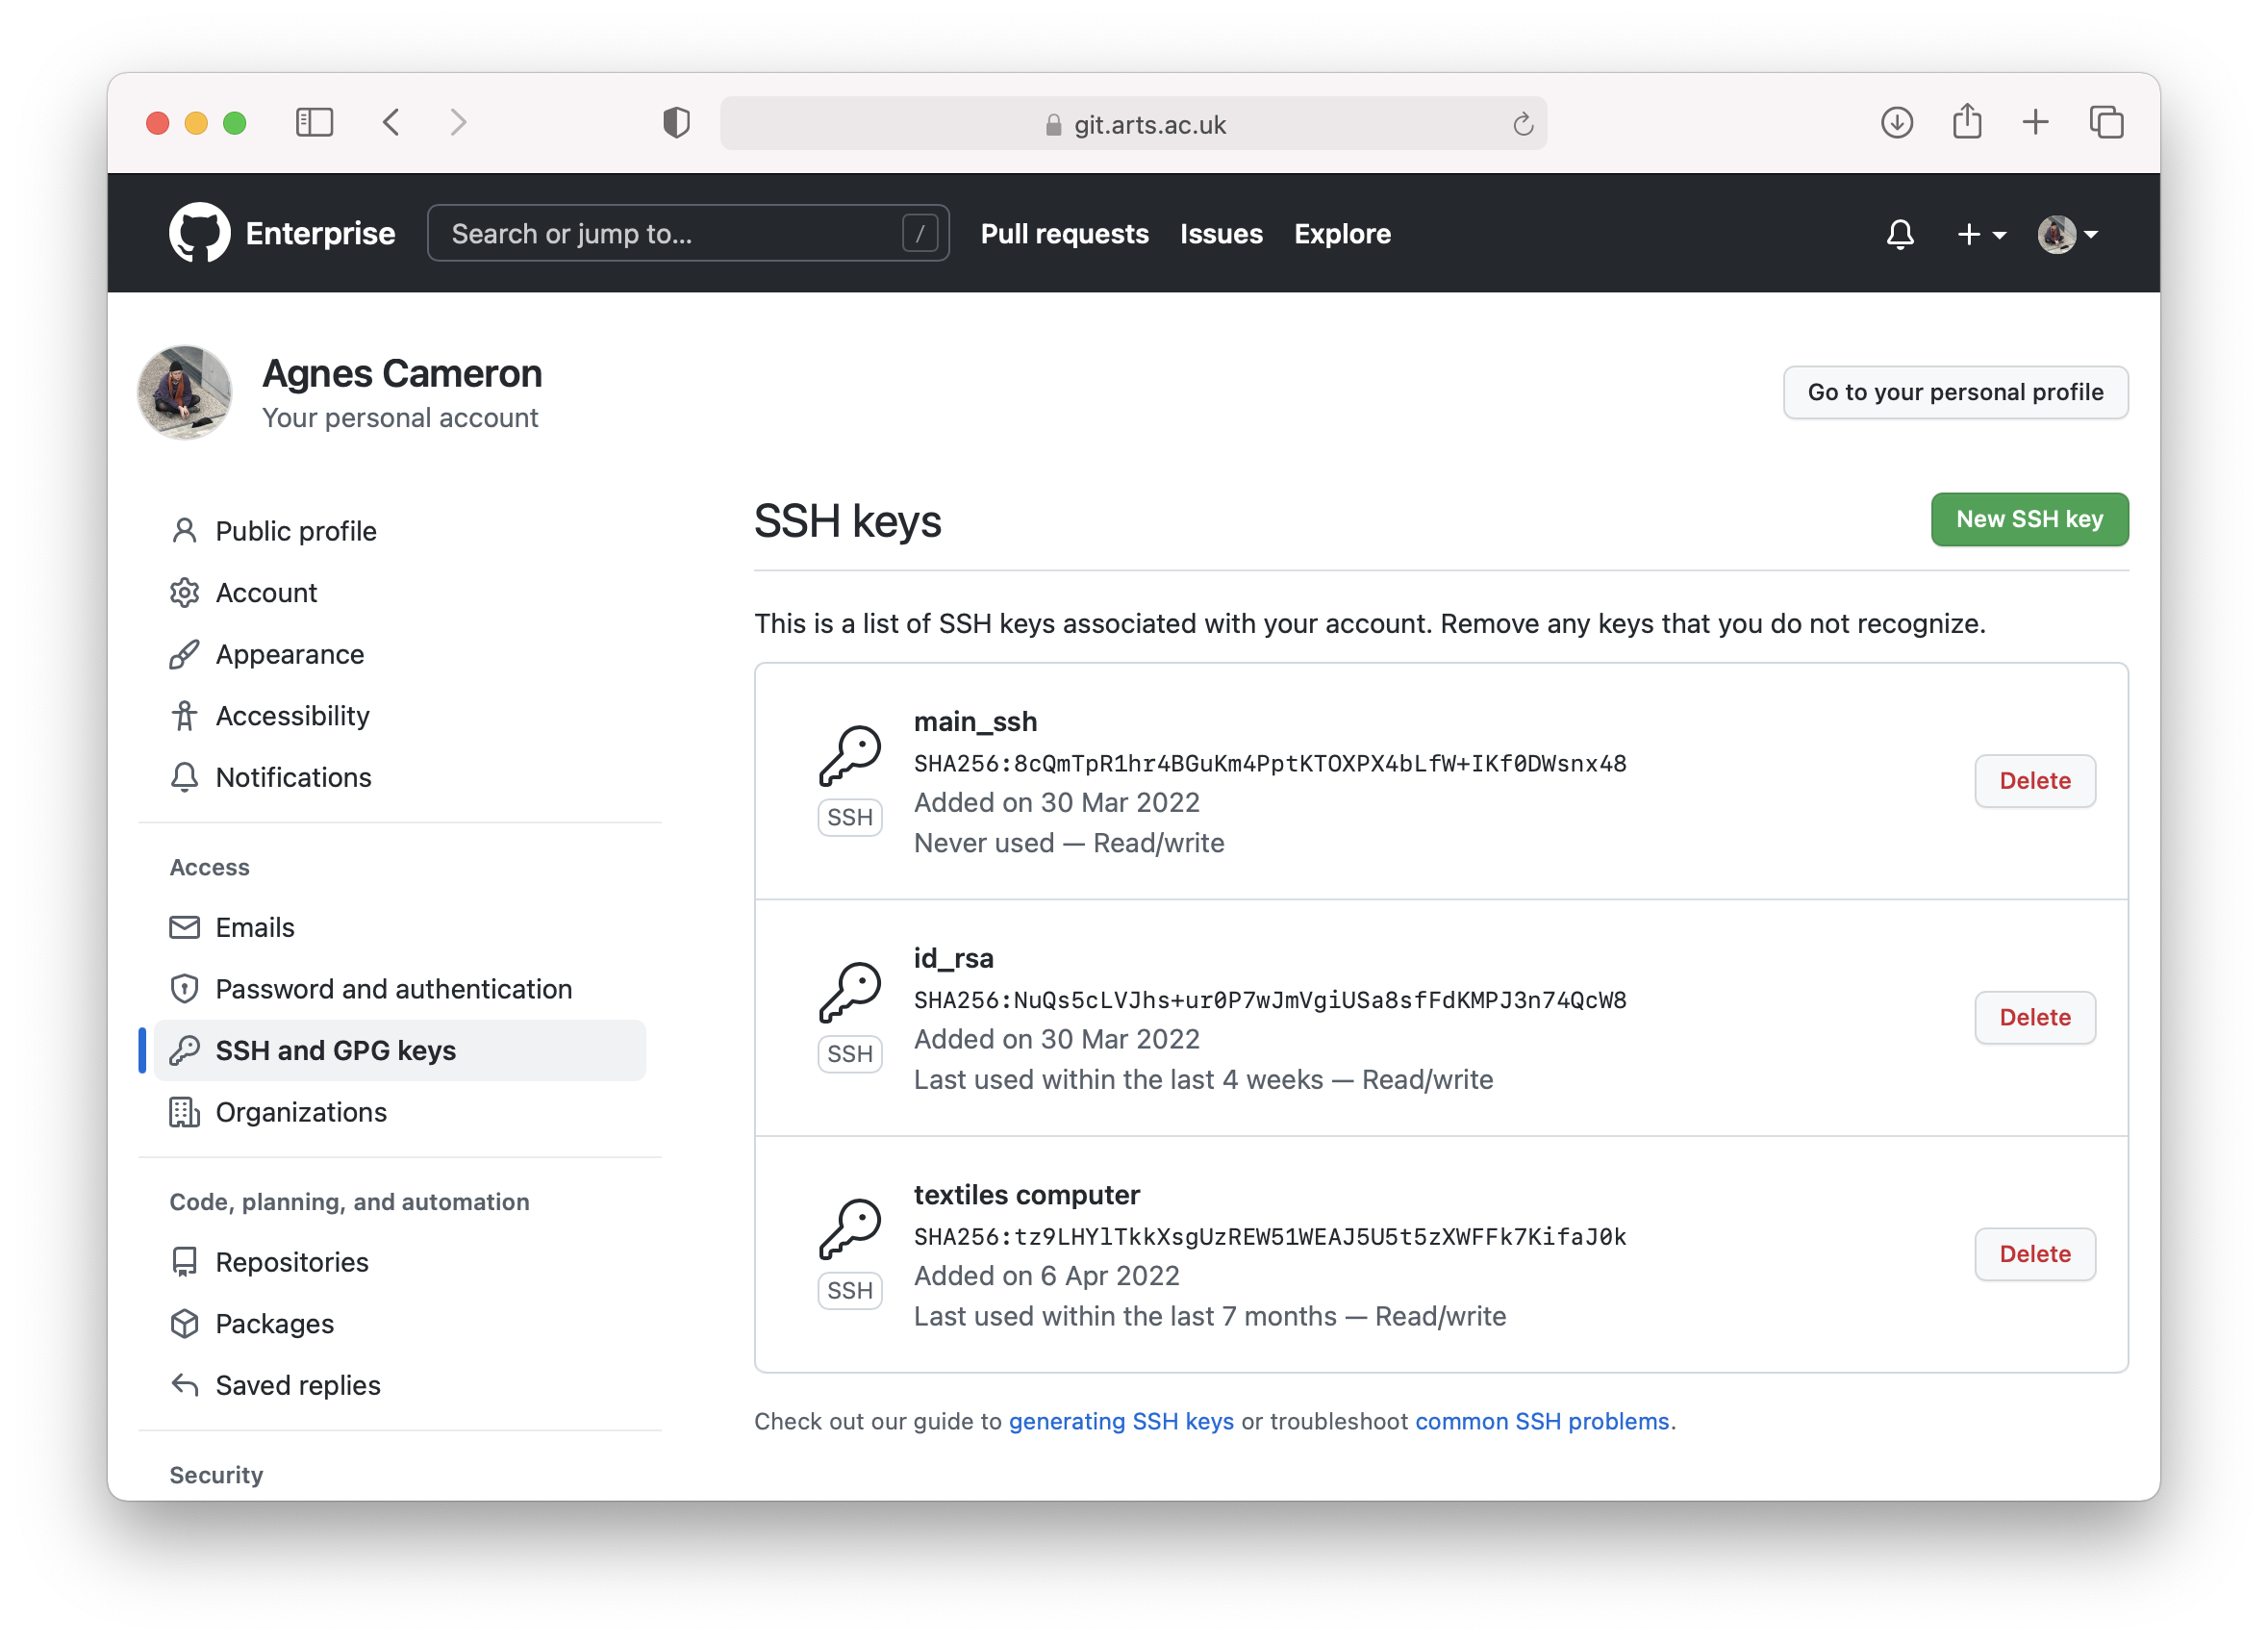
- Go to https://git.arts.ac.uk/settings/keys, you can also navigate to this page by going to your account settings in the top right hand menu, and then selecting "SSH and GPG keys" from the right hand side of the settings menu. In the screenshot below you can see I already have a few keys, because I access my account from a lot of different computers -- you just need to add one!
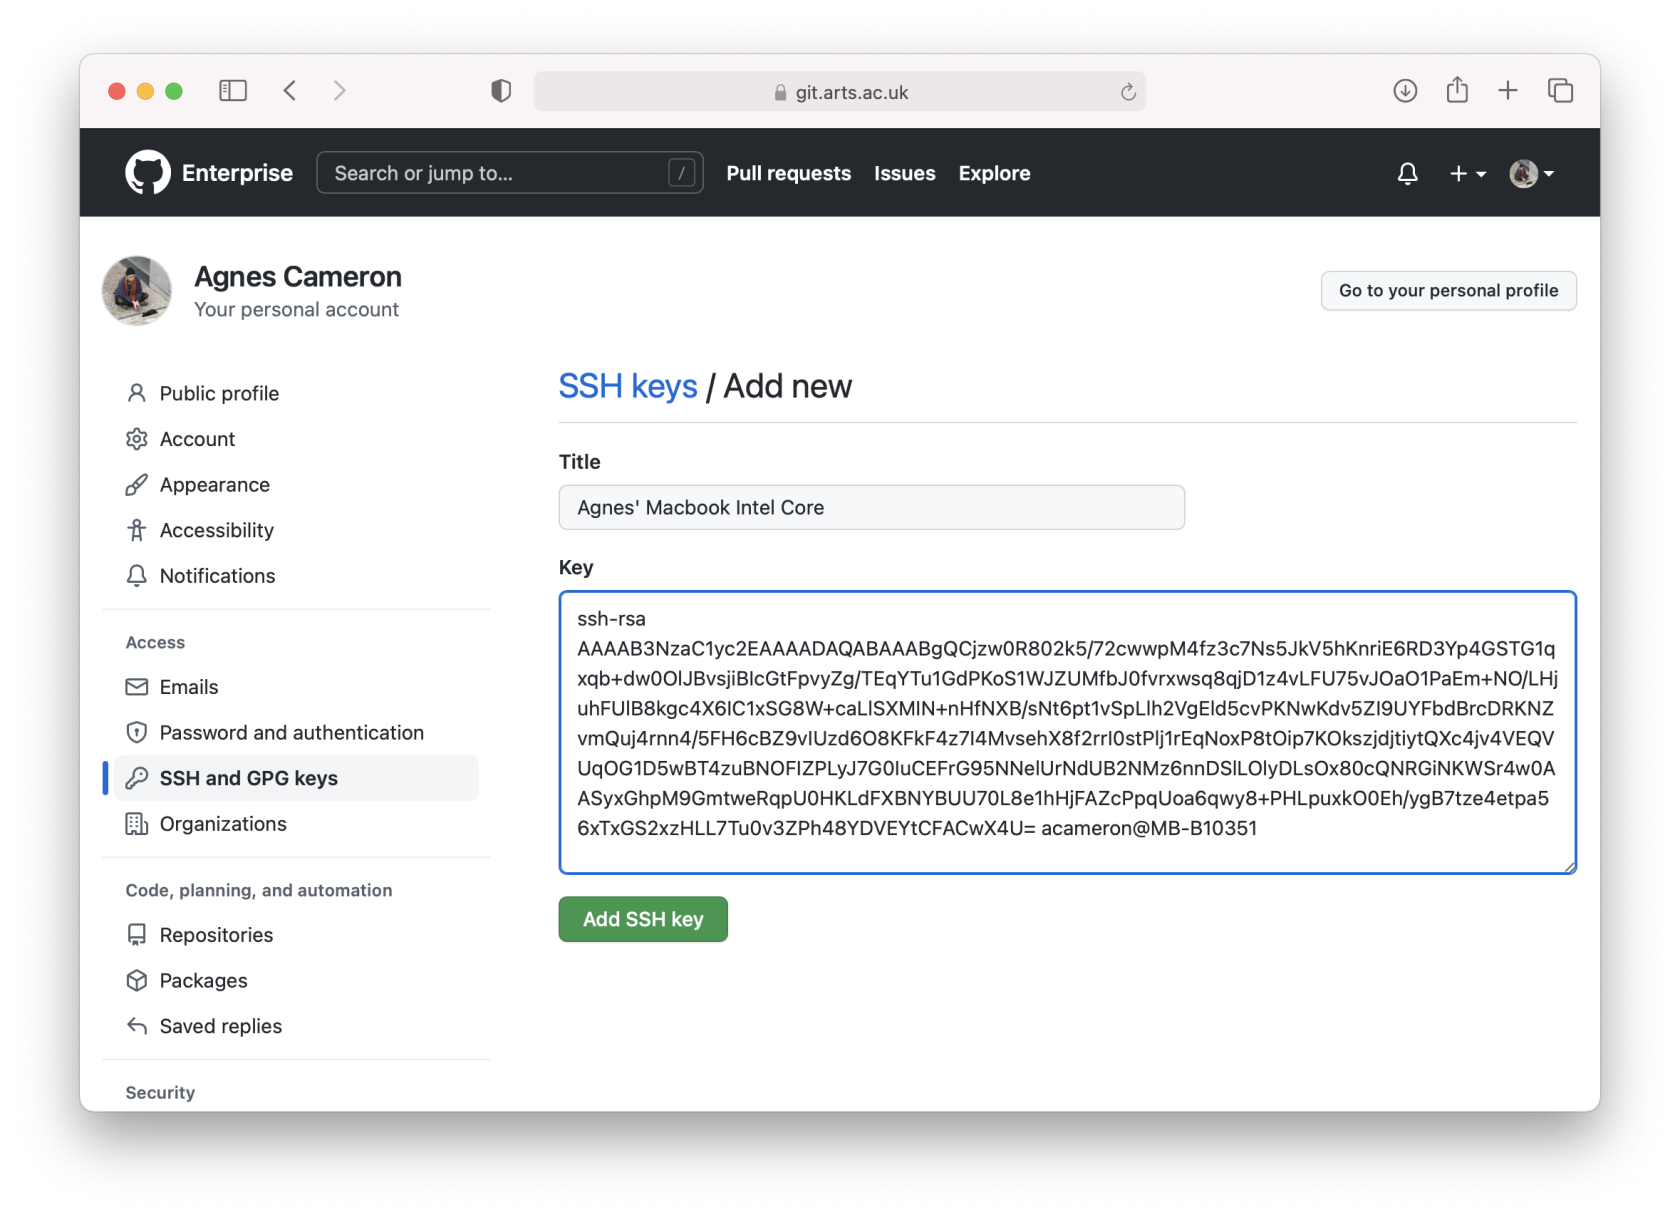
- Click the green button to the right that says "New SSH key", it will open up a new page with some textboxes to paste a key. Take the key that we printed at the end of the previous stage, and paste it into the main box. In the top box, put the name of the computer you made this key on, so you can remember. It should look like this:
 Click 'Add SSH key', and you should see the new key appear in your SSH and GPG keys page.
- Login to git.arts.ac.uk (not github.com) using your UAL login:
-
To connect your local repository to your remote repository, you will want to create a new remote repository first.
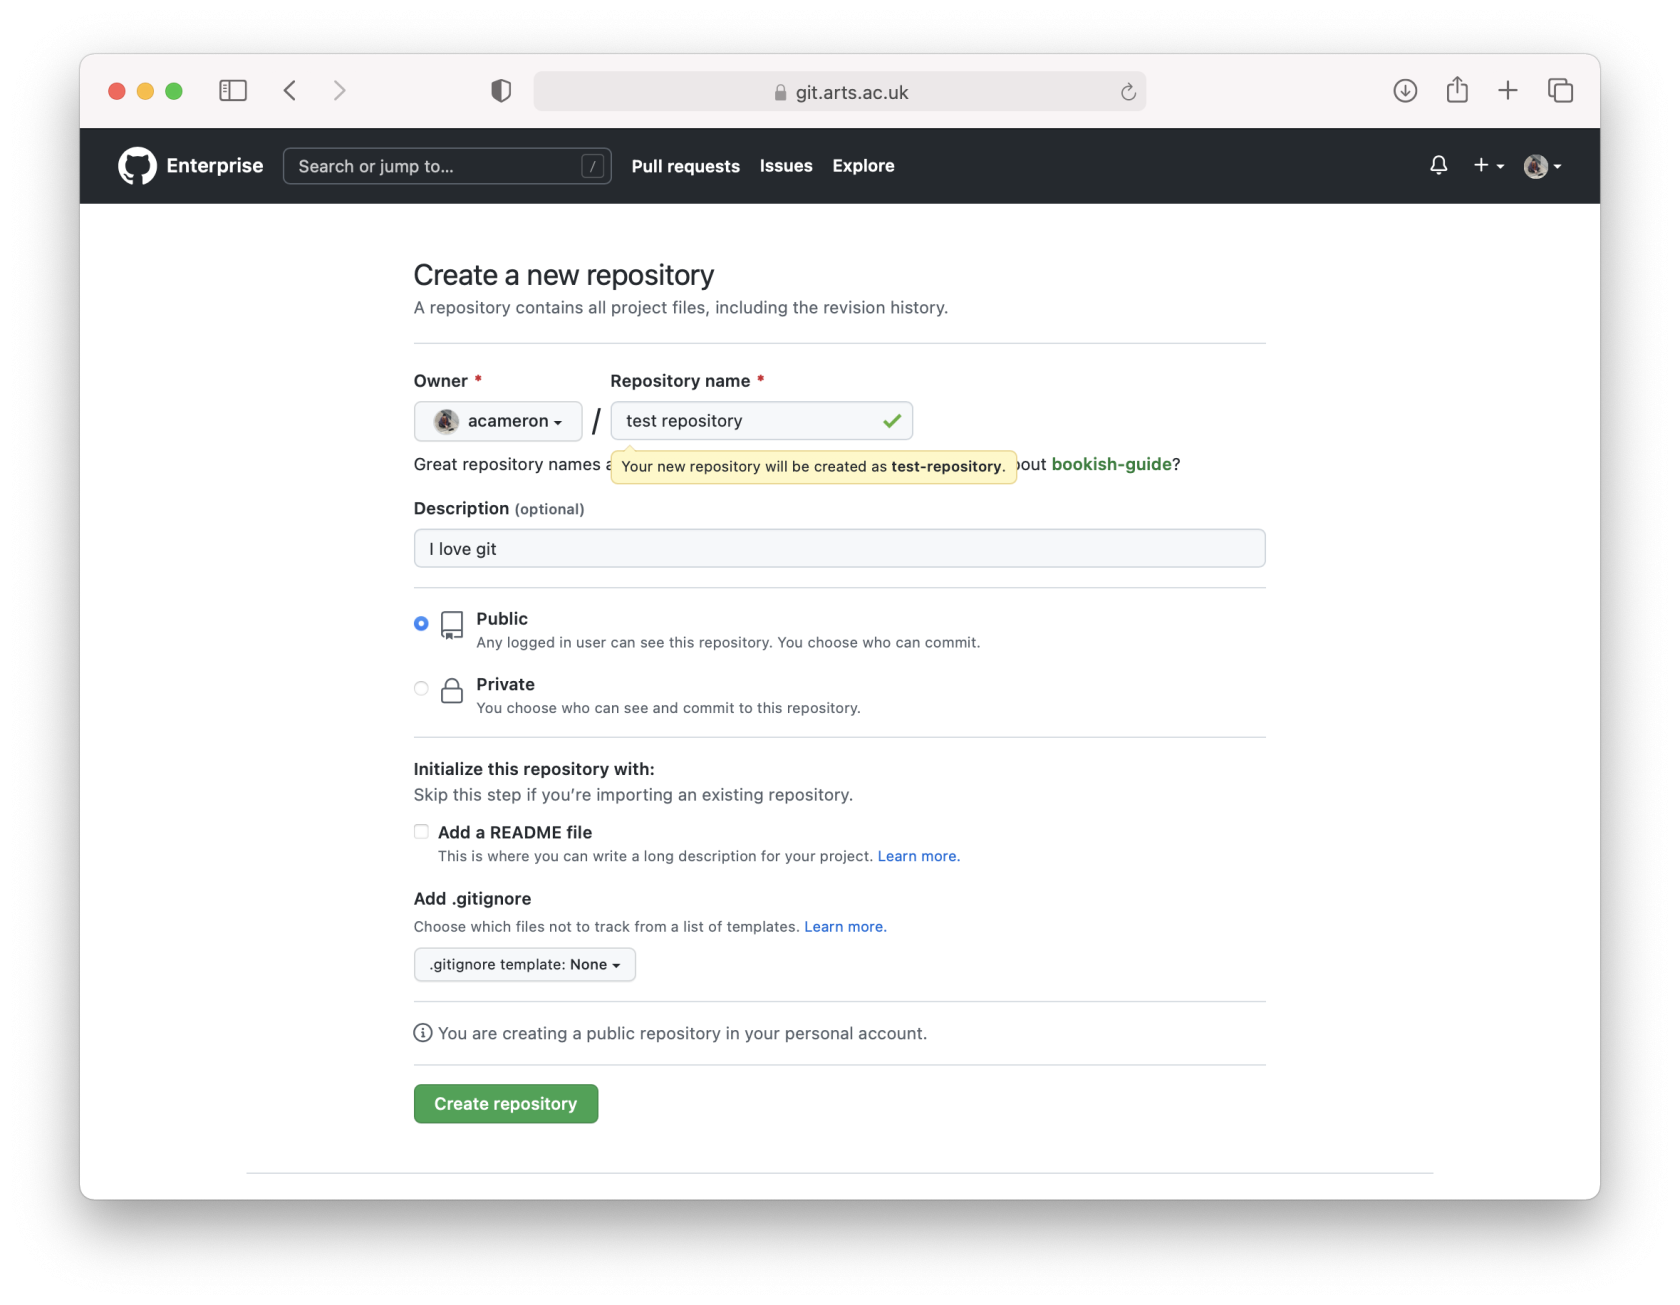
- To create a repository, navigate to the git.arts.ac.uk homepage (not github.com) and click the green 'New' button on the repositories menu on the left hand side. It will open a dialog asking for a name and description of the new repository. Give it a name and a description, and do not tick create a README or 'add .gitignore', as this will make it difficult to link to an existing repository.
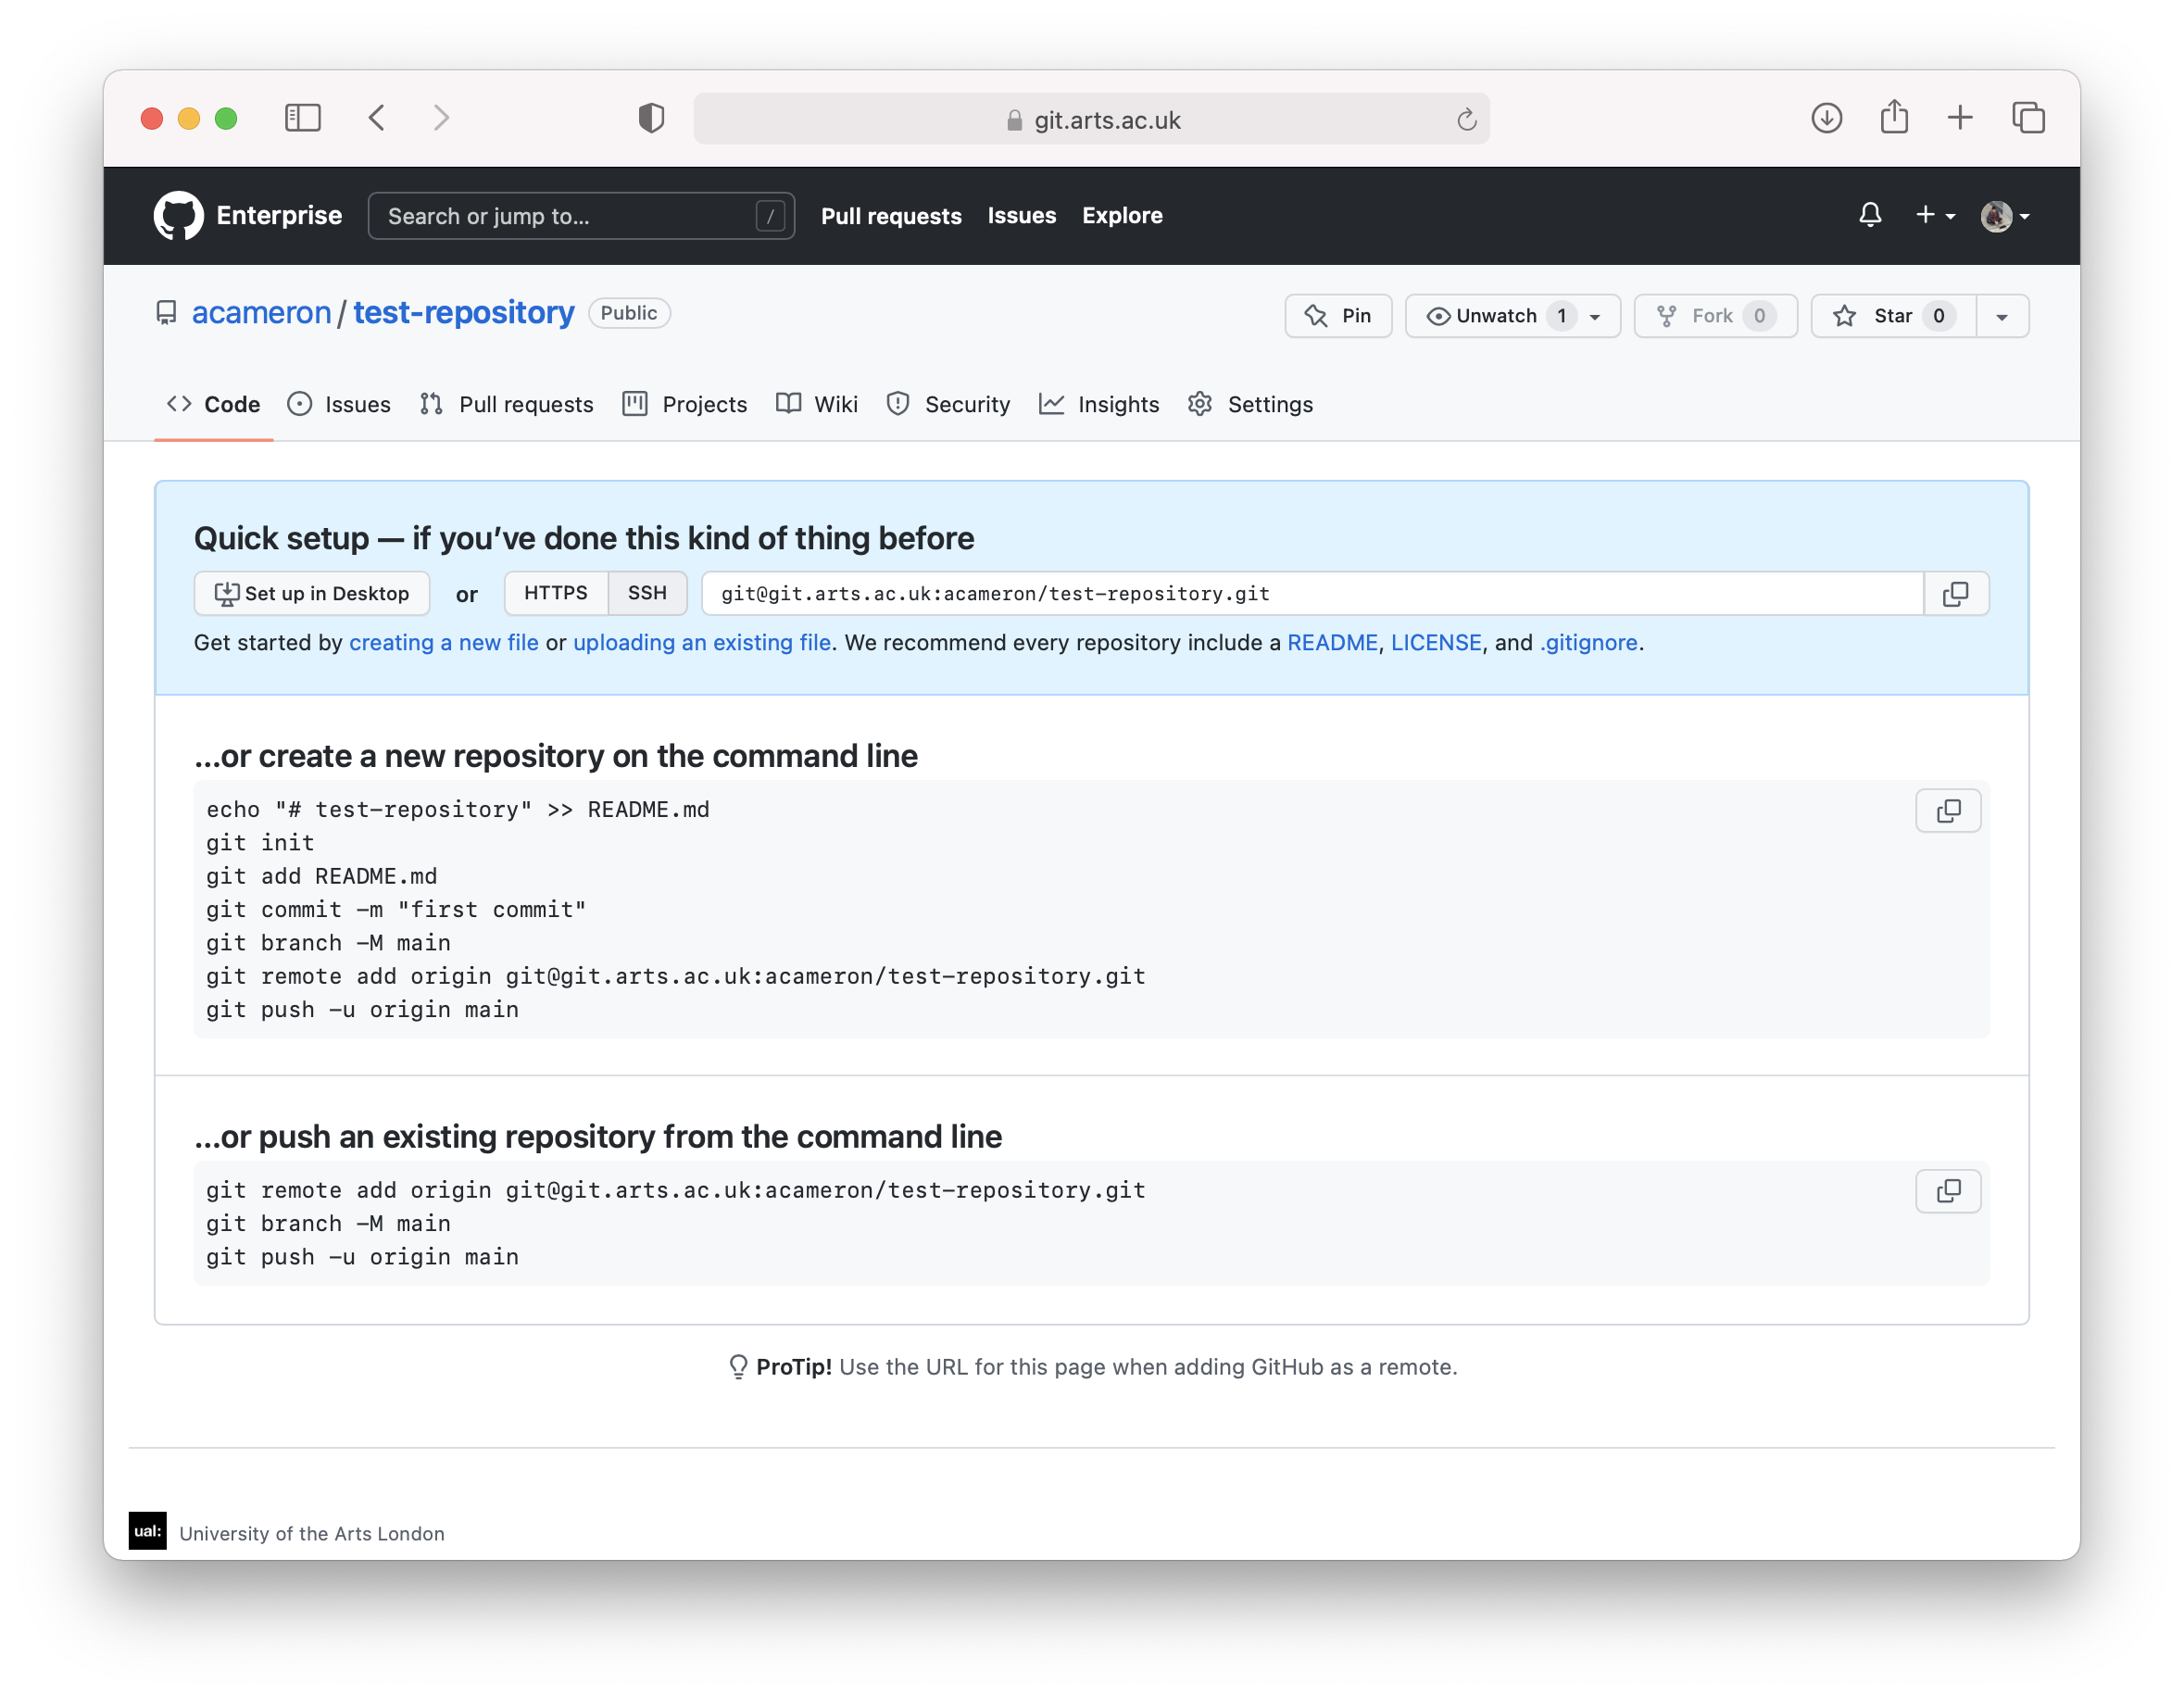
 When you click 'Create Repository', it will bring you to the following page:
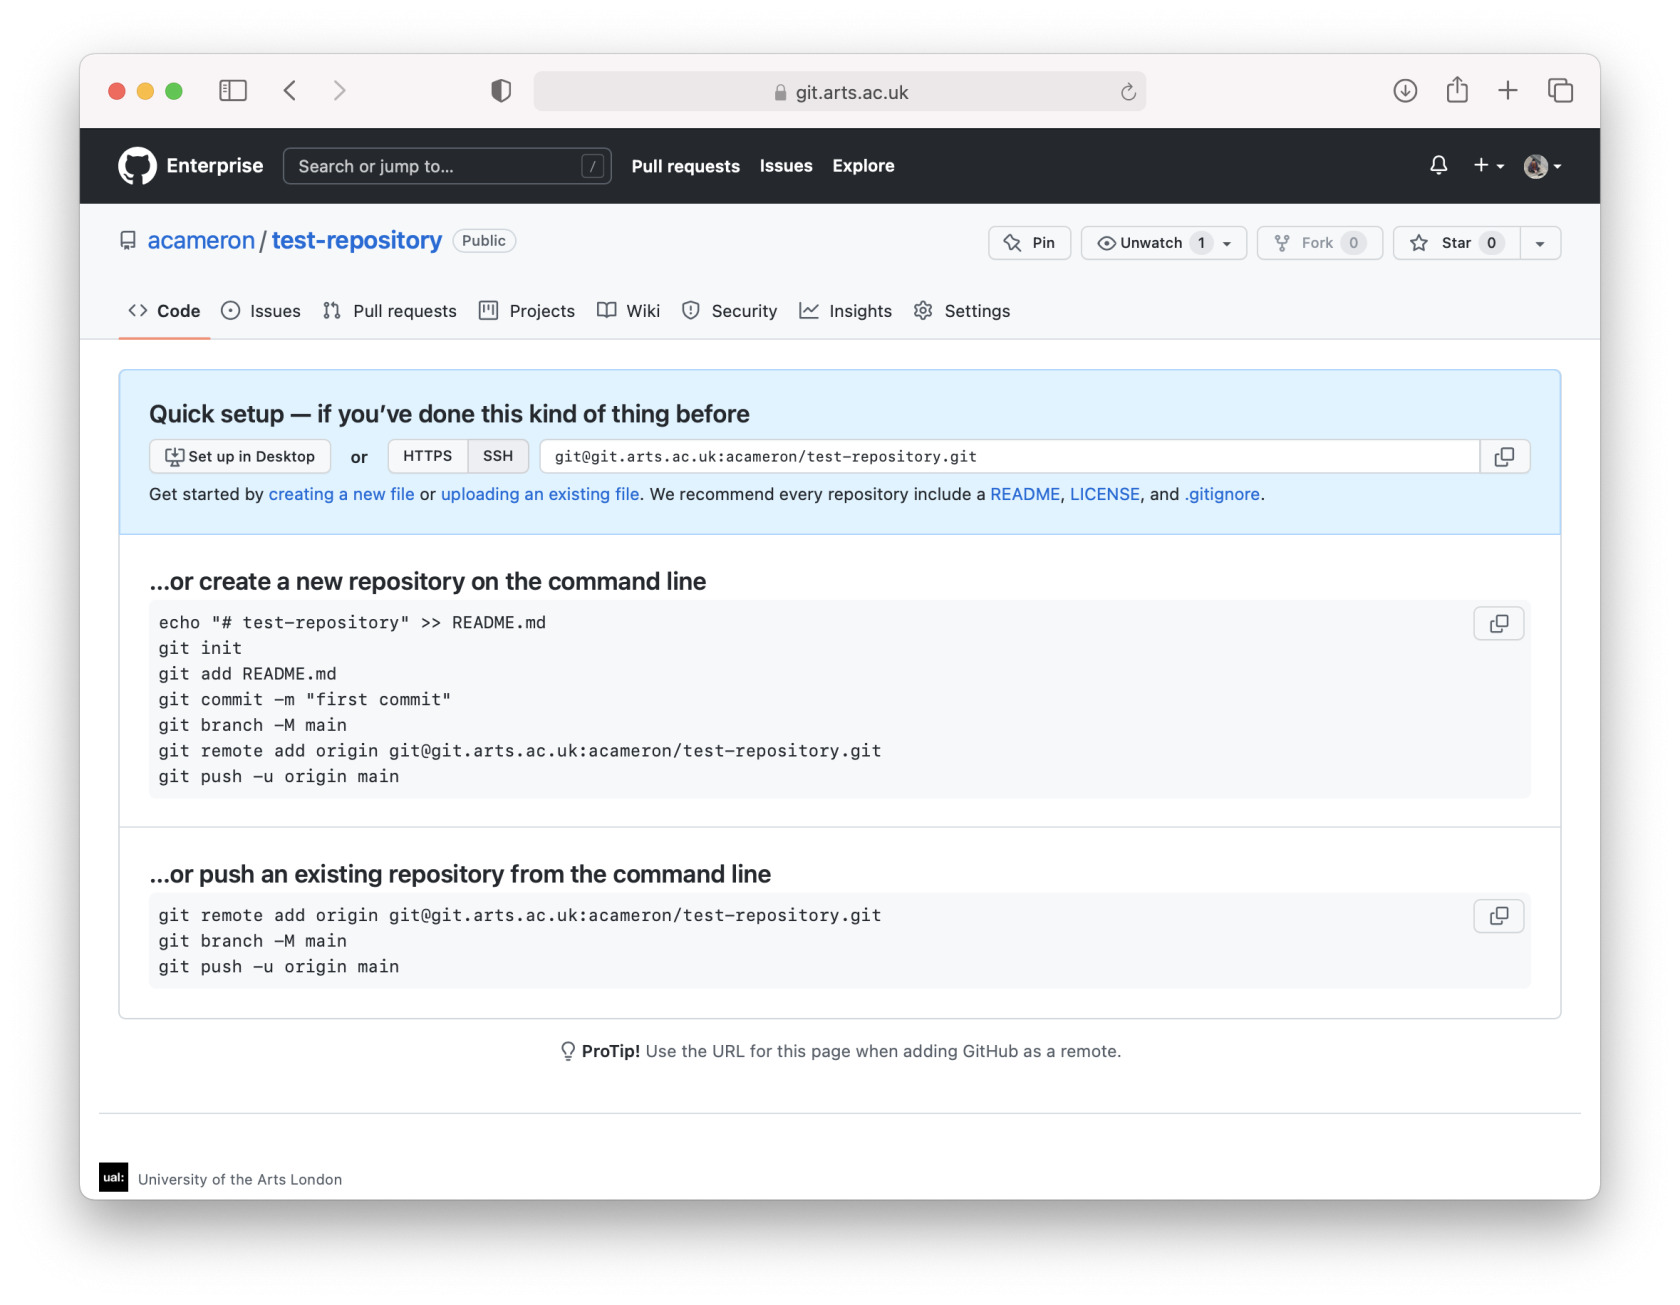
- Back in your Terminal, inside your local git repository, you will need to paste the 3 commands listed under ...or push an existing repository from the command line. Press enter, and it should push the files from your computer onto git.arts. When you reload the page, you should see a github repository with a bunch of files you just added.
- To create a repository, navigate to the git.arts.ac.uk homepage (not github.com) and click the green 'New' button on the repositories menu on the left hand side. It will open a dialog asking for a name and description of the new repository. Give it a name and a description, and do not tick create a README or 'add .gitignore', as this will make it difficult to link to an existing repository.


Save changes to your remote Git Repository on git.arts.ac.uk
Be sure you have already created a remote Git repository on your git.arts.ac.uk account, the example asumes a remote repository called 'NameOfYourRepository'. Then after running 'git add' and 'git commit', 'git push' will upload and save your files to git.arts.ac.uk/NameOfYourRepository
git add .
git commit -m "some message"
git push origin main
A summary of core git commands:
git init   -- make the current folder into a git repository
git remote add origin git@git.arts.ac.uk:YourUsername/TheRepositoryName.git -- connect the local to a remote repository on git.arts.ac.uk
git status -- what's up with my repository
git add . -- tells git you'd like to save *all* the changes you made
git commit -m "some message" -- versions files with a message
git push origin main -- pushes commits to github if it's been set up
Some usefull core unix commands:
These are really gonna make a difference to your life if you know how to use them. It's possible to do these things in the file browser too, but knowing how to do these in terminal will save you a lot of time!
cd -- change directory (folder) to the one you are currently in
touch new.txt -- make a new file called new.txt
ls -- list the files in the current directory(folder)
mkdir myfolder -- make a new directory (folder) called myfolder
clear -- clear the terminal screen
pwd -- print working directory so you know where you are
Making a website with Github Pages
If nothing else, Github provides a clean and effective way of setting up a website for free. Git also integrates with services like Netlify and Vercel, which allow for more advanced sites to be set up, but for a basic HTML or Jekyll site Pages is totally great.
TODO: Write more instructions for this
Further reading: merges, tooling, Github Actions
TODO: Write instructions for this