Installing and Launching the Command Line on Your Computer
The command line -- sometimes also called the terminal or the shell -- is a way of navigating and using your computer that is similar to using the file browser (on mac: Finder, on Windows: File Explorer). It can be used to find, open and move files, run code, use version control software such as git, and install software.
The command line can be counter intuitive to use for the first time, and like many computer programming tools requires practice to be able to use fluently. It's also extremely useful, and presumed knowledge in software engineering jobs. The benefits of using the command line are many -- and you don't need to use it for everything to get good results.
Installing a Command Line
An important way to think about the command line is one way among many to navigate the computer. There are several different 'command lines' that you can have access to. For this guide, we will use Terminal for Mac users, and Git Bash for Windows users, which will allow us to use the same commands.
On a Mac
The most commonly used command line on Mac is called Terminal. This comes installed by default on all macs, so you don't need to do anything. Scroll down for the launching instructions.
On Windows
In this guide, we will give instructions for using a "Unix type" command line. This does not come installed by default on Windows systems, which instead have something called 'Command Prompt' -- commands used on Unix type command lines are different.
The command line we will install instead is called Git Bash.
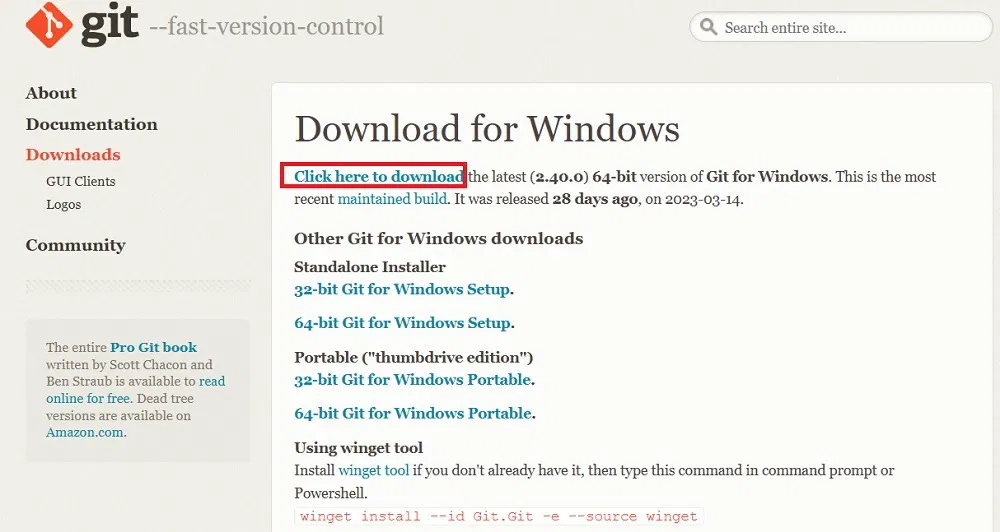
Step 1: Download You need to download Git Bash by clicking the 'Windows' link on this website. This will take you to a page with multiple different options. To get the most recent installer, click the link circled in red below.
Step 2: Launch Installer Once your installer has downloaded, navigate to the 'Downloads' folder on your computer and double click the file called something like 'Git-2.49.0-64-bit.exe' (the numbers in yours might be different). This will open the installer.
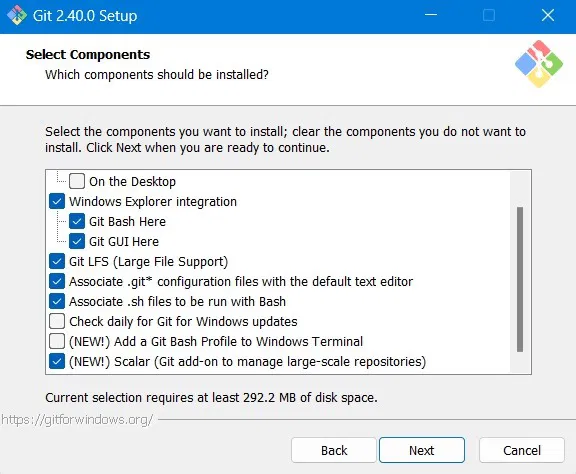
Step 3: Click through Installer Click through each step, selecting the default options. When you reach the 'Select Components' option, make sure the following tools are selected.
Select Nano as the default editor. This is easier to use than Vim, which is set as the default. You can also select any other listed editor that you are comfortable with.

Leave everything else as default, and click through to the end!
Launching the Command Line
On a Mac
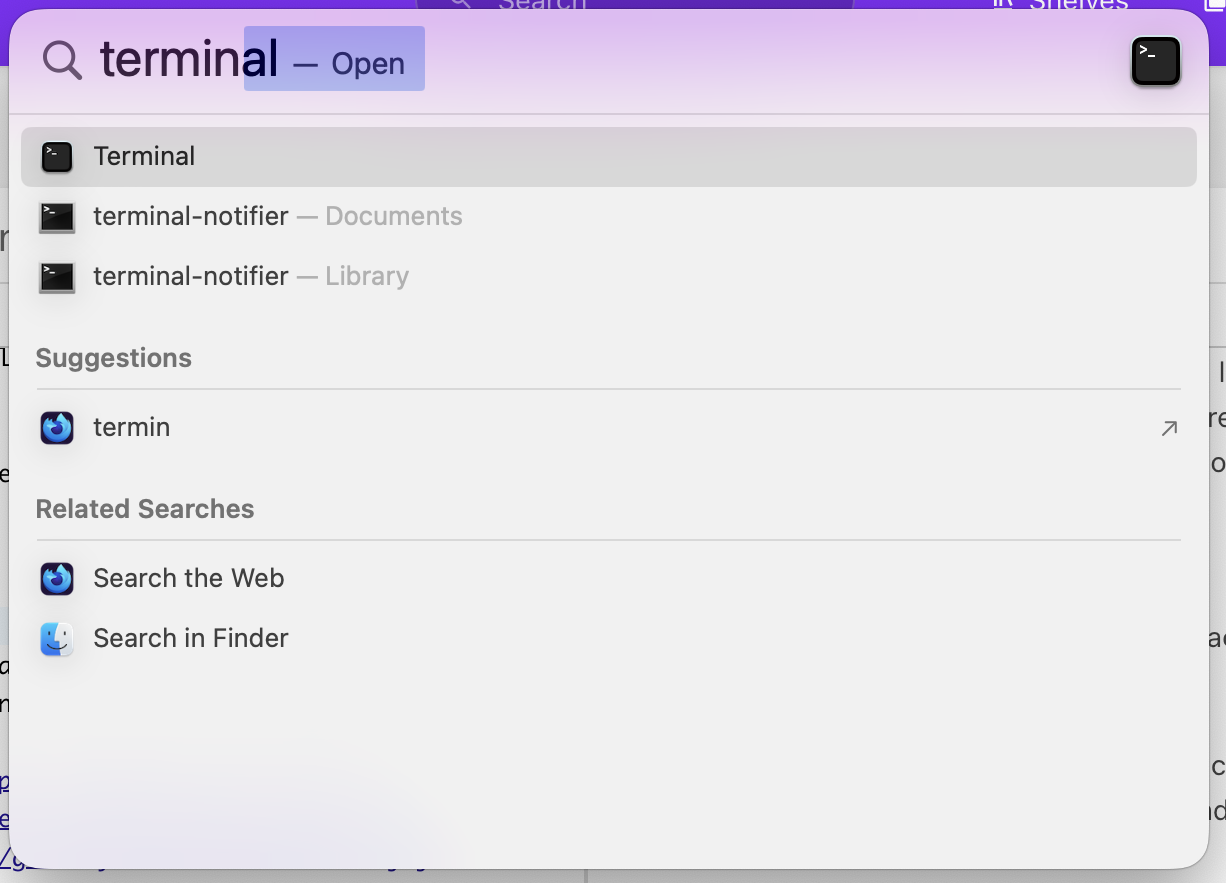
Step 1: To open the Terminal, press ⌘ and Space to open the 'Spotlight Search'. Type 'Terminal', and you should see a black icon with a white triangle.
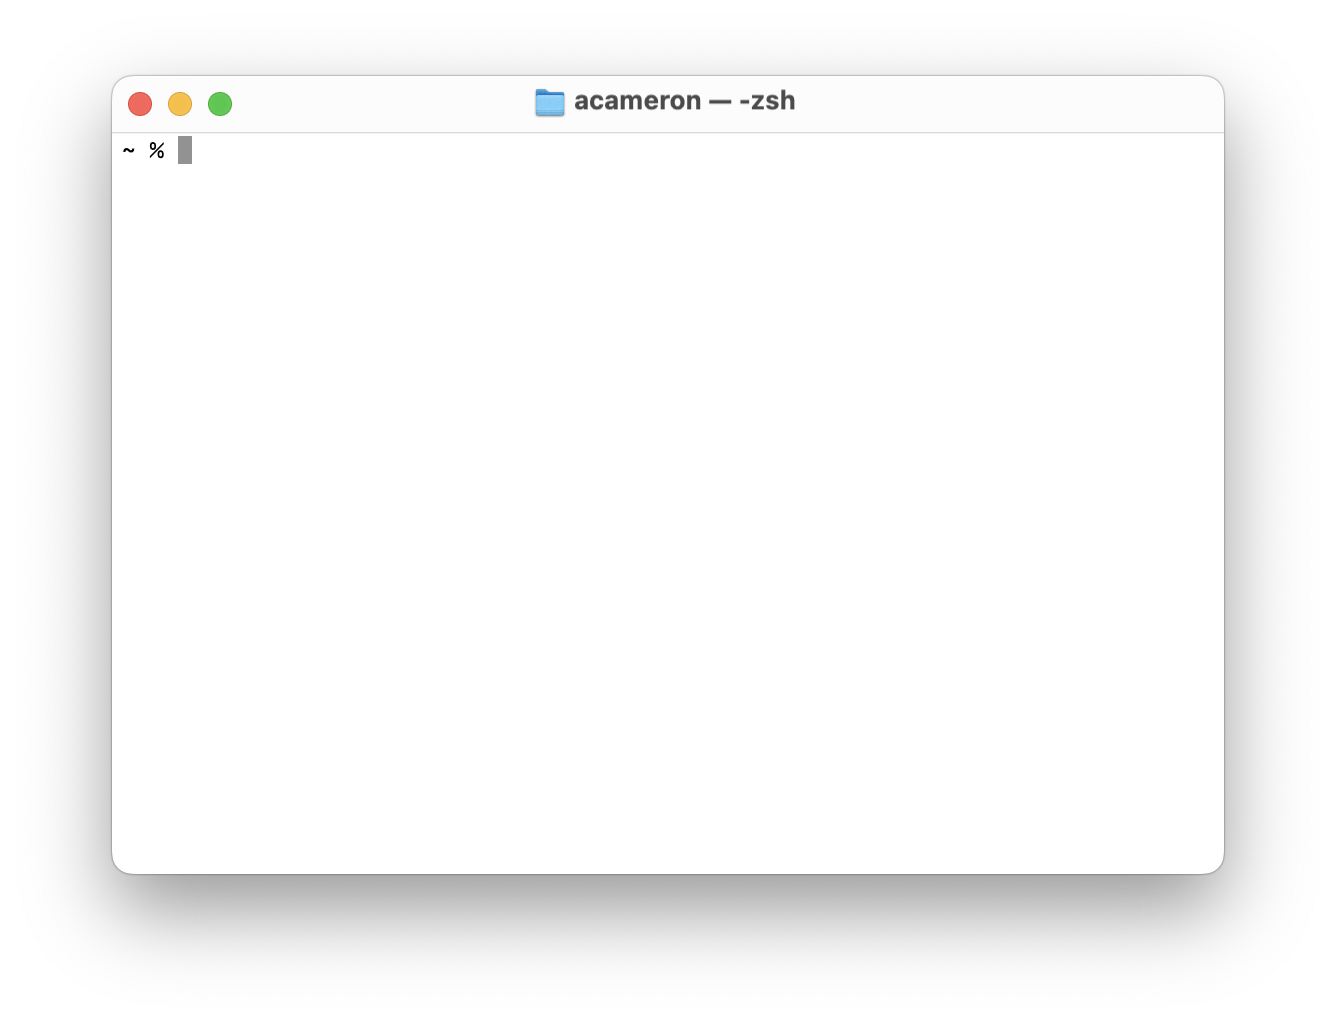
Step 2: Press enter, and a window should open. Depending on your computer's settings, it will have either a white or a black background. It should say 'zsh' at the top, and have a ~ symbol, possibly combined with your username.
Step 3: Sometimes, the first time you open a Terminal on a Mac, it might come up with a message saying “The default interactive shell is now zsh.” -- this is fine and you don't need to do anything! This is just giving you some information about the software that runs the command line.
On Windows
Step 1: To open Git Bash, navigate to the Start menu and start to type 'Git Bash'. Click on the application to open a window.
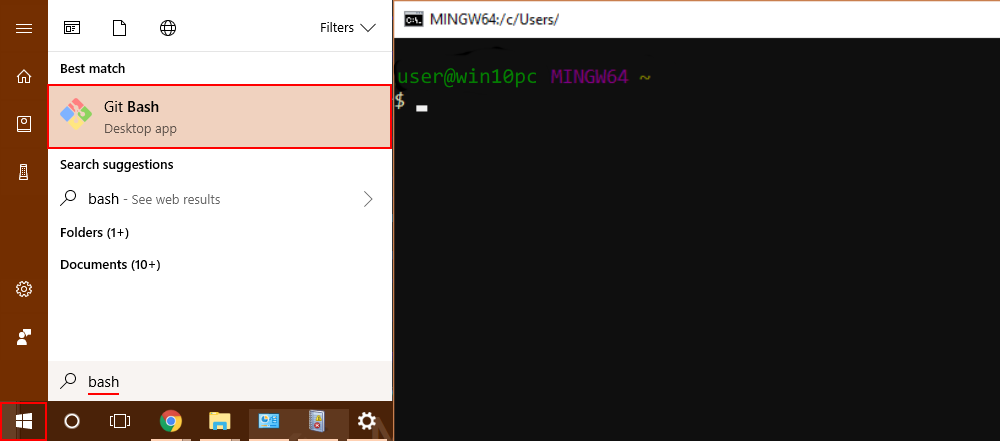
Step 2: You should see a window open, probably green, pink, yellow and white text on a black background. This will have your computer's name followed by a ~ symbol, and a $ with a flashing cursor next to it.
Congratulations, you've got a command line!