Intro to Exif Image Metadata
Image files captured using digital cameras often contain a large amount of information about how and where they were taken, the type of camera that took them, and other information about the image. This is called the 'exif metadata', and it is standard across all digital images. Using code to read this information can tell you a lot about the image and can be useful in particular for geolocation. Likewise, if you are concerned about privacy, this might be information you would like to remove.
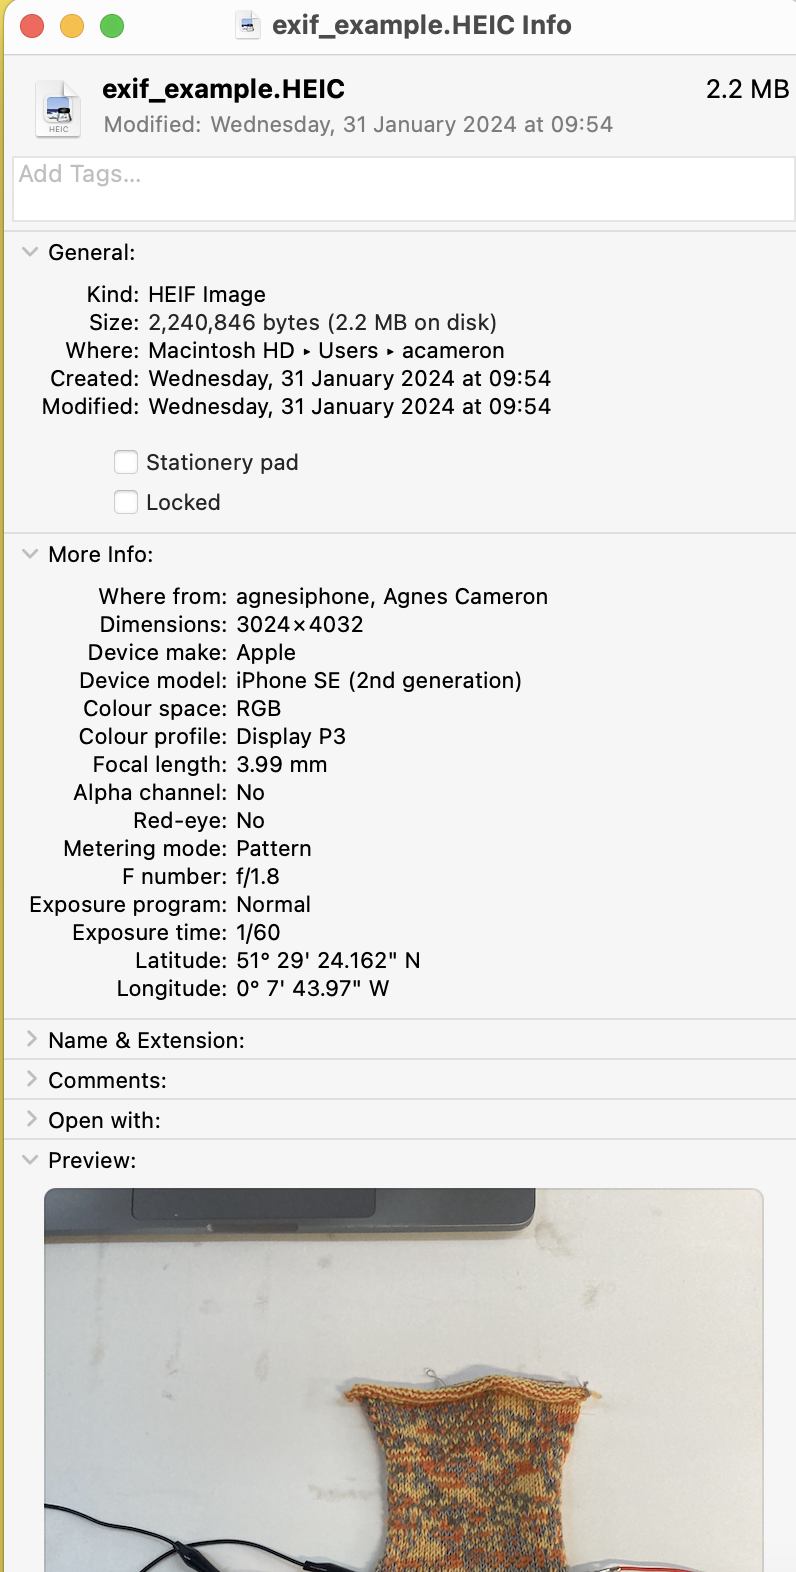
exif metadata in the file browser
On a mac computer, exif metadata about an image can be viewed by right-clicking 'get info', and then expanding the 'more info' panel in the window. Here you can see that the exif metadata about an image taken on my phone includes the latitude and longitude (the geolocation), information about my phone, and then the settings applied to the image.
exiftool
If you want to use information contained in images programatically (or edit this information), the best option is to use exiftool. Exiftool is a command line application for reading and writing exif metadata. It can be downloaded here, and can also be installed on mac using the homebrew package manager.
To check if exiftool is properly installed on your computer, open a command line / terminal window and type in exiftool, then press enter. You should see a page like this -- if you instead get a message saying 'command not found' it means you do not have it installed.
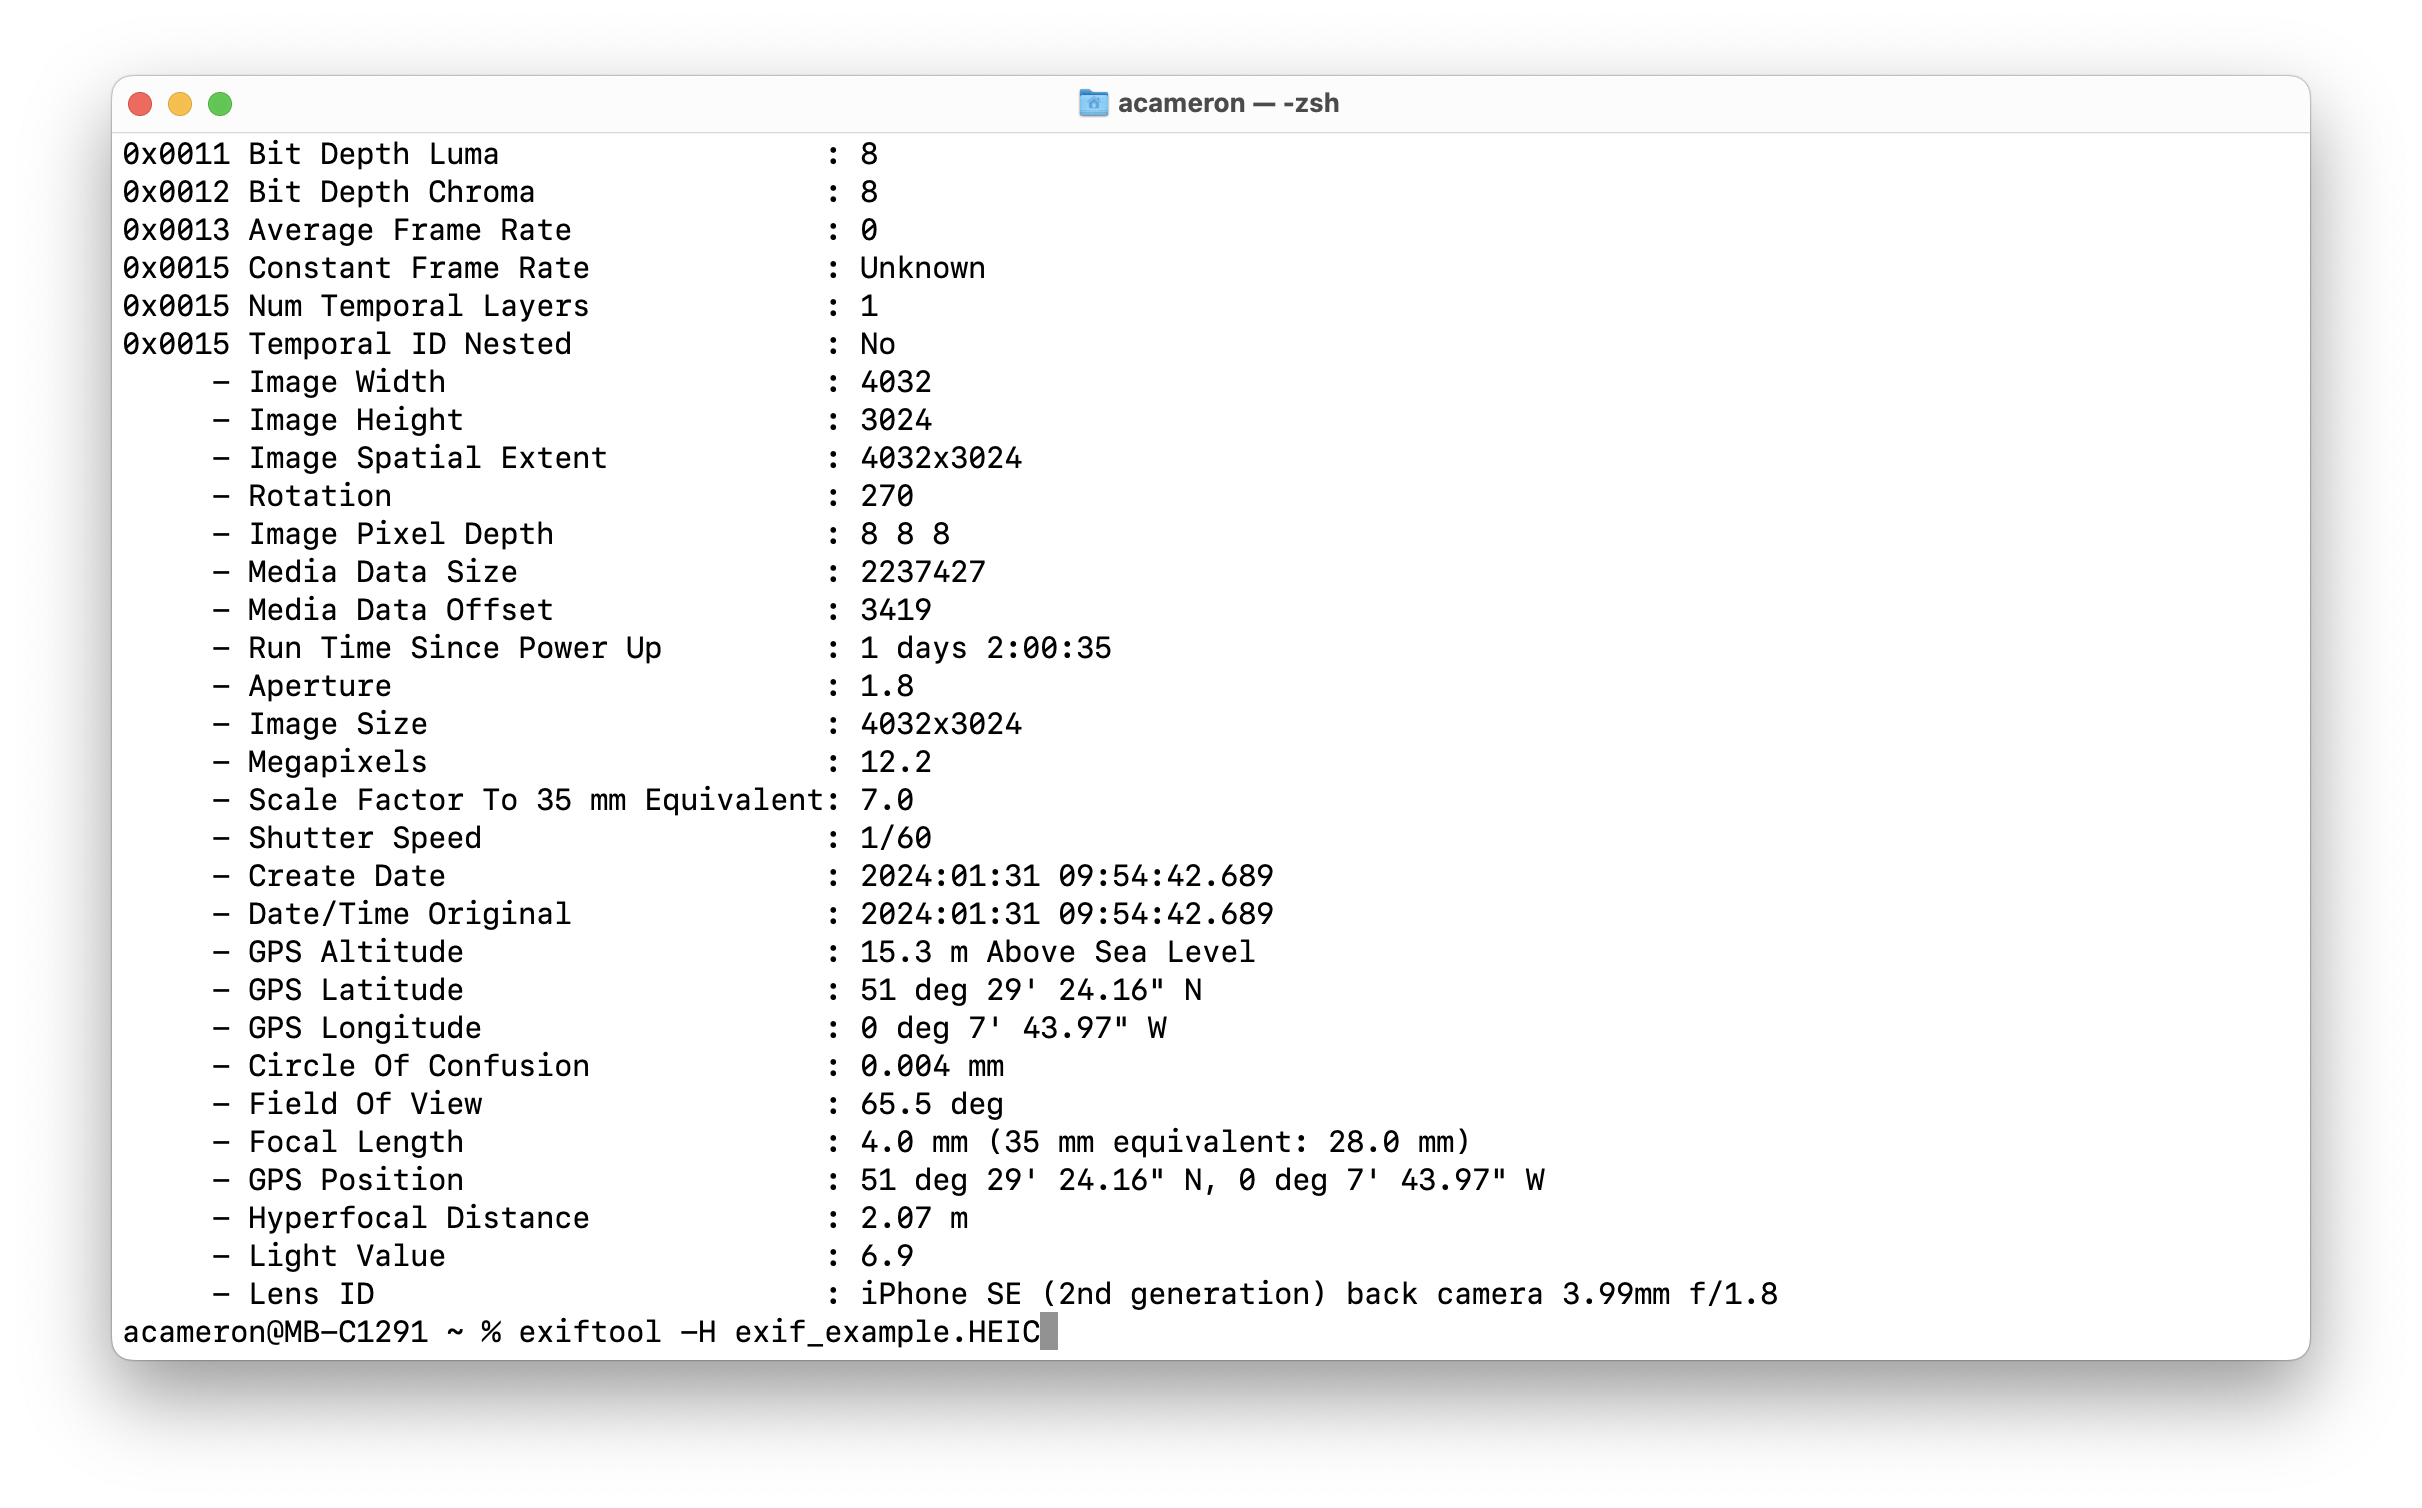
If we wanted to look at exif metadata of the same image, but using exiftool, we can run the following command:
exiftool -H exif_example.HEIC
We get a huge amount of information, including a lot of things that weren't included in the Get Info window.
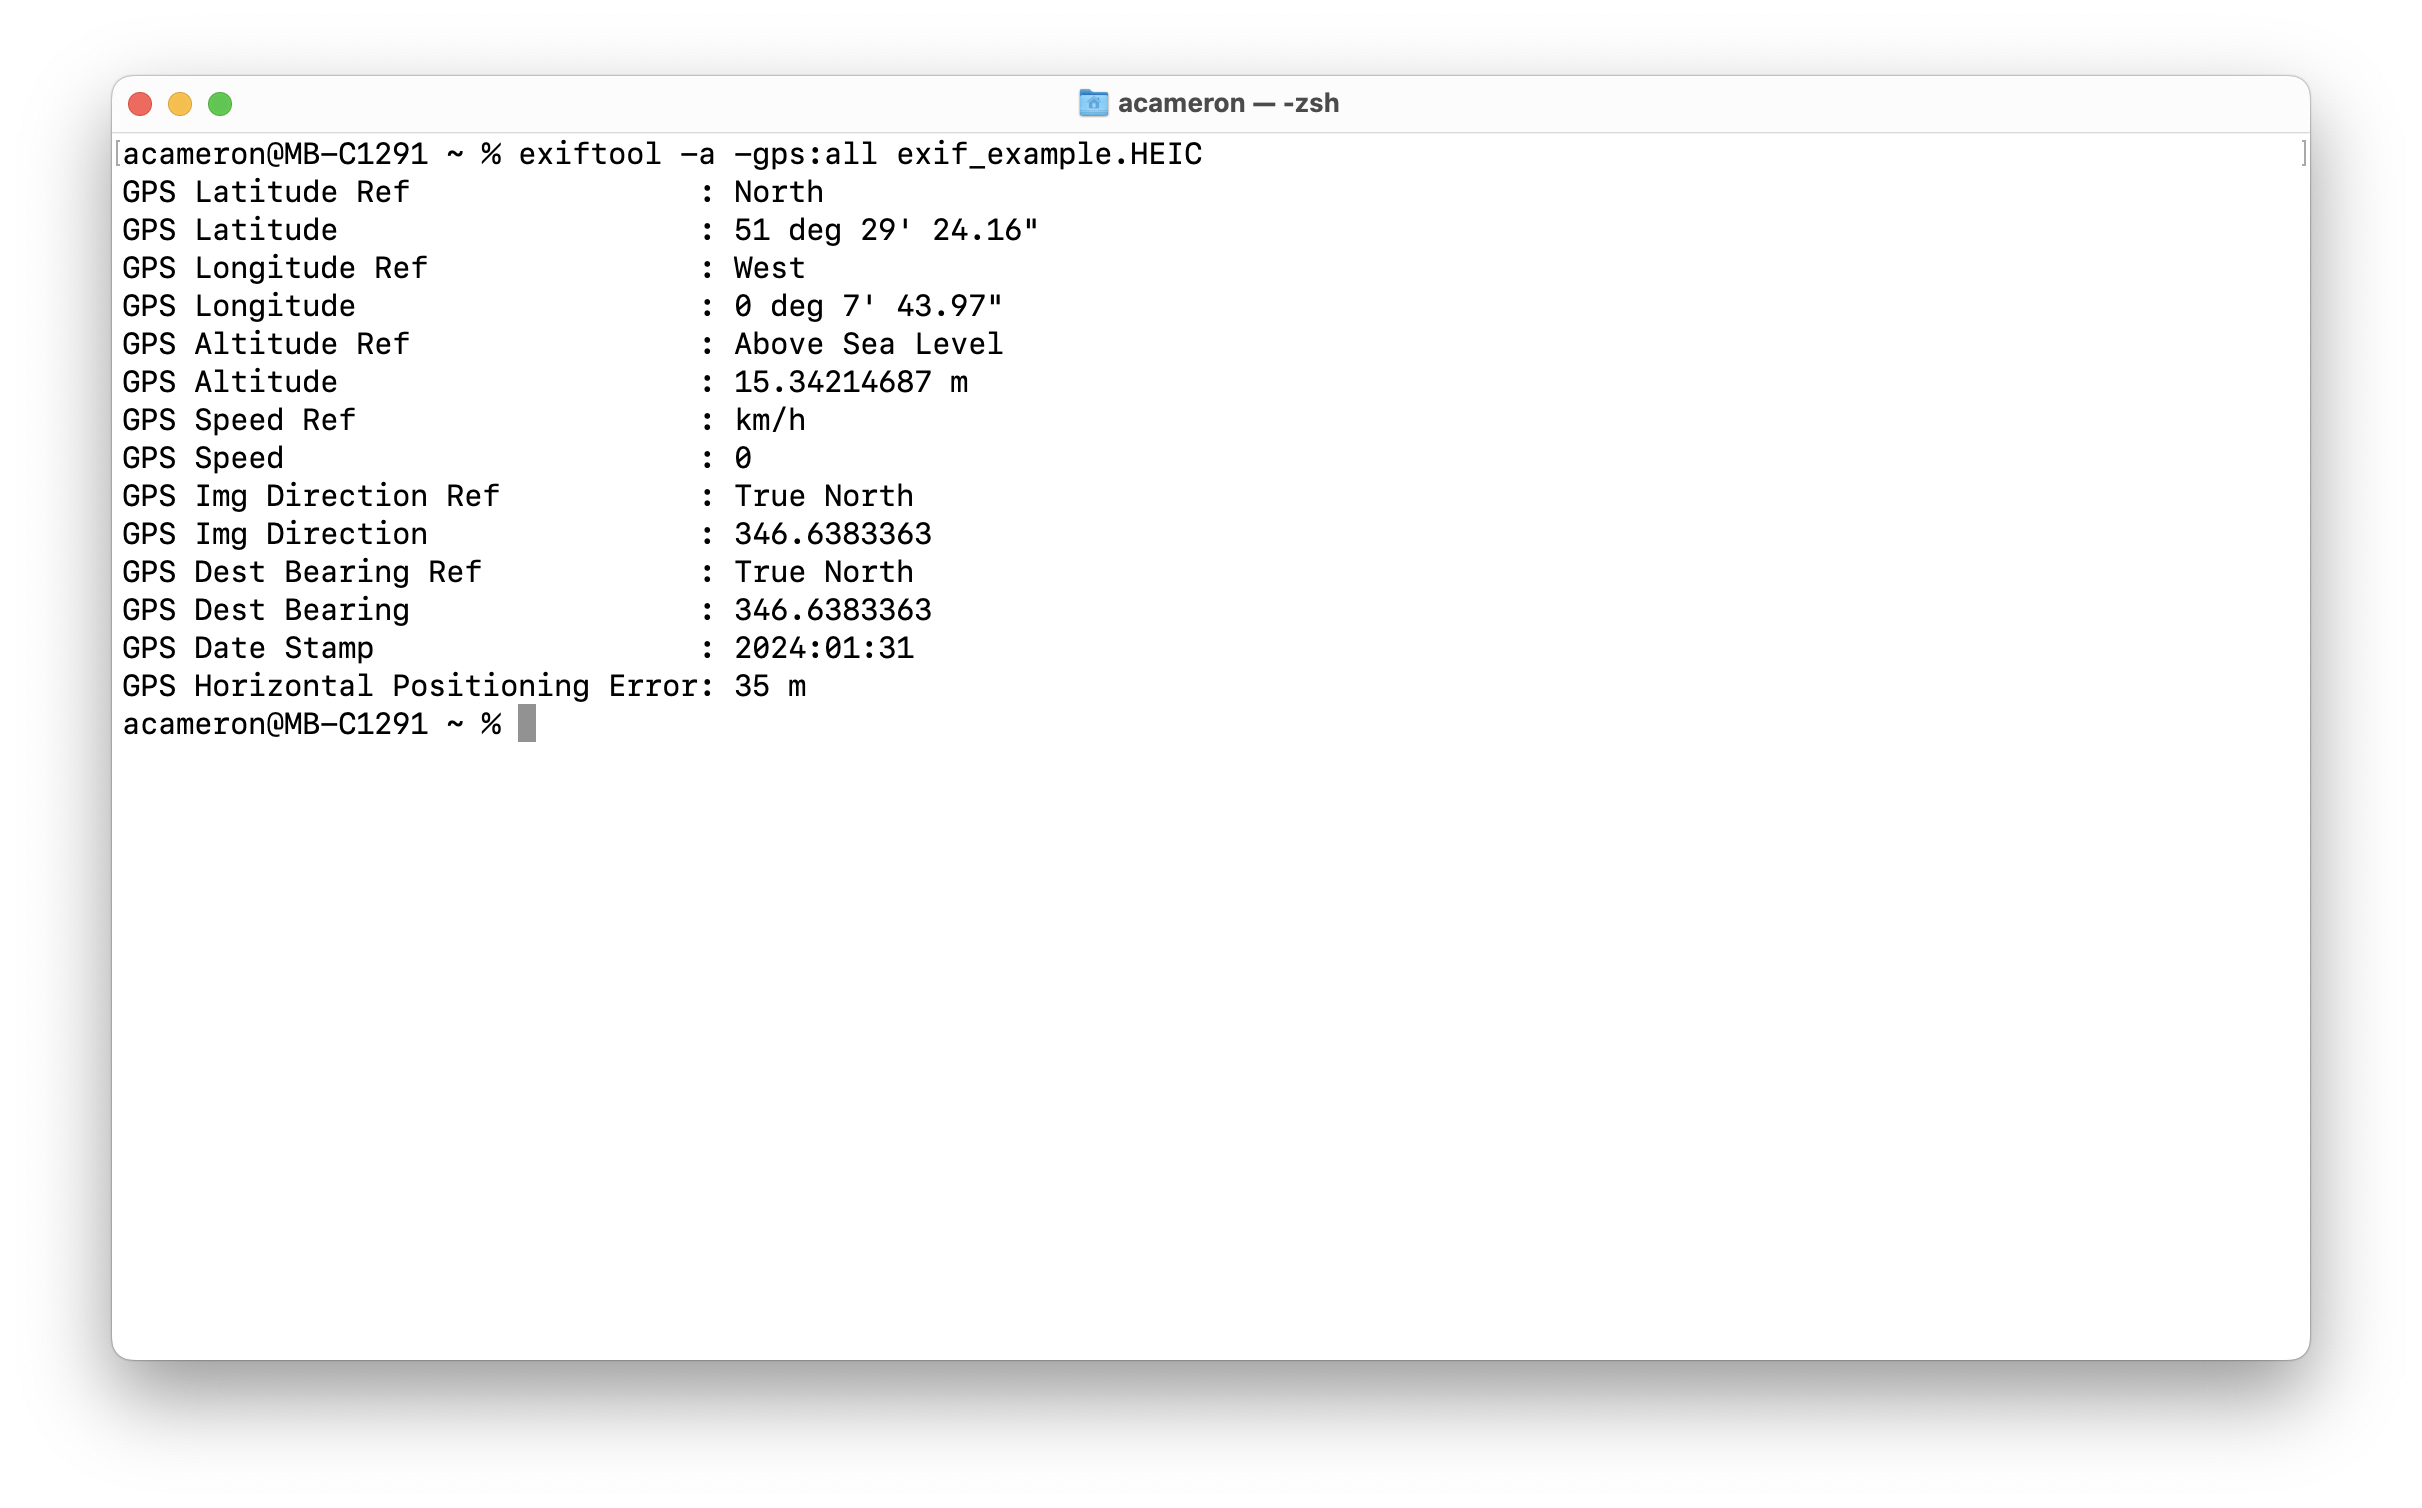
This is loads of information -- if we want an overview, we can also just get the gps component by selecting those tags specifically:
exiftool -a -gps:all exif_example.HEIC
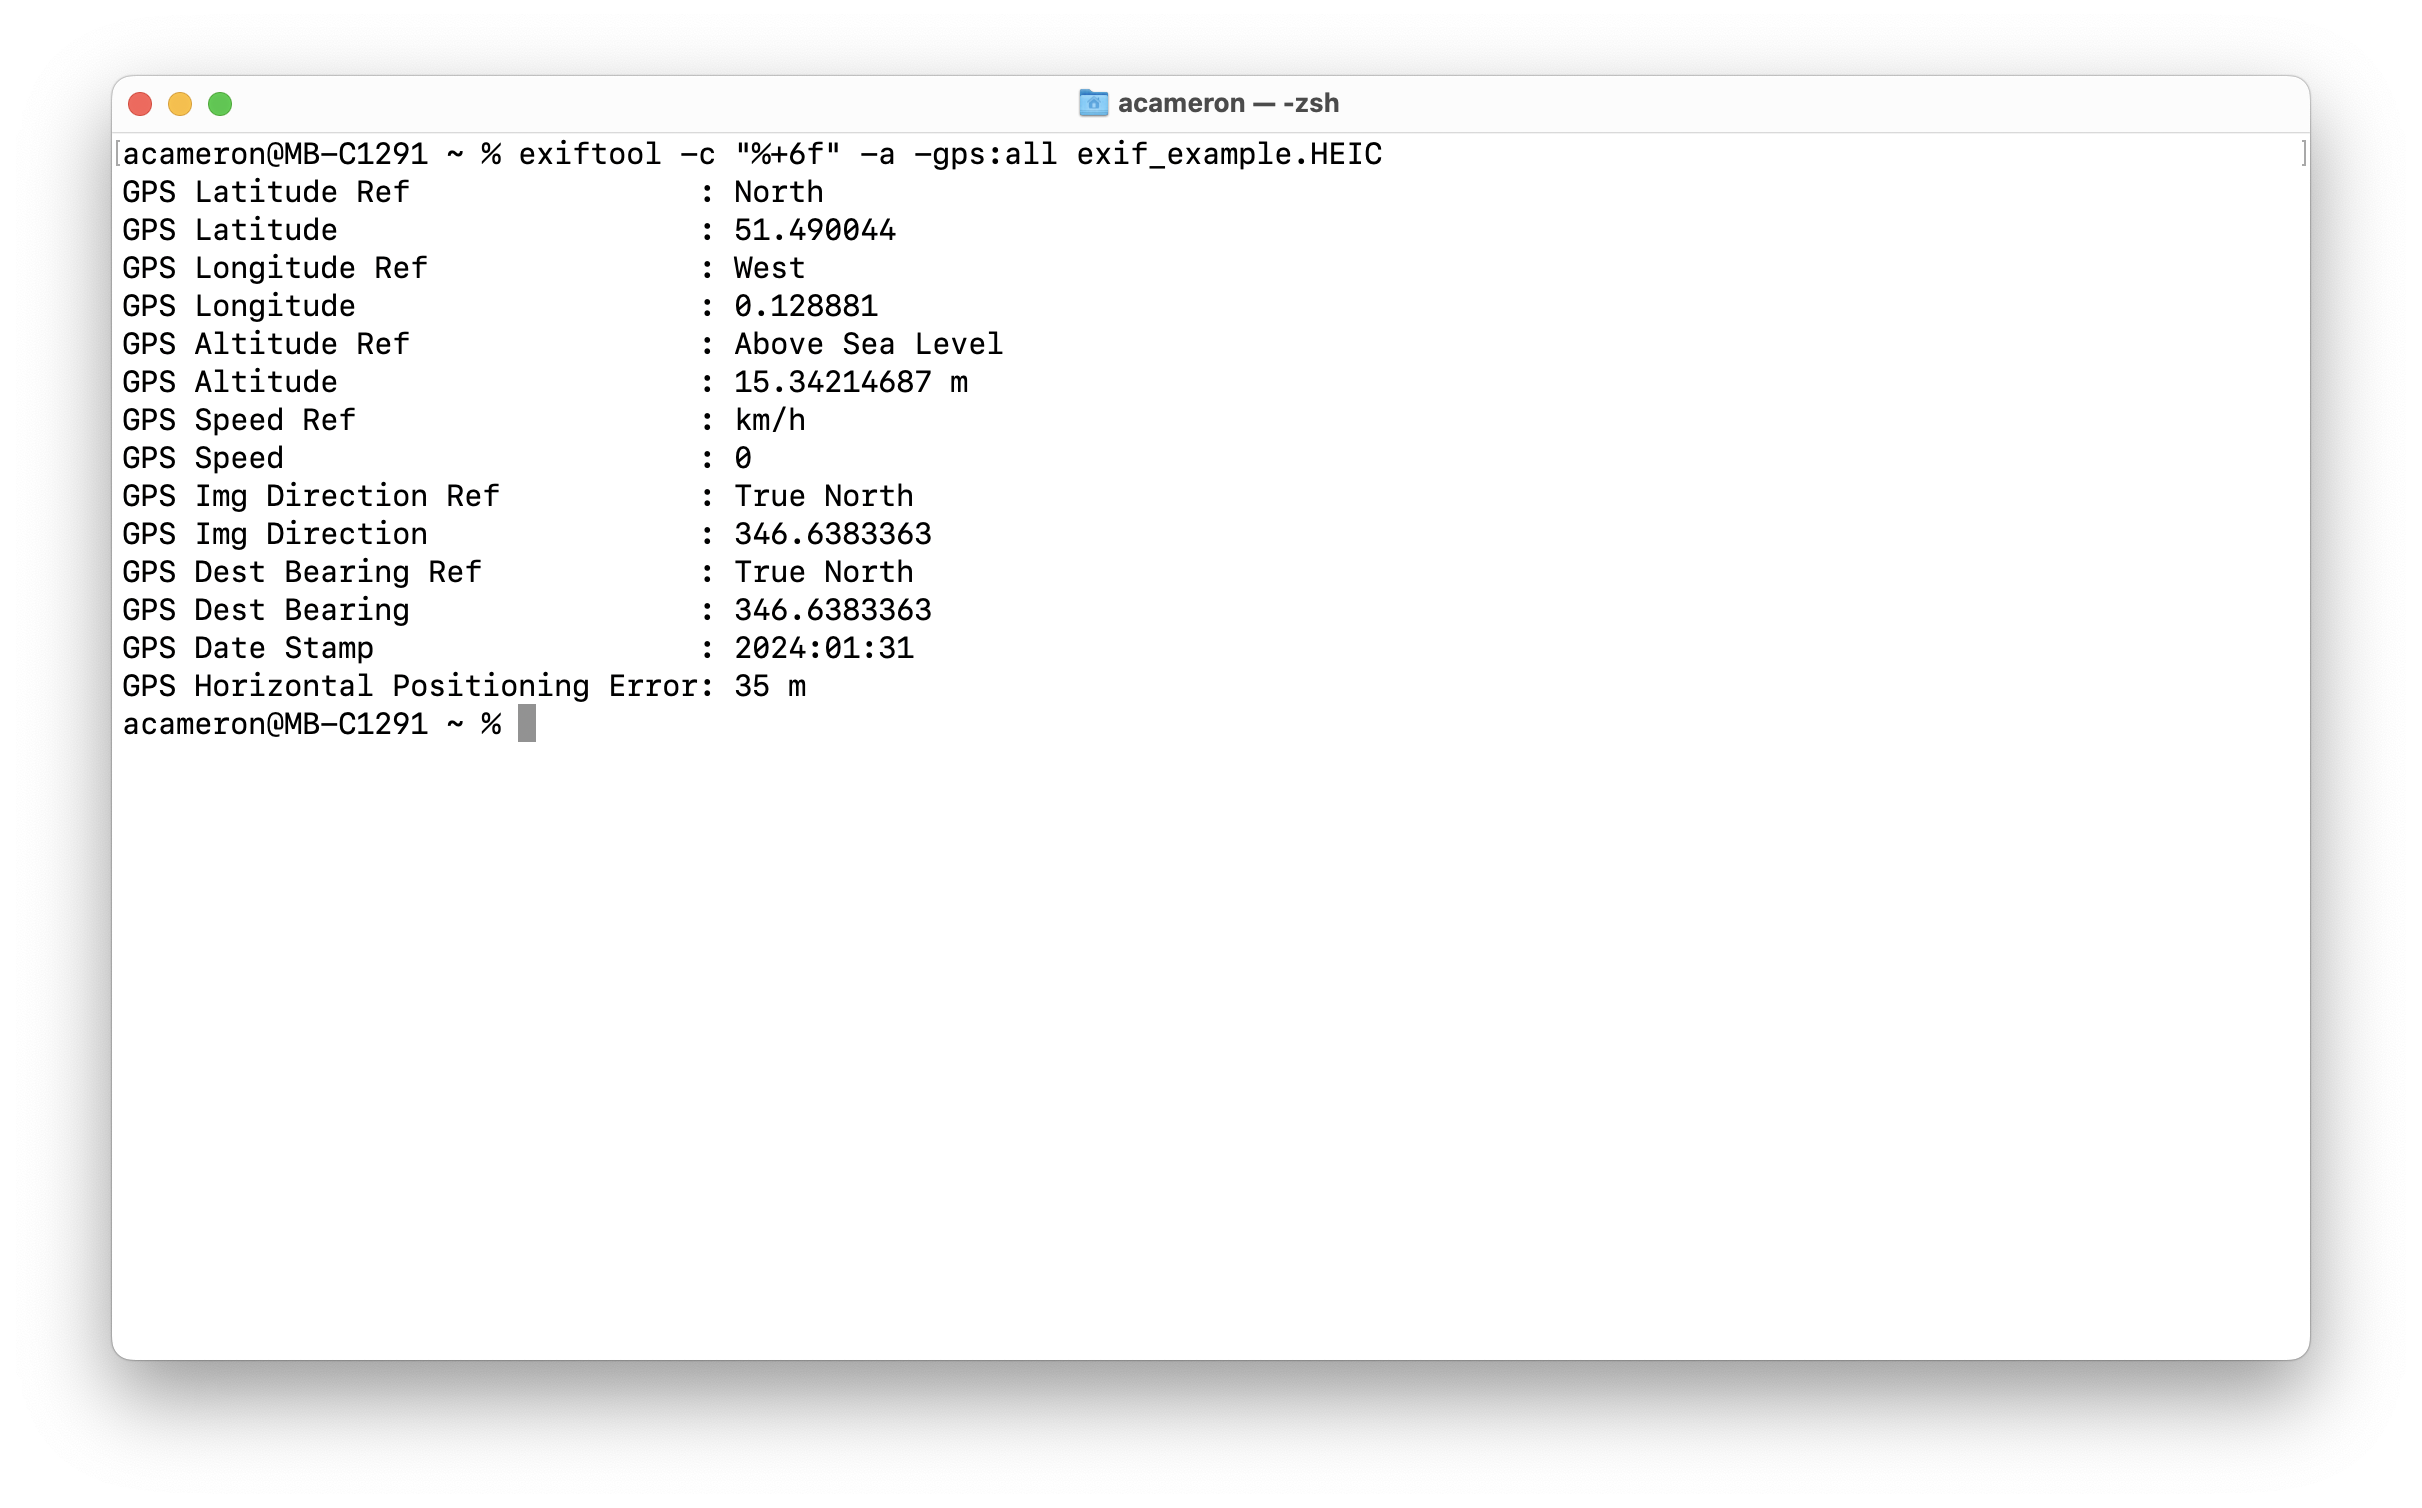
This is great, but you'll notice that our coordinates are in the 'degrees' format -- this makes it easier to read, but it makes it harder for us to use it in code. To use lat and long information programatically, we want to get this information in decimal format. We can use the -c flag to specify the format we want (the "%+6f" bit looks kind of gross, but it's how decimal representation is notated):
exiftool -c "%+6f" -a -gps:all exif_example.HEIC
Now we've got the decimal values, it's easy for us to see where this photo was taken. You'll notice that when you load google maps, the url will contain some numbers: these give the latitude and longitude of the photo.
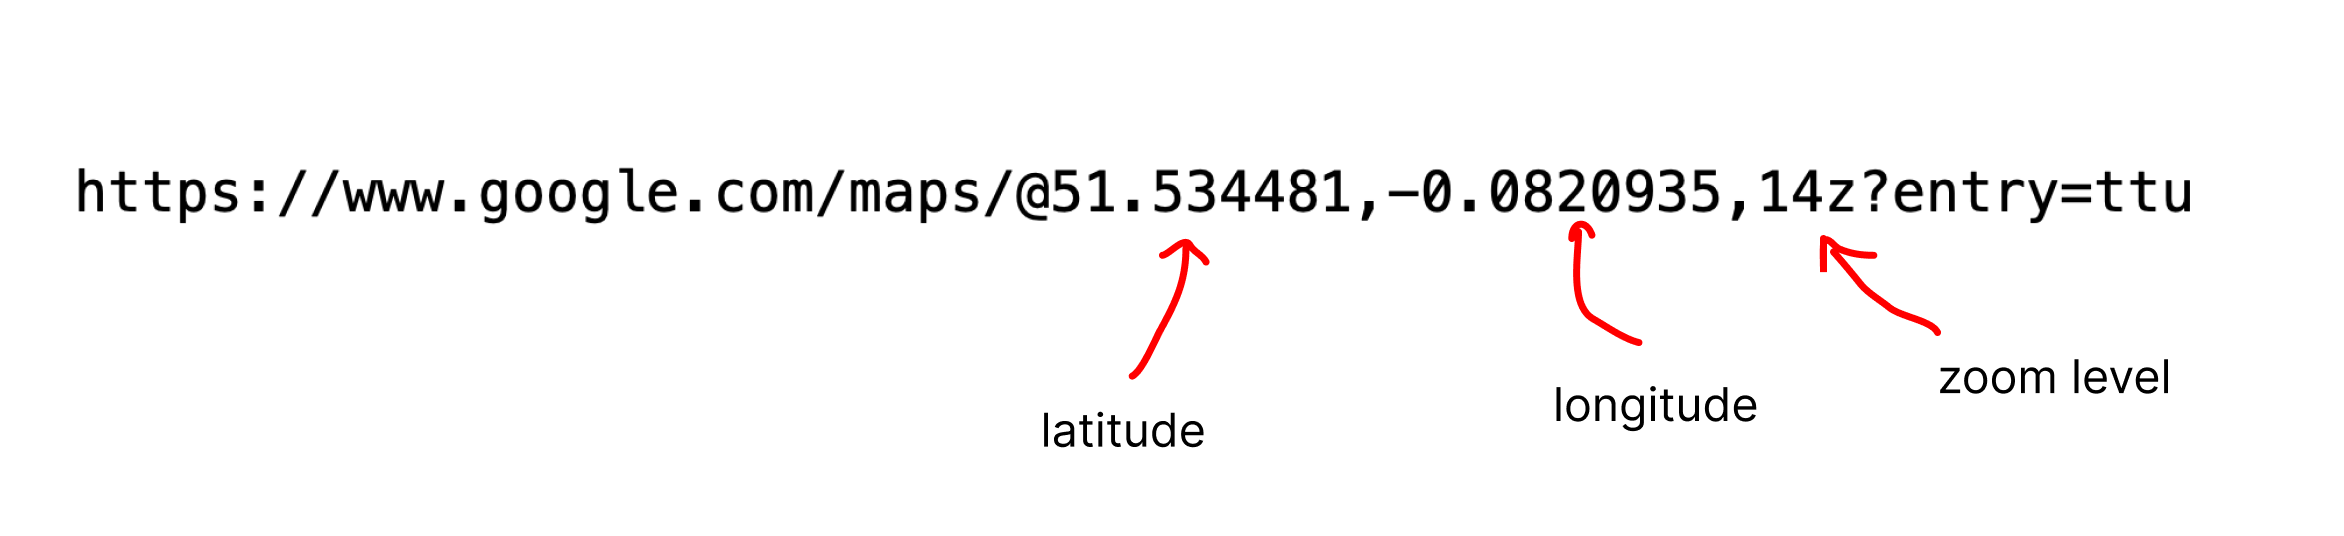
These are the pieces of information we will need to locate the image. The Ref value tells us whether our latitude / longitude is positive or negative. N and E are positive, W and S are negative.
GPS Latitude Ref                : North
GPS Latitude                    : 51.490044
GPS Longitude Ref               : West
GPS Longitude                   : 0.128881
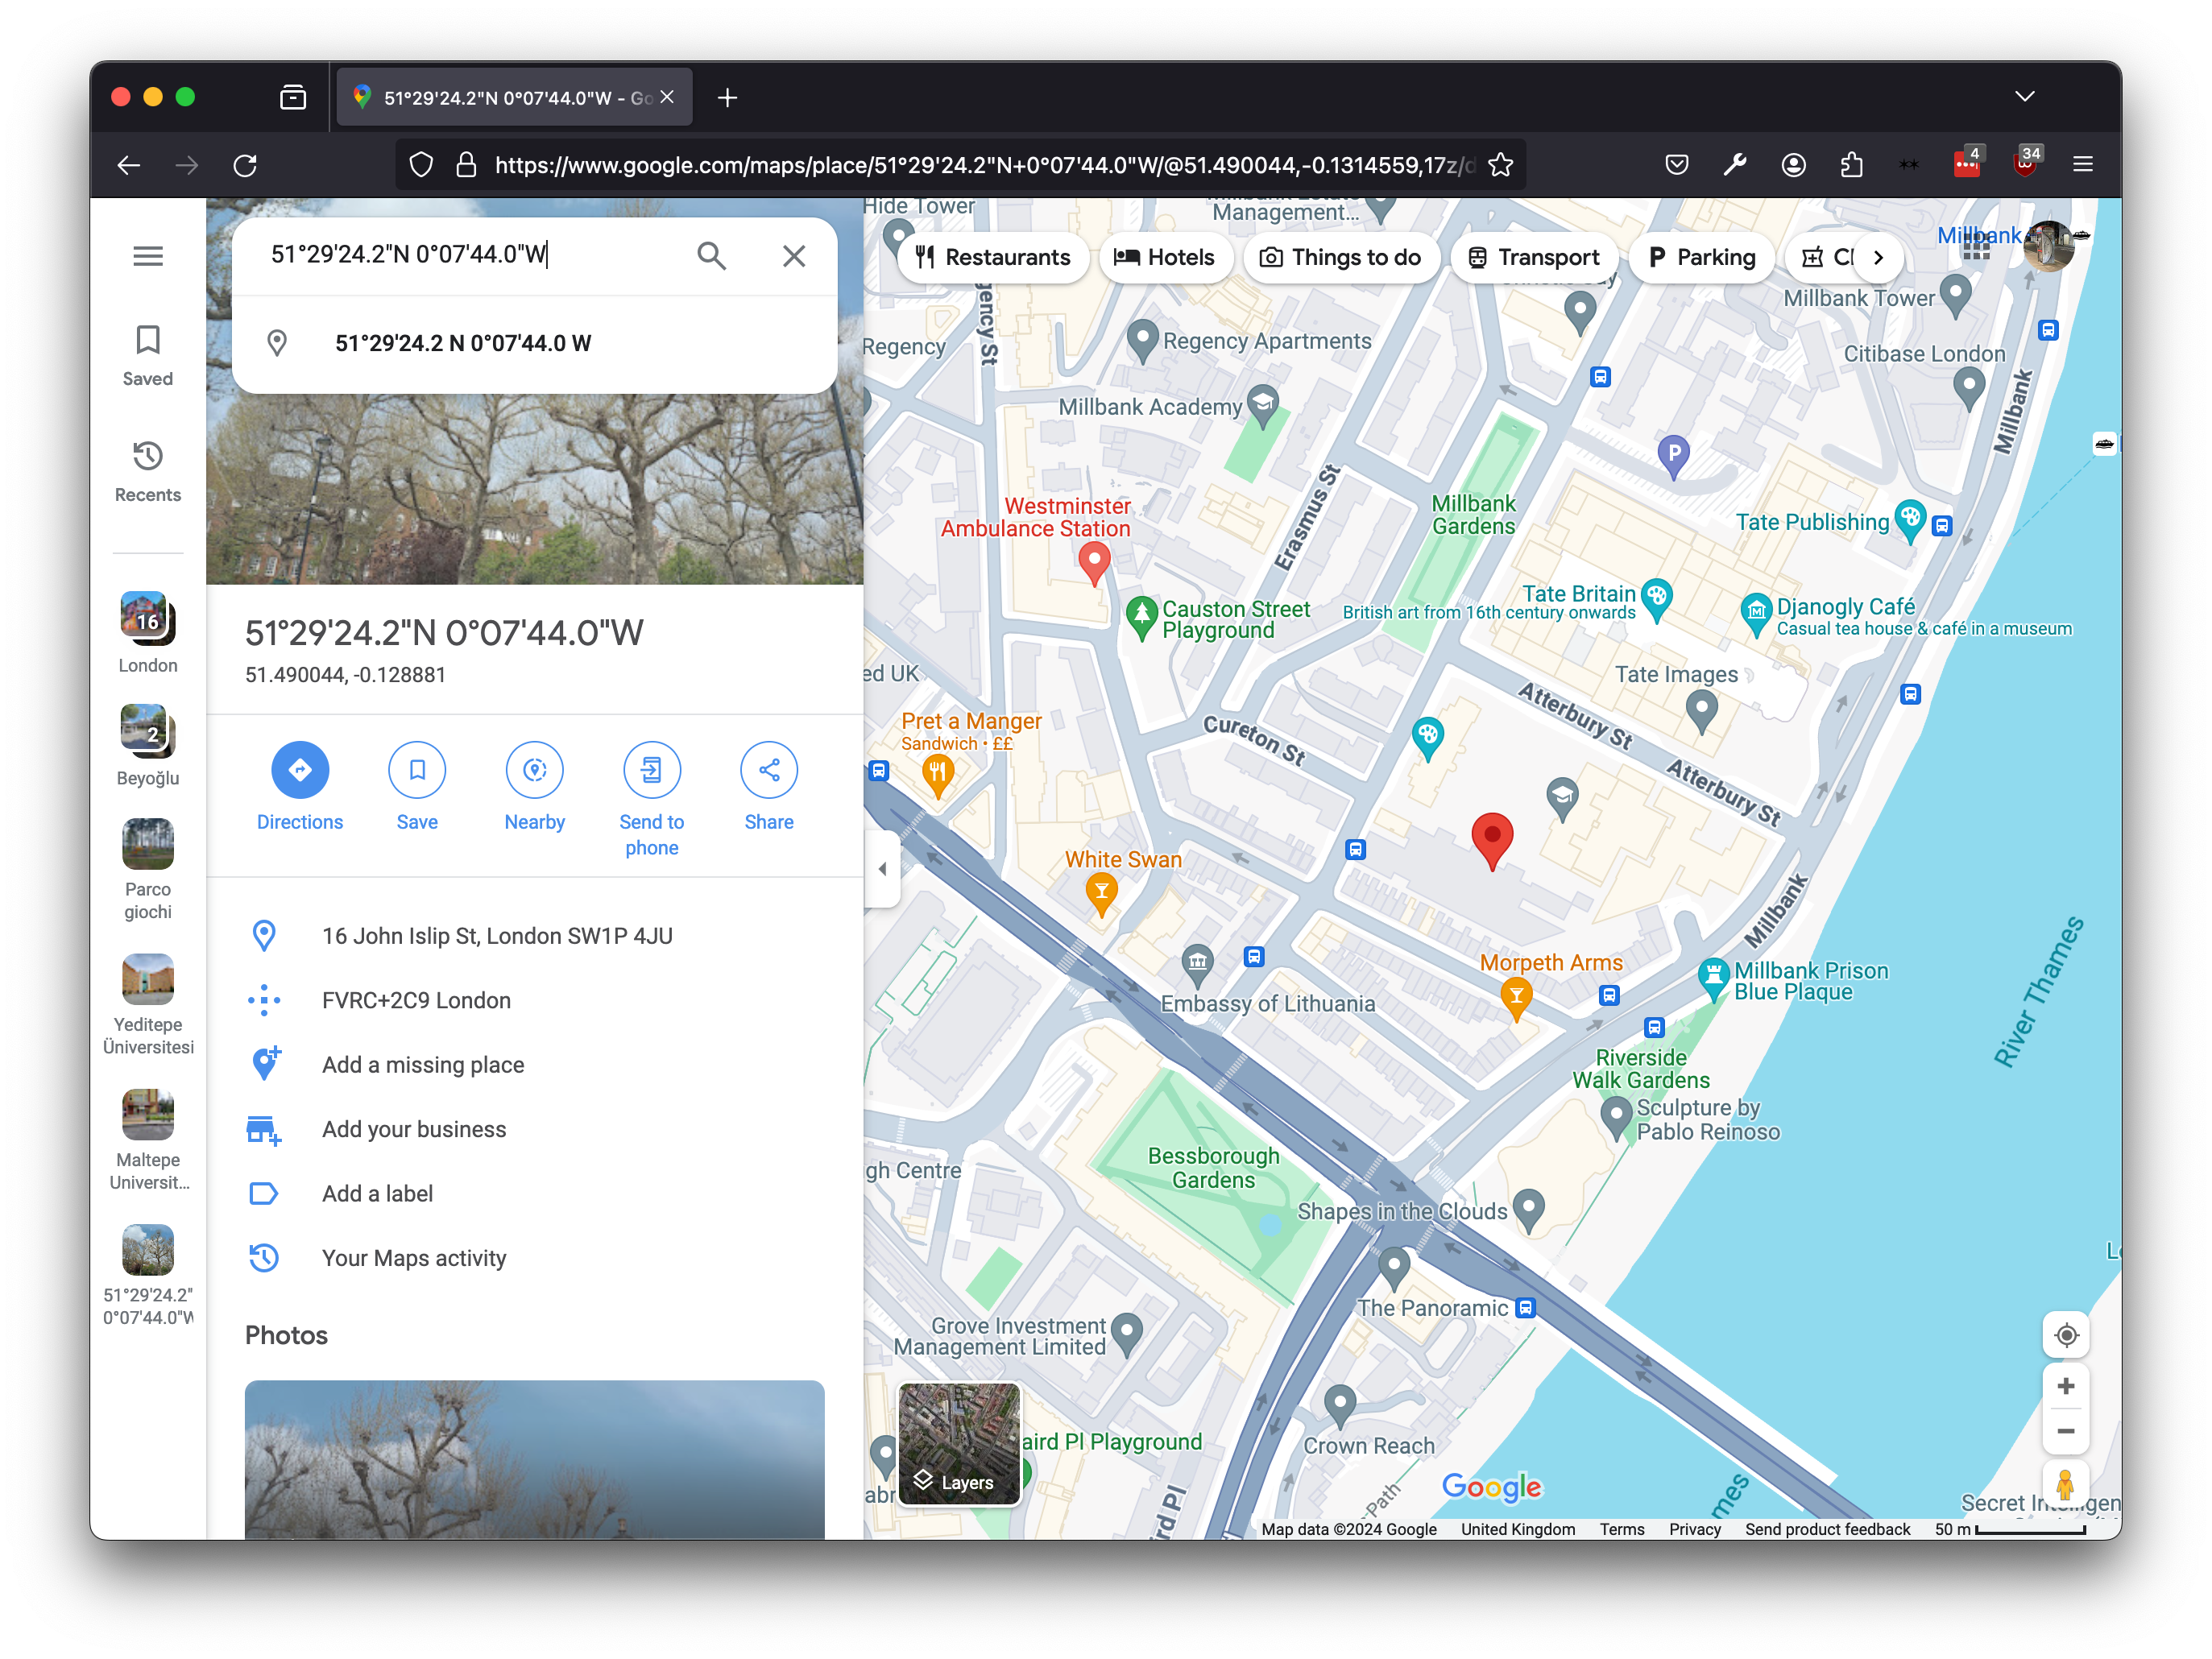
So, for this picture, our final lat and lon values are 51.490044 and -0.128881 respectively. Let's put these in our url!
https://www.google.com/maps/@51.490044,-0.128881,14z?entry=ttu
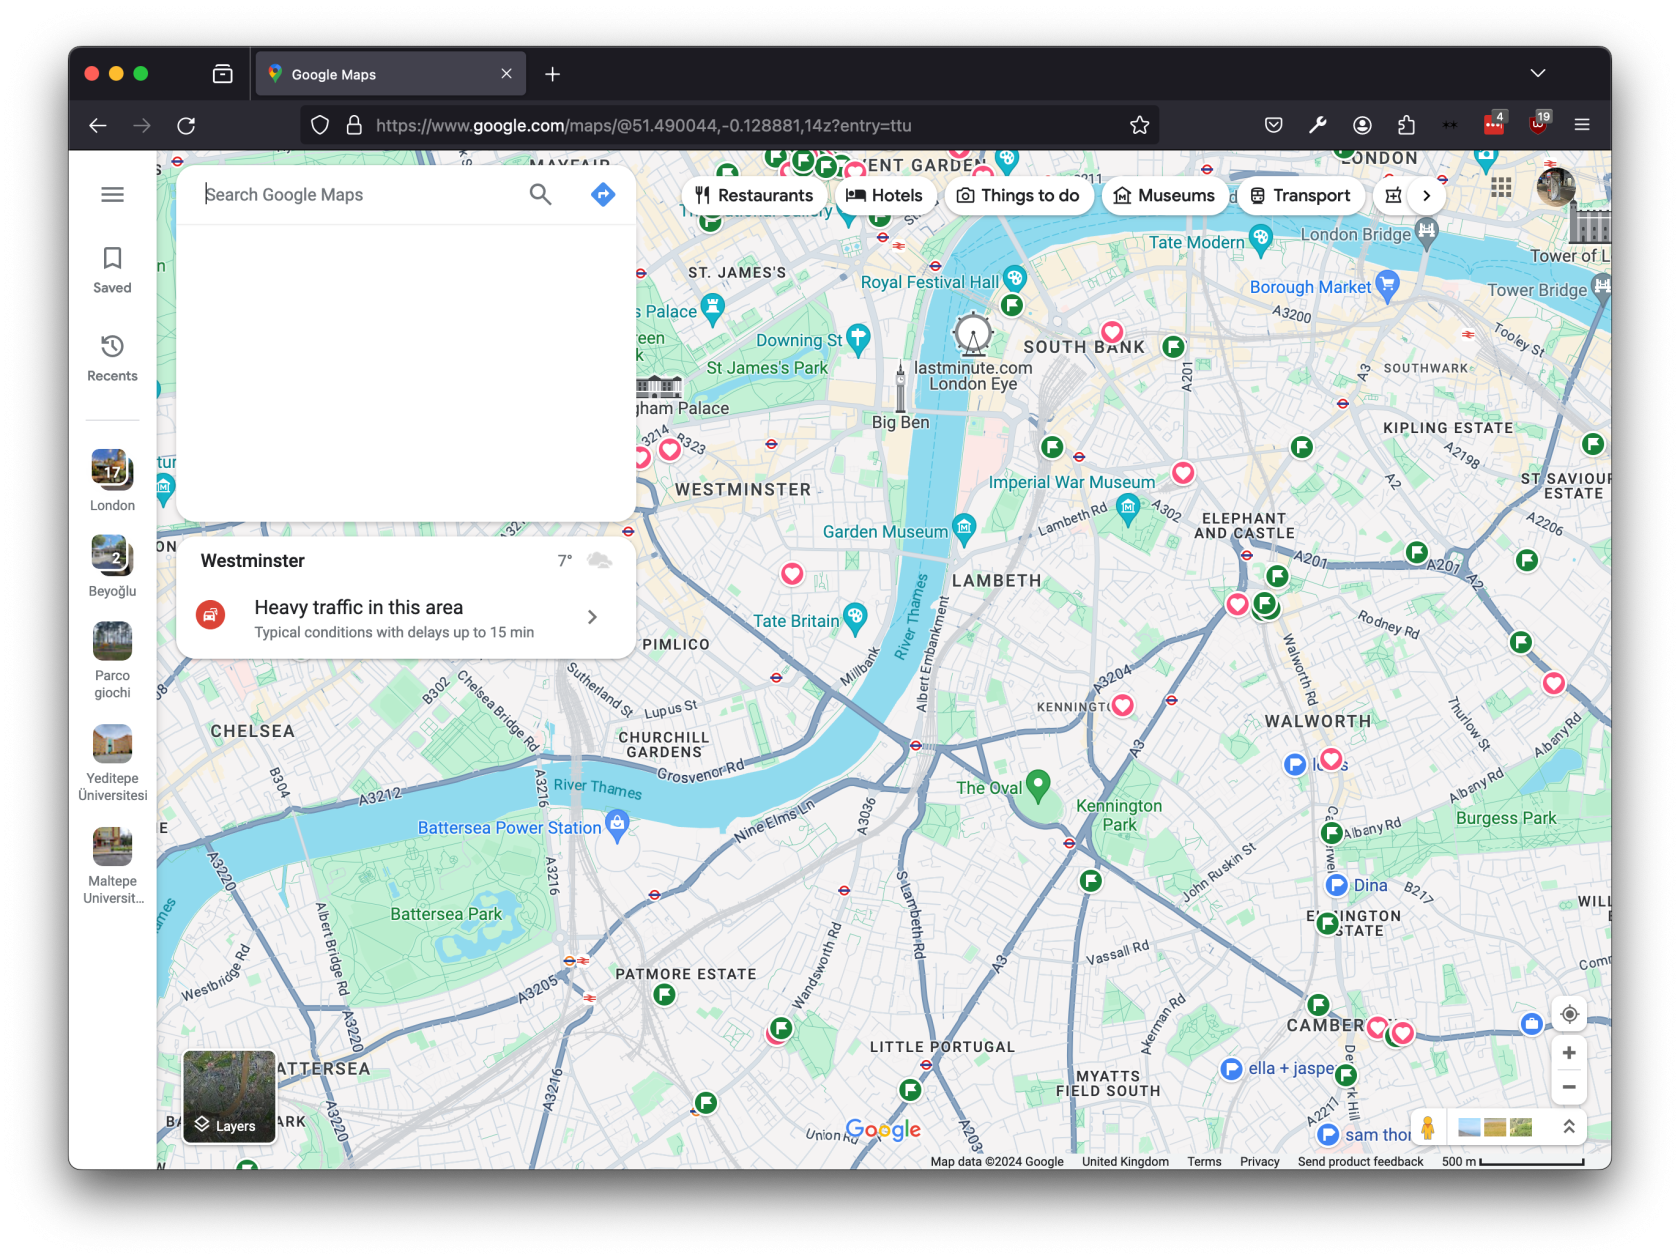
This will center the map on the location. This gives us a vague idea of where the image was taken, but we can do better! If we reformat the url as a query, we can get a pinpoint at the exact location.
https://www.google.com/maps?q=51.490044,-0.128881
Now we can see that this picture was taken in the C block of Chelsea College of Art!
edit/remove metadata using exiftool
If we want to remove exif metadata from an image, we can also do this using the command line -- by including the = at the end of the tag search, it will set all these fields to be blank:
exiftool -a -gps:all= exif_example.HEIC
python programming with exif
(This part of the notes is partly based on this tutorial). To do this part of the tutorial, we'll need a folder full of random images with different exif data. The script used is located here.
As well as using the command line to manipulate exif metadata, we can do this directly using Python code. This works in much the same way. First, to install the package, run:
python3 -m pip install exif
This will install the exif package. (note: if you do not yet have Python on your computer, you can install it using these instructions).
The first thing we want to do is test that we can do the same thing in Python that we were doing in the command line. Let's try analysing our image:
from exif import Image
import os

with open("exif_example.jpg", "rb") as image_file:
    image = Image(image_file)
    if image.has_exif:
        print(image.gps_latitude, image.gps_latitude_ref, image.gps_longitude, image.gps_longitude_ref)
This is what we get out:

If you're trying to use HEIC format, you might run into issues as Python can't easily read these files! There are a few ways around this, probably the quickest is to use the command line command. In order to use it, you need to install imageMagick.
mogrify -format jpg *.HEIC
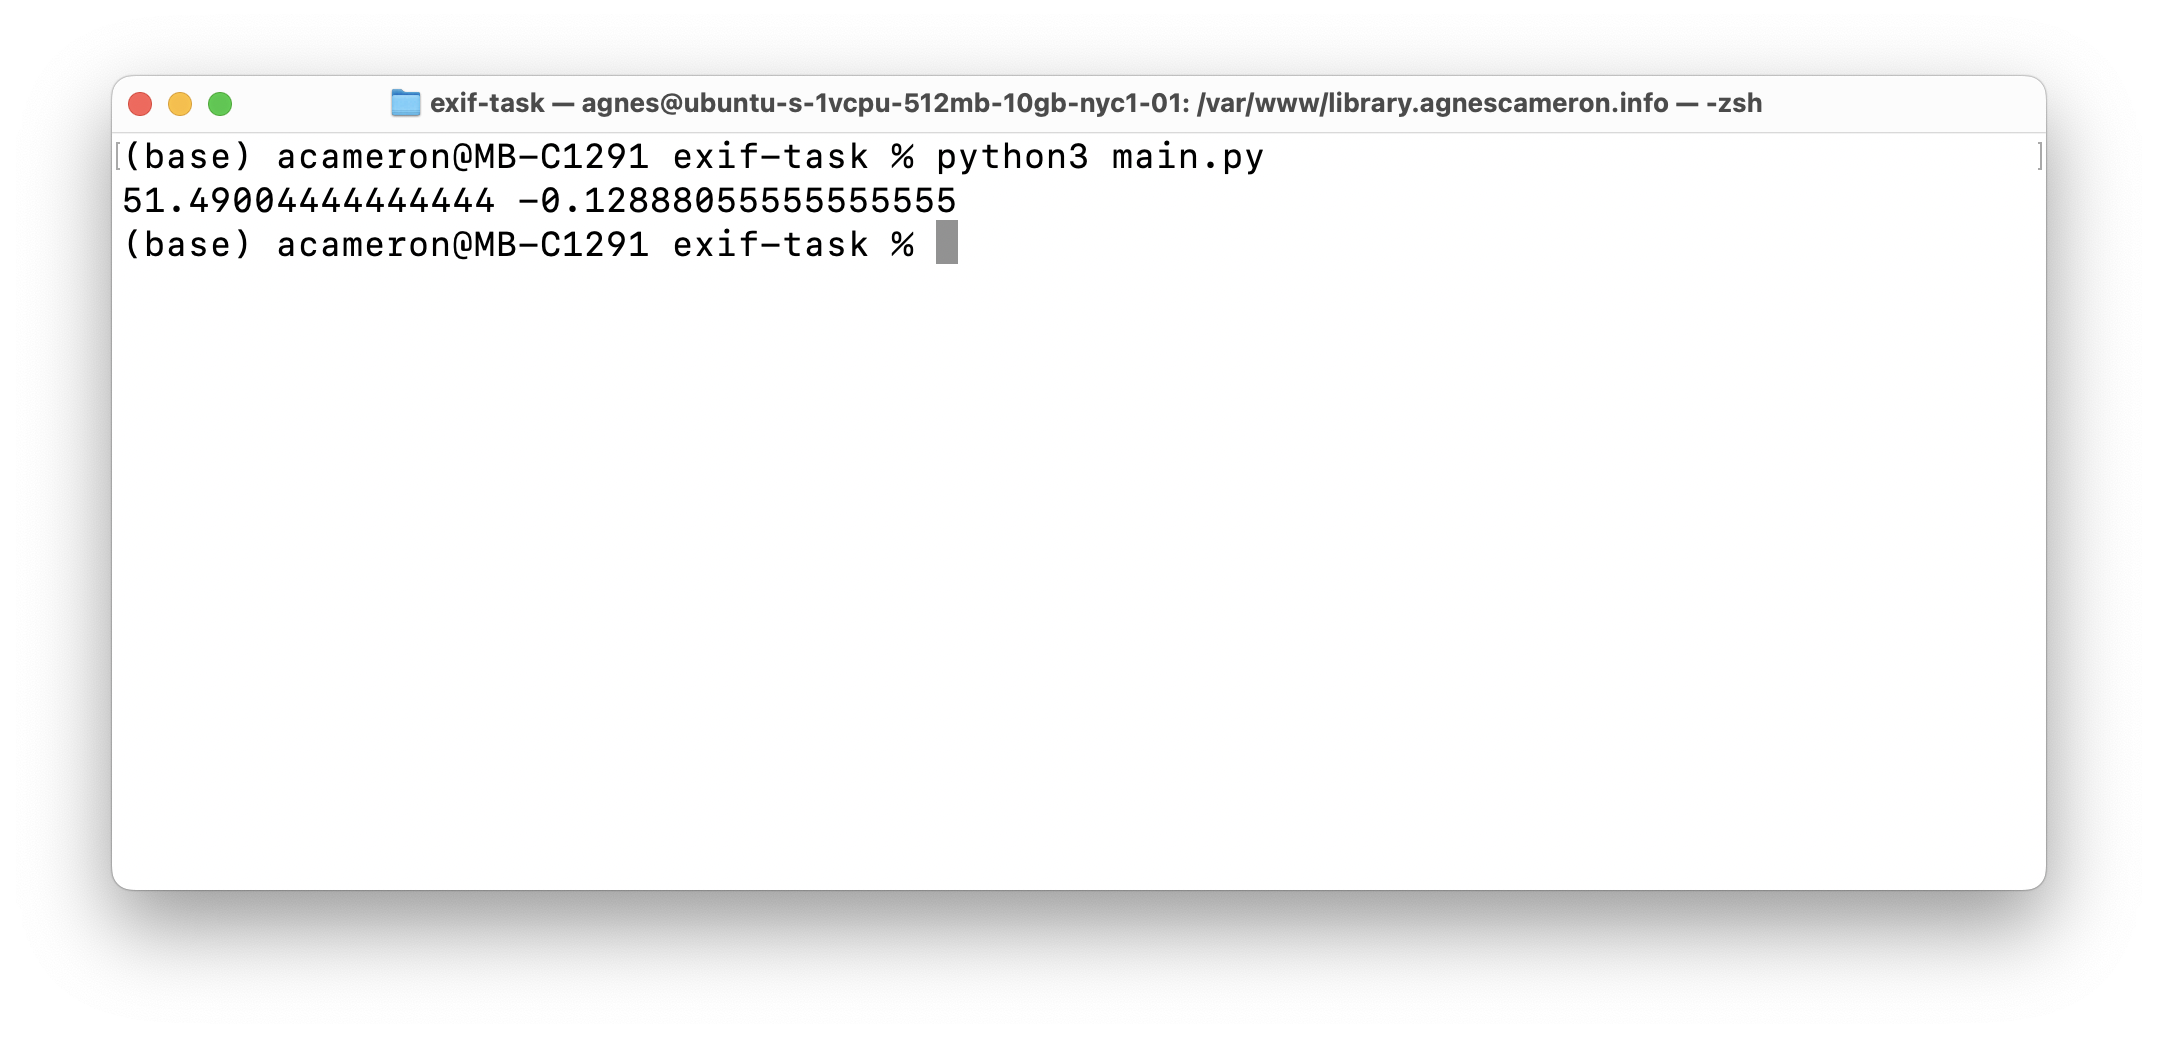
This is nice, but we're back in a non-decimal degree format. This time, we can just write a function to convert our lat and lon data:
def convert_deg(value, direction):
    multiplier = 1
    (d, m, s) = value

    if direction == "S" or direction == "W":
        multiplier = -1

    return multiplier*(d + (m / 60.0) + (s / 3600.0))


with open("exif_example.jpg", "rb") as image_file:
    image = Image(image_file)
    if image.has_exif:
        lat_dec = convert_deg(image.gps_latitude, image.gps_latitude_ref)
        lon_dec = convert_deg(image.gps_longitude, image.gps_longitude_ref)

        print(lat_dec, lon_dec)
Great, now we have the decimal versions: