Using Raspberry Pi for Projects
In the CCI we have a large number of pre-configured Raspberry Pi 4 boards for use by students, as well as a range of other boards (some Pi Zeros, a couple of Pi 5s). We often recommend these to students who are pursuing installation / physical computing projects that are too complex, or require too much processing power to be run on an Arduino. Getting started with Raspberry Pi can be a bit of a learning curve, but really worth doing if you're interested in making durable installation work!
Raspberry Pi vs Arduino
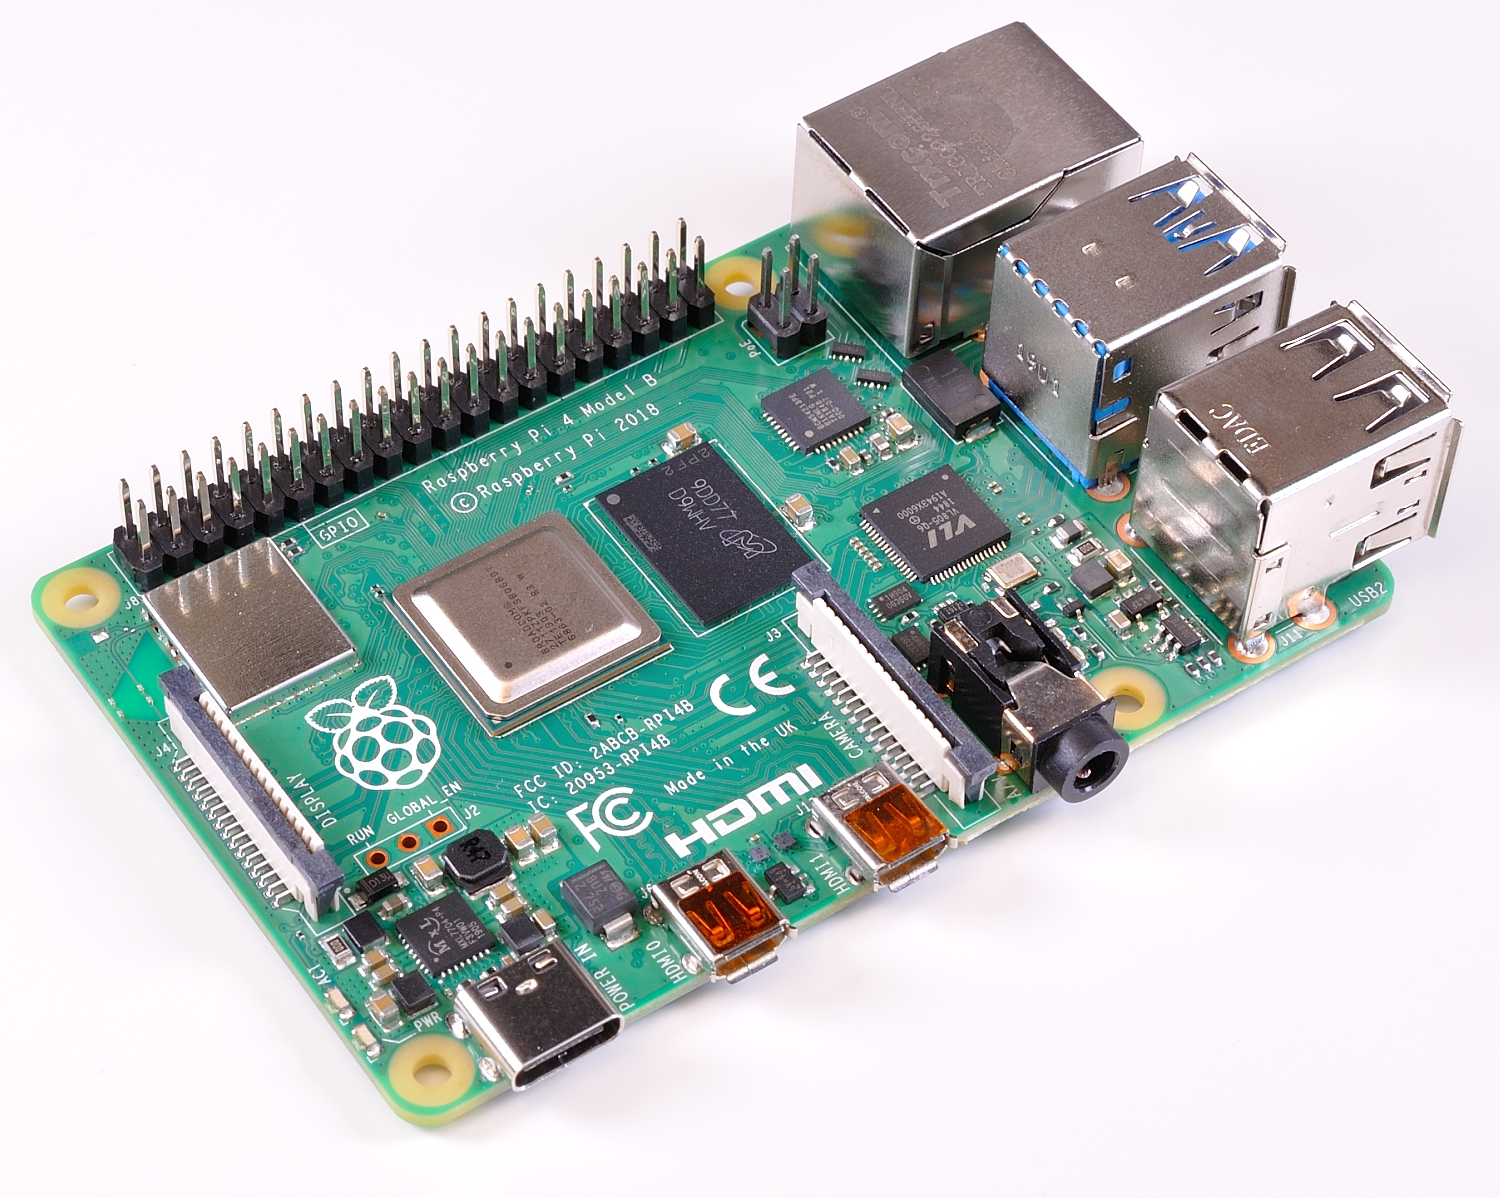
Although they are often talked about in similar contexts, Raspberry Pis are very different to Arduinos, and using them requires a different (but related) set of skills. Crucially, a Raspberry Pi is a computer, running an operating system, and capable of running lots of different programs simultaneously. An Arduino is a microcontroller, and can only run one program at a time.
This difference means that Raspberry Pis are well-suited to more complex projects, including anything involving handling files (as operating systems have a filesystem), images, or peripherals like thermal printers. They also require a lot more setup and configuration, and it's a good idea to talk to the technicians about what's the right approach for your project (if you only have a small amount of time it might be worth scaling back your ideas rather than trying to get set up with a Pi in a short space of time).
Getting Started
By default, Raspberry Pis we will give you run a variant of the Debian operating system called Raspberry Pi OS. This is installed on an SD card -- if you want to change the system the Pi is running, you can overwrite this SD card, or swap in a new one.
If you are configuring a pi from scratch, Raspberry Pi's website has a thorough setup tutorial. You will not need to go through these steps if you are using a preconfigured pi that we have given you.
Capabilities
Raspberry Pi's documentation includes a long guide to Raspberry Pi OS, which includes a detailed description of
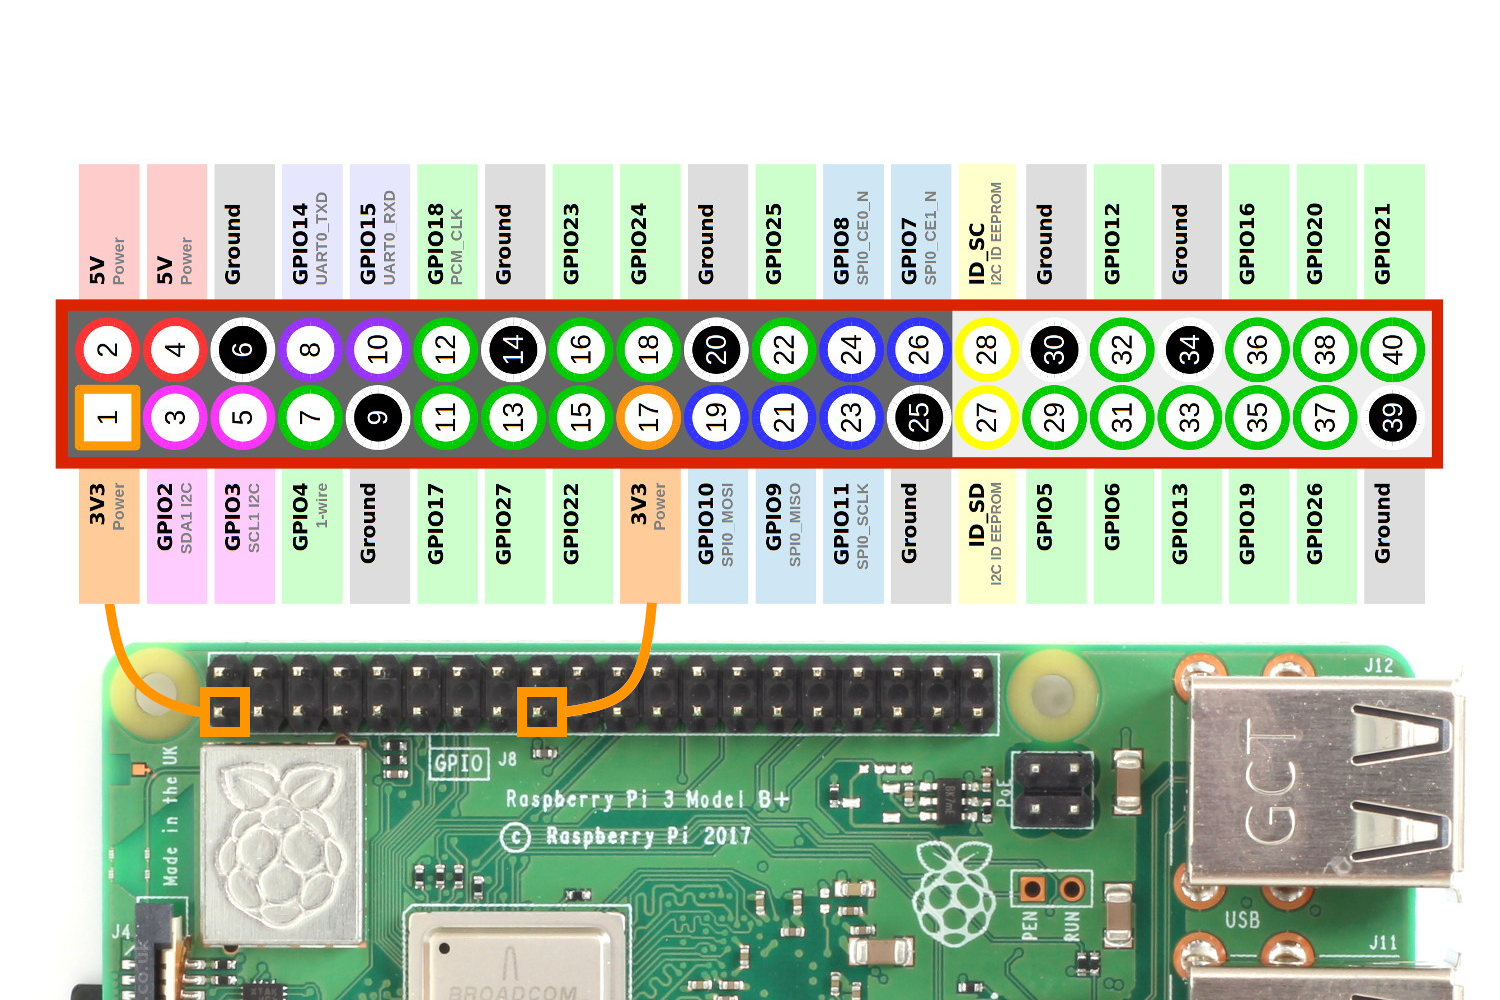
Just like Arduinos, Raspberry Pis have a GPIO that allows electronic components to be connected directly to a set of pins that can be read and written to programatically.
Connecting to Wifi
It's very difficult to connect devices like Raspberry Pi to the UAL Wifi network. To get around this, the IT department maintains a separate network for "Internet of Things" devices, including Raspberry Pis. UAL-IoT is connected to UAL-WiFi, so it's possible to SSH into a Raspberry Pi connected to UAL-IoT from a device connected to UAL-Wifi.
New devices have to be registered in order to connect to the UAL-IoT network. We have done this process already for the Raspberry Pi 4s, but other devices may not be registered. A guide to this process is available here.
Helpfully, the IoT network may require a different password depending on what building you are in and what device you are using. Talk to technicians to get the correct password for your pi!