Forking a Git Repository
A common way to run classes at the CCI is for your lecturer to manage homework through a main git repository that they update with new files weekly, and ask you to make a fork of it to complete the work. Once you have a fork of the repository set up properly, this can be a very efficient workflow, but it takes a bit of getting used to!
In order to follow these instructions, make sure that you have first gone through the process of creating a CCI Github account and setting it up locally.
Overview: what are we doing
Forked repositories are really useful as they allow the lecturer to update code in a single location every week, which students can then integrate into their own work.
The key to using forks correctly is to make sure that you are pushing changes to your repository, but pulling changes from their repository. (if you make edits online, you'll also need to pull from your remote too, but it's best to try and manage everything locally if you can). The eventual aim of what we're trying to achieve is illustrated by this diagram:
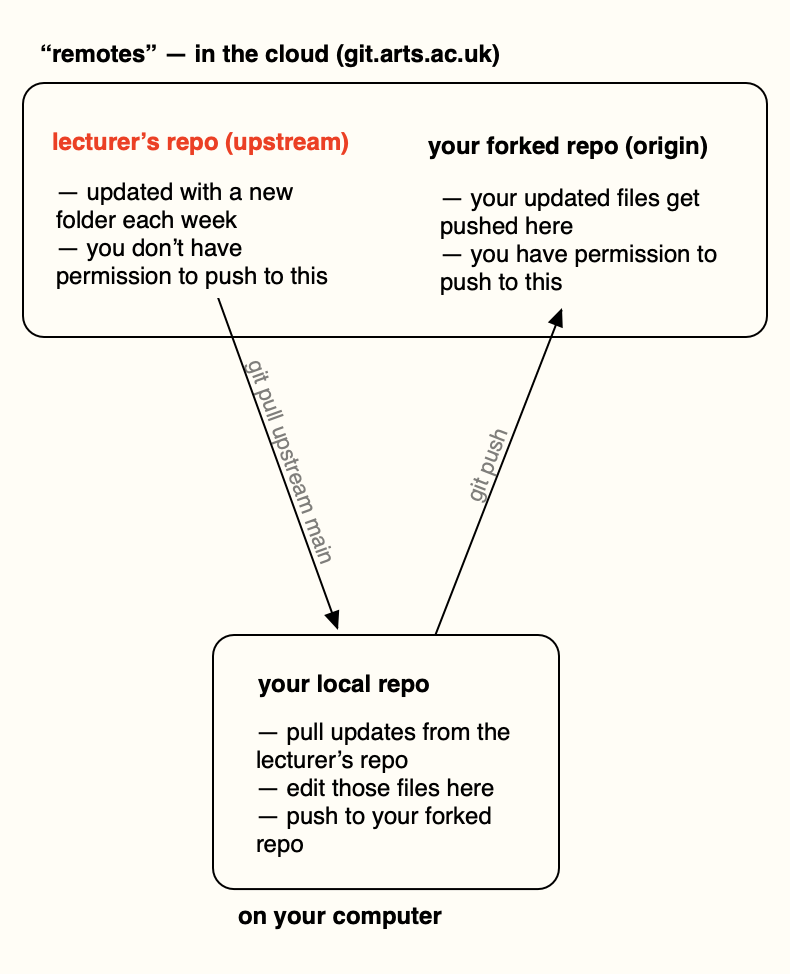
We'll work through getting to this in the steps below, starting from making the cloud-based fork.
Step 1: make a fork of the remote repository
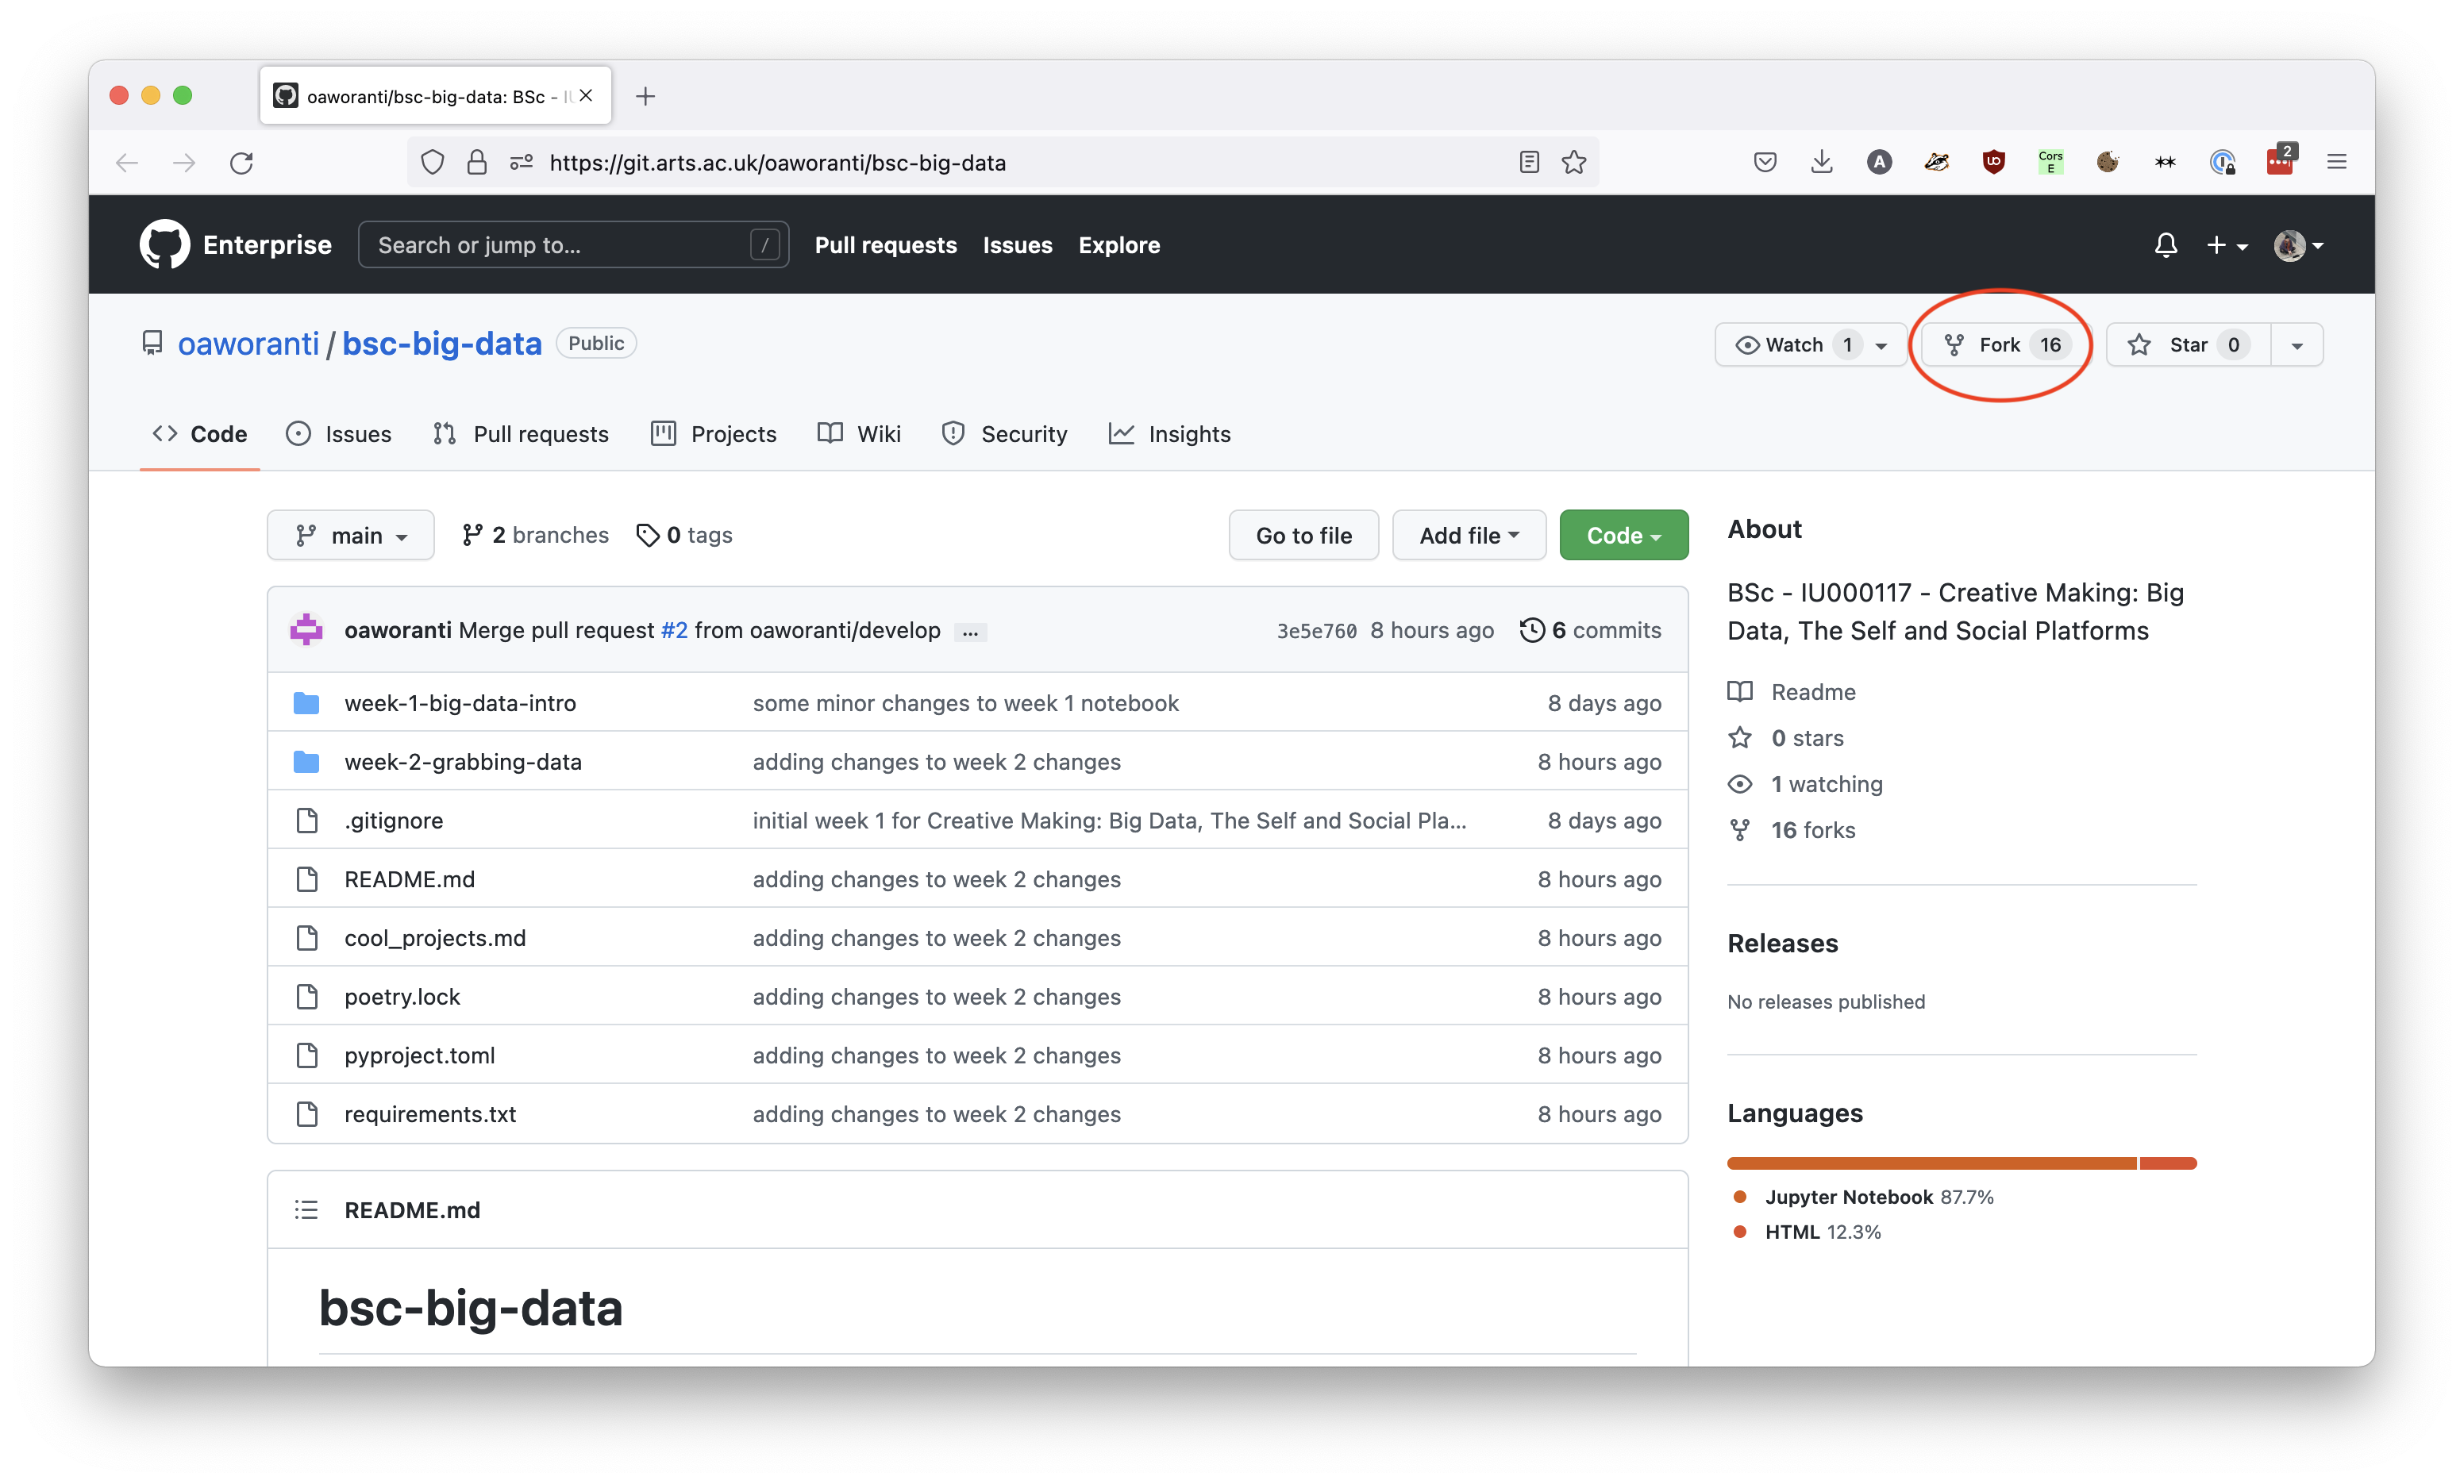
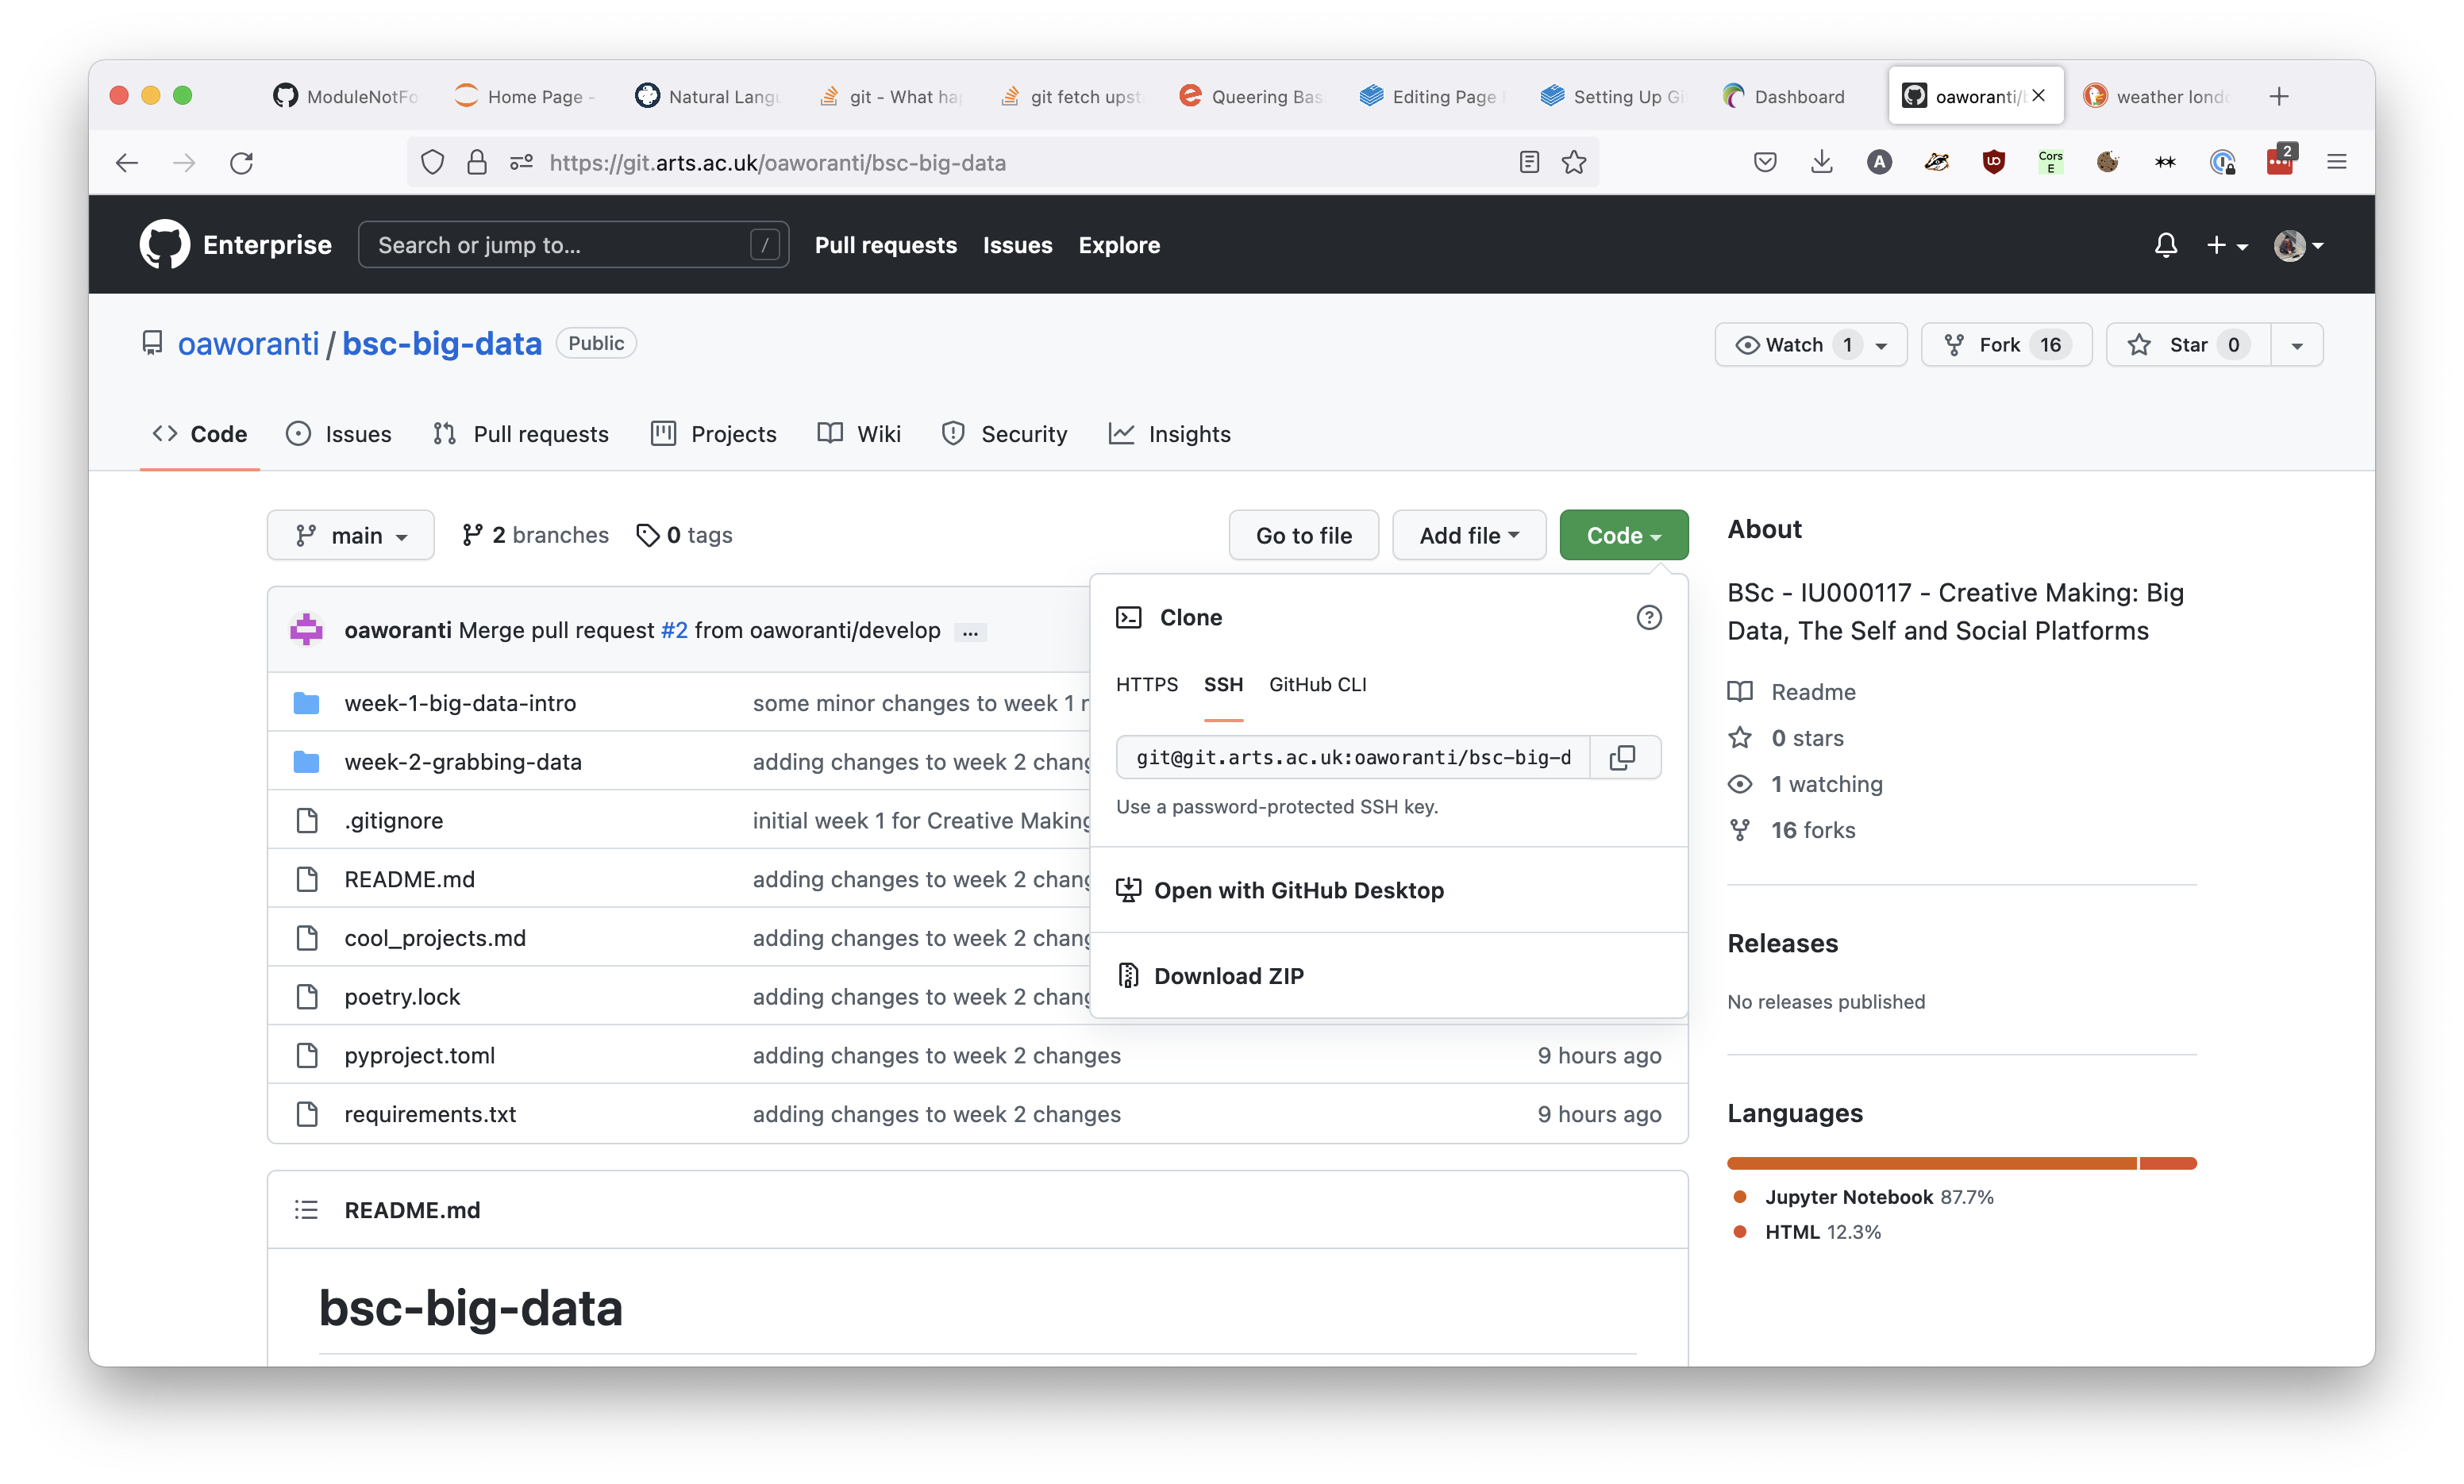
This step should be completed in your browser. Navigate to the repository you want to fork, e.g. the one that your lecturer made, and click the 'fork' button. This will take you to a page that allows you to name your copy -- you can either change this, or leave it the same, it won't affect the function. If you have already made a fork, it will link you to your existing copy.
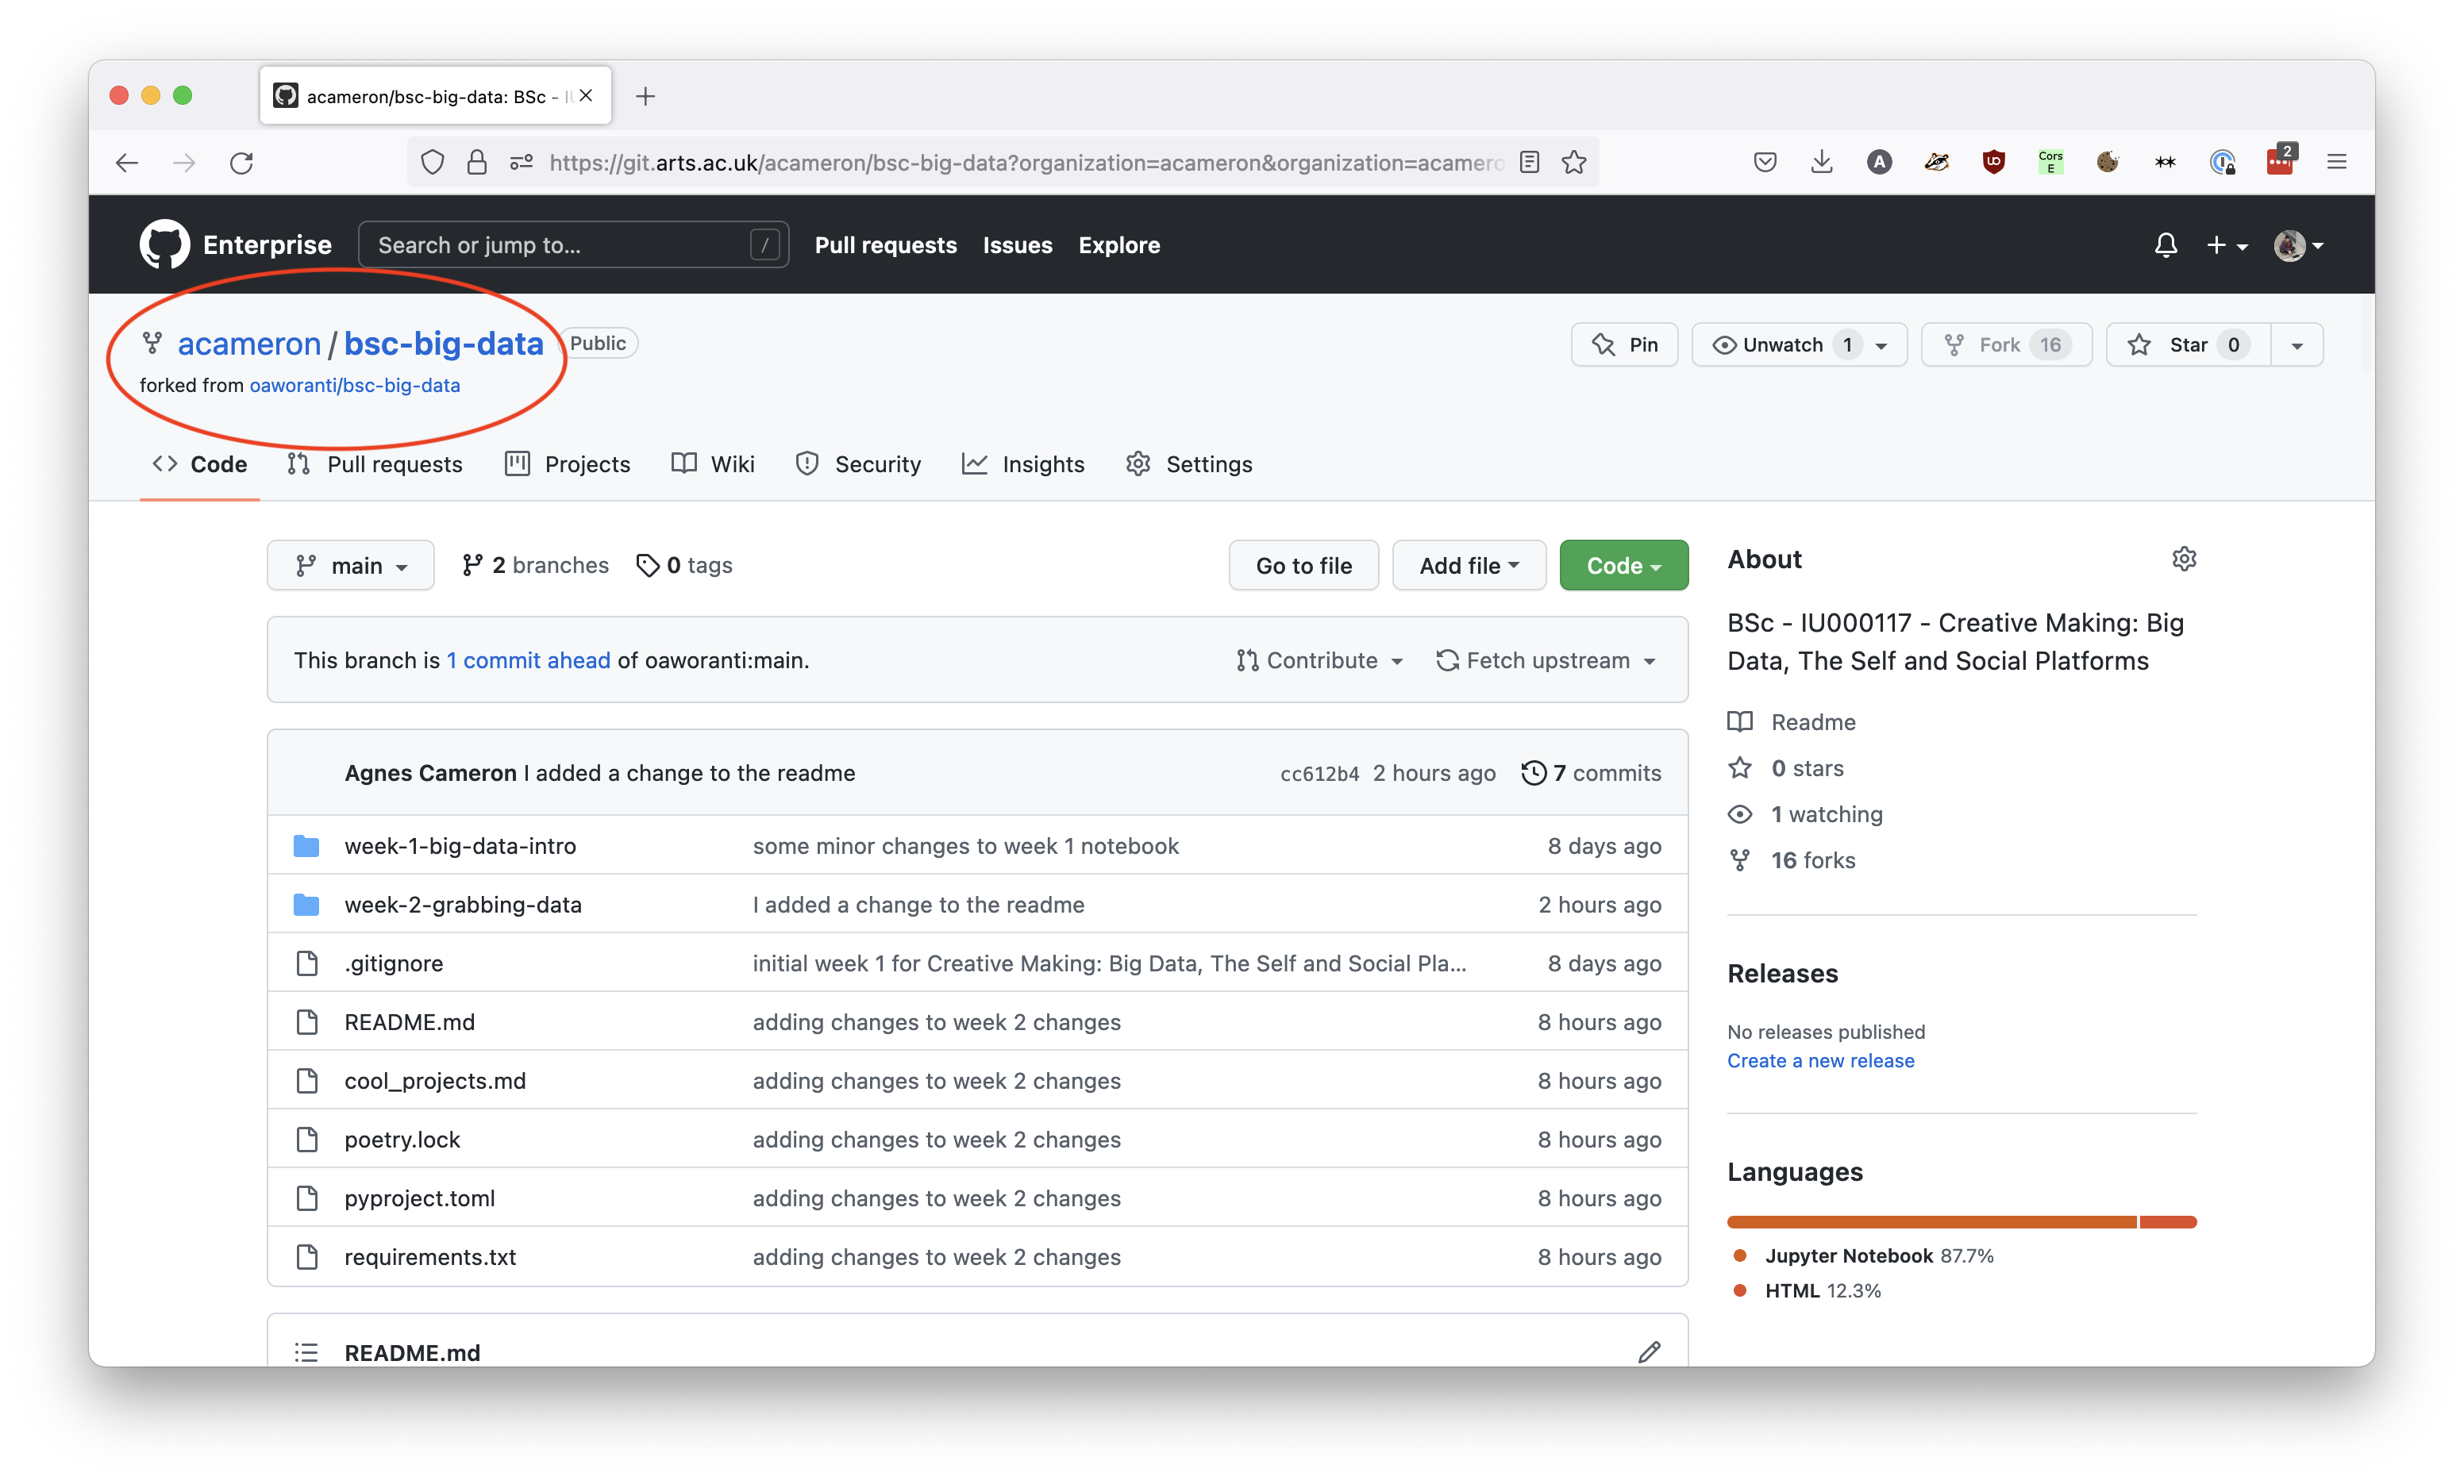
Once you have created the fork, it will take you to your copy of the repository. This should look the same as the original, but this one belongs to you! Note that the name of the person who owns the repository has changed, but it contains a link to the original repository underneath the main title.
Step 2: clone your fork locally
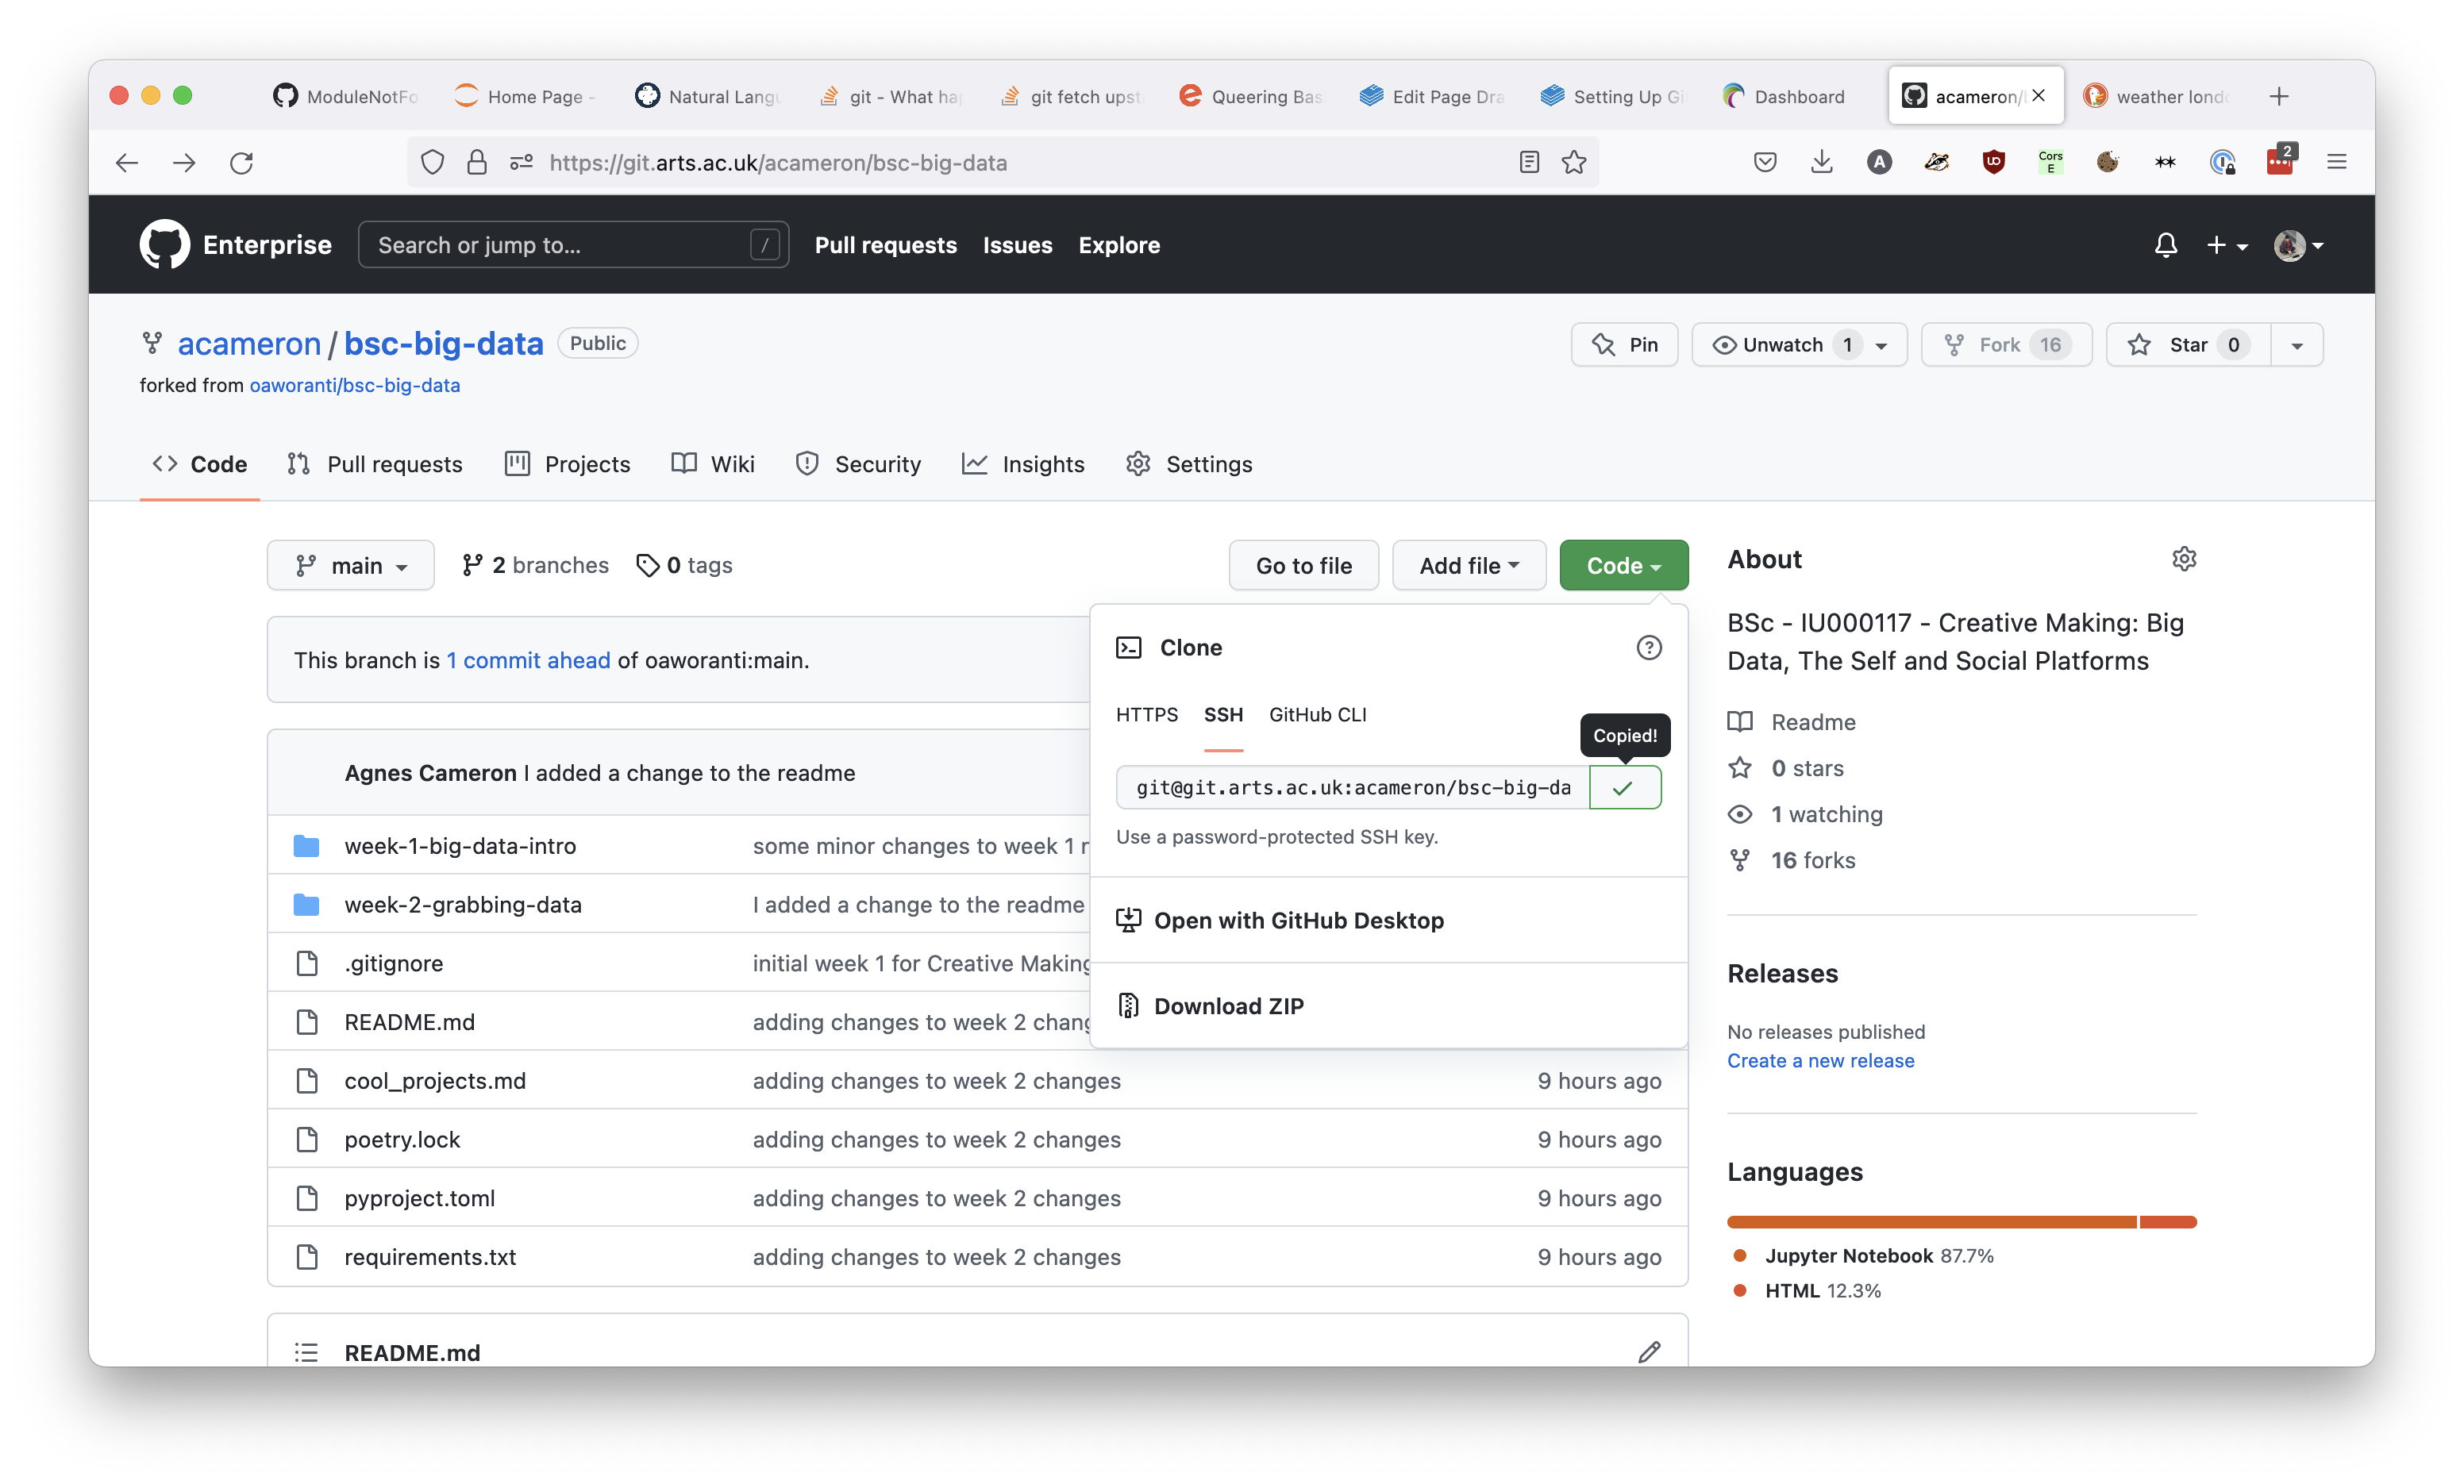
Next, you want to create a local copy of your fork. This is where you will edit the code to do your homework. It's important that you clone your repo, not the original one! That's because your one is the one you have permission to update and push to.
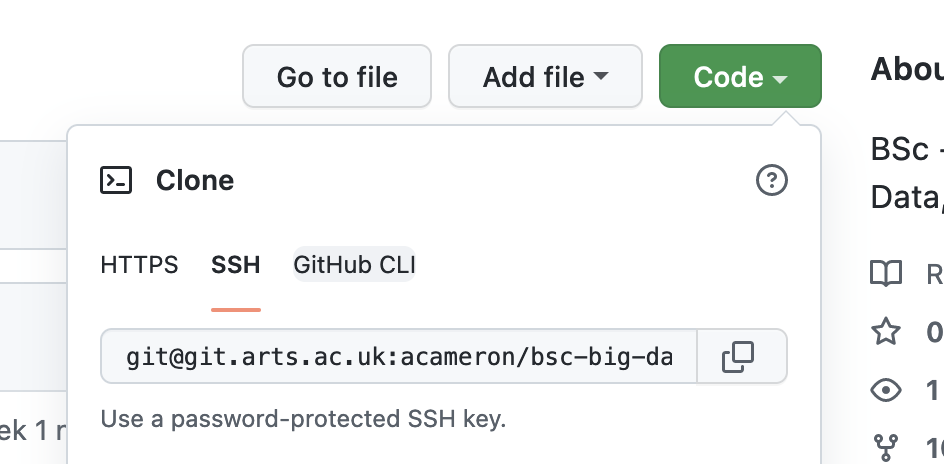
To make a local copy, navigate to the 'Code' tab and copy the 'SSH' version of the URL, not the HTTPS!
Open your terminal (if you are using Windows, you should use Git Bash here rather than Command Prompt), and navigate to the folder you want to create your repository in. Make sure you don't clone the repository inside an existing git repo -- this will cause you problems. The best way to check if you're in a git repo already is to type git status -- if it gives you an error like fatal! not a git repository then you know it's safe to clone things there.
In this instance, I'm going to clone my repository to Desktop:
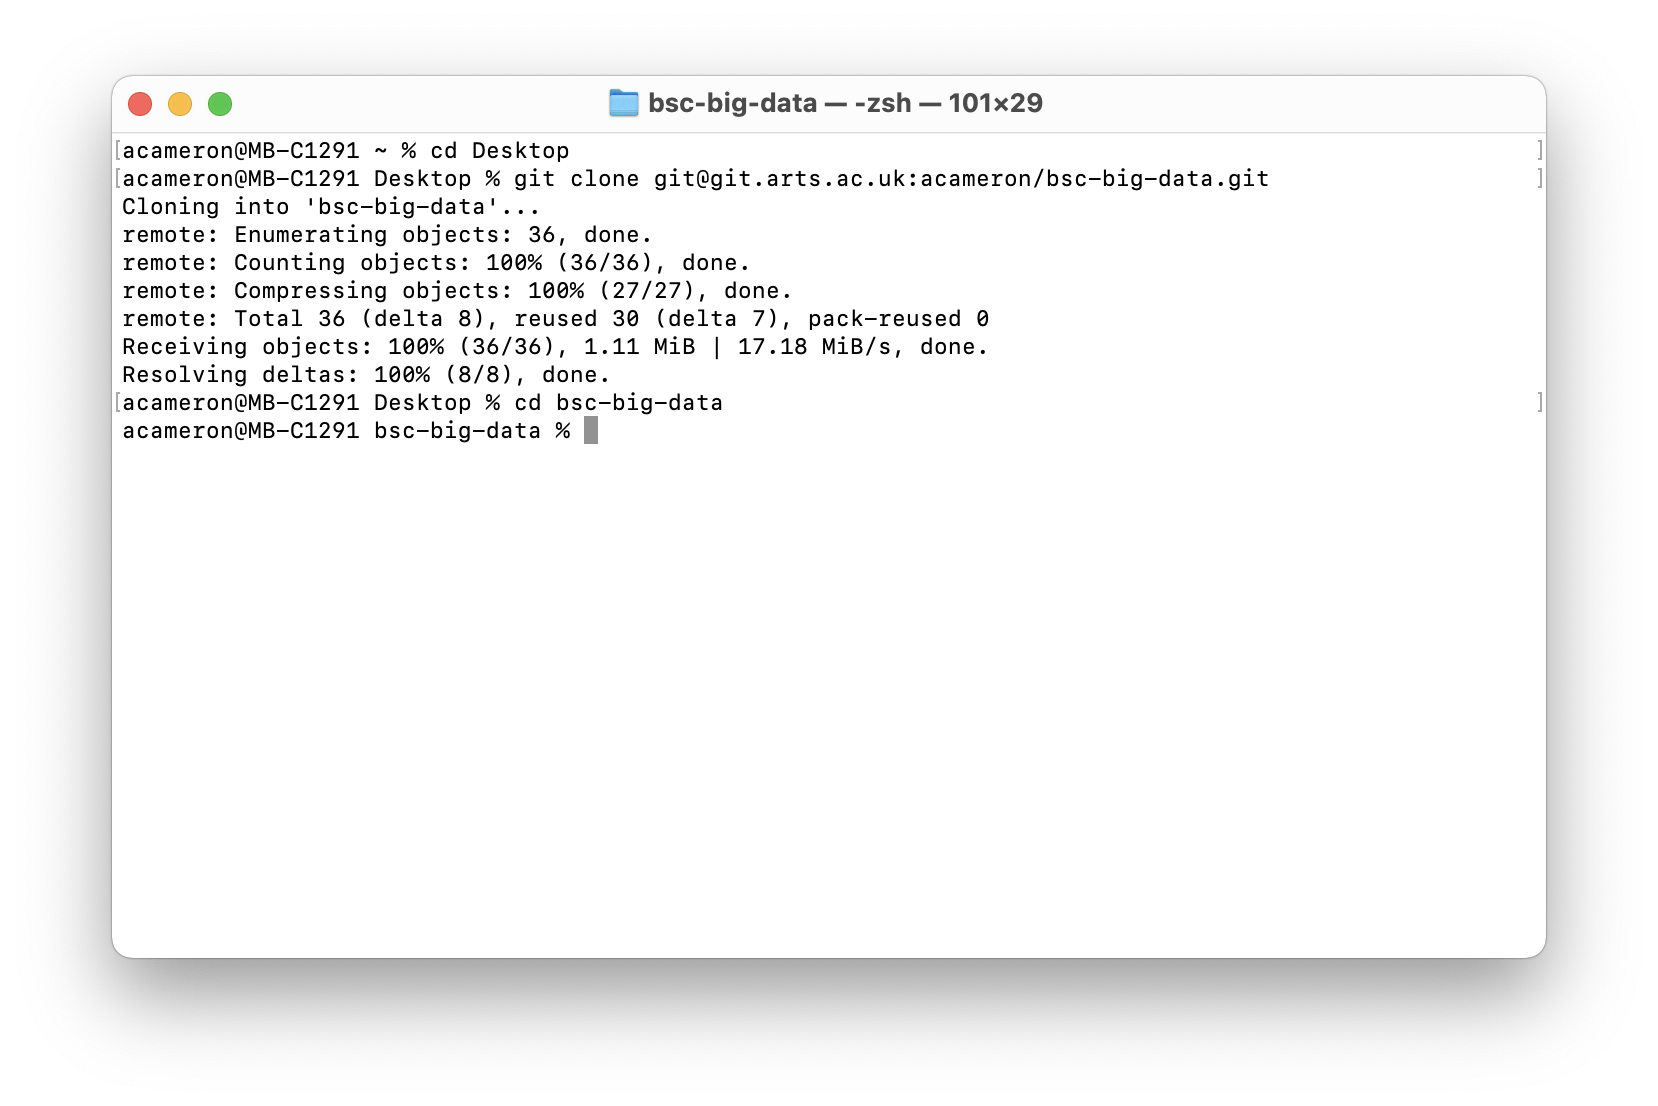
so, the commands are:
cd where/you/want/repo
git clone git@git.arts.ac.uk:yourname/repo-name.git
cd repo-name
Step 3: add the original repository as an upstream branch
Now, you have a local copy of your code. You can add, commit and push to your fork of the repository, and this will work just like a repository that you made. However, if your lecturer is regularly publishing changes to your code, you will also want to link their repository as what's called the upstream repository, so you can regularly pull and incorporate their changes.
In order to do this, we want to look at the state of the remotes. The remote branches point to copies of the repository that exist online. You want the origin to be pointing to a repository that you own, and to have the upstream point to your lecturer's repository.
The origin is what git thinks of as the 'default' -- so when you type in git push or git pull without specifying a named repository, git will assume you mean that one.
To inspect your remote branches, type in the command git remote -v:
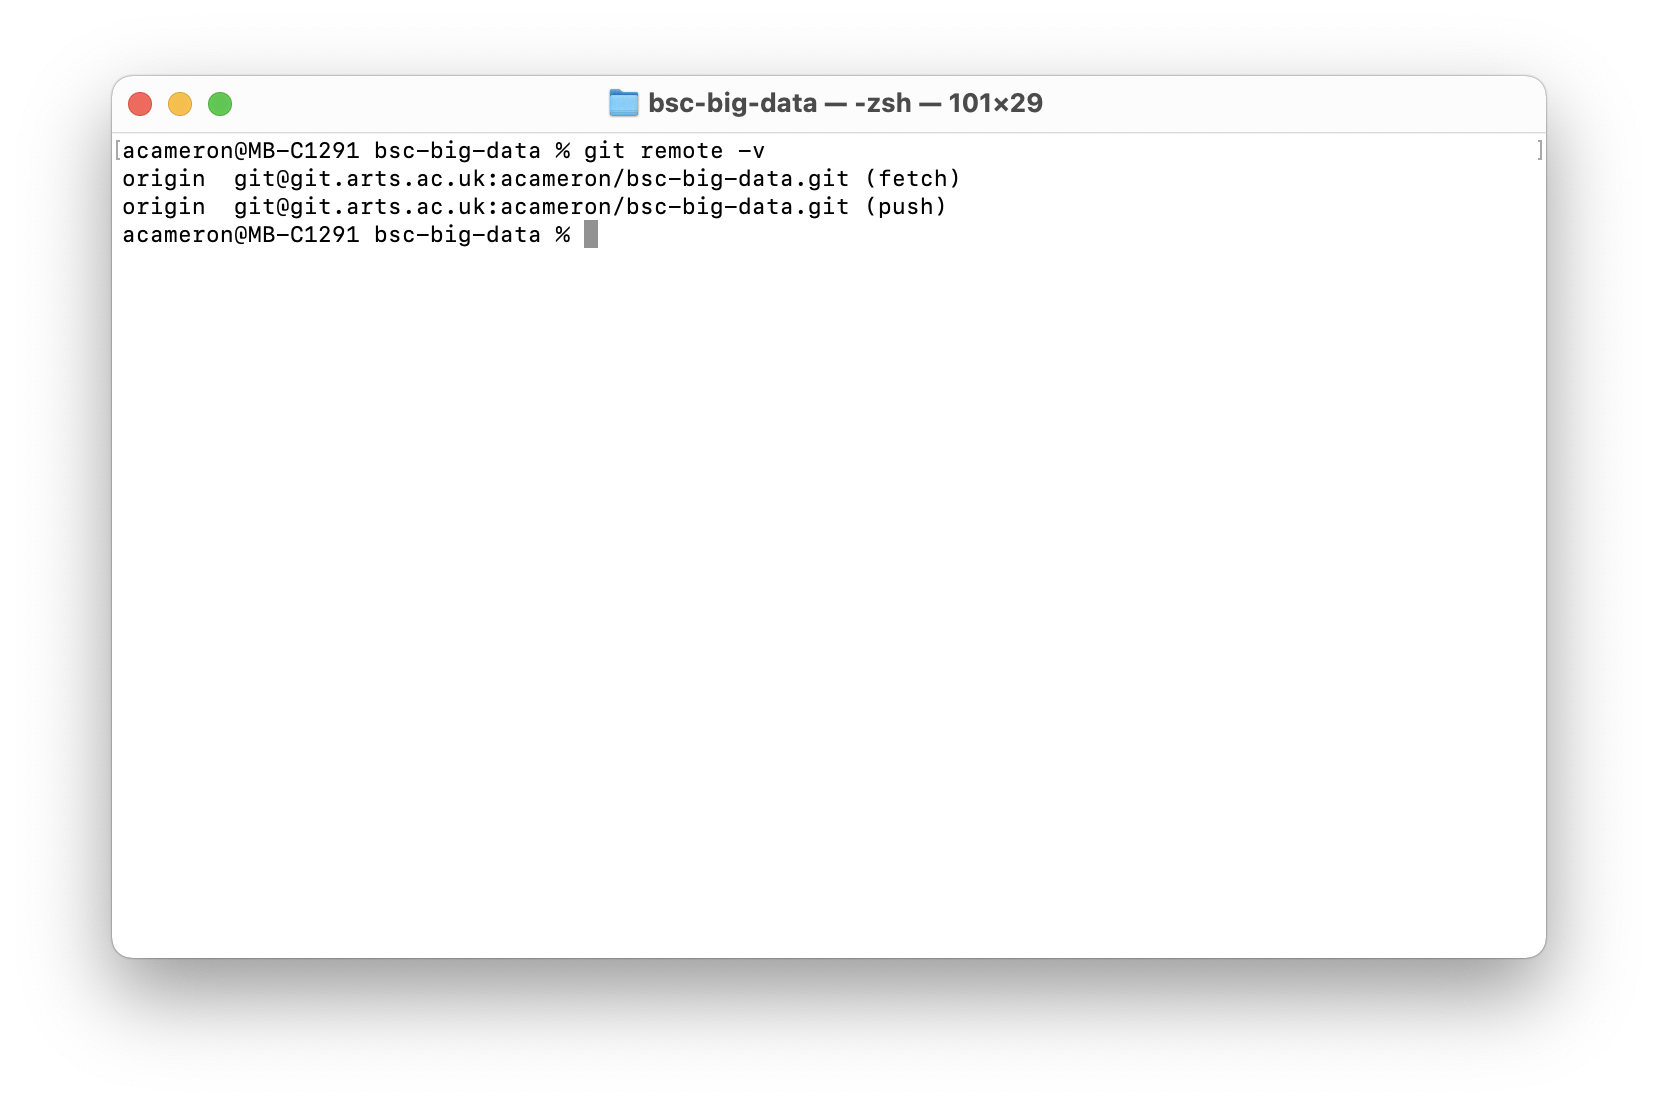
You should see 2 links, both to the origin repository. We want to keep these! We're going to add a new one.
On git.arts.ac.uk, navigate to the original repository, the one that belongs to your lecturer. Like before, copy the SSH url from the 'code' icon in the top right.
git remote add upstream git@git.arts.ac.uk:your-lecturer/your-lecturers-repo.git
Run git remote -v again, and you should see something like the following:

At this point, we now have the setup shown in the diagram at the top of the page. When you want to integrate changes made by your lecturer, run the command:
git pull upstream main
If this doesn't work, you might want to check that the main branch of your lecturer's git repository is definitely called main -- some older versions of git use master. If that's the case, you would write:
git pull origin master
Bonus: general workflow advice
When working with git, it's always a good idea to commit and push your changes at the end of each working session (and every time you add a new feature), and then pull changes before starting to edit code when you are next working. This minimises the chances of conflicts and also makes sure everything is up to date. Working with forked repos is no different. Depending on whether you are also editing your online repo, or collaborating with anyone, you might want to leave out the second 'git pull'.
As such, each session will look like:
cd /path/to/repo
git status 			// see what's up, not always needed
git pull upstream main 		// pulls from your lecturer's repo
git pull			// pulls from your fork, not always needed

... edit your files, test things ...

git add .			// stages your changes for commit
git commit -m "message" 	// commits with a commit message
git push			// pushes your changes to your fork