How to assemble your CCI Learn to Solder Badge

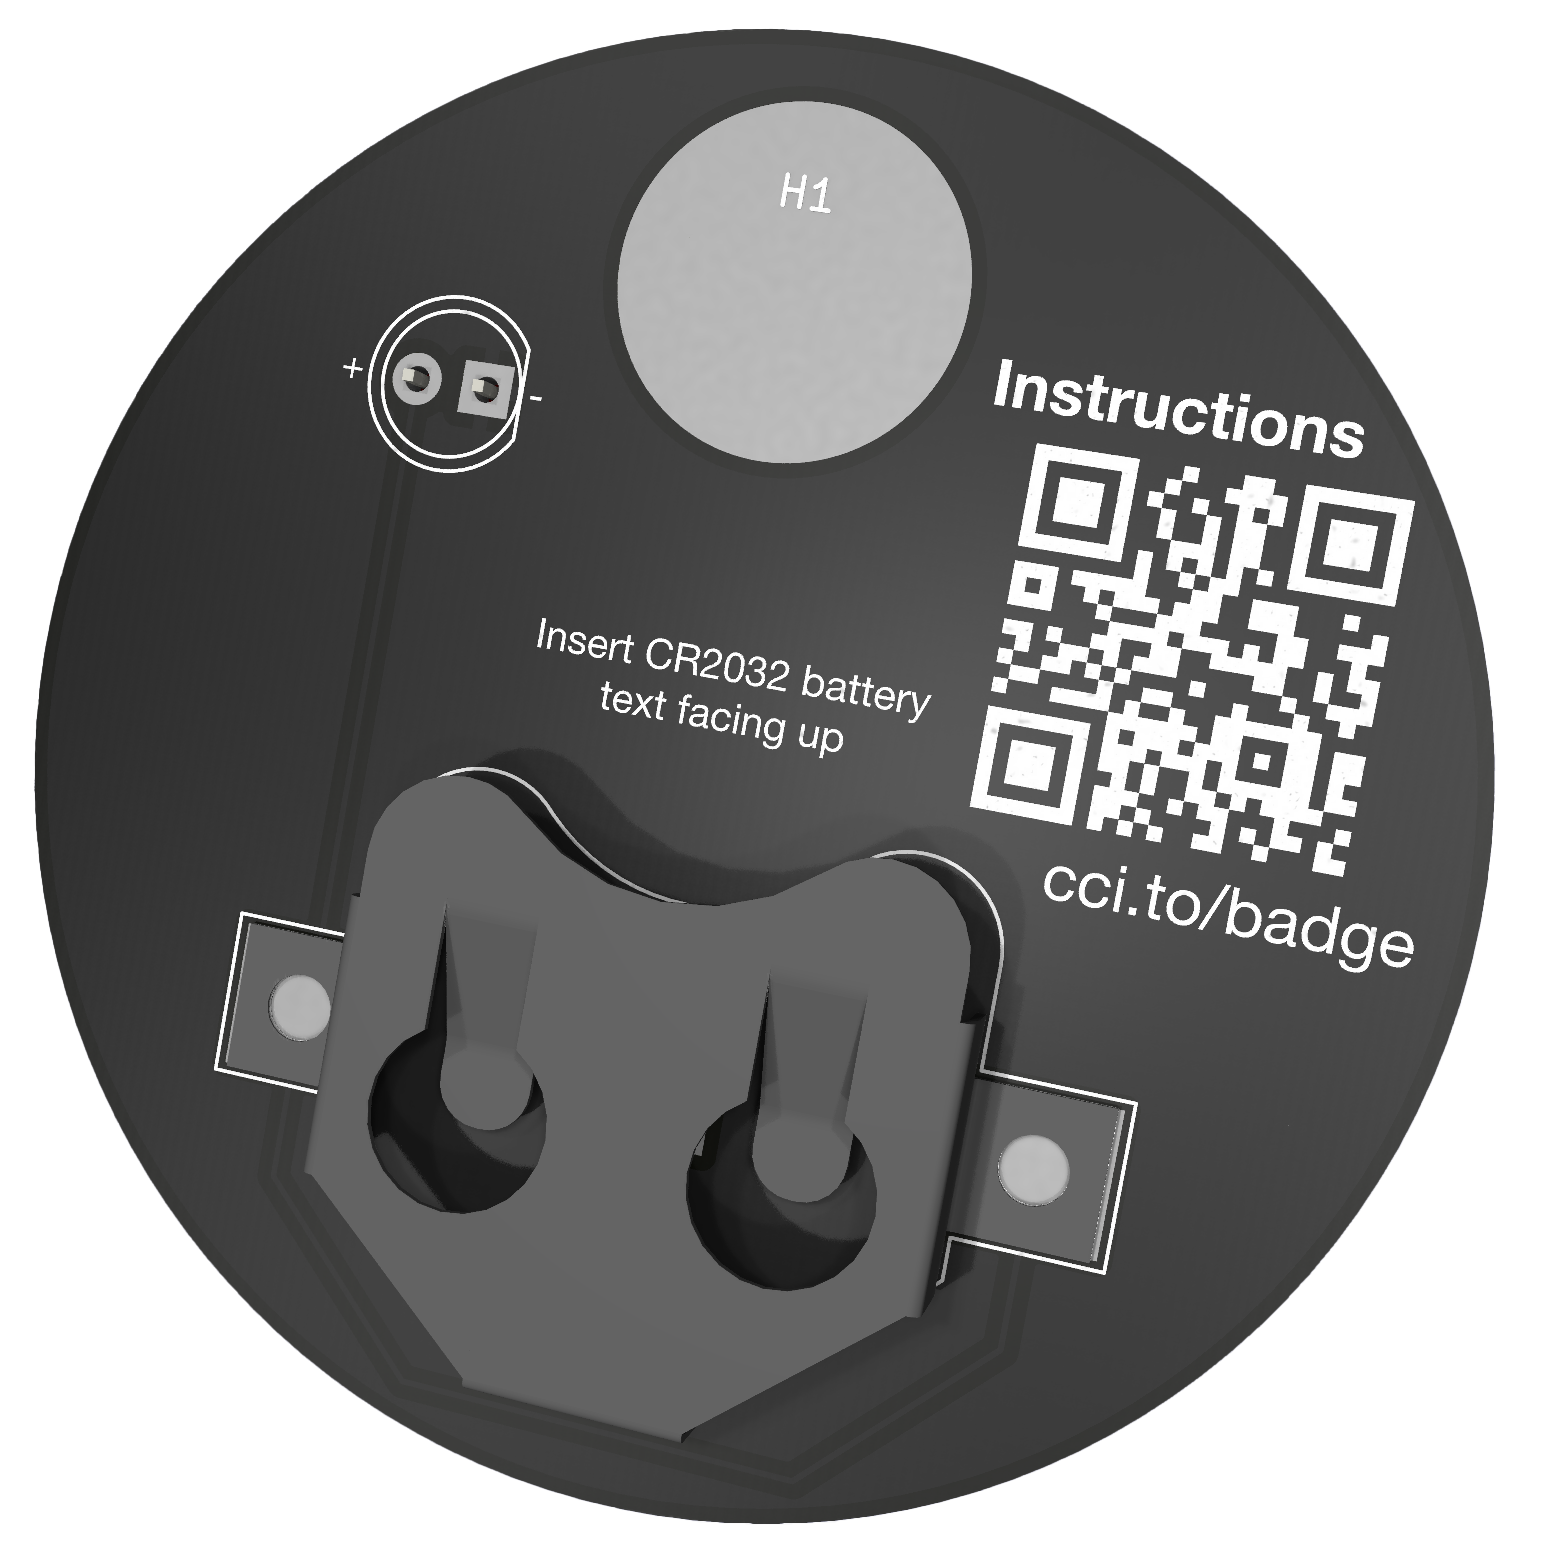
This is a 3D render of the CCI Learn to Solder badge in black solder mask.
The badge is a very basic introduction to solder that introduces you to how to place parts, solder and celebrate your successes!
Instructions
This guide will not cover the specifics of how to solder, for that please read Soldering is Easy commic by Mighty Ohm, available in most major languages.
Battery holder
Hot metal, don't touch!
Do not touch the battery holder once you start soldering as it gets very hot for several minutes after.
Step 1 - Identifying the battery holder and where it goes
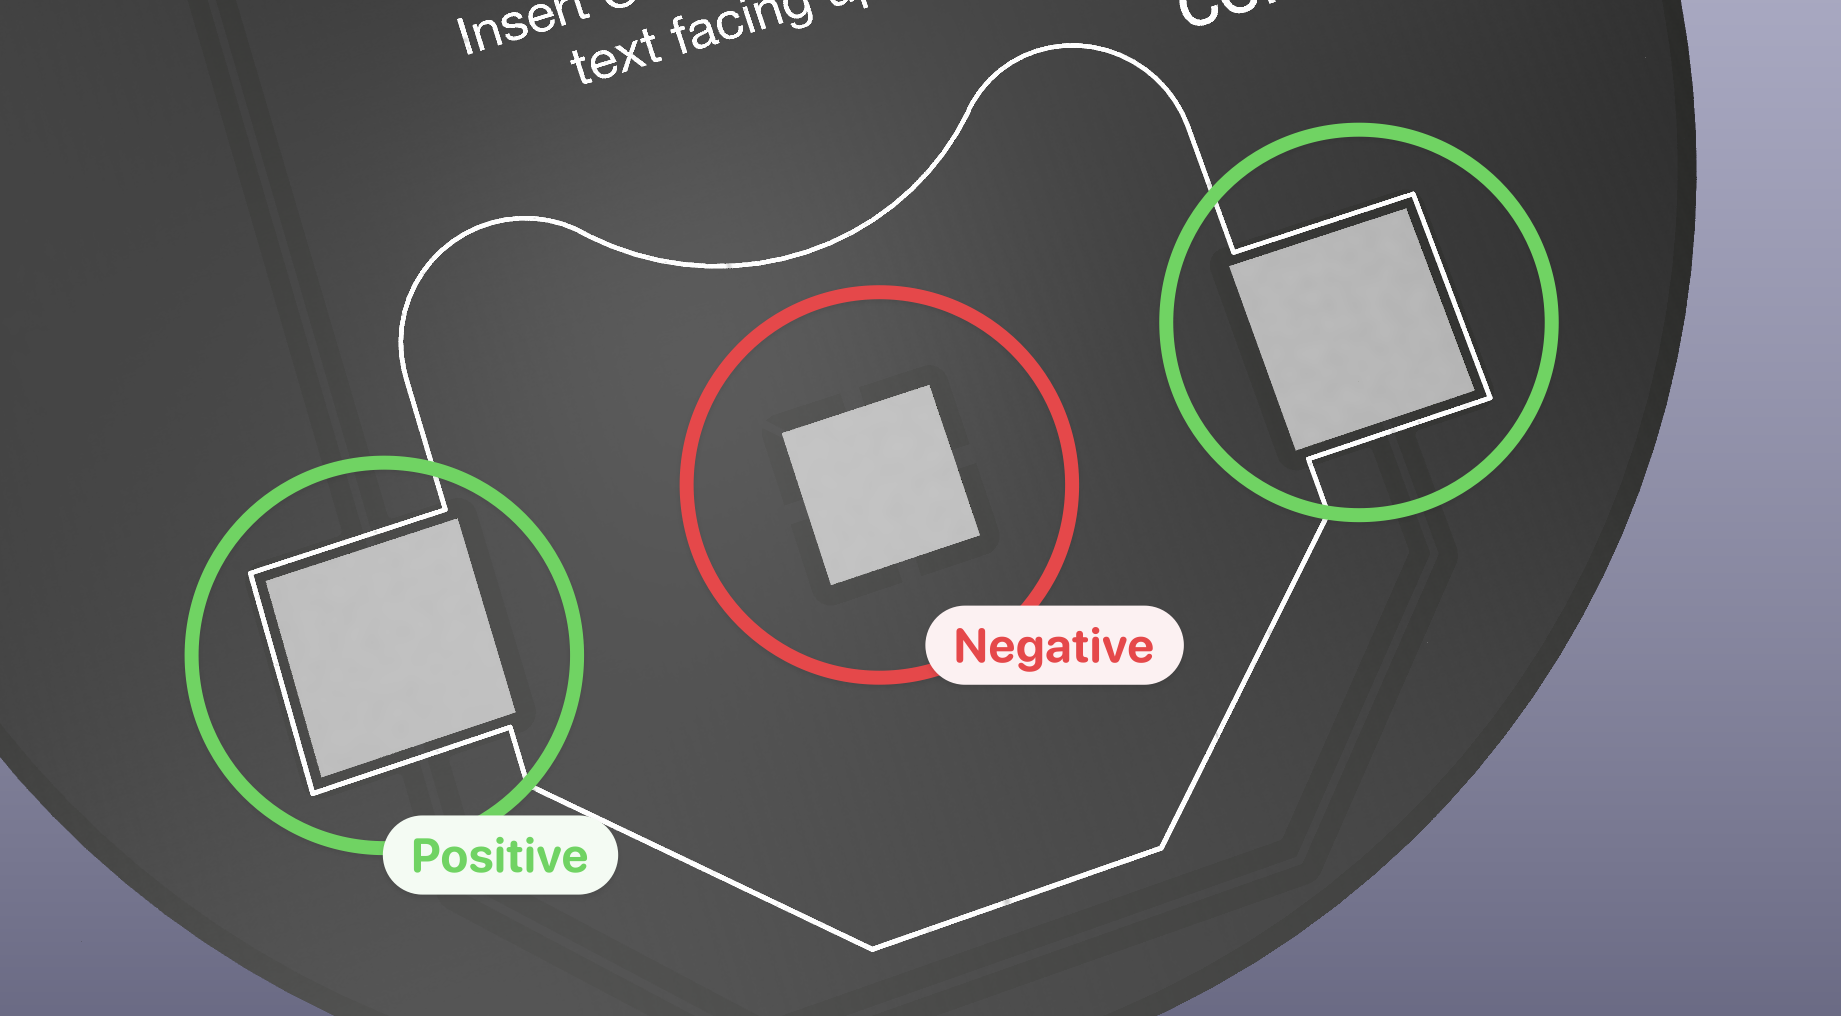
The battery holder is a folded piece of metal which will hold the coin cell CR2032 battery against the PCB.
Take a look at the PCB (Printed Circuit Board), you can see where this part goes, it has 3 square pads (metal areas). The outer 2 square pads should line up with the 2 metal tabs on the battery holder.
Step 2 - Negative pin (optional)
The middle square pad is where the –ve (negative) or "ground" side of your circuit will connect, to ensure a good conenction you need to put some solder on this pad, just to make a nice pillow, but not too much or you'll struggle to get the battery in and out.
Step 3 - Positive pin
You can now position the metal battery holder with the metal tabs aligned with the positive pads on the PCB.
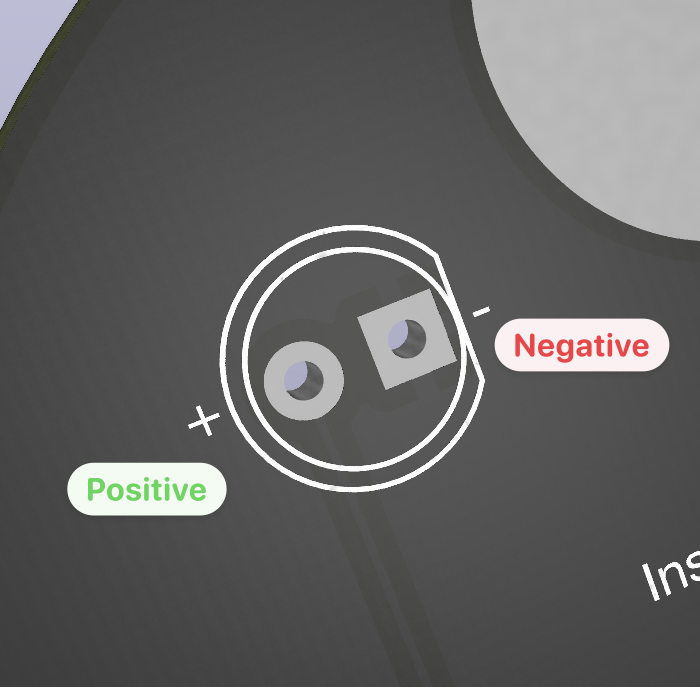
The battery holder can be soldered either way round, however the design intention is that you slide the battery from the side with the text as this will make it less likely to fall out when you wear the badge the right way up.
You should flow some solder onto one side and get the holder aligned perfectly before doing the other side, you can use some long nose pliers to hold the battery holder in place while the solder sets.
LED
An LED, or Light Emitting Diode is a polarised component, which means it has 2 pins and must be connected the correct way round (unlike the battery holder we just soldered).
Step 1 - Identifying the LED and where it goes
The LED is a small cylinder of frosted white plastic about 5mm in diameter with 2 metal legs sticking out the bottom.
Step 2 - Insert the LED
One leg should be shorter than the other, which may also corrispond to a flat edge on the cylinder, this is the negative leg of the LED. The longer leg with no flat edge is the positive.
This part will form the "dot" (technically called a tittle) of the CCI logo. To keep it clean we've put the markings on the back of the PCB, you should be able to match the positive (+) and negative (-) symbols with the legs of your LED, as well as the flat edge if your LED has one.
Make sure the plastic side of the LED is on the CCI side of the badge.
Colour coding
Colour coding is often used in electronics. Red and black usually mean negative in a circuit, and blue, white or green will usually mean positive.
This only applies to low voltage DC (Direct Current) circuits, and not your home electrical systems!
Step 3 - Soldering the connections
You can now solder these legs, make sure you follow the Soldering is Easy commic, we want to make sure we have a strong connection that is shiny with a nice cone or mountain shape.
Step 4 - Trim the excess
You can use the side cutters to remove the excess wire.
Flying legs!
When you cut the wires they may fly off, you should use 1 hand to cut, and the other to catch them, and everyone soldering with you must wear goggles. We don't want to be removing someone's legs from your eye!
Attach the pin and clasp
Step 1 - Identifying the pin and clasp and where it goes
The pin and claps are how you will wear your badge with pride, they come assembled, and can be taken appart by squeezing the 'wings' of the clasp.
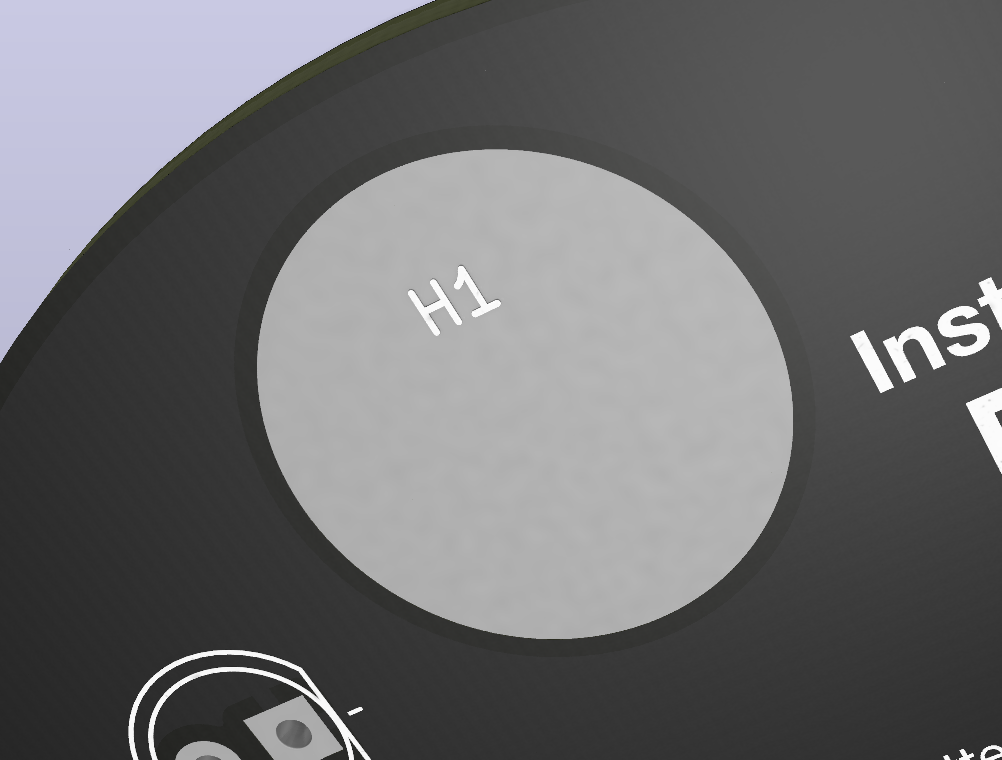
It's going to be soldered onto the large 12mm pad at the top of the back of the badge, here:
Step 2 - Solder the pin
You need to solder the pin with it's head flat against the PCB so that the sharp end is sticking out from horizontally.
Again, use the comic and make sure you are careful to use pliers to hold the metal as you solder because it will burn you if you use fingers!
Step 3 - Attach the clasp
Once the pin cools you can push the clasp on again so you don't loose it.
Insert the battery
You can now insert your CR2032 battery.
Make sure to insert it with the writing (including the positive symbol) facing up as described on PCB.
Wear with pride
You can now remove the clasp, fit your badge somewhere and you should get up to 1 week of continuous use, or you can remove the battery for storage.
You can buy new batteries from many highstreet shops, look for "Coin Cell CR2032 battery".
Disposing of batteries
Please make sure you recycle your old batteries, you can hand them to a CCI technician, or a battery recycling point at your local high street, such as a super market like Tesco, Sainsburys, etc...
Danger for children!
Coin cell batteries can be dangerous around children as they can eat them and it can cause serious internal harm. Keep the battery away from all children, and if you are concerned that someone has eaten the battery you must call emergency services immediately, 999 in the UK.