Workshop: Make and Publish a Website
Making a site and putting it online
In this workshop, we will use a template to make a website, but we will also go through the process of setting up from blank files. You can download the template here.
Download and unzip the folder, and then right click to open the 'index.html' file in your browser. Right click again to open it in parallel in your text editor.
Modifying your site
The template contains basic HTML, CSS and Javascript. The only thing you actually need to have a website is HTML. CSS allows you to change the look of the website, and Javascript is used for interactivity.
First of all, have a go at editing the html file. This will let us change things like text and content on the page. For this workshop, we're making small informational websites about a favourite fact, artwork or object. W3 Schools has an intro guide to structuring HTML elements here, and a full reference for all the different kinds of elements here.
We'll also look at using CSS to style the site. Because it's a brief workshop we're just going to cover the basics!
Static Websites
'Static' websites comprise most of the websites you might make at the CCI. They're called static because broadly, they don't change permanently -- they might be interactive, but every time you load them they should look the same. These can be made using 'vanilla' HTML+CSS+JS, using libraries (like p5, jQuery), using Javascript frameworks.
we love vanilla JS
You will hear the phrase 'vanilla' used to describe websites that are made using just HTML, CSS and Javascript. These are the building blocks of the web, it's important to know how to use them! You can make really good websites just using these -- their downside is when you need to make lots of pages (it can get laborious writing HTML), or when your site needs to be edited by people that don't code.
an aside: pure html There's been some nice projects in recent years to revive the practice of making sites just using vanilla HTML and CSS. A nice one is html.energy.
Hosting
The biggest part of putting anything online is this -- how do you 'host' your site, so it stays up and people on the internet can find and use it. The hosting method you use will depend on the kind of site you are making, who needs to edit your site, whether you're needing to store information in a database, and whether you're doing anything that depends on physical infrastructure that you've built.
All static sites are comprised of files (HTML, CSS and JS files) that are sent to visitors to the site (the 'client') when they load a webpage. Static sites are the easiest kinds of sites to host, and there are lots of different options! At this point in web history, you should basically never have to pay to host a static site (unless you have like 10million visitors), though you will still have to pay for domains.
Github Pages
Using Github Pages is popular in the department, and depending on the class you take, your teacher might get you to use Github or the git.arts server. These look very similar, the main difference is that git.arts is managed by us, and you will need to use your CCI account to connect to it. For the purpose of this workshop, we will use Github. We have tutorials on the wiki for using these.
Github Pages gives you a way to host a site that is saved as a repository on Github. You can create this either as a git repository on your computer, or directly edit the files in Github itself. The former is a good idea as it also allows you to test the site out, and make the most of the versioning tools.
Domains, DNS and SSL
The last part of hosting a website is often adding your own domain to it. Providers like Github Pages, Netlify and Vercel will allow you to modify the domain they give you. Domains need to be bought and renewed year-on-year and can vary wildly in price. The companies that trade in domains tend to be a bit sneaky and will also often try and sell you stuff on top of it. Moniker are meant to be OK, and generally I recommend picking one company and sticking with it.
The steps for pointing your domain name to your host depend on where you're hosting your site! For services like Github Pages, Netlify and Vercel, you normallly need to point your domain at their 'load balancing IP'. You can do this by creating what's called an Apex or A record, or changing the one that already exists for your site.
For some reason, it can often be hard to find the servers to point your domains to -- I think this is because they sometimes change and there's a few different ways to do it, but for the sake of simplicity:
- Github Pages: 185.199.108.153
- Netlify: 75.2.60.5
- Vercel: 76.76.21.21
Free domains forever with one neat trick
I love making subdomains! This is a great way to host loads of different sites from a single domain. You create a new Apex record for each domain and point it to the IP address you want. It took me years to realise I could do this!!
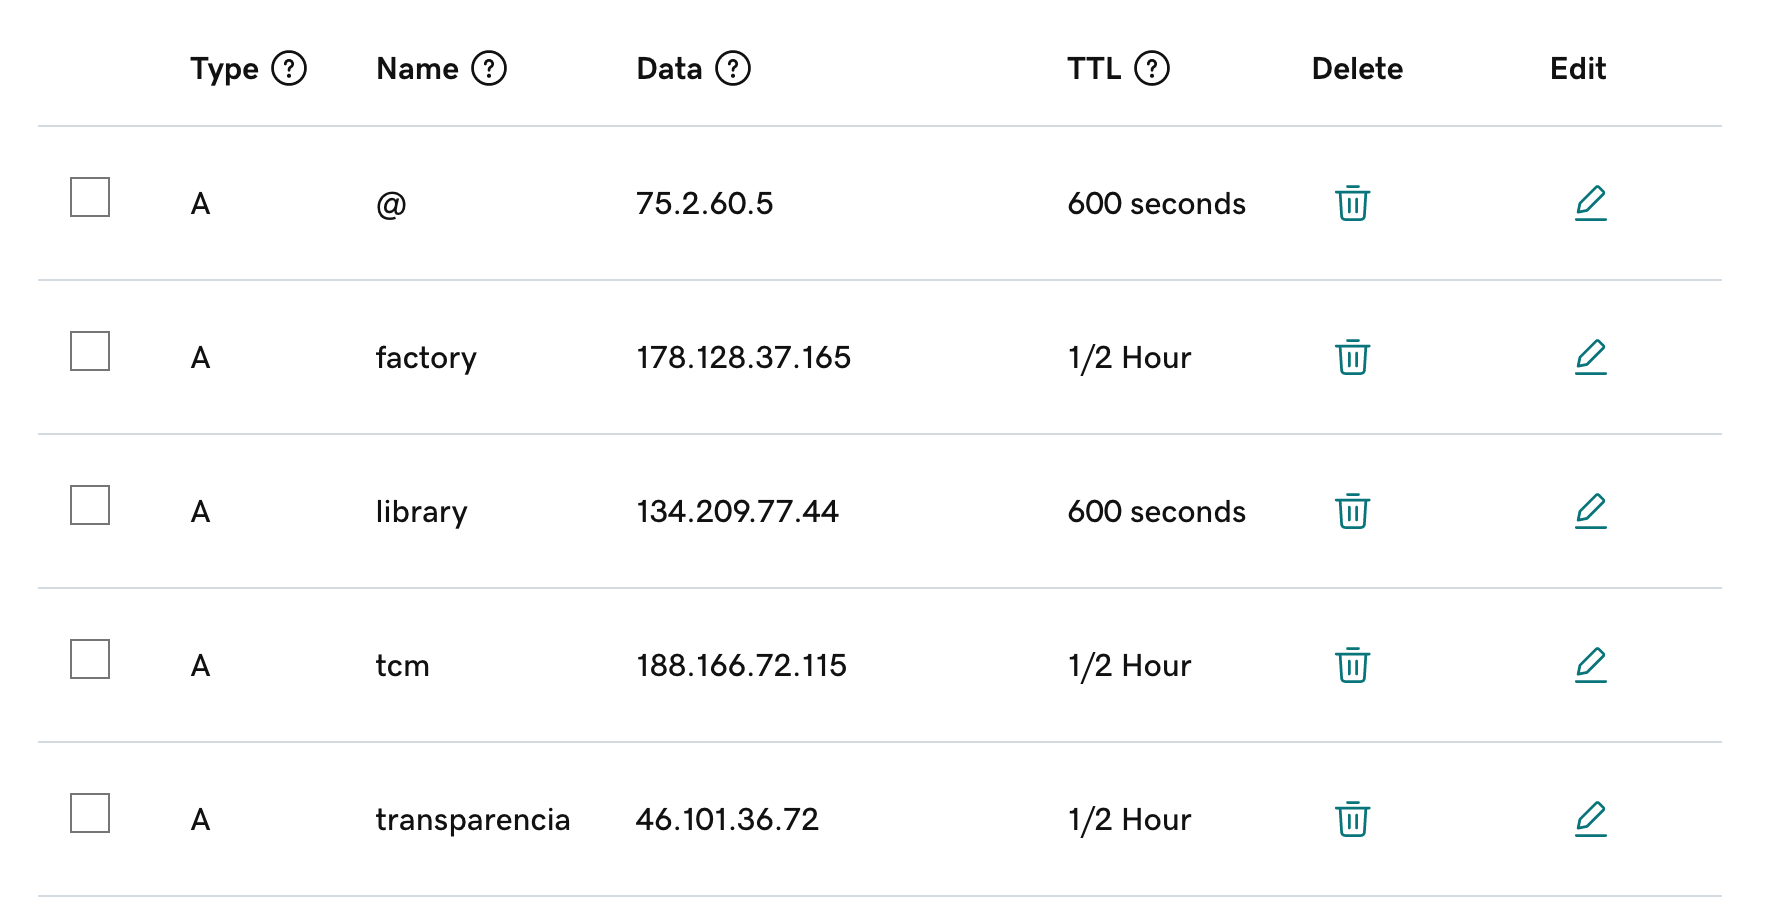
You can tell from this screenshot that my website is hosted on Netlify :)
Putting the site online
To put this site online, we are going to use Github Pages, following these steps. You could also use netlify, vercel or another static hosting service.
bonus round: making a sticker
For the last part of the workshop, we're going to encode the website urls in NFC stickers. There's a great free and open source phone app you can use to do this, called NFC tools. This is inspired by a project from the web designer Spencer Chang.
:)