How to install Arduino libraries
Arduino libraries are collections of code that are designed to provide additional, reusable functionality or to simplify using external electronic modules.
Libraries typically come with examples of how to use them. The library developer usually provides online documentation and explains how it possibly relates to what you are trying to achieve.
Installing a library
There are three different ways to install libraries; we'll show you each of them.
Arduino Library Manager
The simplest method of installing libraries is using the Library Manager built into the Arduino IDE.
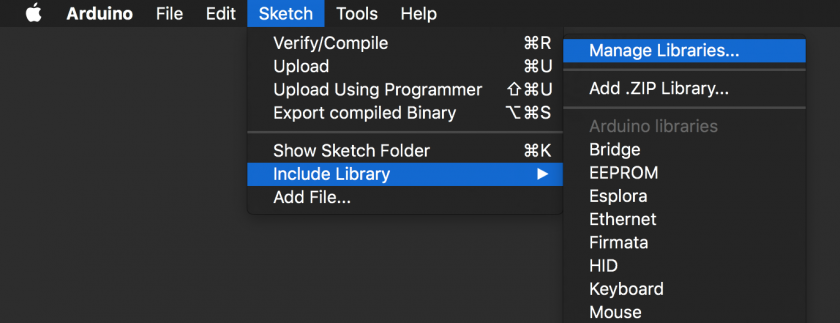
You can access the Library Manager from the menu bar:

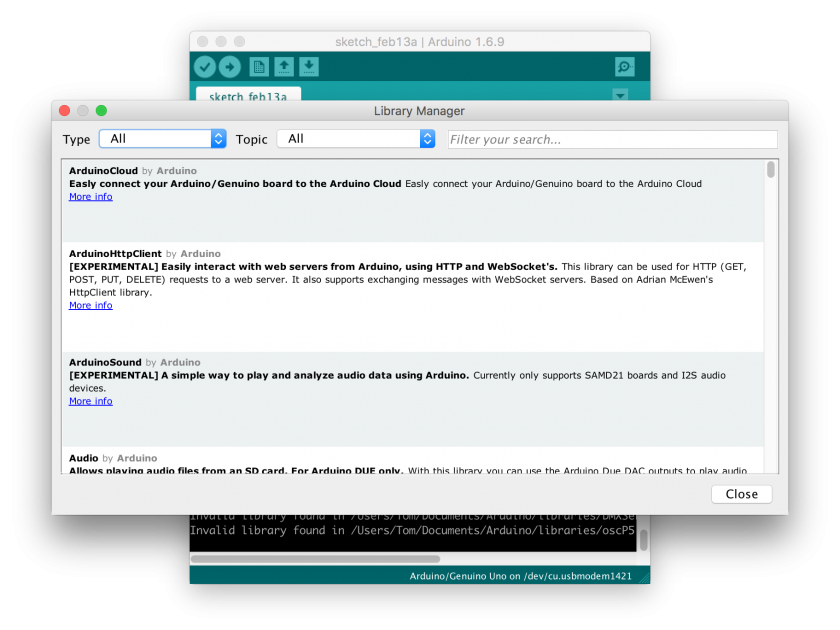
A new window will open:

From here you can search for libraries to use in your code. Only a few libraries are currently available this way, as this feature is relatively new. You will often have to manually download and install a library, following the other two processes.
ZIP library
Locate and download a library you wish to use. Sometimes the library will download as a *.zip archive, which can sometimes be installed directly without restarting the Arduino IDE.
Similar to the Library Manager, this option is in the menu bar:

Use the file dialog to locate and select the zip file from your Downloads folder. You will be notified if the installation has been successful – otherwise you'll need to install manually.
Manually adding libraries
This is the original method of adding libraries.
- Locate the
Arduinofolder inside yourDocumentsdirectory. - Open the
librariesfolder. If not found, create a new folder with that name (must be lowercase). - Unzip the library archive that you wish to install.
- Inside the archive you should find a folder bearing the name of the library – for example 'MPR121'.
- Copy this entire folder (named 'MPR121' in our example) into the Arduino's
librariesfolder. - Restart the Arduino IDE.
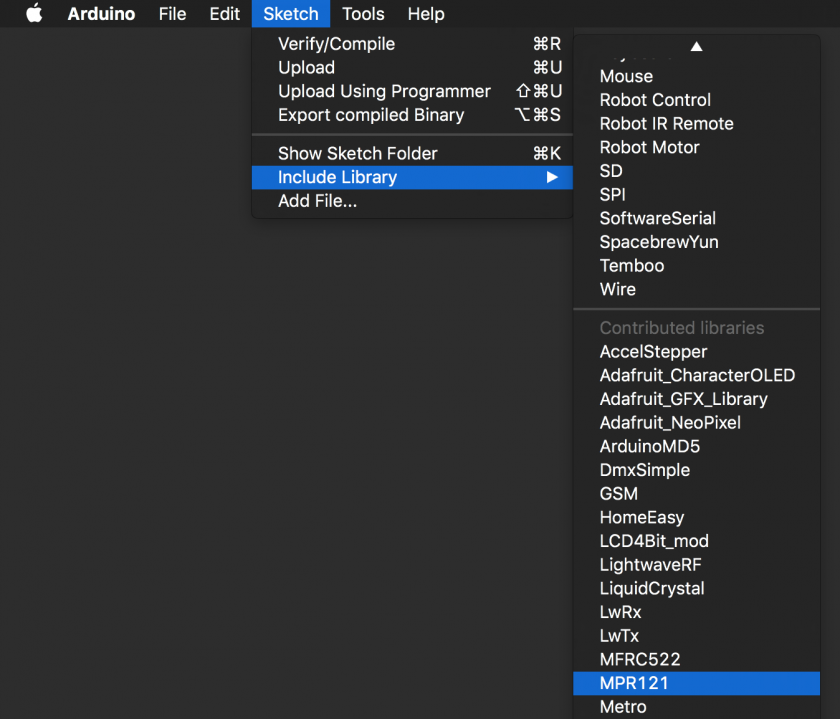
- In the menu bar, select
Sketch>Include Library. You should now see that your library is listed:

